
ESX VN940-4G
ESX VN940-4G Autoradio Navigation Naviceiver User Manual
Model: VN940-4G
1. Introduction
This manual provides comprehensive instructions for the installation, operation, and maintenance of your ESX VN940-4G Autoradio Navigation Naviceiver. Please read this manual thoroughly before using the device to ensure proper and safe operation.
The ESX VN940-4G is a state-of-the-art car radio system featuring a 9-inch touchscreen display, integrated navigation, and Bluetooth connectivity, designed to enhance your in-car entertainment and navigation experience.
2. Safety Information
Always observe the following safety precautions to prevent injury or damage to the device:
- Do not operate the device in a way that distracts you from driving. Always prioritize road safety.
- Ensure all wiring is correctly connected to prevent short circuits or electrical hazards. Consult a professional for installation if unsure.
- Do not expose the device to extreme temperatures, direct sunlight for prolonged periods, or excessive moisture.
- Avoid disassembling or modifying the unit. This can void the warranty and cause damage.
- Keep the volume at a level that allows you to hear external traffic sounds.
3. Package Contents
Please check that all items are present in the package:
- ESX VN940-4G Naviceiver Unit
- Mounting Bracket
- Power Cable Harness
- GPS Antenna
- USB Extension Cable
- User Manual (this document)
4. Setup and Installation
Proper installation is crucial for the performance and longevity of your ESX VN940-4G. It is recommended to have the unit installed by a qualified professional.
4.1 Mounting the Unit
Use the provided mounting bracket to secure the Naviceiver in your vehicle's dashboard. Ensure the unit is firmly seated and does not obstruct any vehicle controls or airbags.
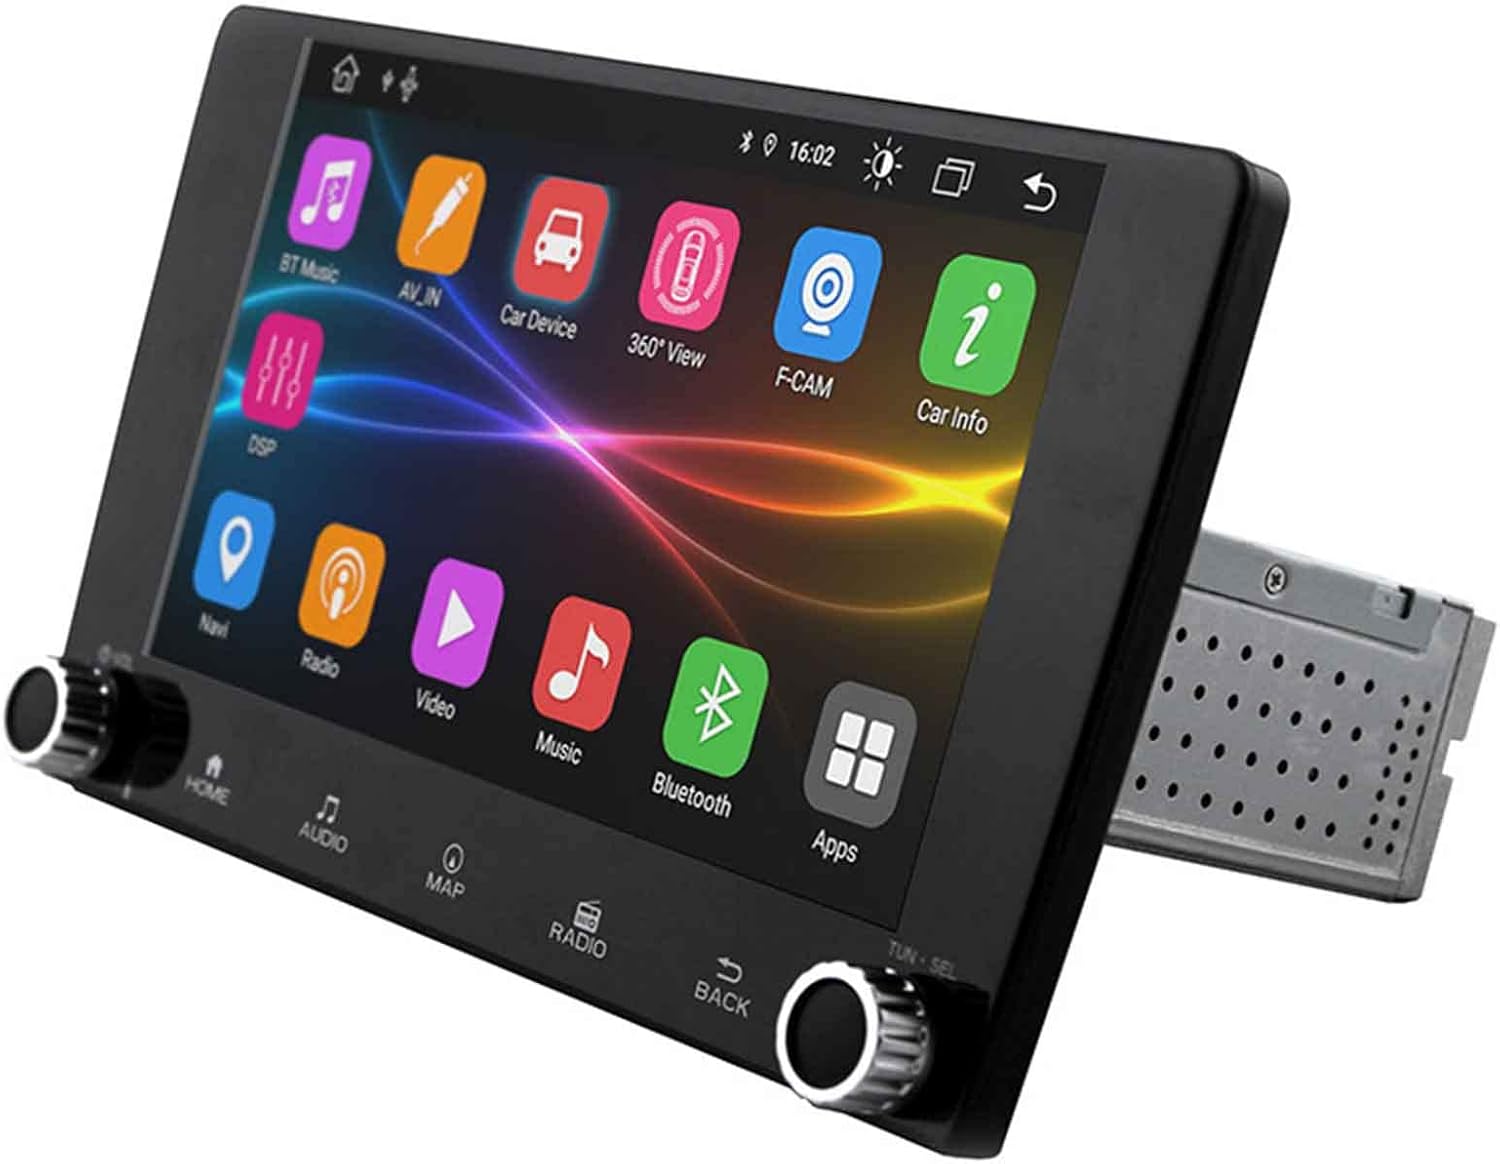
Image: The ESX VN940-4G Naviceiver unit, displaying its side profile and the integrated mounting cage, ready for dashboard installation.
4.2 Wiring Connections
Connect the power harness, speaker wires, GPS antenna, and any other auxiliary inputs/outputs according to your vehicle's wiring diagram and the unit's connection ports. Pay close attention to positive and negative terminals.
- Power (Yellow): Constant 12V (Battery)
- Ignition (Red): Switched 12V (ACC)
- Ground (Black): Vehicle Chassis Ground
- Speaker Wires: Connect to corresponding vehicle speaker wires (e.g., Front Left +, Front Left -).
- GPS Antenna: Connect to the dedicated GPS antenna port and mount the antenna in a location with a clear view of the sky.
4.3 Initial Power-On and Configuration
After installation, turn on your vehicle's ignition. The unit should power on. Follow the on-screen prompts for initial setup, which may include:
- Language Selection
- Time and Date Setting
- Radio Region Selection
5. Operating Instructions
This section details the primary functions and operations of your ESX VN940-4G.
5.1 Basic Controls
- Power Button: Press and hold to turn the unit on/off. Short press to mute/unmute.
- Volume Knob: Rotate clockwise to increase volume, counter-clockwise to decrease.
- Home Button: Returns to the main menu screen.
- Back Button: Returns to the previous screen or menu.
5.2 Radio Operation
From the main menu, select the 'Radio' icon. You can manually tune frequencies, scan for stations, or save your favorite stations as presets.
- Scan: Automatically searches for and stops at strong signals.
- Presets: Touch and hold a numbered button to save the current station.
5.3 Bluetooth Connectivity
The unit supports Bluetooth for hands-free calling and audio streaming.
- Go to the 'Bluetooth' menu.
- Enable Bluetooth on your mobile device and search for available devices.
- Select 'ESX VN940-4G' from the list on your phone.
- Confirm the pairing code if prompted.
Once paired, you can make/receive calls and stream music wirelessly.
5.4 Navigation System
Access the navigation application by selecting the 'Map' or 'Navi' icon from the main menu. The system provides turn-by-turn directions and real-time traffic information (if supported by the map software).

Image: The ESX VN940-4G Naviceiver's touchscreen displaying a detailed navigation map, including current route, speed, and remaining distance to destination.
- Destination Input: Use the on-screen keyboard to enter addresses or points of interest.
- Route Guidance: Follow the voice prompts and visual cues on the screen.
- Map View: Switch between 2D and 3D views, and adjust zoom levels.
5.5 Media Playback
The unit supports media playback from various sources, such as USB drives. Connect your USB device to the designated USB port. The unit will automatically detect compatible audio or video files.
6. Maintenance
Regular maintenance ensures the longevity and optimal performance of your Naviceiver.
- Cleaning the Screen: Use a soft, lint-free cloth to gently wipe the touchscreen. For stubborn smudges, dampen the cloth slightly with water or a screen-cleaning solution. Do not use abrasive cleaners.
- Software Updates: Periodically check the manufacturer's website for available software updates. Updates can improve performance, add new features, or fix bugs. Follow the instructions provided with the update package carefully.
7. Troubleshooting
If you encounter issues with your ESX VN940-4G, refer to the following common problems and solutions:
| Problem | Possible Cause | Solution |
|---|---|---|
| Unit does not power on. | Incorrect wiring, blown fuse, vehicle battery issue. | Check power and ground connections. Inspect vehicle fuses. Ensure battery is charged. |
| No sound from speakers. | Speaker wires disconnected, volume too low, unit muted. | Verify speaker connections. Increase volume. Check if unit is muted. |
| Bluetooth connection fails. | Bluetooth not enabled on phone/unit, device out of range, interference. | Ensure Bluetooth is active on both devices. Move phone closer. Restart both devices. |
| GPS signal lost or inaccurate. | GPS antenna obstructed, faulty antenna, poor satellite reception. | Relocate GPS antenna to a clear area. Check antenna connection. Wait for clear sky. |
If the problem persists after attempting these solutions, please contact customer support.
8. Specifications
| Feature | Detail |
|---|---|
| Model Name | ESX VN940-4G |
| Brand | ESX |
| Display Size | 9 inches (22.8 cm) |
| Display Resolution | 800 x 480 pixels |
| Connectivity Technology | Bluetooth |
| Mounting Type | Dashboard-Mounting |
| Audio Output Mode | Stereo |
| Vehicle Service Type | Car |
| Included Components | Mounting Bracket |
| First Available Date | March 10, 2022 |
9. Warranty and Support
For warranty information, please refer to the documentation provided at the time of purchase or contact your retailer. Warranty terms and conditions may vary by region and seller.
For technical support, troubleshooting assistance beyond this manual, or inquiries about spare parts, please contact the seller or the official ESX customer service. Contact details are typically available on the seller's website or the ESX official website.
Related documentsVN940-4G


Ask a question about this manual
Ask about setup, troubleshooting, compatibility, parts, safety, or missing instructions. Manuals+ will review the question and use this page’s manual context to help answer it.