
1. Introduction
This manual provides comprehensive instructions for the operation and maintenance of your Funai VHS to DVD Recorder VCR Combo. This device allows you to play both VHS tapes and DVDs, and to record content from VHS tapes directly onto blank DVDs. Please read this manual thoroughly before use to ensure proper setup and functionality.
2. Package Contents
Verify that all items listed below are included in your package:
- Funai VHS to DVD Recorder VCR Combo Unit
- Remote Control
- Instruction Manual (this document)
- HDMI Converter
- AV Cable (RCA type)
- Blank DVDs (for immediate recording)
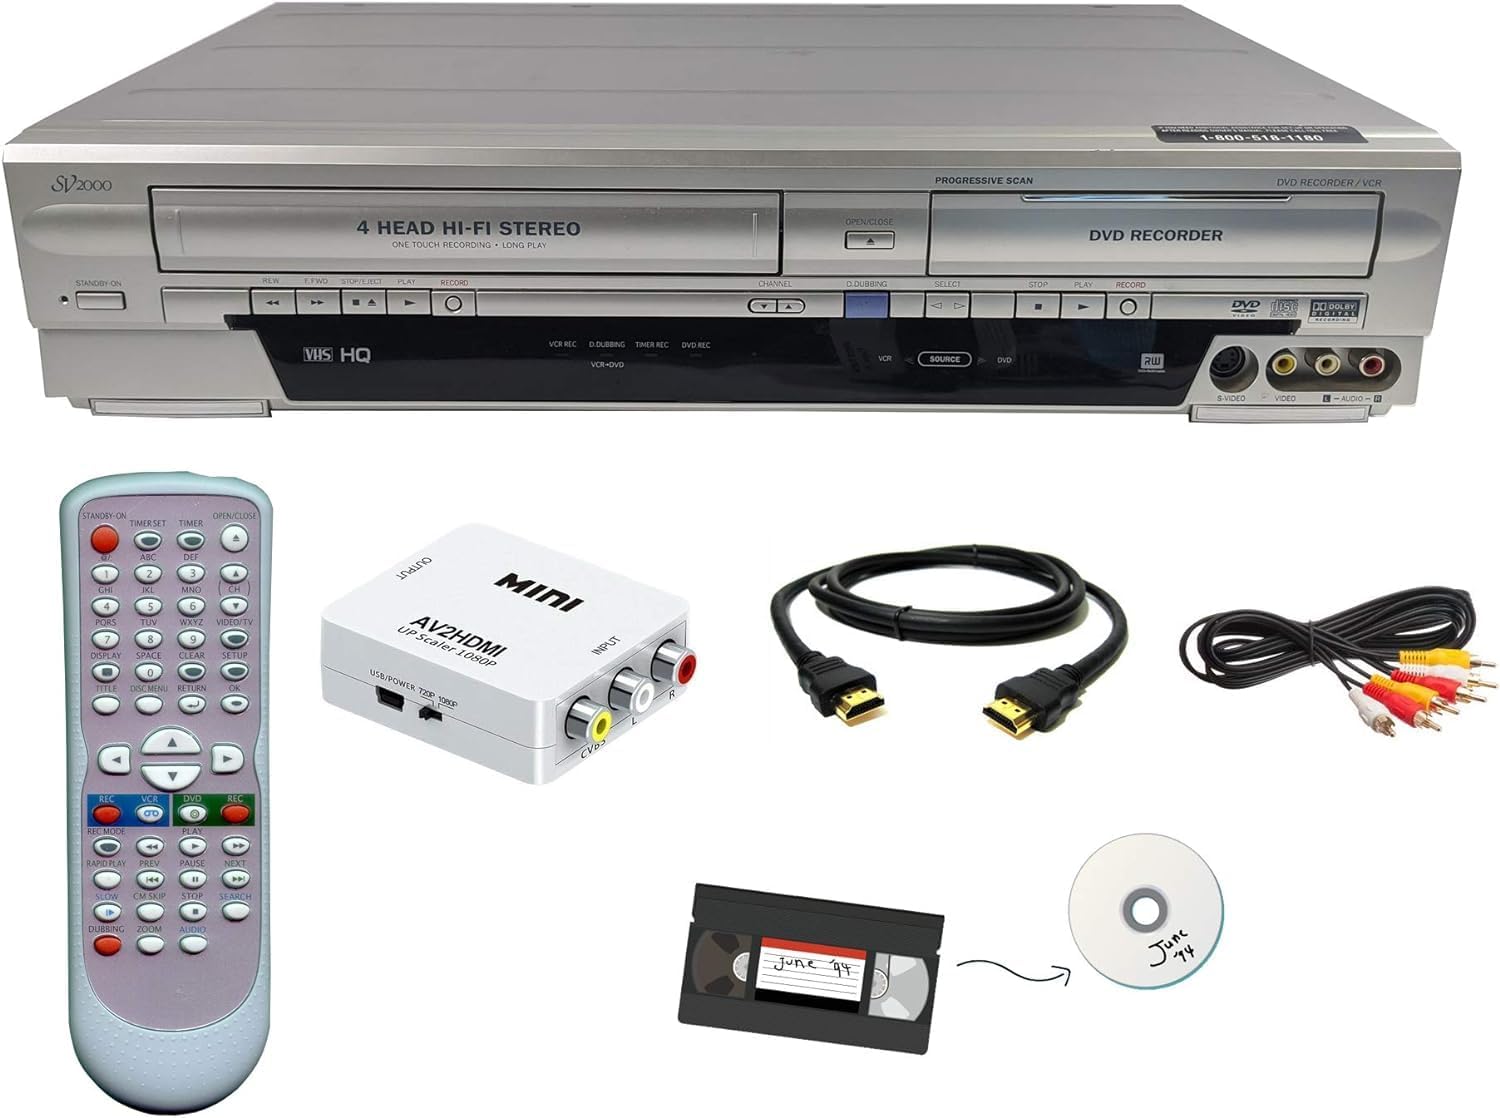
Image: The Funai VHS to DVD Recorder VCR Combo unit, accompanied by its remote control, an HDMI converter box, RCA AV cables, and a blank DVD for recording.
3. Product Features
- Integrated VHS player and DVD recorder for versatile media handling.
- One-touch recording function for easy transfer of VHS tapes to DVD.
- Includes an HDMI converter and AV cable for broad compatibility with modern televisions.
- Supports playback of both VHS tapes and DVD discs.
- Capable of recording onto blank DVDs.
4. Setup Instructions
- Placement: Place the Funai combo unit on a stable, flat surface with adequate ventilation. Avoid placing it near heat sources or in direct sunlight.
- Power Connection: Connect the power cord to the unit and then to a standard electrical outlet.
- Connecting to TV (HDMI):
- Connect the AV cable (red, white, yellow RCA) from the "OUTPUT" jacks on the Funai unit to the "INPUT" jacks on the HDMI converter.
- Connect an HDMI cable from the "OUTPUT" of the HDMI converter to an available HDMI "INPUT" on your television.
- Ensure the HDMI converter is powered, if required (check converter's manual).
- Connecting to TV (RCA/Composite):
- Connect the AV cable (red, white, yellow RCA) from the "OUTPUT" jacks on the Funai unit directly to the corresponding "INPUT" jacks on your television.
- Input Selection: Turn on your television and select the correct input source (e.g., HDMI 1, Video 1, AV) that corresponds to the connection you made.
5. Operating Instructions
5.1 Playing a VHS Tape
- Ensure the unit is powered on and connected to your TV.
- Insert a VHS tape into the VCR slot. The unit should automatically pull the tape in.
- On the unit's front panel or remote, press the "VCR" button to select VCR mode.
- Press the "PLAY" button. The VHS tape will begin to play on your television.
- Use the "REW", "FFWD", "STOP", and "PAUSE" buttons for tape control.

Image: Close-up of the front panel of the Funai combo unit, highlighting the VCR and DVD controls, including play, stop, rewind, fast forward, and source selection buttons.
5.2 Playing a DVD Disc
- Ensure the unit is powered on and connected to your TV.
- Press the "OPEN/CLOSE" button on the DVD tray to open it.
- Place a DVD disc onto the tray with the label side facing up.
- Press the "OPEN/CLOSE" button again to close the tray.
- On the unit's front panel or remote, press the "DVD" button to select DVD mode.
- The DVD should begin playing automatically. If not, press the "PLAY" button.
- Use the "PREV", "STOP", "PLAY", and "NEXT" buttons for disc control.
5.3 Recording from VHS to DVD (One-Touch Recording)
This unit features a convenient one-touch recording function to transfer your VHS content to DVD.
- Insert the VHS tape you wish to record into the VCR slot.
- Insert a blank, recordable DVD (e.g., DVD-R, DVD-RW) into the DVD tray.
- Ensure the unit is in VCR mode (press "VCR" button).
- Locate the "REC" button (often red) on the front panel or remote.
- Press the "REC" button once. The unit will begin playing the VHS tape and simultaneously recording it onto the blank DVD.
- To stop recording, press the "STOP" button.
- Finalize the DVD after recording to ensure it can be played on other DVD players. Refer to the unit's on-screen display or full manual for specific finalization steps.
6. Maintenance
- Cleaning: Use a soft, dry cloth to clean the exterior of the unit. Do not use liquid cleaners or abrasive materials. For internal cleaning of VCR heads or DVD lens, consult a professional or use specialized cleaning kits with caution.
- Media Handling: Handle VHS tapes and DVDs by their edges to avoid fingerprints and scratches. Store them in their cases away from direct sunlight, dust, and extreme temperatures.
- Ventilation: Ensure the unit's ventilation openings are not blocked to prevent overheating.
7. Troubleshooting
| Problem | Possible Cause | Solution |
|---|---|---|
| No power | Power cord disconnected; power outlet issue | Check power cord connection; try a different outlet. |
| No picture/sound on TV | Incorrect TV input selected; loose AV/HDMI cables | Select correct TV input; ensure all cables are securely connected. |
| VHS tape not playing/ejecting | Tape jammed; unit malfunction | Gently try to eject the tape. Do not force it. If issue persists, seek professional service. |
| DVD disc not playing/reading | Disc dirty/scratched; disc format not supported | Clean the disc with a soft cloth; ensure disc is compatible (e.g., not a Blu-ray). |
| Recording fails | Blank DVD not recordable; disc full; VCR mode not selected | Use a recordable DVD (DVD-R/RW); ensure disc has enough space; select VCR mode before recording. |
8. Specifications
| Feature | Detail |
|---|---|
| Brand | FUNAI |
| Model Name | Funai VHS to DVD Recorder VCR Combo |
| Media Type | DVD, VHS |
| Special Feature | Recording |
| Resolution | 1920 x 1080 pixels (via HDMI upconverter) |
| Connector Type | HDMI, RCA |
| Connectivity Technology | HDMI, RCA |
| Audio Output Mode | Surround |
| Supported Audio Format | Dolby Digital (AC-3), DTS, MPEG-2 Audio (for DVDs), Linear PCM, Dolby Digital (for VHS tapes) |
| Item Weight | 10.93 pounds |
| Product Dimensions | 10.3 x 17.2 x 4 inches |
| Color | Black, Silver (Note: Color and model may vary for renewed products) |
9. Warranty and Support
This product is offered as an Amazon Renewed item. Amazon Renewed products are professionally inspected and tested to work and look like new by Amazon-qualified suppliers. If you are not satisfied with your purchase, renewed products are eligible for replacement or refund under the Amazon Renewed Guarantee.
For specific details regarding the Amazon Renewed Guarantee, please refer to the Amazon Renewed Store or your purchase documentation.