
1. Introduction
This manual provides detailed instructions for the installation, setup, and operation of your LT Security CMIP1382NW-28MA 8MP IR Fixed Turret Network Dome Camera. This camera features high-quality 4K resolution imaging, efficient H.265+ compression, 120 dB WDR for clear imaging in strong backlighting, and Matrix IR 2.0 for extended night vision. It is designed for both indoor and outdoor use with an IP67 water and dust resistant housing and includes a built-in microphone for audio security. Please read this manual thoroughly before using the product to ensure correct and safe operation.
2. Package Contents
Verify that all items listed below are included in your package. If any items are missing or damaged, please contact your retailer.
- LT Security CMIP1382NW-28MA Network Dome Camera
- Drill Template
- Mounting Screws and Wall Plugs
- Hex Wrench
- Quick Start Guide (may be included separately or as part of this manual)
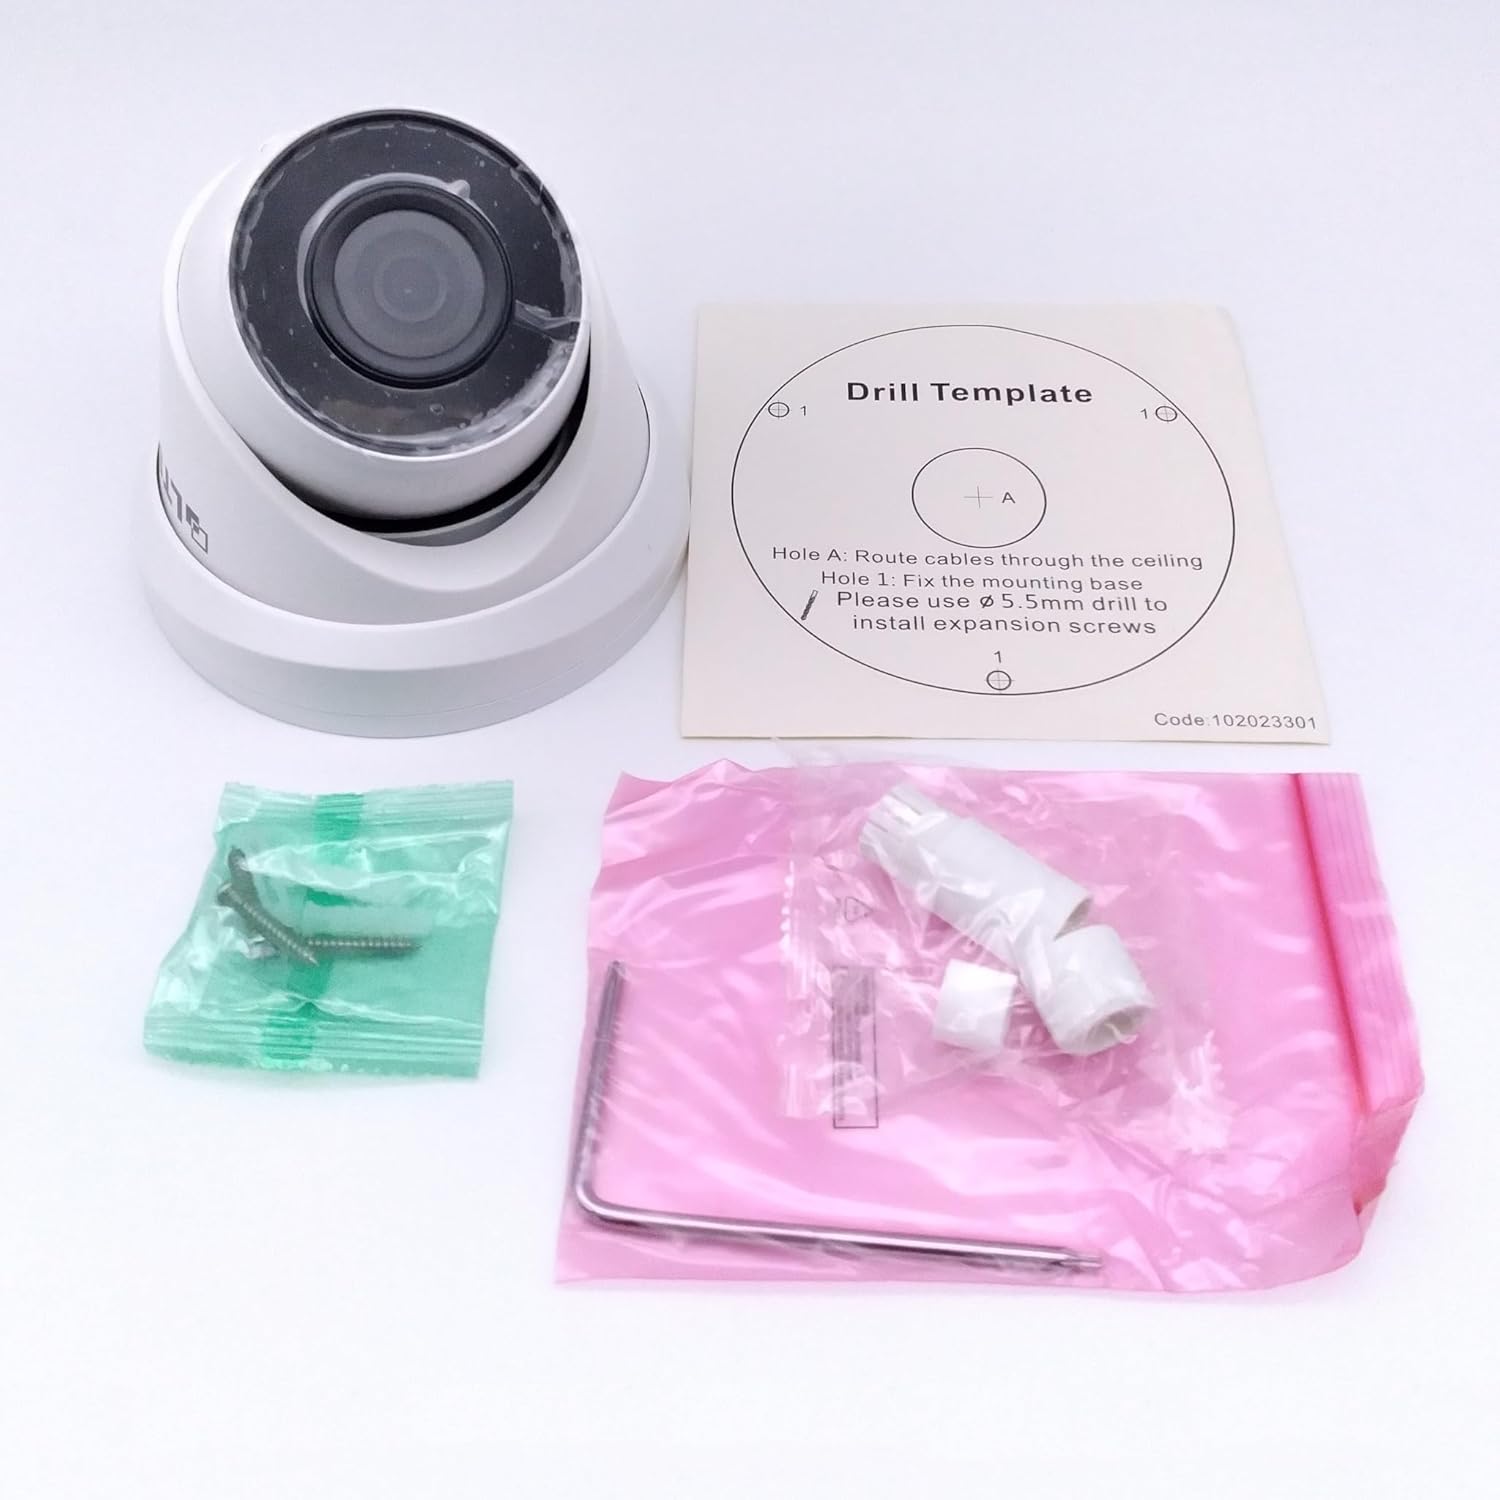
Figure 2.1: Contents of the camera package. Includes the camera unit, a drill template for mounting, mounting hardware (screws and wall plugs), and a hex wrench for adjustments.
3. Product Overview
The CMIP1382NW-28MA is a compact turret-style network camera designed for versatile surveillance. It features a durable metal housing and a fixed 2.8mm lens providing a wide viewing angle.
3.1 Front View

Figure 3.1: Front view of the camera, showing the lens and IR illuminators. The protective film should be removed before operation.
3.2 Bottom View and Mounting Base
The base of the camera contains the mounting holes and cable routing channels for a clean installation.

Figure 3.2: Bottom view of the camera, illustrating the mounting base with screw holes and cable management channels.
3.3 Dimensions
Refer to the diagram below for the physical dimensions of the camera unit.

Figure 3.3: Technical drawing showing the dimensions of the camera in millimeters and inches.
4. Installation
This camera is suitable for ceiling or wall mounting. Ensure the mounting surface is strong enough to support the camera's weight.
4.1 Mounting Steps
- Prepare the Mounting Surface: Choose a suitable location. Use the provided drill template to mark the screw holes on the ceiling or wall.
- Drill Holes: Drill pilot holes (approximately Ø5.5mm) at the marked positions. Insert the wall plugs if mounting on drywall or masonry.
- Route Cables: If routing cables through the mounting surface, drill a larger hole (as indicated on the drill template) and pass the cables through.
- Secure the Camera Base: Align the camera's mounting base with the drilled holes. Use the provided screws to firmly attach the camera to the surface.
- Adjust Camera Angle: Loosen the adjustment screws (if applicable) to position the camera lens for the desired viewing angle. Tighten the screws to secure the position.
Note: For optimal performance and longevity, ensure the camera is installed in a location that minimizes direct exposure to extreme weather conditions, even with its IP67 rating.
5. Wiring and Connections
The CMIP1382NW-28MA camera supports Power over Ethernet (PoE) for simplified installation, allowing both power and data transmission over a single Ethernet cable. It also has an option for a 12V DC power input.
5.1 Connection Ports

Figure 5.1: The camera's connection cables, showing the 12V DC power input and the Network Port (PoE).
- Network Port (PoE): Connect a standard Ethernet cable from a PoE-enabled switch or NVR to this port. This provides both power and network connectivity.
- Power (12V DC): If PoE is not available, connect a 12V DC power adapter (not included) to this port. Ensure the power adapter meets the camera's specifications.
5.2 Compatible Wiring
This camera is designed for network connectivity via an Ethernet cable, supporting PoE. It is not compatible with analog BNC video or separate DC power and BNC video connections.

Figure 5.2: Illustration differentiating compatible network (PoE) cabling from incompatible analog video and separate DC power connections.
6. Initial Setup and Configuration
After physical installation and wiring, the camera requires network configuration and initial setup.
- Network Connection: Connect the camera to your network via the Ethernet cable. Ensure your network has a DHCP server or assign a static IP address manually.
- Accessing the Camera:
- Via NVR: If connecting to an LT Security NVR, the NVR should automatically detect and configure the camera. Refer to your NVR manual for specific steps.
- Via PC: Use the LT Security client software (available on the official website) to discover the camera on your network. You may need to activate the camera and set a strong password for security.
- LTS-Connect App: Download the LTS-Connect app on your smartphone or tablet. Register an account and add your camera for remote viewing and management.
- Basic Settings: Configure essential settings such as date/time, video resolution (up to 4K), compression (H.265+), motion detection zones, and recording schedules.
- SD Card Storage: If using an SD card (up to 256 GB, not included) for local storage, ensure it is properly inserted and formatted through the camera's interface.
Important: Always set a strong, unique password for your camera to prevent unauthorized access.
7. Operating Instructions
Once configured, your camera is ready for operation.
- Live View: Access the live video feed through your NVR, PC client software, or the LTS-Connect mobile app.
- Recording: Recordings can be stored on an NVR, a local SD card, or network storage (NAS). Configure recording modes (continuous, motion-triggered, scheduled) via the camera's web interface or client software.
- Audio Monitoring: The built-in microphone provides real-time audio security. Enable and adjust audio settings through the camera's interface.
- Motion Detection: Set up motion detection zones and sensitivity levels to trigger alarms or recordings when activity is detected.
- Remote Access: Use the LTS-Connect app to view live footage, playback recordings, and receive alerts from anywhere with an internet connection.
- WDR Functionality: The 120 dB WDR (Wide Dynamic Range) feature automatically adjusts to provide clear images in scenes with both very bright and very dark areas.
- Night Vision: Matrix IR 2.0 technology provides advanced infrared illumination for clear imaging in low-light or no-light conditions.
8. Maintenance
Regular maintenance ensures optimal performance and longevity of your camera.
- Cleaning:
- Gently wipe the camera lens and housing with a soft, clean cloth.
- For stubborn dirt, use a cloth lightly dampened with water or a mild, non-abrasive cleaning solution.
- Do not use strong detergents, solvents, or abrasive materials, as these can damage the camera's finish or lens.
- Firmware Updates: Periodically check the LT Security official website for firmware updates. Keeping your camera's firmware up-to-date ensures access to the latest features, security patches, and performance improvements. Follow the provided instructions carefully when performing updates.
- Cable Inspection: Regularly inspect all cables for any signs of wear, damage, or corrosion, especially for outdoor installations.
9. Troubleshooting
If you encounter issues with your camera, refer to the following common problems and solutions:
| Problem | Possible Cause | Solution |
|---|---|---|
| No video feed | No power; Network connection issue; Incorrect IP address | Check power supply (PoE or 12V DC adapter). Verify Ethernet cable connection. Ensure camera has a valid IP address and is accessible on the network. |
| Poor image quality | Dirty lens; Incorrect resolution settings; Insufficient lighting | Clean the camera lens. Check video resolution settings in the camera's interface. Ensure adequate lighting or verify night vision is active. |
| Cannot connect via LTS-Connect app | Camera not online; Incorrect network settings; App configuration issue | Ensure camera is connected to the internet. Verify network settings. Re-add the camera to the app if necessary. Check firewall settings. |
| No audio | Microphone disabled; Audio settings incorrect | Check audio settings in the camera's web interface or client software to ensure the microphone is enabled and audio output is configured correctly. |
If the problem persists after attempting these solutions, please refer to the support section.
10. Specifications
Below are the key technical specifications for the LT Security CMIP1382NW-28MA camera:
| Feature | Detail |
|---|---|
| Model Number | CMIP1382NW-28MA |
| Effective Still Resolution | 8 MP (4K) |
| Video Capture Resolution | 4K |
| Lens | 2.8mm Fixed Lens |
| Connectivity Technology | Wired (Ethernet, POE) |
| Connectivity Protocol | Ethernet, ONVIF, RTSP |
| Wireless Communication Technology | POE |
| Night Vision Range | 98 Feet |
| International Protection Rating | IP67 (Water and Dust Resistant) |
| Indoor/Outdoor Usage | Indoor, Outdoor |
| Built-in Microphone | Yes |
| SD Card Storage | Supports up to 256 GB |
| Compression Technology | H.265+ |
| Wide Dynamic Range (WDR) | 120 dB |
| Material | Metal |
| Product Dimensions (L x W x H) | 4.33 x 4.33 x 3.2 inches |
| Item Weight | 2 pounds |
11. Warranty and Support
For warranty information, please refer to the documentation provided with your purchase or visit the official LT Security website. Warranty terms and conditions may vary.
Customer Support: For technical assistance, troubleshooting beyond this manual, or specific inquiries, it is recommended to contact LT Security customer support. Please note that direct customer service may be prioritized for licensed installers. If you are a self-installer, ensure you have all product details and purchase information ready when contacting support.
Visit the official LT Security website for contact information, FAQs, and additional resources.
