
Introduction
This manual provides instructions for the proper installation, operation, and maintenance of the Directed Electronics 6866T Replacement Antenna and Cable. This product is designed to replace the antenna and cable for specific Directed Electronics systems, ensuring reliable communication for your remote start and security features.
Product Overview
The Directed Electronics 6866T consists of a replacement antenna unit and a connecting cable, engineered to integrate seamlessly with compatible systems.
Components
- Antenna Unit: A compact black unit, typically featuring an adhesive backing for secure mounting. It is equipped with a 4-pin connector for system integration.
- Connecting Cable: A black cable with 4-pin connectors on both ends, designed to link the antenna unit to the main system.

Image Description: A top-down view of the Directed Electronics 6866T replacement antenna and its coiled connecting cable. The antenna is a rectangular black unit with a small button, and the cable has 4-pin connectors.
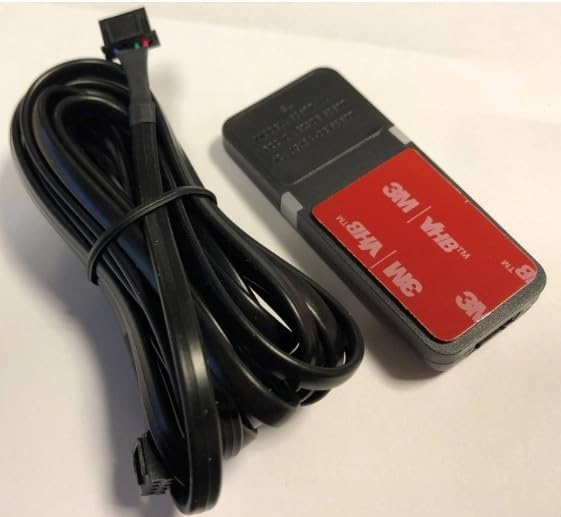
Image Description: A view of the Directed Electronics 6866T replacement antenna showing its underside with 3M VHB adhesive tape for mounting, alongside its coiled connecting cable. The cable has a 4-pin connector visible.
Compatibility
This replacement antenna and cable are compatible with the following Directed Electronics systems:
- DS4 Systems
- DS4+ Systems
It is also compatible with various Viper, Autostart, Clifford, Automate, and Astro Antenna systems that utilize a 4-pin antenna connection.
Setup and Installation
Professional Installation Recommended.
The installation of the 6866T replacement antenna and cable requires careful attention to detail. It is strongly recommended that this product be installed by a qualified professional to ensure correct functionality and to avoid damage to the unit or the vehicle's electrical system.
General Installation Steps (Consult a professional for detailed instructions):
- Preparation: Ensure the vehicle's power is disconnected before beginning installation. Identify the optimal location for the new antenna, typically on the windshield or dashboard, ensuring it has a clear line of sight and is away from metal obstructions that could interfere with signal reception.
- Mounting the Antenna: Clean the chosen mounting surface thoroughly with an alcohol wipe and allow it to dry. Remove the protective backing from the 3M VHB adhesive on the antenna unit. Firmly press the antenna onto the surface for at least 30 seconds to ensure a strong, lasting bond.
- Connecting the Cable: Connect one end of the 4-pin cable to the antenna unit. Route the cable carefully to the main DS4 or DS4+ system, avoiding sharp bends, areas where it could be pinched, or proximity to high-heat components.
- System Connection: Connect the other end of the 4-pin cable to the designated antenna port on your DS4 or DS4+ system. Ensure the connection is secure.
- Testing: Reconnect vehicle power and test the system's functionality to ensure the new antenna is receiving signals correctly from your remote control.
For specific wiring diagrams and system integration, always refer to the primary manual of your DS4 or DS4+ system or consult with a professional installer.
Operation
The 6866T replacement antenna operates passively by receiving radio frequency signals from your remote control and transmitting them to the DS4 or DS4+ system. Once correctly installed and connected, no further user interaction is typically required for its operation. The antenna's function is integral to the remote start and security system's communication, enabling features such as locking, unlocking, and remote engine start.
Maintenance
The Directed Electronics 6866T antenna and cable are designed for durability and require minimal maintenance to ensure long-term performance.
- Cleaning: If necessary, gently wipe the antenna unit with a soft, dry cloth to remove dust or smudges. Avoid using harsh chemicals, abrasive cleaners, or excessive moisture, as these can damage the unit.
- Cable Inspection: Periodically check the connecting cable for any signs of wear, fraying, cuts, or damage. Ensure all connections remain secure and free from corrosion.
- Adhesive Check: Verify that the antenna remains firmly attached to its mounting surface. If it becomes loose, re-secure it or replace the adhesive if needed, using a high-quality automotive-grade adhesive tape.
Do not attempt to open or repair the antenna unit yourself, as this may void any potential warranty and could damage the device. For any concerns beyond routine cleaning, consult a professional.
Troubleshooting
If you experience issues with your remote start or security system after installing the 6866T antenna, consider the following troubleshooting steps:
No Remote Signal / Reduced Range
- Check Connections: Ensure both ends of the 4-pin cable are securely connected to the antenna unit and the main DS4 or DS4+ system. A loose connection is a common cause of signal issues.
- Antenna Placement: Verify the antenna is mounted in a location with minimal obstructions and a clear line of sight to where the remote is typically used. Metal objects, tinted windows with metallic content, or other electronic devices can interfere with signal reception.
- Cable Damage: Inspect the cable for any visible damage, such as cuts, kinks, or severe bends. A damaged cable can prevent proper signal transmission.
- System Power: Confirm that the main DS4 or DS4+ system is receiving power and functioning correctly.
- Remote Battery: Ensure your remote control has fresh batteries. A weak remote battery can mimic antenna issues.
Intermittent Operation
- Loose Connections: Re-check all cable connections for tightness. Vibrations can sometimes loosen connections over time.
- Environmental Interference: Strong radio frequency interference from other devices, power lines, or specific geographical locations can temporarily affect performance. Try testing the system in a different environment.
If problems persist after checking these points, it is recommended to consult a professional installer or contact Directed Electronics customer support for further assistance.
Specifications
| Feature | Detail |
|---|---|
| Model Number | 6866T |
| Compatibility | DS4, DS4+ Systems; Viper, Autostart, Clifford, Automate, Astro Antenna |
| Antenna Connector | 4-pin |
| Cable Connectors | 4-pin on both ends |
| Color | Black |
| UPC | 753359740379 |
Warranty and Support
For detailed warranty information and technical support, please refer to the documentation provided with your original DS4 or DS4+ system, or visit the official Directed Electronics website. It is important to retain your proof of purchase for any warranty claims.
For professional assistance with installation, troubleshooting, or advanced technical inquiries, contact an authorized Directed Electronics dealer or customer service representative.


