
1. Introduction
The Sinocare Safe AQ Smart Blood Glucose Monitoring System is designed for the quantitative measurement of glucose in fresh capillary whole blood. This system is intended for self-testing by people with diabetes at home and by healthcare professionals in clinical settings as an aid in managing diabetes. The kit provides quick and reliable results to help monitor blood sugar levels effectively.

Image 1.1: The complete Sinocare Safe AQ Smart Blood Glucose Meter kit, including the meter, test strips, lancing device, lancets, and carrying case.
Key Features:
- No Coding Required: Automatic strip identification for ease of use.
- Fast Results: Obtain accurate readings in just 5 seconds.
- Small Sample Size: Requires only 0.6 microliters of blood.
- User-Friendly Design: Features a strip ejection button to prevent infection and a large LCD display.
- Memory Capacity: Stores up to 1000 test results.

Image 1.2: Visual representation of the key features of the Safe AQ Smart meter, highlighting its SOD chip, 5-second test time, small blood sample requirement, ease of operation, and memory capacity.
2. Product Components
Your Sinocare Safe AQ Smart kit includes the following items:
- Blood Glucose Meter (Safe AQ Smart)
- Test Strips (50 count, no coding)
- Lancets (50 count)
- Lancing Device (painless)
- User Manual
- Quick Guide
- Carrying Bag
- AAA Batteries (2, pre-installed or included)

Image 2.1: Diagram illustrating the different parts of the Safe AQ Smart meter, including the blood sampling segment, test strip port, strip ejection button, LCD display, power button, and battery door.
3. Setup
3.1 Battery Installation
The meter uses two AAA batteries. If not already installed, open the battery compartment on the back of the meter and insert the batteries according to the polarity indicators. Close the compartment securely.
3.2 Setting Up the Lancing Device
- Unscrew the lancing device cap.
- Insert a new sterile lancet firmly into the lancet holder.
- Twist off the protective cap of the lancet.
- Replace the lancing device cap.
- Adjust the penetration depth by rotating the cap. Start with a lower setting (e.g., 1 or 2) and adjust as needed for a sufficient blood sample.
- Pull back the cocking control until it clicks, indicating it is ready to use.
4. Operating Instructions (Taking a Blood Glucose Test)
- Prepare Your Hands: Wash your hands thoroughly with warm, soapy water and dry them completely. This helps ensure an accurate reading and prevents infection.
- Prepare the Puncture Site: Disinfect the chosen finger (typically the side of a fingertip) with a 75% alcohol swab and let it air dry completely.
- Insert Test Strip: Remove a test strip from its vial and immediately close the vial cap tightly. Insert the test strip into the meter's test strip port. The meter will automatically turn on and display a blood drop symbol, indicating it's ready for a blood sample.
- Obtain Blood Sample: Place the lancing device firmly against the prepared fingertip and press the release button. A small drop of blood will form.
- Apply Blood Sample: Gently touch the tip of the test strip to the blood drop. The blood will be drawn into the strip automatically. Do not apply blood to the top of the strip or press the finger against the strip.
- Read Results: The meter will count down (e.g., 5 seconds) and then display your blood glucose result in mg/dL.
- Eject Used Strip and Lancet: Use the strip ejection button on the meter to safely discard the used test strip. Carefully remove the used lancet from the lancing device and dispose of it in a sharps container.

Image 4.1: A step-by-step visual guide on how to use the blood glucose meter, from hand washing to obtaining and applying the blood sample, and finally reading the result.

Image 4.2: Illustration demonstrating the user-friendly ejection mechanisms for both the lancet from the lancing device and the test strip from the meter, promoting hygienic disposal.
5. Maintenance and Storage
5.1 Cleaning the Meter
Clean the meter regularly with a soft, damp cloth. Do not immerse the meter in water or use harsh cleaning agents. Ensure no liquid enters the test strip port.
5.2 Test Strip Storage
Proper storage of test strips is crucial for accurate results:
- Store test strips in their original vial with the cap tightly closed.
- Keep strips at a temperature between 12 °C and 30 °C (53.6 °F and 86 °F).
- Avoid humid environments, direct sunlight, and extreme temperatures.
- Use test strips within six months after opening the vial, or before the expiration date printed on the vial, whichever comes first.
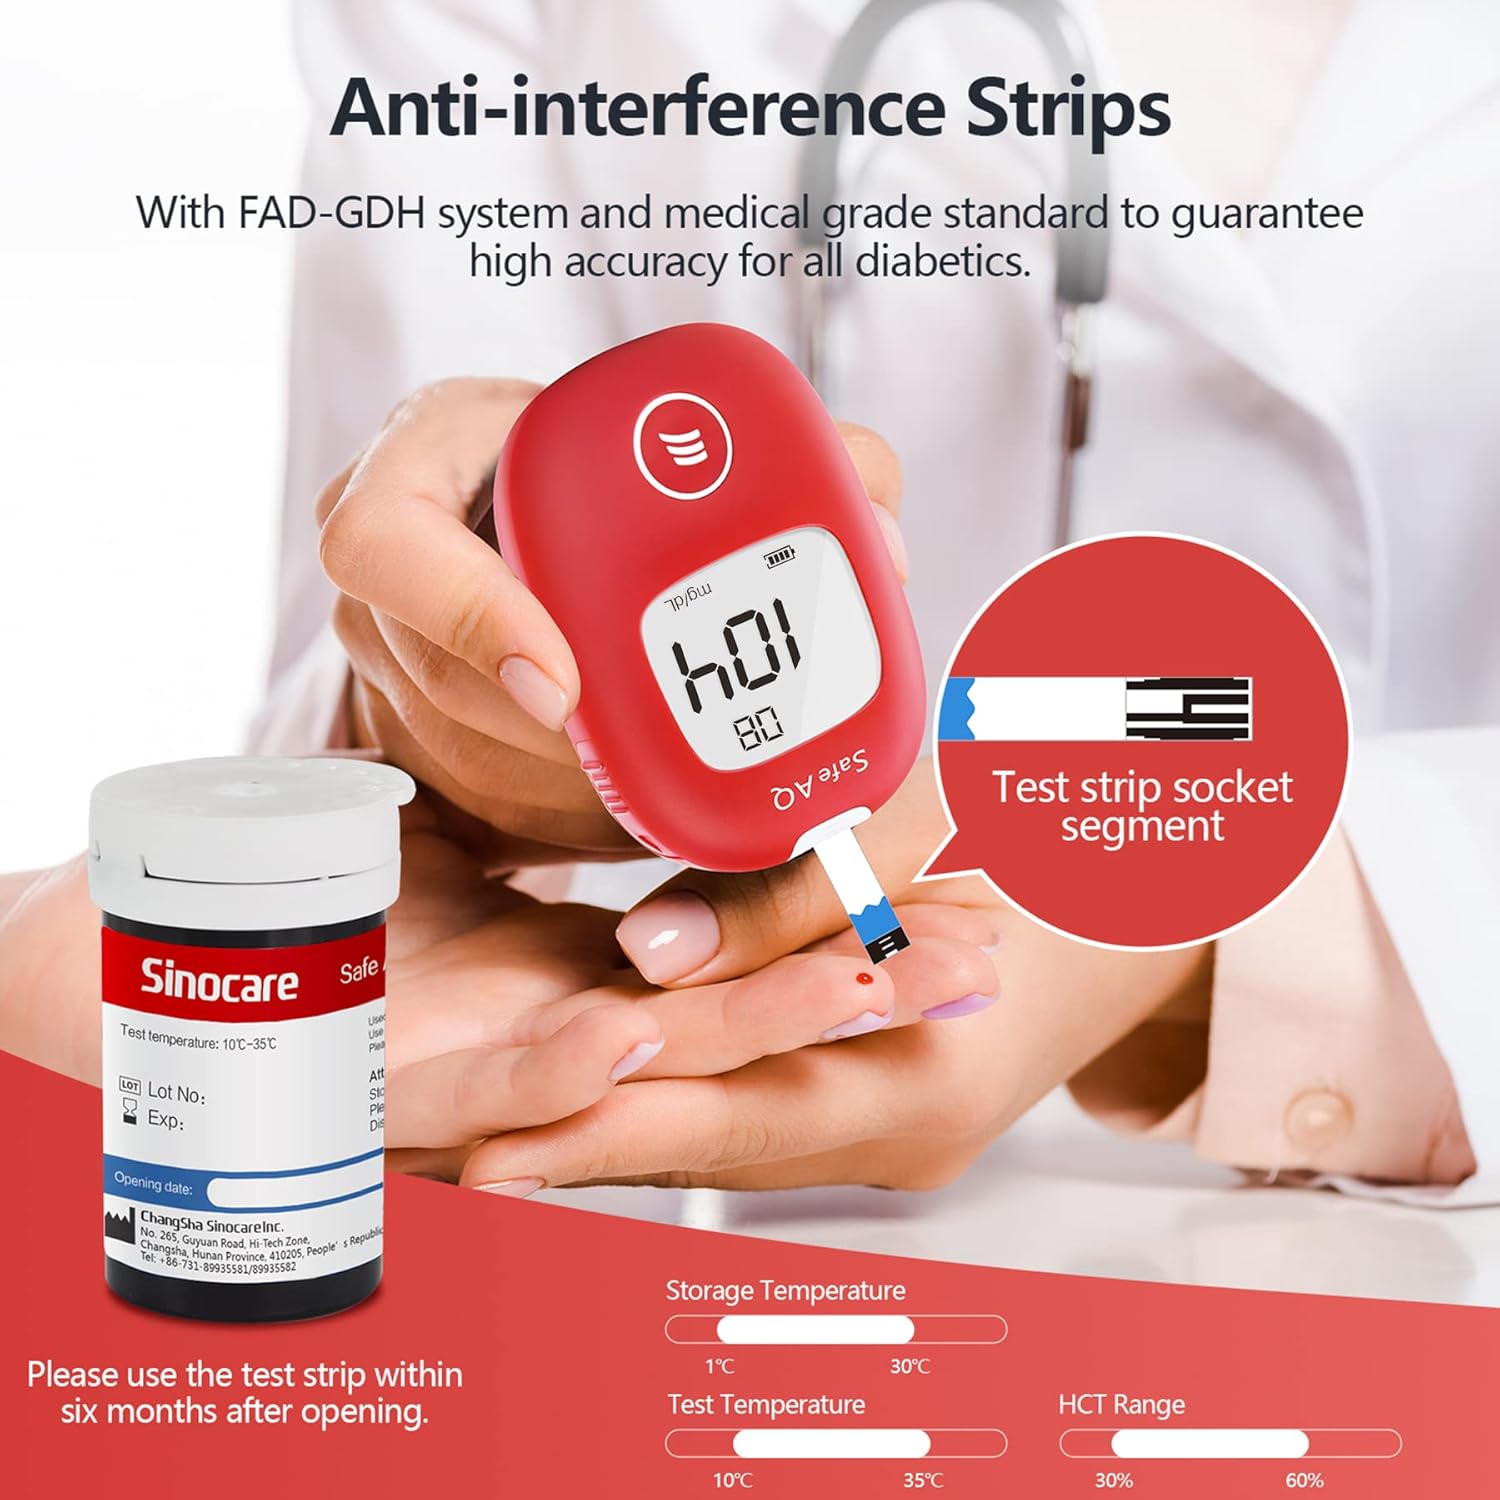
Image 5.1: Information regarding the anti-interference properties of the test strips and recommended storage conditions, including temperature ranges for storage and testing, and HCT range.
6. Troubleshooting
| Problem | Possible Cause | Solution |
|---|---|---|
| Meter does not turn on. | Dead or incorrectly inserted batteries. | Check battery polarity or replace with new AAA batteries. |
| Error message displayed. | Insufficient blood sample, damaged strip, or incorrect temperature. | Repeat test with a new strip and sufficient blood. Ensure proper temperature. Refer to quick guide for specific error codes. |
| Inaccurate readings. | Expired or improperly stored strips, dirty meter, or incorrect testing procedure. | Check strip expiration date and storage conditions. Clean the meter. Review operating instructions carefully. Consult a healthcare professional if discrepancies persist. |
| Difficulty getting blood sample. | Lancing device depth too shallow, or insufficient blood flow. | Increase lancing device depth setting. Warm hands before testing. Gently massage finger to encourage blood flow. |
7. Technical Specifications
- Measurement Unit: mg/dL (as per product information)
- Sample Volume: 0.6 µL
- Test Time: 5 seconds
- Memory: Up to 1000 test results
- Battery Type: 2 x AAA batteries (included)
- Operating Temperature: Refer to test strip vial for specific range (typically 10°C - 35°C)
- Storage Temperature (Meter): -20°C to 55°C
- Storage Temperature (Strips): 12°C to 30°C
- Dimensions: 17.6 x 16.6 x 5.1 cm (package dimensions)
- Weight: 420 g (package weight)
- Model Number: Safe AQ Smart 50 kit
- Manufacturer: sinocare Inc.
- Country of Origin: China
8. Warranty and Support
Sinocare provides quality products and customer support. For any questions regarding the use, maintenance, or troubleshooting of your Safe AQ Smart Blood Glucose Meter, please refer to the quick guide included in your kit or contact Sinocare customer service. Contact information may be found on the product packaging or the official Sinocare website.
Please retain your purchase receipt as proof of purchase for warranty purposes.


