
Introduction
This manual provides essential information for the safe and efficient operation of your Total Tools THT15246 Automatic 3-in-1 Wire Stripper. Please read these instructions carefully before use and retain them for future reference. This tool is designed for stripping, cutting, and crimping electrical wires.
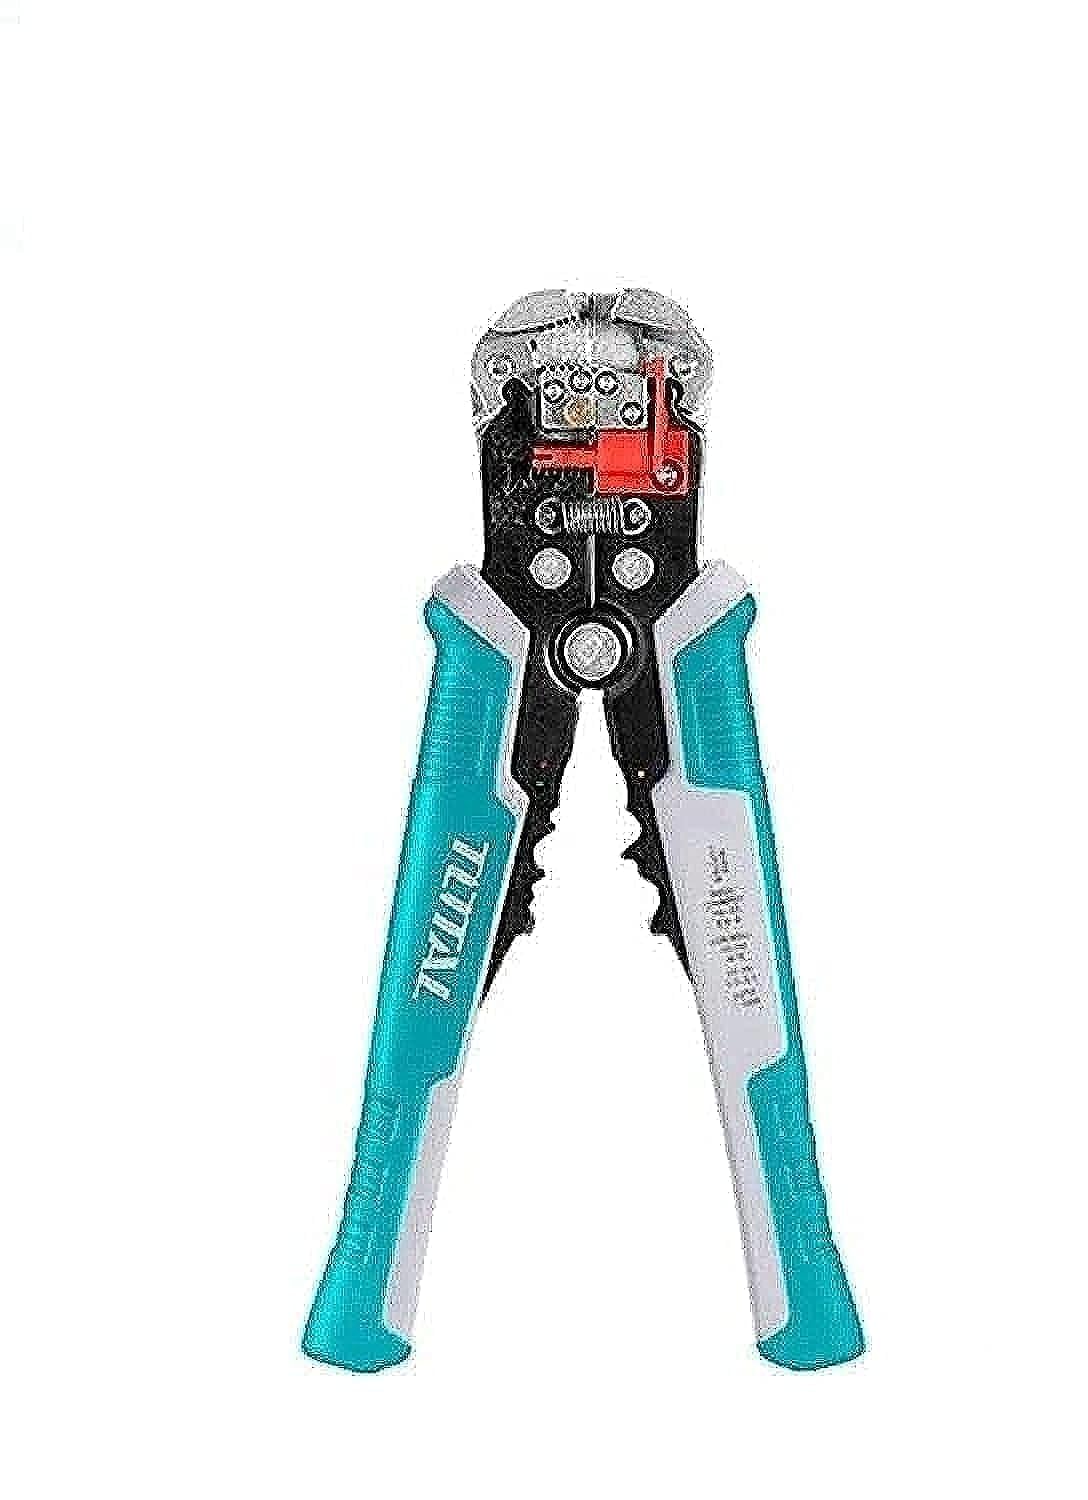
Image: The Total Tools THT15246 Automatic 3-in-1 Wire Stripper, featuring a teal and white handle with a black and silver head. The tool is designed for multiple electrical tasks.
Safety Information
- Always wear appropriate personal protective equipment, such as safety glasses, when using this tool.
- Ensure the power to the circuit is disconnected before working on electrical wires.
- Do not use the tool on live electrical circuits.
- Keep hands and fingers clear of the cutting and stripping blades during operation.
- Store the tool in a dry, safe place, out of reach of children.
- Inspect the tool for damage before each use. Do not use if damaged.
Setup
The Total Tools THT15246 is ready for use out of the packaging. No assembly is required. Familiarize yourself with the tool's components before operation.
- Stripping Jaws: Located at the front, these automatically adjust to wire size.
- Wire Cutter: Integrated into the tool for clean cuts.
- Crimping Dies: Various slots for insulated, non-insulated, and ignition terminals.
- Adjustable Stopper: Used to control the length of insulation to be stripped.
- Comfortable Handles: Designed for ergonomic grip.
Operating Instructions
1. Wire Stripping
- Adjust Stripping Length: Use the adjustable stopper to set the desired length of insulation to be removed. For shorter strips, slide the stopper closer to the jaws.
- Insert Wire: Place the wire into the stripping jaws, ensuring the end of the insulation aligns with the stopper (if used) or the desired stripping point.
- Squeeze Handles: Firmly squeeze the handles together. The tool will automatically grip the wire, cut the insulation, and pull it away, leaving the conductor exposed.
- Release: Release the handles to free the stripped wire.
Note: The automatic mechanism adjusts to wire gauges from 10 AWG to 24 AWG (0.2 mm² to 6 mm²).
2. Wire Cutting
- Position Wire: Place the wire into the designated cutting blades located near the pivot point of the tool.
- Squeeze Handles: Squeeze the handles firmly to cut through the wire.
Caution: Ensure the wire is fully seated in the cutting blades for a clean cut and to prevent damage to the tool.
3. Wire Crimping
The tool features multiple crimping dies for different terminal types:
- Insulated Terminals: Use the dies marked for 0.5-6 mm² (10-22 AWG).
- Non-Insulated Terminals: Use the dies marked for 0.5-6 mm² (4-22 AWG).
- Ignition Terminals: Use the dies marked for 7-8 mm².
- Select Die: Choose the appropriate crimping die based on the terminal type and wire gauge.
- Insert Terminal: Place the terminal into the selected crimping die.
- Insert Wire: Insert the stripped wire into the terminal.
- Squeeze Handles: Squeeze the handles completely until the crimp is formed. The ratchet mechanism will ensure a full crimp cycle.
- Release: Release the handles and remove the crimped terminal.
Tip: A proper crimp should securely hold the wire without damaging the terminal or insulation.
Maintenance
- Cleaning: After each use, wipe the tool clean with a dry cloth to remove any dust, dirt, or wire fragments.
- Lubrication: Periodically apply a light machine oil to the pivot points and moving parts to ensure smooth operation.
- Inspection: Regularly check the stripping jaws and cutting blades for wear or damage. Replace the tool if significant wear or damage is observed.
- Storage: Store the tool in a clean, dry environment to prevent rust and corrosion.
Troubleshooting
| Problem | Possible Cause | Solution |
|---|---|---|
| Wire not stripping cleanly. | Incorrect wire gauge, dull blades, or insufficient pressure. | Ensure wire is within specified gauge range. Apply firm, consistent pressure. Inspect blades for wear. |
| Wire insulation is damaged during stripping. | Wire not properly seated in jaws, or blades are misaligned. | Ensure wire is straight and fully inserted. Check for debris in jaws. |
| Crimped terminal is loose. | Incorrect crimping die used, or handles not fully squeezed. | Verify correct die for terminal and wire size. Squeeze handles completely until the ratchet releases. |
| Tool feels stiff or difficult to operate. | Lack of lubrication or accumulation of dirt. | Clean the tool and apply a light machine oil to moving parts. |
Specifications
| Feature | Detail |
|---|---|
| Model Number | THT15246 |
| Tool Type | Automatic 3-in-1 Wire Stripper, Cutter, Crimper |
| Overall Length | 210 mm |
| Wire Stripping Range | 10-24 AWG (0.2-6 mm²) |
| Crimping Insulated Terminals | 0.5-6 mm² (10-22 AWG) |
| Crimping Non-Insulated Terminals | 0.5-6 mm² (4-22 AWG) |
| Crimping Ignition Terminals | 7-8 mm² |
| Handle Material | Thermoplastic Rubber (TPE) |
| Product Dimensions | 27.8 x 12.1 x 2.9 cm |
| Weight | 360 grams |
| Certifications | UL |
Warranty and Support
For warranty information or technical support regarding your Total Tools THT15246 Automatic 3-in-1 Wire Stripper, please refer to the product packaging or contact your retailer. Keep your purchase receipt as proof of purchase.
For general inquiries, visit the official Total Tools website or contact their customer service department.