
1. Product Overview
This manual provides essential information for the installation and use of your A-Tech 16GB (2x8GB) DDR3L 1600MHz PC3-12800 Non ECC SO-DIMM memory upgrade kit, specifically designed for the Fujitsu LIFEBOOK E754 laptop. This kit is engineered to enhance your system's performance by providing reliable and high-speed memory.
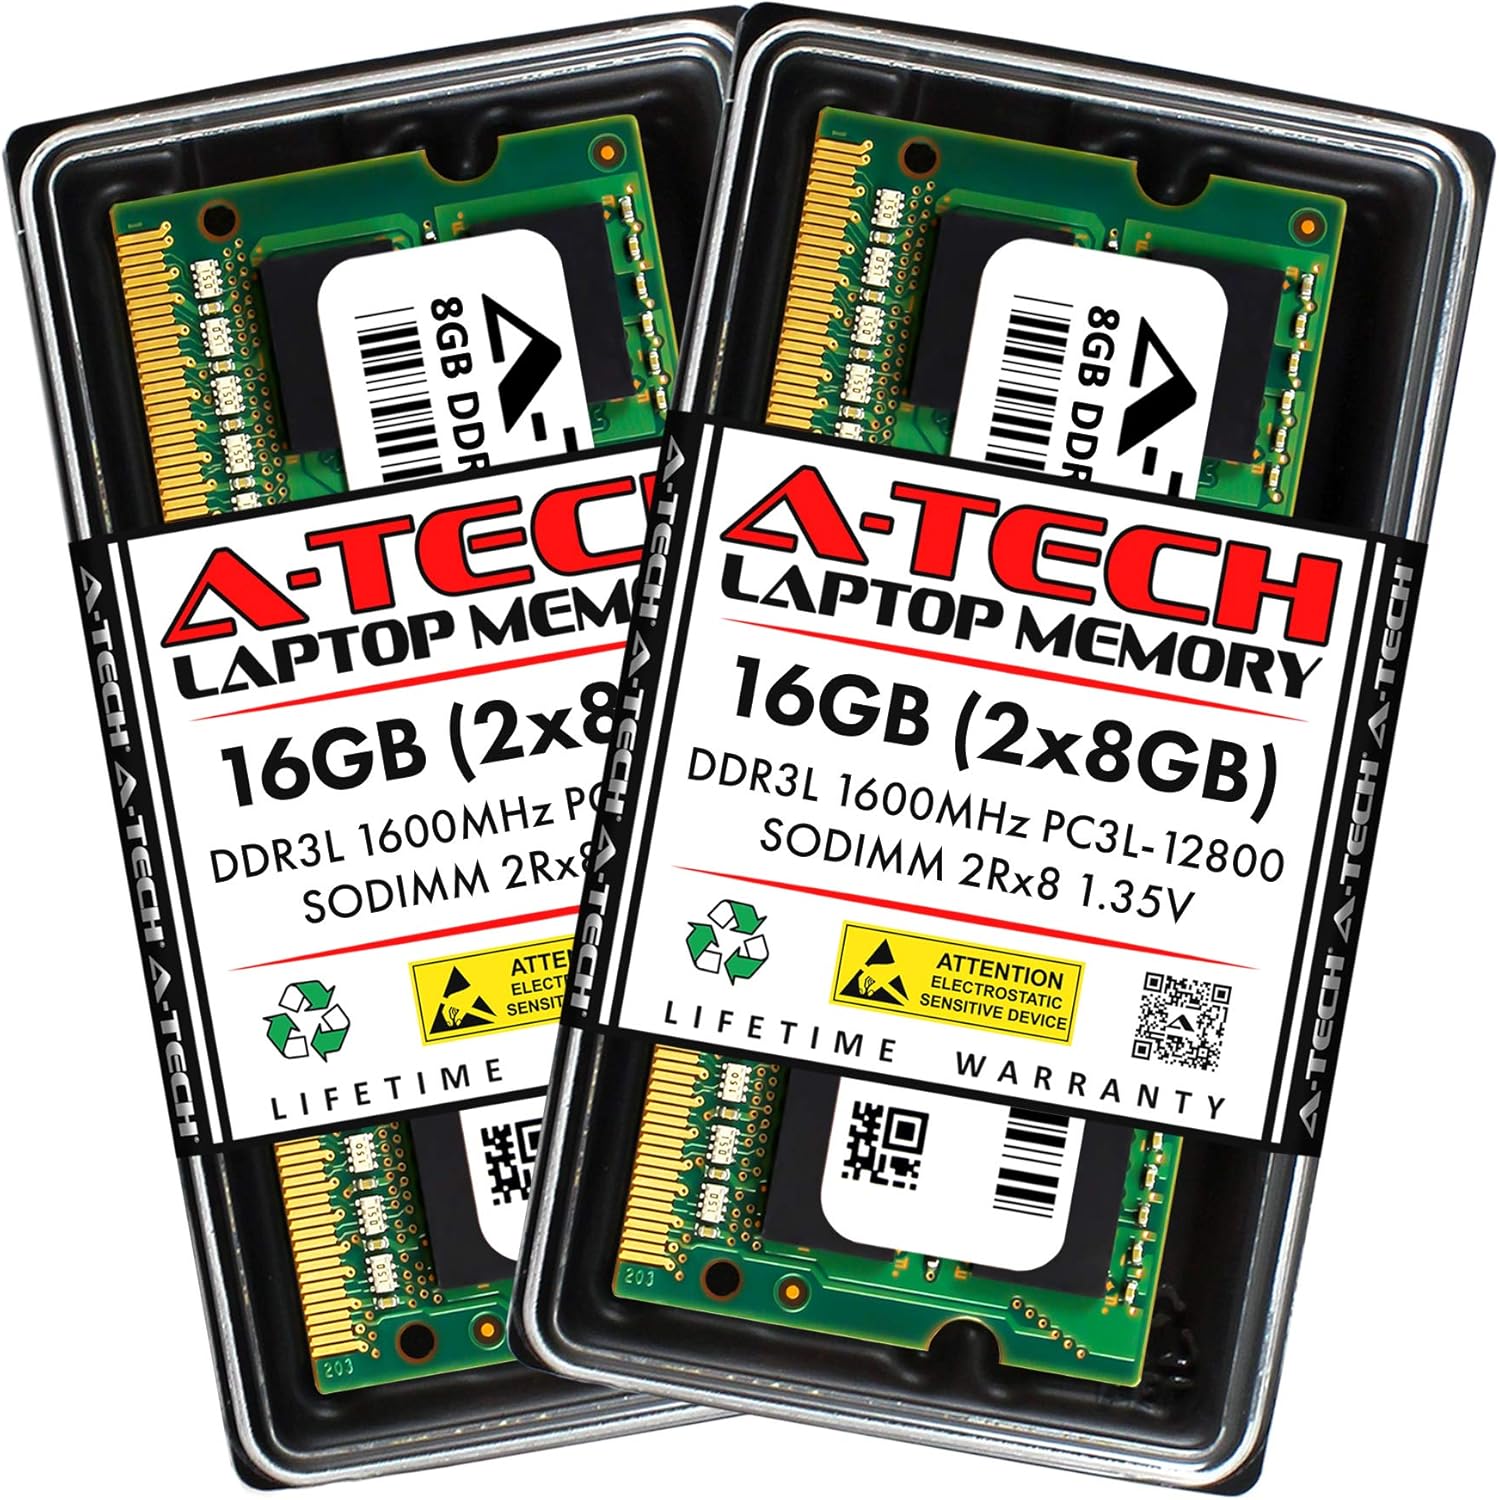
Figure 1.1: A-Tech 16GB (2x8GB) DDR3L SO-DIMM Memory Kit in its retail packaging.
Key Features:
- Capacity: 16GB Kit (2x 8GB Modules)
- Type: DDR3L SO-DIMM (204-Pin)
- Speed: 1600 MHz (PC3-12800)
- Error Correction: Non-ECC Unbuffered
- Rank: 2Rx8 (Dual Rank x8)
- Voltage: 1.35V (Low Voltage)
- Compatibility: Specifically designed for Fujitsu LIFEBOOK E754.

Figure 1.2: Illustrates the performance benefits of upgrading with A-Tech Memory.

Figure 1.3: Emphasizes compatibility with Laptop, Mini PC, and AIO systems.
2. Setup & Installation
Installing RAM is a straightforward process, but it requires careful handling to prevent damage to the modules or your laptop. Always refer to your Fujitsu LIFEBOOK E754's official service manual for specific instructions on accessing and replacing memory modules, as procedures may vary by model.
2.1. Before You Begin:
- Safety First: Disconnect your laptop from all power sources (AC adapter and battery).
- Static Electricity: Static discharge can damage electronic components. Ground yourself by touching a metal, unpainted part of your laptop's chassis before handling the memory modules. Consider using an anti-static wrist strap.
- Work Area: Work on a clean, flat, and well-lit surface.
- Tools: You may need a small Phillips-head screwdriver to open your laptop's memory compartment.
2.2. Installation Steps:
- Power Down: Ensure your laptop is completely powered off, not just in sleep mode.
- Disconnect Power: Unplug the AC adapter and remove the battery.
- Access Memory Bay: Carefully open the memory compartment cover on the underside of your laptop. Refer to your laptop's manual for exact location and opening procedure.
- Remove Old Modules (if applicable): If replacing existing RAM, gently push the small clips on either side of the module outwards. The module will pop up at an angle. You can then slide it out of the slot.
- Install New Modules:
- Hold the new A-Tech memory module by its edges, avoiding touching the gold connectors.
- Align the notch on the module with the key in the memory slot.
- Insert the module firmly into the slot at a 45-degree angle.
- Gently push the module down until the clips on both sides snap into place, securing the module horizontally.

Figure 2.1: A-Tech 8GB DDR3L SO-DIMM modules ready for installation.
- Dual Channel Mode: For optimal performance, install both 8GB modules in pairs to enable Dual Channel mode. Consult your system's manual for proper memory seating and channel guidelines.
- Close Compartment: Replace the memory compartment cover and secure it.
- Reconnect Power: Reinstall the battery and plug in the AC adapter.
- Power On: Turn on your laptop. The system should automatically detect the new memory.
Upon successful installation, your operating system should recognize the increased RAM. You can verify this in your system's properties (e.g., "System Information" on Windows, "About This Mac" on macOS).
3. Operation
Once installed, the A-Tech memory modules operate automatically with your system. They provide the necessary Random Access Memory for your operating system and applications to run efficiently. The increased memory capacity will allow for smoother multitasking, faster application loading, and improved overall system responsiveness.
3.1. System Requirements:
- Operating System: To fully utilize 16GB of RAM, a 64-bit operating system is required. 32-bit operating systems typically have a memory limit of around 4GB.
- BIOS/UEFI: Ensure your laptop's BIOS/UEFI is up-to-date, though this is rarely necessary for standard RAM upgrades.

Figure 3.1: A-Tech memory modules undergo extensive quality control testing for reliable performance.
4. Maintenance
Memory modules are solid-state components and generally require no ongoing maintenance once installed. However, proper handling and environmental conditions are crucial for their longevity.
- Environmental Conditions: Keep your laptop in a cool, dry environment. Avoid extreme temperatures and high humidity, which can degrade electronic components over time.
- Dust Control: Periodically clean your laptop's cooling vents to prevent dust buildup, which can lead to overheating and affect component performance.
- Physical Handling: If you ever need to remove or re-install the modules, always handle them by the edges and avoid touching the gold contacts or the chips on the module.
5. Troubleshooting
If you encounter issues after installing your A-Tech memory, consider the following common troubleshooting steps:
- System Does Not Boot / Black Screen:
- Ensure the memory modules are fully seated in their slots. Gently push down on both ends of each module until the clips snap into place.
- Try installing one module at a time to identify if one of the modules is faulty.
- Verify that the modules are compatible with your specific Fujitsu LIFEBOOK E754 model.
- Incorrect RAM Amount Detected:
- Confirm that your operating system is 64-bit. A 32-bit OS cannot utilize more than approximately 4GB of RAM.
- Check your system's BIOS/UEFI settings to ensure the memory is recognized correctly.
- Re-seat the modules to ensure proper contact.
- System Instability / Blue Screens (BSOD):
- This can indicate faulty RAM or improper installation. Re-seat the modules.
- Run a memory diagnostic tool (e.g., Windows Memory Diagnostic) to check for errors.
- Compatibility Issues:
- While this kit is designed for the Fujitsu LIFEBOOK E754, always cross-reference with your laptop's official documentation for maximum supported RAM and specific module requirements.
If these steps do not resolve your issue, please contact A-Tech Technical Support for further assistance.
6. Product Specifications
Detailed technical specifications for the A-Tech 16GB (2x8GB) DDR3L 1600MHz PC3-12800 SO-DIMM Memory Kit (Model: APH809).
| Feature | Specification |
|---|---|
| Brand | A-Tech |
| Model Number | APH809 |
| RAM Capacity | 16 GB (2x 8GB Modules) |
| RAM Type | DDR3L SO-DIMM |
| Memory Speed | 1600 MHz (PC3-12800) |
| Error Correction | Non-ECC Unbuffered |
| Rank | 2Rx8 (Dual Rank x8) |
| Voltage | 1.35 Volts |
| Pin Count | 204-Pin |
| Product Dimensions (LxWxH) | 2.66 x 1.18 x 0.15 inches (67.60 x 30 x 3.81 mm) |
| Compatible Devices | Fujitsu LIFEBOOK E754 |

Figure 6.1: Detailed dimensions of an A-Tech SO-DIMM module.
7. Warranty & Support
A-Tech is committed to providing high-quality products and excellent customer service.
7.1. Lifetime Warranty:
A-Tech provides a Lifetime Warranty for all orders. This warranty covers defects in materials and workmanship for the lifetime of the product. Please retain your proof of purchase for warranty claims.
7.2. Technical Support:
Complimentary United States based Technical Support is available to assist you before, during, and after your purchase. For technical assistance, troubleshooting, or warranty inquiries, please contact A-Tech Support through their official website or the contact information provided with your product.
For more information and support resources, visit the official A-Tech website:

