
1. Introduction
Thank you for choosing the Haier I-Pro Series 5 Washing Machine, model HW80-B14959S8U1S. This manual provides essential information for the safe and efficient operation, installation, maintenance, and troubleshooting of your new appliance. Please read these instructions carefully before using the washing machine and keep them for future reference.
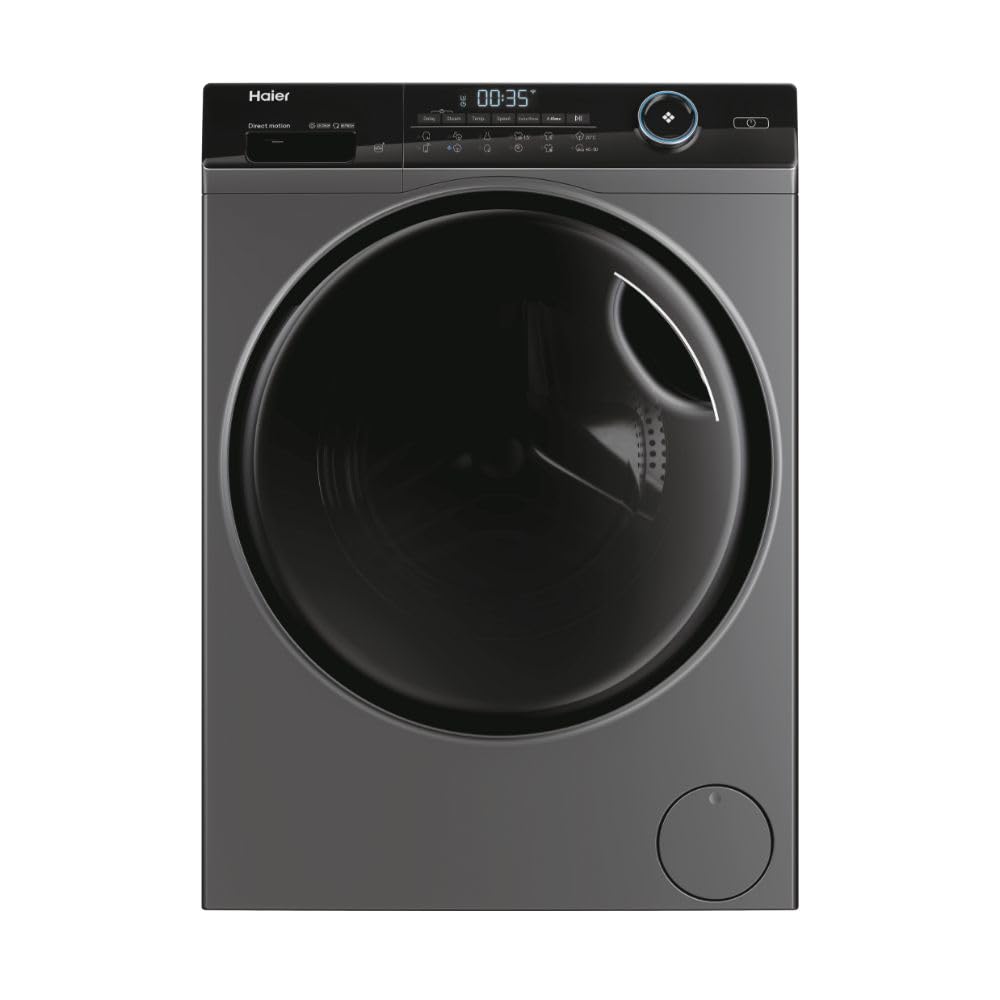
Figure 1: Front view of the Haier I-Pro Series 5 Washing Machine.
2. Safety Information
Always follow basic safety precautions when using electrical appliances to reduce the risk of fire, electric shock, and injury to persons.
- Read all instructions before using the appliance.
- Ensure the appliance is properly grounded.
- Do not wash articles that have been previously cleaned in, washed in, soaked in, or spotted with gasoline, dry-cleaning solvents, or other flammable or explosive substances.
- Do not allow children to play on or in the appliance. Close supervision of children is necessary when the appliance is used near children.
- Do not reach into the appliance if the tub or agitator is moving.
- Do not install or store this appliance where it will be exposed to the weather.
- Do not tamper with controls.
- Do not repair or replace any part of the appliance or attempt any servicing unless specifically recommended in the user-maintenance instructions or in published user-repair instructions that you understand and have the skills to carry out.
3. Product Overview
The Haier I-Pro Series 5 washing machine is designed for efficient and quiet laundry care. Key features include:
- Capacity: 8 kg for various load sizes.
- Spin Speed: Up to 1400 revolutions per minute (rpm) for effective water extraction.
- Inverter Motor: Provides quiet operation, durability, and energy efficiency.
- Front-Load Design: Convenient loading and unloading.
- Anthracite Finish: Modern aesthetic.
- Stainless Steel Drum: Durable and gentle on fabrics.

Figure 2: Front-load design with the door open, revealing the stainless steel drum.

Figure 3: Detailed view of the control panel with program selector and display.
4. Setup and Installation
Proper installation is crucial for the performance and longevity of your washing machine. It is recommended to have the appliance installed by a qualified technician.
4.1 Unpacking
Carefully remove all packaging materials. Ensure all transit bolts are removed from the rear of the machine before use. Keep packaging materials out of reach of children.
4.2 Positioning
Place the washing machine on a firm, level floor. Adjust the leveling feet to ensure the machine is stable and does not wobble. Leave adequate space around the machine for ventilation and maintenance.
4.3 Water and Electrical Connections
- Connect the water inlet hose to a cold water tap.
- Ensure the drain hose is properly installed into a standpipe or sink, preventing kinks.
- Plug the power cord into a grounded electrical outlet (230 Volt). Do not use extension cords.
4.4 Dimensions
The physical dimensions of the washing machine are important for proper placement.
- Width: 60 cm
- Depth: 58 cm
- Height: 85 cm

Figure 4: Dimensional drawing of the washing machine (measurements in mm).
4.5 First Use
Before washing clothes for the first time, run an empty wash cycle with a small amount of detergent to clean the drum and remove any manufacturing residues.
5. Operating Instructions
Follow these steps for optimal washing results.
5.1 Loading Laundry
- Sort laundry by fabric type, color, and degree of soiling.
- Open the door and load items loosely into the drum, ensuring not to overload. The maximum capacity is 8 kg.
- Close the door firmly.
5.2 Adding Detergent
Pull out the detergent dispenser drawer. Add the appropriate amount of detergent to the main wash compartment. For pre-wash or fabric softener, use the designated compartments if available. This model features a single-compartment dispenser.
5.3 Selecting a Wash Program
Turn the program selector knob (refer to Figure 3 for control panel layout) to choose the desired wash program. The display will show the default settings for the selected program.
5.4 Adjusting Settings
Use the touch buttons on the control panel to adjust settings such as:
- Temperature: Adjust the wash water temperature.
- Spin Speed: Modify the spin speed up to 1400 rpm.
- Extra Rinse: Add an additional rinse cycle.
- Delay Start: Set a delayed start time for the wash cycle.
- Steam Function: Utilize the steam option for enhanced cleaning or wrinkle reduction (if available on selected program).
5.5 Starting the Wash Cycle
Press the Start/Pause button to begin the wash cycle. The machine will automatically proceed through the selected program.
5.6 Ending the Cycle
Once the cycle is complete, the machine will signal with an audible alert or display a completion message. Open the door and remove your laundry promptly to prevent wrinkles and odors.
6. Maintenance
Regular maintenance ensures optimal performance and extends the lifespan of your washing machine. Always unplug the appliance before performing any cleaning or maintenance.
6.1 Cleaning the Exterior
Wipe the exterior surfaces with a soft, damp cloth. Do not use abrasive cleaners or solvents.
6.2 Cleaning the Detergent Dispenser
Periodically remove and clean the detergent dispenser drawer under running water to prevent detergent buildup.
6.3 Cleaning the Drum
Run a maintenance wash cycle (e.g., a hot wash with no laundry and a drum cleaner) monthly to keep the stainless steel drum clean and free of odors.

Figure 5: Interior view of the stainless steel drum.
6.4 Cleaning the Drain Filter
Locate the drain filter (usually at the bottom front of the machine). Open the cover, drain any residual water, and carefully remove and clean the filter of lint and debris. Reinstall securely.
7. Troubleshooting
Before contacting service, check the following common issues and solutions.
| Problem | Possible Cause | Solution |
|---|---|---|
| Machine does not start | Power cord unplugged, door not closed properly, no water supply, program not selected. | Check power connection, ensure door is latched, check water tap, select a program and press start. |
| Water leakage | Hoses loose or damaged, detergent dispenser overflowing, drain filter not secured. | Check hose connections, do not overfill detergent, ensure drain filter is tight. |
| Excessive vibration/noise | Transit bolts not removed, machine not level, uneven load. | Remove transit bolts, adjust leveling feet, redistribute laundry inside the drum. |
| Poor washing results | Incorrect program, too much/too little detergent, overloaded drum. | Select appropriate program, use correct detergent dosage, do not overload. |
If the problem persists after checking these points, please contact customer support.
8. Specifications
Technical details for the Haier I-Pro Series 5 Washing Machine (Model: HW80-B14959S).
| Feature | Detail |
|---|---|
| Brand | Haier |
| Model Number | HW80-B14959S |
| Loading Type | Front Load |
| Capacity | 8 kg |
| Maximum Spin Speed | 1400 rpm |
| Spin Efficiency Class | B |
| Noise Level (Spin) | 70 dB |
| Motor Type | Inverter |
| Color | Anthracite |
| Product Dimensions (W x D x H) | 60 cm x 58 cm x 85 cm |
| Weight | 63 kg |
| Voltage | 230 Volt |
| Drum Material | Stainless Steel |
| Detergent Dispenser Options | Single-compartment |
9. Warranty and Support
Your Haier washing machine comes with a manufacturer's warranty.
- Warranty for Private Users: 2 years
- Warranty for Businesses: 1 year
For warranty claims, technical support, or to purchase spare parts, please contact Haier customer service or visit the official Haier website. Ensure you have your model number (HW80-B14959S8U1S) and proof of purchase available.


