
Adviace B09R4HWZMN
Adviace Replacement Parts Instruction Manual
Model: B09R4HWZMN
Introduction
This instruction manual provides comprehensive guidance for the installation, operation, and maintenance of your new Adviace replacement parts for Charbroil grills. These high-quality stainless steel components are designed to restore your grill's performance and extend its lifespan. Please read this manual thoroughly before beginning installation to ensure proper fit and function.
Product Components
The Adviace grill rebuild kit includes the following essential components:
- Grill Burners: 5 units, made of stainless steel, measuring 17 3/4" x 3/5" diameter. These are crucial for even heat distribution.
- Heat Plates (Heat Tents): 5 units, made of stainless steel, measuring 16 15/16" x 2 1/12". These protect the burners and vaporize drippings for flavor.
- Crossover Tubes: 4 units, adjustable from 5" - 9.5", made of stainless steel. These connect burners to ensure consistent ignition.
- Grill Igniters: 5 units. Essential for reliable ignition of the burners.

Image: Complete Adviace grill replacement parts kit, showcasing all components.

Image: Detailed view of the dimensions for the burner, heat plate, and crossover tube, indicating length, width, and diameter.

Image: Visual representation of the premium quality stainless steel, highlighting its rustproof, anti-corrosion, heat resistant, and easy-to-clean properties.
Compatibility
These replacement parts are compatible with various Charbroil Performance grill models. Please verify your grill's model number against the list below to ensure proper fit.
- For Charbroil Performance 2 Burner Grill: 463673519, 463625217, 463625219, 463673517, 463673017, 463673019, 463673617, 463673619
- For Charbroil Performance 4 Burner Grill: 463377319, 463342119, 463335517, 463342118, 463347418, 463376017, 463377319, 463349917, 463376217, 463375919, 463332718, 463376519, 463377017, 463375619, 463376319, 463376017P1, 463376419, 463361017, 463376819, 463376018P2, 463377420, 463377117, 463376619, 463376117, 463377217, 463335519, 466335517, 466347017, 463332719, 463375719, 466342119, 466347019
- For Charbroil Performance 5 Burner Grill: 463347519, 463275517, 463347518, 463243518, 463243519, 463373019, 463373319, 463275717
- For Charbroil Performance 6 Burner Grill: 463276517, 463245917, 463244819, 463274619, 463274919, 463276617, 463274419, 463277918, 463238218, 463240420, 463274719, 463274819, 463274919, 466245917
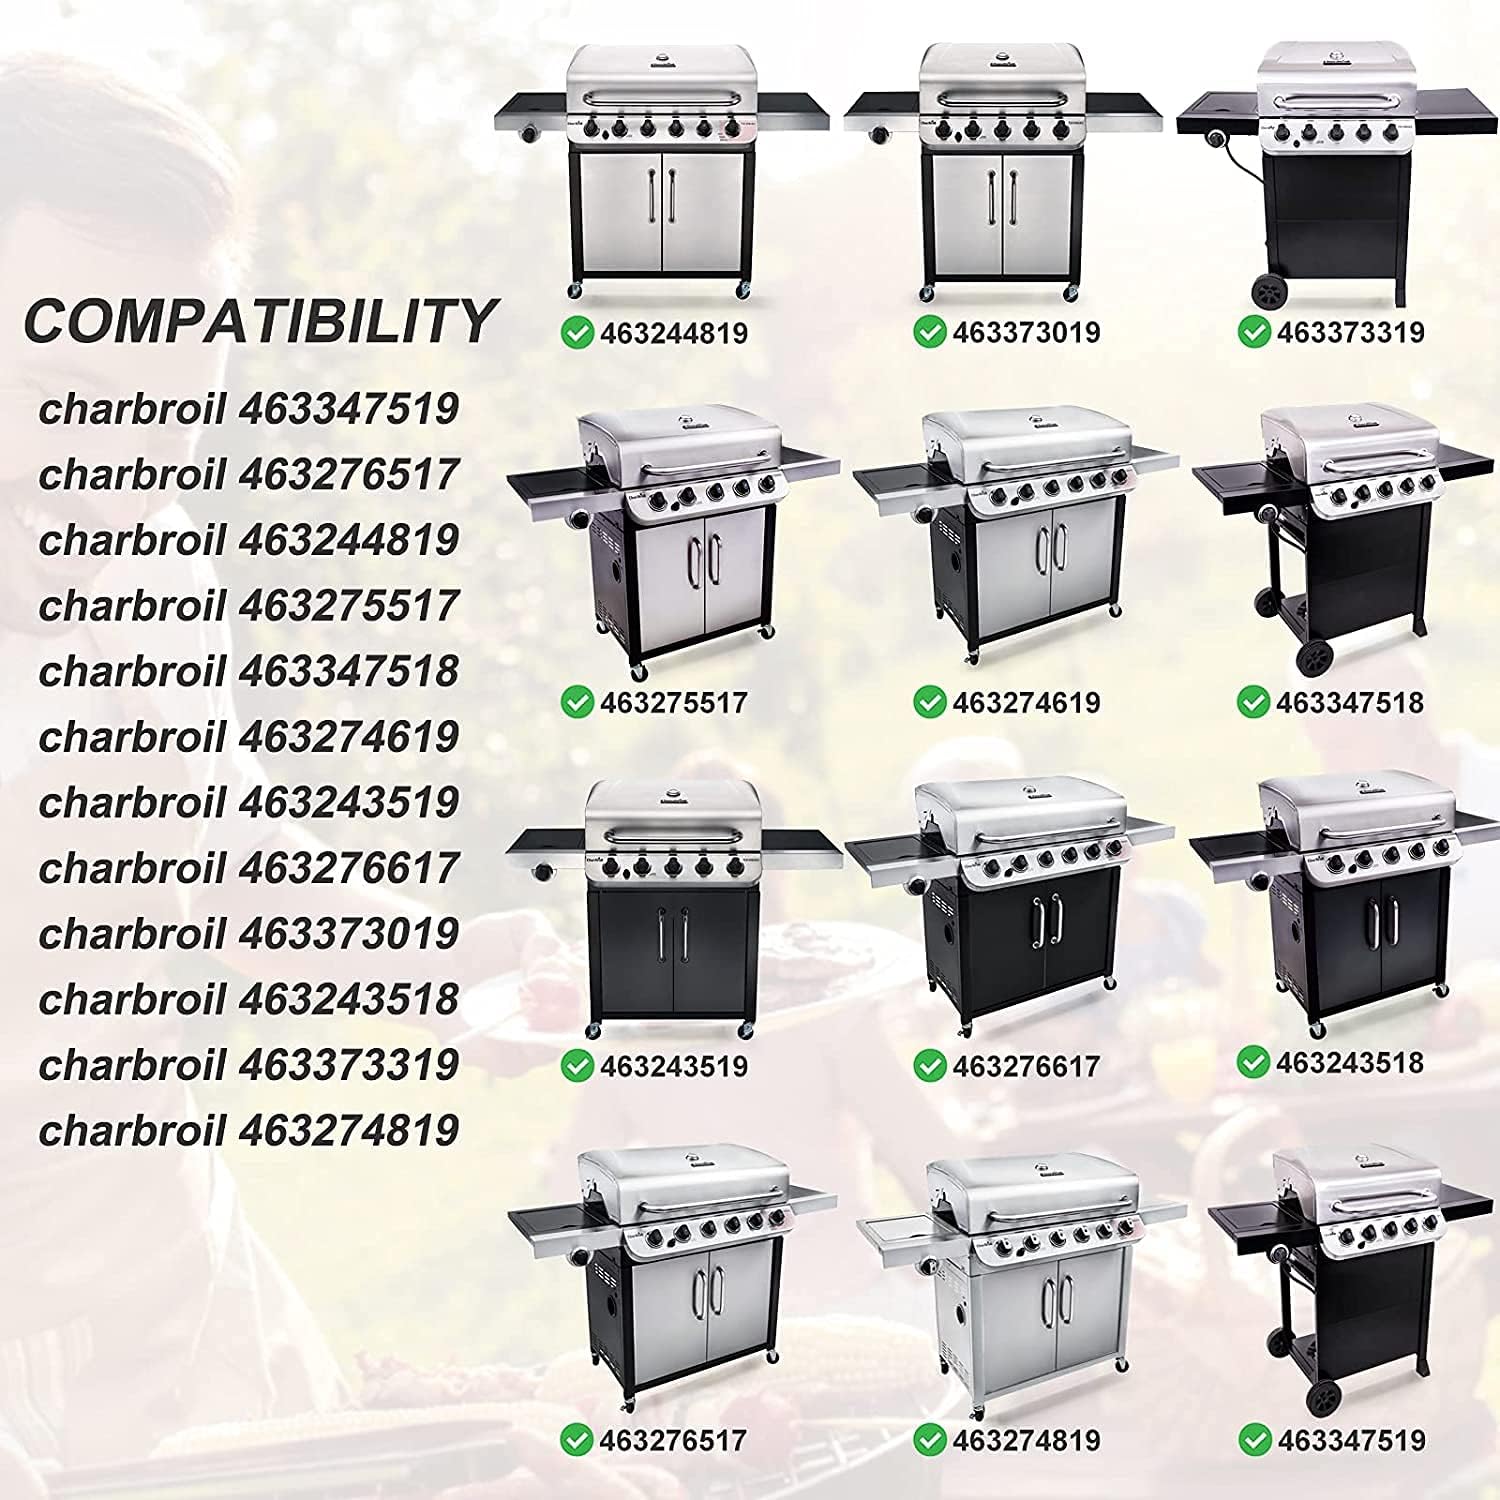
Image: Visual compatibility guide displaying various Charbroil grill models that are compatible with these replacement parts.
Setup and Installation
Replacing your grill's worn-out parts can significantly improve its performance. Follow these steps for a smooth installation process. It is recommended to wear protective gloves during installation.
- Preparation: Ensure your grill is completely cool and disconnected from its gas supply. Remove the cooking grates and any existing heat tents or burners. Clean out any debris from the grill's firebox.
- Install Burners: Carefully place each new burner into its designated slot. Ensure the gas inlet end of the burner aligns with the gas valve opening. Secure the burners in place using the provided pins or clips.
- Connect Crossover Tubes: Attach the crossover tubes between the burners. These tubes ensure that all burners ignite simultaneously. Secure them with the provided hardware.
- Install Igniters: If replacing igniters, connect the new igniter wires to the appropriate terminals on the igniter module. Secure the igniter electrodes near the burner ports.
- Place Heat Plates: Position the new heat plates over the burners. These plates should rest securely on the grill's internal supports, covering the burners.
- Final Assembly: Replace the cooking grates. Reconnect the gas supply and perform a leak test before first use.

Image: A visual comparison showing the grill interior before and after the installation of new replacement parts, highlighting the improved appearance and readiness for use.
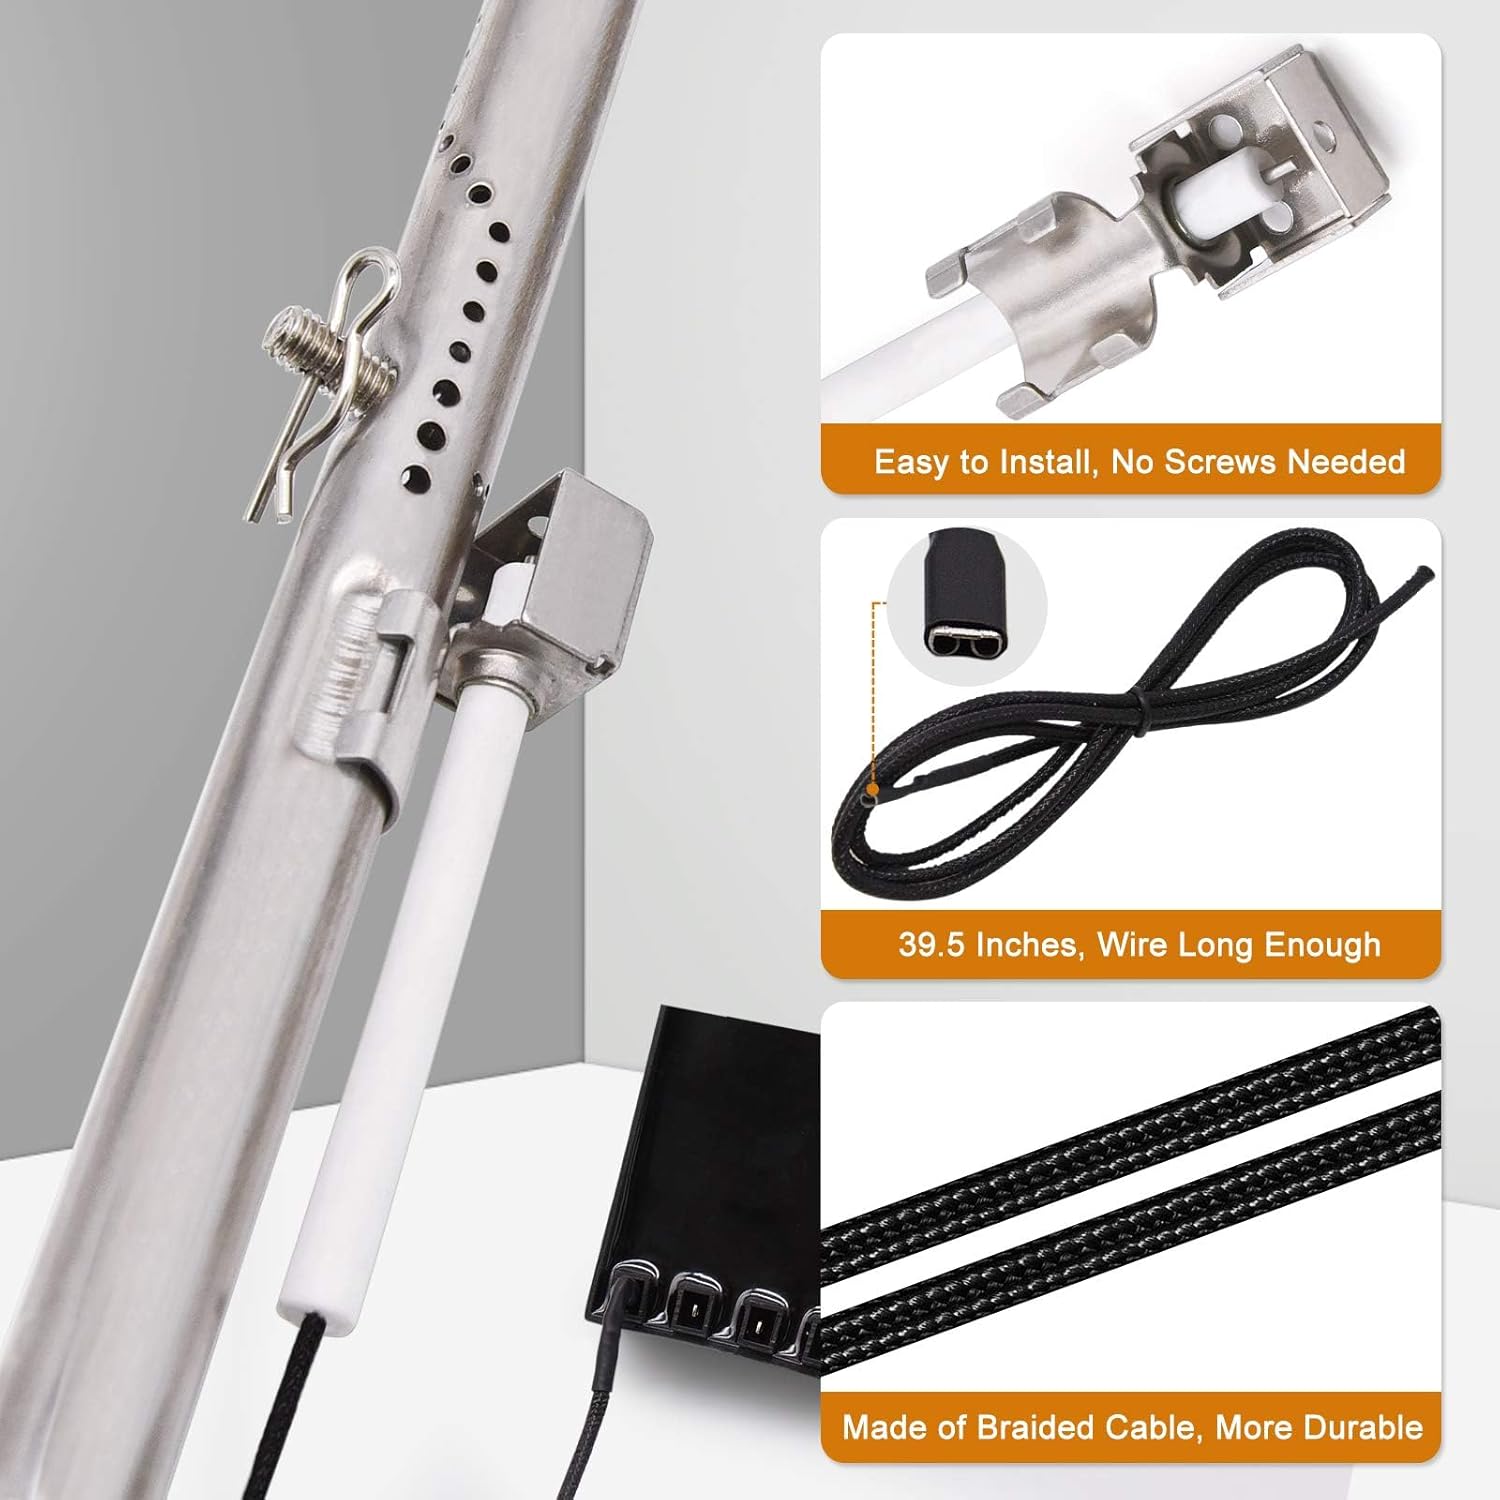
Image: Detailed view of the igniter installation, demonstrating how the igniter wire connects and the electrode is positioned on the burner.
Installation Video Guide
Video: A step-by-step guide demonstrating the installation process for the Adviace grill replacement parts, including burners, crossover tubes, and heat plates. This video provides a visual aid for proper assembly.
Operating Your Grill with New Parts
Once the new parts are installed, your grill should operate with improved efficiency and consistent heat. Always ensure proper ventilation when operating your grill. Follow your grill manufacturer's instructions for safe lighting and operation. The new burners are designed for optimal gas flow, providing even heat across the cooking surface.
Maintenance
Regular maintenance of your grill's internal components will prolong their life and ensure continued optimal performance. The stainless steel construction of these parts offers enhanced durability against rust and corrosion.
- Regular Cleaning: After each use, allow the grill to cool. Brush off any food debris from the heat plates and burners.
- Deep Cleaning: Periodically, remove the heat plates and burners for a more thorough cleaning. Use a grill brush to remove any accumulated grease or carbon buildup.
- Inspection: Regularly inspect the burners for any clogged ports and clear them with a wire brush or a small tool. Check crossover tubes and igniters for any signs of wear or damage.
- Storage: If storing the grill for an extended period, ensure all internal components are clean and dry to prevent moisture-related damage.
Troubleshooting
If you encounter issues after installing the new parts, consider the following common troubleshooting steps:
| Problem | Possible Cause | Solution |
|---|---|---|
| Burner not lighting | Clogged burner ports, faulty igniter, gas flow issue. | Clean burner ports. Check igniter wire connection. Ensure gas tank is open and not empty. |
| Uneven heat distribution | Partially clogged burner ports, improperly seated heat plates. | Clean burner ports thoroughly. Ensure heat plates are correctly positioned. |
| Flame is yellow or orange | Improper air/gas mixture, clogged burner ports. | Clean burner ports. Consult grill manual for air shutter adjustments if applicable. |
For persistent issues, refer to your original grill's user manual or contact a qualified grill technician.
Specifications
- Material: Stainless Steel
- Color: Black (for some components like igniter wires)
- Item Weight: Approximately 4.14 pounds (1.88 Kilograms)
- Product Dimensions (packaging): 4"L x 3"W x 1"Th
- Shape: Rectangular (for heat plates)
- Recommended Uses: Grilling
- Dishwasher Safe: Yes (for stainless steel components)
- Manufacturer: Adviace
- UPC: 752859432425
Warranty and Support
Adviace stands behind the quality of its products. For any questions regarding installation, compatibility, or product performance, please refer to the seller's contact information on the original purchase platform. Keep your proof of purchase for warranty claims, if applicable.
For additional support or to explore other Adviace products, you may visit the Adviace Store on Amazon.
Ask a question about this manual
Ask about setup, troubleshooting, compatibility, parts, safety, or missing instructions. Manuals+ will review the question and use this page’s manual context to help answer it.