
3nStar PPT305BT
80mm (3") Portable Direct Thermal Receipt and Label Printer
Model: PPT305BT | Brand: 3nStar
Introduction
This manual provides comprehensive instructions for the setup, operation, and maintenance of your 3nStar PPT305BT Portable Direct Thermal Receipt and Label Printer. Designed for on-demand and on-the-go printing, this lightweight and compact mobile printer is equipped with essential features for various applications, including Direct Store Delivery and Field Sales Automation.
Key features of the PPT305BT include:
- Ultra-light, compact and portable design.
- Rugged construction with 1.5m (5’) drop resistance.
- Versatile connectivity via Bluetooth and USB Interface.
- Broad compatibility with Android, Windows, Linux, and Mac OS.
- Convenient USB Type C charging.
- Ability to print most 1D & 2D Barcodes.
- Long-lasting battery life with Power Saving - Sleep Mode.
- Clear OLED Screen for easy operation.
- Simple drop-in media loading mechanism.
What's in the Box
Upon unboxing your 3nStar PPT305BT printer, please verify that all the following components are included:
- 3nStar PPT305BT Portable Thermal Printer
- USB Type C Cable
- Quick Start Guide
- CD (containing drivers and software)
- Thermal paper roll
- Power adapter
Product Overview

Figure 1: Top-down view of the 3nStar PPT305BT Portable Thermal Printer, showcasing its compact red and black design with the 3nStar logo, power button, OLED screen, and control buttons.
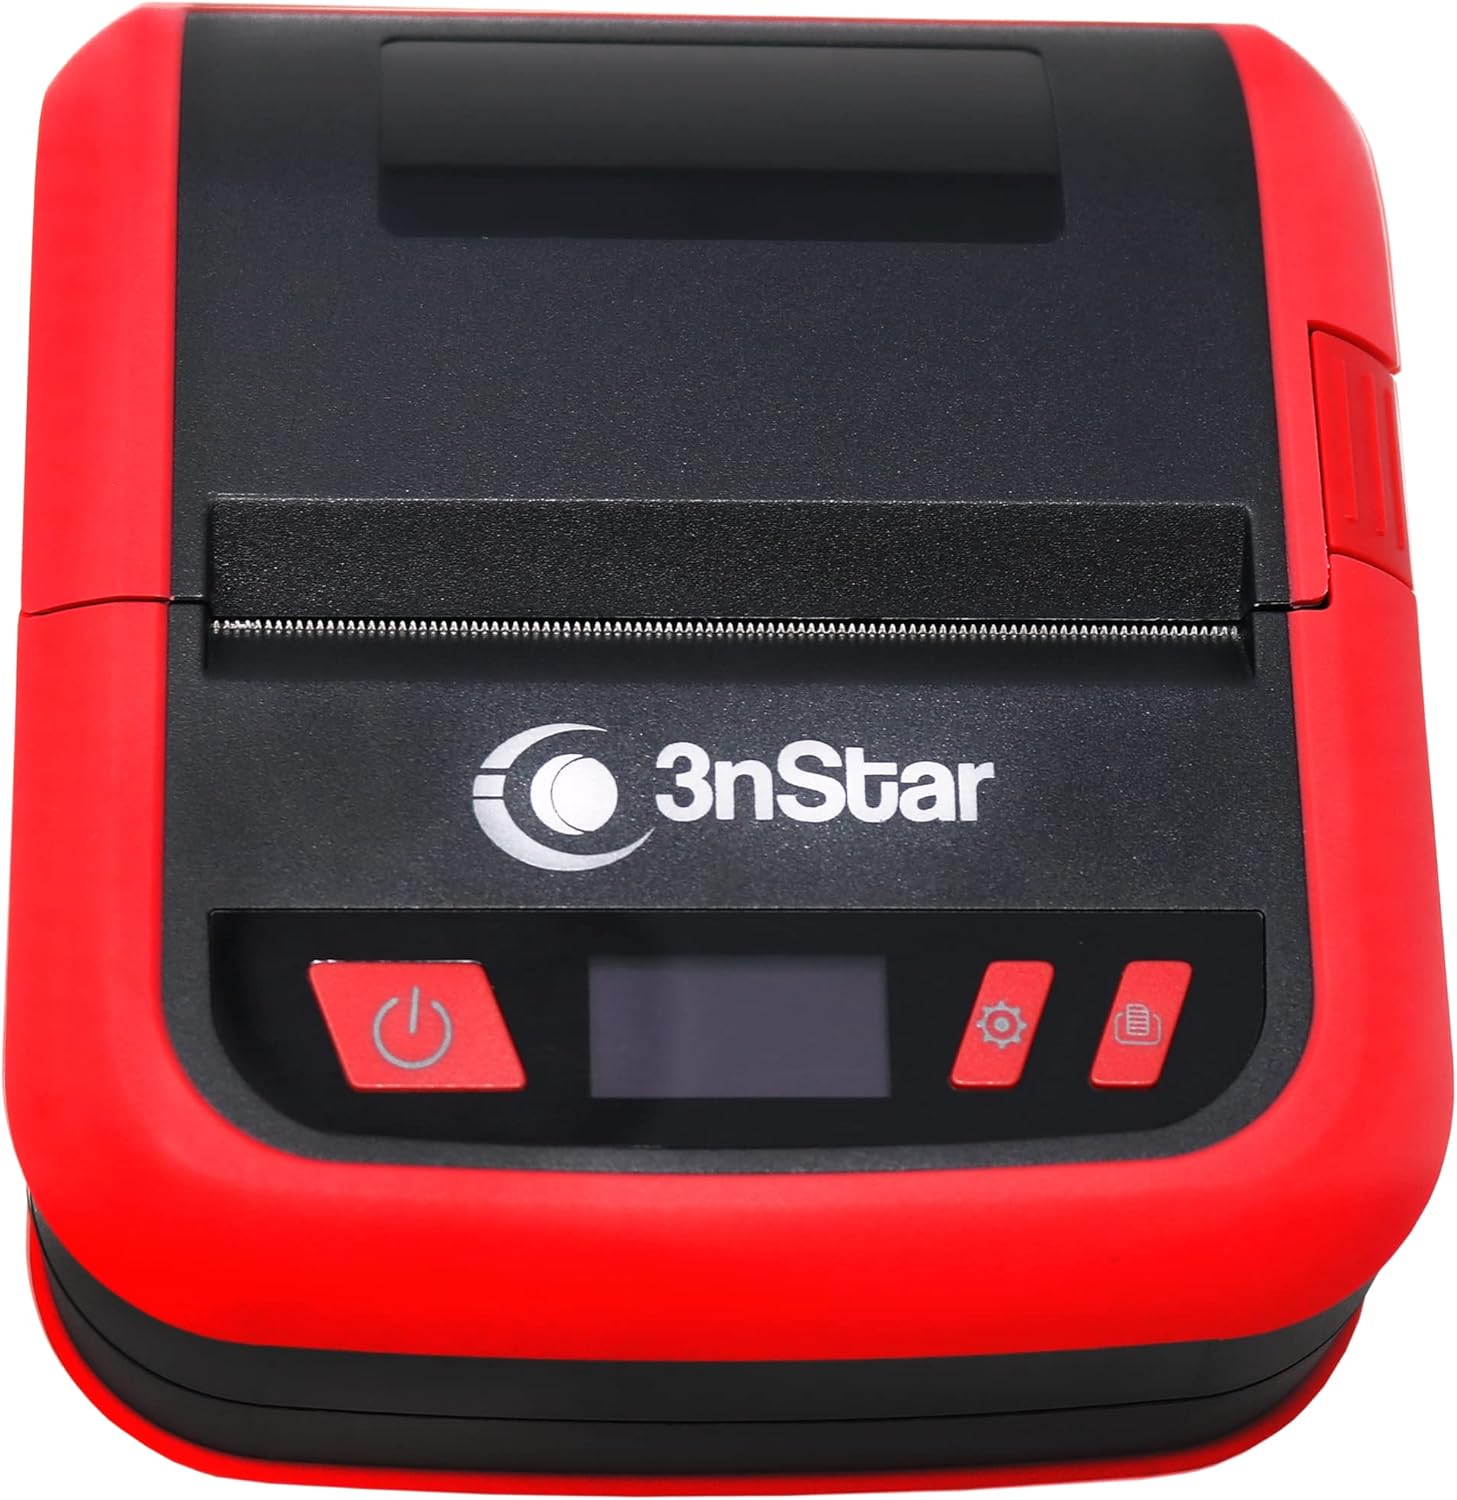
Figure 2: Front view of the printer, highlighting the paper output slot, the 3nStar branding, and the user interface buttons including power, settings, and feed.

Figure 3: Side view of the printer, illustrating the DC/USB Type C charging and data port, essential for connectivity and power.

Figure 4: Bottom view of the printer, revealing the battery compartment cover, which can be opened for battery installation or replacement.
Setup
1. Charging the Printer
Before initial use, ensure the printer is fully charged. Connect the provided USB Type C cable to the printer's USB-C port and the other end to the power adapter. Plug the power adapter into a wall outlet. The OLED screen or an indicator light will show charging status.
2. Loading Thermal Paper
- Open the paper compartment cover by sliding the latch or pressing the release button (refer to Figure 2 for location).
- Insert the thermal paper roll into the compartment, ensuring the paper feeds from the bottom and the leading edge is straight.
- Pull a small amount of paper out past the cutting edge.
- Close the paper compartment cover firmly until it clicks into place.
3. Installing Drivers and Software
For optimal performance, install the necessary drivers and software from the included CD or download them from the official 3nStar website. This is crucial for connecting the printer to your computer (Windows, Linux, Mac OS) via USB and for advanced configurations.
4. Initial Power On
Press and hold the power button (refer to Figure 2) until the OLED screen illuminates. The printer will perform a self-test and be ready for operation.
Operating Instructions
1. Connecting via Bluetooth (Android)
- Ensure the printer is powered on and Bluetooth is enabled on your Android device.
- Go to your device's Bluetooth settings and search for available devices.
- Select "PPT305BT" (or similar name) from the list. You may be prompted for a pairing code, typically "0000" or "1234".
- Once paired, you can use compatible printing applications (e.g., ESC/POS compatible apps) to send print jobs.
2. Connecting via USB (Windows, Linux, Mac OS)
- Connect the printer to your computer using the provided USB Type C cable.
- Ensure the printer drivers are installed on your computer.
- The printer should be recognized as a printing device. You can then select it from your application's print dialogue.
3. Printing Receipts and Labels
Use your preferred point-of-sale (POS) software, label design software, or custom application that supports ESC/POS or ZPL commands. Send the print command from your device, and the printer will automatically process the data and print the receipt or label.
4. Using the OLED Screen and Control Buttons
The OLED screen displays status information such as battery level, connectivity status, and error messages. The control buttons (settings, feed) allow for basic operations like feeding paper or accessing printer settings (refer to the Quick Start Guide for detailed button functions).
Maintenance
1. Cleaning the Print Head
Regularly clean the thermal print head to ensure clear print quality. Use a lint-free cloth lightly dampened with isopropyl alcohol. Gently wipe the print head surface. Allow it to dry completely before closing the cover and resuming operation.
2. Cleaning the Paper Path
Remove any paper dust or debris from the paper path using a soft brush or compressed air. This prevents paper jams and ensures smooth feeding.
3. Battery Care
To prolong battery life, avoid fully discharging the battery frequently. Store the printer in a cool, dry place when not in use for extended periods. Recharge the battery periodically if stored for a long time.
4. Paper Storage
Store thermal paper in a cool, dark, and dry place to prevent premature fading or degradation of the thermal coating.
Troubleshooting
| Problem | Possible Cause | Solution |
|---|---|---|
| Printer does not power on. | Low battery or power adapter issue. | Charge the printer using the provided power adapter. Ensure the adapter is properly connected to a working outlet. |
| No print output. | Paper loaded incorrectly, out of paper, or connectivity issue. | Check paper loading direction and ensure there is paper. Verify Bluetooth or USB connection. Reinstall drivers if necessary. |
| Poor print quality (faded, lines). | Dirty print head or low-quality thermal paper. | Clean the print head as described in the Maintenance section. Use high-quality thermal paper. |
| Bluetooth connection fails. | Printer not in pairing mode, incorrect pairing code, or interference. | Ensure printer Bluetooth is discoverable. Re-enter pairing code. Move closer to the printer and away from other wireless devices. |
| Paper jam. | Paper loaded incorrectly or foreign object in paper path. | Open the paper cover and carefully remove any jammed paper. Ensure paper is loaded straight. |
Specifications
| Feature | Detail |
|---|---|
| Model Name | PPT305BT |
| Brand | 3nStar |
| Product Dimensions | 5"D x 4"W x 2"H |
| Item Weight | 13.2 ounces (375 Grams) |
| Printing Technology | Thermal |
| Printer Output | Monochrome |
| Maximum Media Size | 80 mm |
| Maximum Black and White Print Resolution | 203dpi (8dots/mm) |
| Max Print Speed (Monochrome) | 70 mm/s |
| Connectivity Technology | Bluetooth, USB |
| Compatible Devices | Smartphones (Android), Windows, Linux, Mac OS |
| Control Method | App |
| Display Type | OLED |
| Included Components | USB Type C Cable, Quick Start Guide, CD, Thermal paper, Power adapter |
Warranty and Support
Warranty Information
The 3nStar PPT305BT Portable Thermal Printer comes with a 1 Year Limited Warranty. This warranty covers defects in materials and workmanship under normal use. Please retain your proof of purchase for warranty claims.
Customer Support
For technical assistance, troubleshooting, or warranty inquiries, please visit the official 3nStar Store or contact their customer support channels. You can find more information and resources by visiting the 3nStar Store on Amazon.
Always refer to the latest information available on the manufacturer's website for updated drivers, firmware, and support documentation.
Related documentsPPT305BT


Ask a question about this manual
Ask about setup, troubleshooting, compatibility, parts, safety, or missing instructions. Manuals+ will review the question and use this page’s manual context to help answer it.