
Introduction
Thank you for choosing the OtterBox 5,000 mAh Portable Power Bank. This compact and durable power bank is designed to provide reliable power on the go for your mobile devices. Featuring a slim profile, LED indicator, and a versatile 3-in-1 charging cable, it ensures you stay connected wherever you are. This manual provides essential information on how to set up, operate, and maintain your power bank.
Package Contents
- OtterBox 5,000 mAh Portable Power Bank
- 3-in-1 Charging Cable (USB-A to Micro-USB, USB-C, and Lightning connectors)
- User Manual (this document)
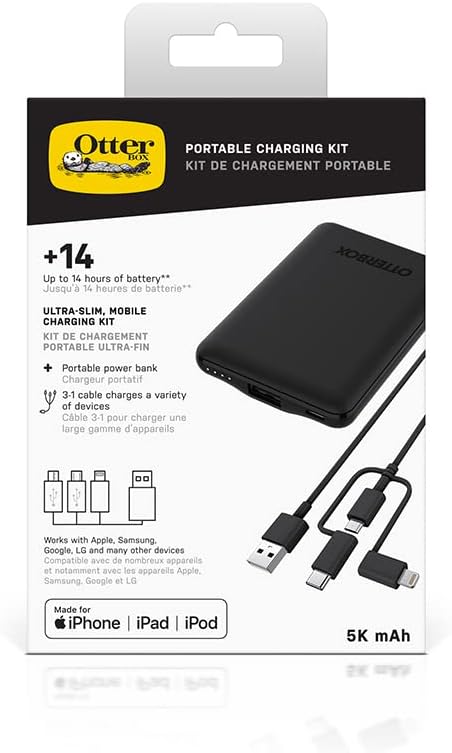
Figure 1: Retail packaging of the OtterBox 5,000 mAh Portable Power Bank, showing the power bank and the included 3-in-1 cable.
Product Overview
Familiarize yourself with the components of your OtterBox Power Bank:
- Power Bank Unit: The main portable battery unit.
- LED Indicator Lights: Located on the side, these lights show the remaining battery charge.
- USB-A Output Port: For connecting your device's charging cable.
- Micro-USB Input Port: For charging the power bank itself.
- 3-in-1 Charging Cable: A versatile cable with USB-A connector on one end and Micro-USB, USB-C, and Lightning adapters on the other.
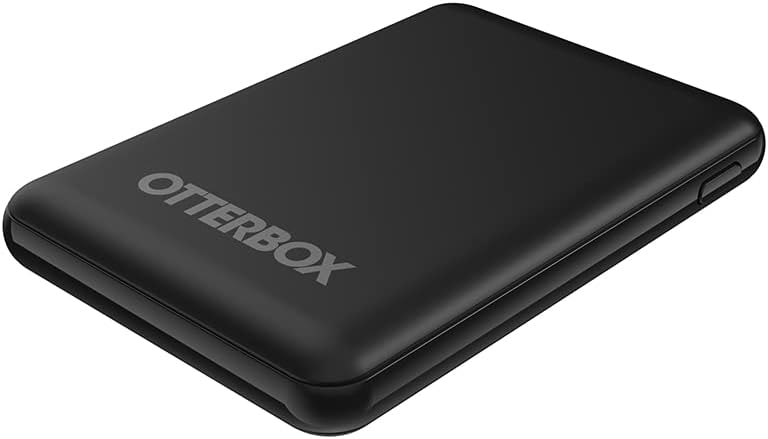
Figure 2: Top view of the OtterBox Power Bank, highlighting its slim design and the OtterBox logo.

Figure 3: The OtterBox Power Bank connected to its 3-in-1 charging cable, demonstrating its compact form factor.

Figure 4: A detailed view of the 3-in-1 charging cable, showing the USB-A connector and the Micro-USB, USB-C, and Lightning adapters.
Setup
Charging the Power Bank
- Connect the Micro-USB end of the included 3-in-1 cable (or any compatible Micro-USB cable) into the input port on the OtterBox Power Bank.
- Connect the USB-A end of the cable to a USB wall adapter (not included) or a computer's USB port.
- The LED indicator lights on the power bank will illuminate to show charging progress. When all LEDs are solid, the power bank is fully charged.
Note: For optimal charging speed, use a 10W (5V/2A) USB wall adapter.
Operating Instructions
Charging Your Device
- Identify the correct adapter on the 3-in-1 cable for your device (Micro-USB, USB-C, or Lightning).
- Connect the appropriate adapter to your mobile device's charging port.
- Connect the USB-A end of the 3-in-1 cable to the USB-A output port on the OtterBox Power Bank.
- Your device should begin charging automatically. The LED indicators on the power bank will show its remaining charge level.
Checking Battery Level
To check the remaining battery level of the power bank, simply press the small button located next to the LED indicators. The number of illuminated LEDs indicates the approximate charge:
- 4 LEDs: 75-100% charge
- 3 LEDs: 50-75% charge
- 2 LEDs: 25-50% charge
- 1 LED: 0-25% charge (recharge soon)
Maintenance
- Keep the power bank dry and away from moisture.
- Avoid extreme temperatures (hot or cold).
- Clean the surface with a soft, dry cloth. Do not use harsh chemicals or abrasive materials.
- Store the power bank in a cool, dry place when not in use for extended periods.
- Recharge the power bank at least once every three months to maintain battery health, even if not in use.
Troubleshooting
| Problem | Possible Cause | Solution |
|---|---|---|
| Power bank not charging | Cable not properly connected; faulty cable/adapter; power bank fully charged. | Ensure all connections are secure. Try a different cable or wall adapter. Check LED indicators to confirm if it's already full. |
| Device not charging from power bank | Power bank battery empty; incorrect cable adapter; device not compatible; power bank in standby. | Recharge the power bank. Ensure the correct 3-in-1 cable adapter is used. Press the power bank button to activate output. |
| Slow charging | Low power input source; high power consumption by device; cable issue. | Use a 10W (5V/2A) wall adapter for charging the power bank. Ensure your device is not heavily in use while charging. Try a different cable. |
Specifications
| Feature | Detail |
|---|---|
| Battery Capacity | 5,000 mAh |
| Output | USB-A 10W |
| Input | Micro-USB 10W |
| Voltage | 5 Volts |
| Weight | 120 Grams |
| Color | Black |
| Special Features | Ultra-thin, Durable Design, LED Indicator, Drop Protection |
| Included Cable | 3-in-1 (USB-A to Micro-USB, USB-C, Lightning) |
| Recommended Use | Mobile Phones, Tablets |
Safety Information
- Do not expose the power bank to fire or extreme heat.
- Do not immerse in water or other liquids.
- Do not disassemble, crush, or puncture the power bank.
- Keep out of reach of children.
- Dispose of the power bank responsibly according to local regulations. Do not dispose of with household waste.
- Avoid dropping or subjecting the power bank to severe impacts, despite its drop protection, to ensure longevity.
Warranty and Support
For warranty information and customer support, please refer to the official OtterBox website or contact their customer service directly. Keep your proof of purchase for any warranty claims.