
1. Introduction
The Easyfone Prime-A1 Pro is a 4G unlocked flip mobile phone designed for ease of use, particularly for seniors. It features a classic flip design, large buttons, clear sound, and essential functions like an SOS button and a convenient charging dock. This manual provides comprehensive instructions for setting up, operating, and maintaining your device.

Image: The Easyfone Prime-A1 Pro in its closed, flip configuration, showcasing its compact design.
2. Package Contents
Please verify that all items are present in your package:
- Easyfone Prime-A1 Pro Mobile Phone
- User Manual (this document)
- 1500mAh Lithium Ion Battery
- Charging Dock (Cradle Charger)
- USB Cable
- Power Adapter (Charger)
- Lanyard

Image: An illustration of all components included in the Easyfone Prime-A1 Pro retail package.
3. Product Features
The Easyfone Prime-A1 Pro is equipped with features designed for simplicity and accessibility:
- Classic Flip Design: Flip to answer or end calls, protecting the keypad when closed.
- Large Buttons with Talking Numbers: Oversized, tactile buttons with an audible feedback feature for easy dialing and navigation.
- Dual HD Displays: A 2.4-inch main HD display and a 1.44-inch external colorful HD screen, both showing large fonts and icons for clear viewing.
- Long-lasting Battery: A 1500mAh battery provides extended standby time, easily charged with the included cradle.
- Powerful Speaker & HAC Compatibility: Delivers clear and loud sound, suitable for users with hearing impairments and compatible with hearing aid devices.
- SOS Emergency Button: A dedicated button for quick access to emergency contacts and location sharing.
- Photo Speed Dial: Assign up to 8 contacts with photos for quick dialing.
- Dedicated Shortcut Buttons: Includes buttons for Call Block, Alarm Clock, and Photo Speed Dial.
- Unlocked for All Carriers: Compatible with major GSM networks like Telus, Rogers, Bell, Koodo, Fido, Virgin Mobile, Chatr, and Public Mobile.

Image: The phone displaying its main and external screens, highlighting the large font and icon visibility.
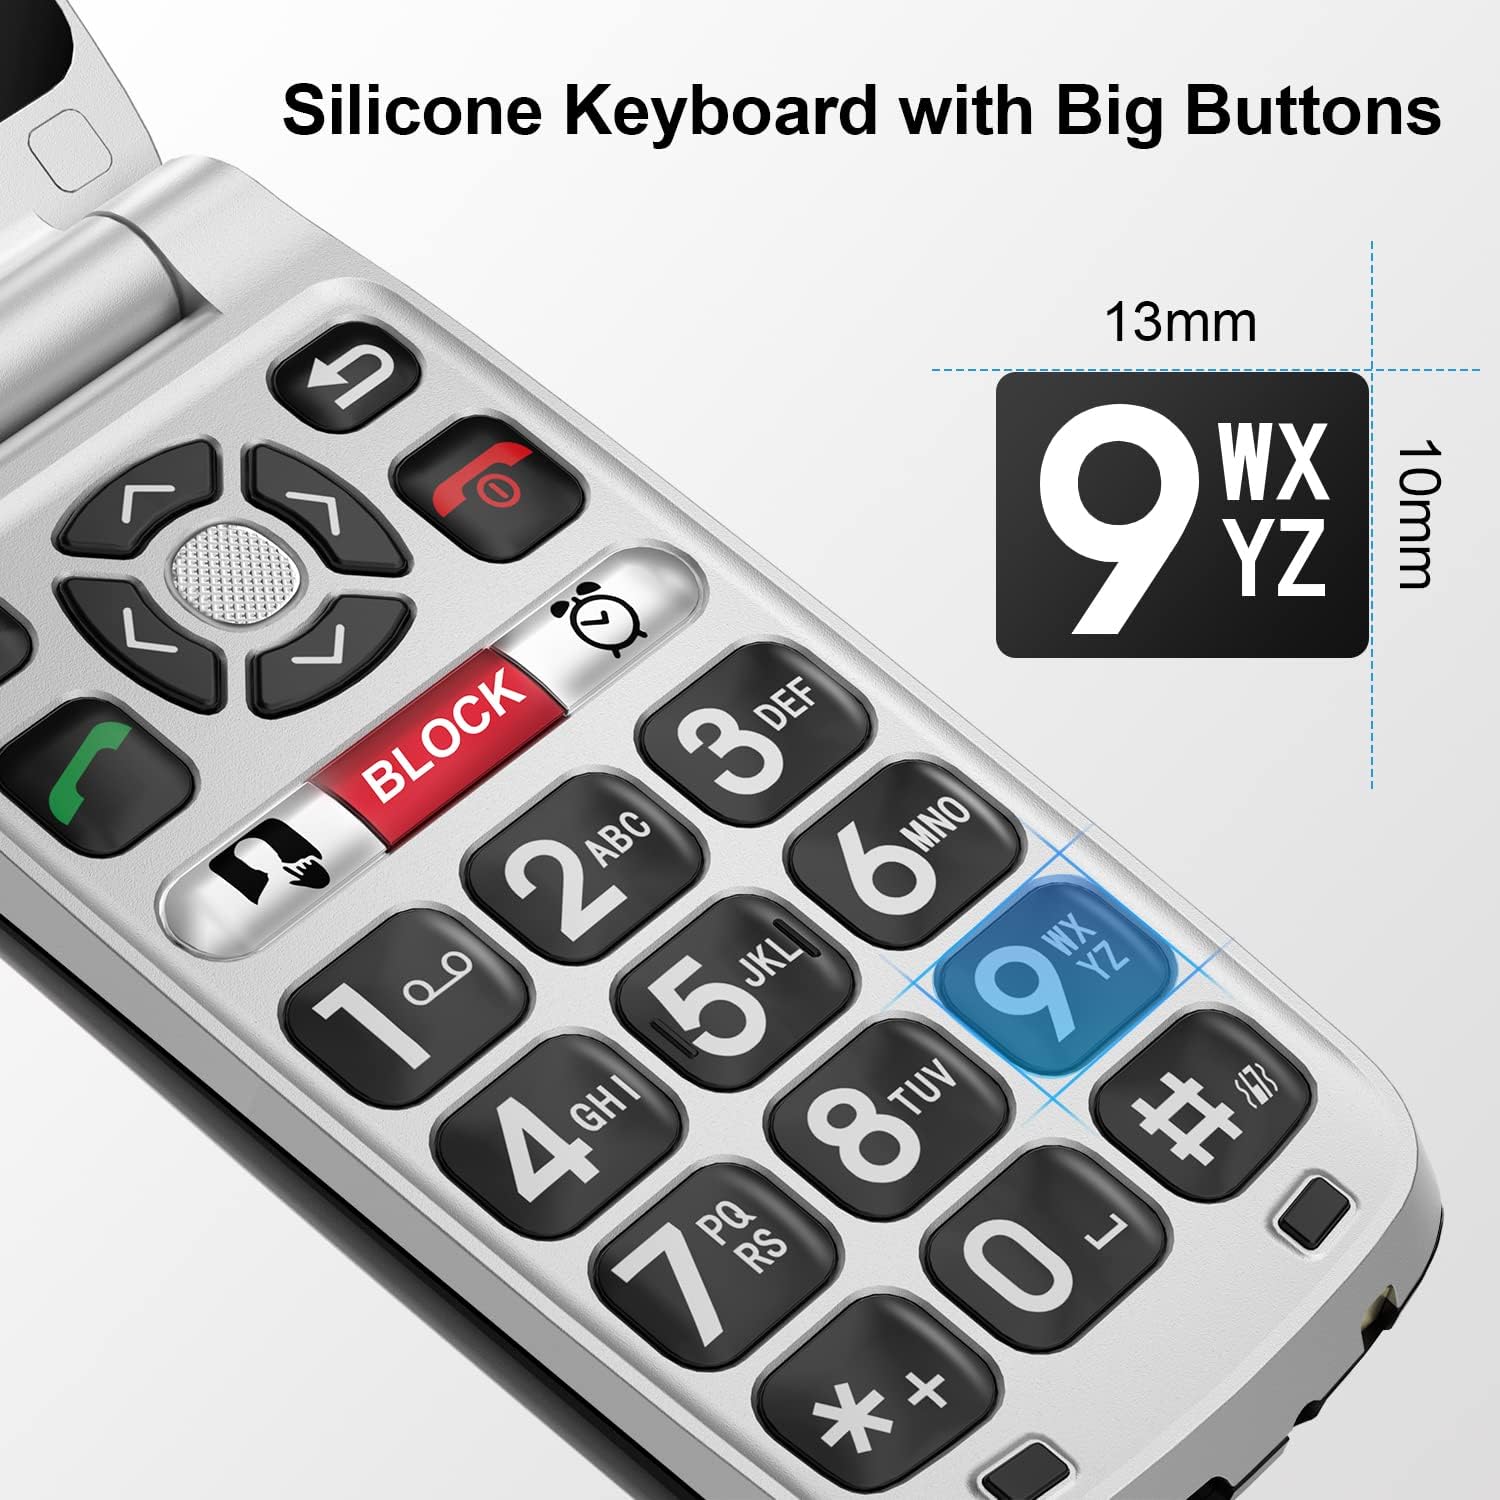
Image: A detailed view of the phone's large, easy-to-press silicone keypad.

Image: Visual representation of the phone's enhanced audio features for clear communication.
4. Setup Guide
4.1. Installing the SIM Card and Battery
- Remove the Back Cover: Gently pry open the back cover of the phone.
- Insert SIM Card: Locate the SIM card slot. Insert your activated Nano SIM card into the designated slot with the gold contacts facing down. Ensure it clicks into place.
- Insert Micro SD Card (Optional): If desired, insert a Micro SD card into the memory card slot for additional storage.
- Insert Battery: Align the battery contacts with the phone's contacts and gently press the battery into the compartment.
- Replace Back Cover: Snap the back cover securely onto the phone.

Image: The internal compartment of the phone, illustrating where to insert the SIM and SD cards.
4.2. Charging the Phone
Before first use, fully charge the phone. You have two charging options:
- Using the Charging Dock: Place the phone into the charging dock. Ensure the charging contacts align. The phone will begin charging automatically.
- Using the USB Cable: Connect the USB cable to the phone's charging port and the other end to the power adapter. Plug the adapter into a wall outlet.
The battery indicator on the screen will show charging status. A full charge typically takes a few hours.

Image: Demonstrates both direct USB cable charging and charging via the convenient desktop dock.
5. Operating Instructions
5.1. Power On/Off
- To Power On: Open the flip and press and hold the red End Call/Power button until the screen lights up.
- To Power Off: Open the flip, press and hold the red End Call/Power button, then confirm "Power Off" on the screen.
5.2. Making and Receiving Calls
- To Make a Call:
- Open the flip.
- Dial the phone number using the large keypad.
- Press the green Call button to initiate the call.
- To Answer a Call:
- Open the flip, or press the green Call button if the flip is already open.
- To End a Call:
- Close the flip, or press the red End Call button.
5.3. SOS Emergency Button
The dedicated SOS button on the back of the phone allows for quick emergency contact.
- Setting Up SOS Contacts: Navigate to the SOS settings in the phone's menu to add up to 5 emergency contacts. These contacts will be called sequentially until one answers.
- Activating SOS: Press and hold the SOS button on the back of the phone for 3 seconds. The phone will automatically:
- Emit a loud alarm sound (can be disabled in settings).
- Send an emergency SMS message with your location (if GPS is active) to all SOS contacts.
- Begin dialing the SOS contacts in the preset order.

Image: The SOS button's functionality, including emergency calls and location sharing.

Image: A visual guide to setting up and using the SOS emergency function.
5.4. Photo Speed Dial
Assign frequently called contacts to the 8 photo speed dial buttons for one-touch calling.
- Setting Up Photo Speed Dial:
- Go to the "Photo Speed Dial" section in the phone's menu.
- Select an empty slot (1-8) and assign a contact from your phonebook. You can also add a photo for visual recognition.
- Using Photo Speed Dial:
- Open the flip.
- Press the corresponding number key (1-8) for the desired contact.
- The phone will display the contact's name and photo (if set). Press the green Call button to dial.

Image: How to use the photo speed dial feature for quick access to contacts.
5.5. Messaging
The phone supports sending and receiving SMS text messages.
- Accessing Messages: Navigate to the "Messaging" icon from the main menu.
- Composing a New Message: Select "New Message," enter the recipient's number or select from contacts, and type your message using the keypad.
- Reading Messages: Select "Inbox" to view received messages.
6. Maintenance
- Cleaning: Use a soft, dry cloth to clean the phone's surface. Avoid liquid cleaners or abrasive materials.
- Battery Care:
- Do not expose the battery to extreme temperatures.
- Avoid fully discharging the battery frequently to prolong its lifespan.
- Use only the provided charger and charging dock.
- Storage: If storing the phone for an extended period, charge the battery to about 50% and store it in a cool, dry place.
- Water Resistance: This phone is not water-resistant. Avoid exposure to liquids.
7. Troubleshooting
If you encounter issues with your Easyfone Prime-A1 Pro, please refer to the following common solutions:
| Problem | Possible Solution |
|---|---|
| Phone does not power on. | Ensure the battery is correctly inserted and fully charged. Connect the phone to the charger and try again. |
| Cannot make or receive calls. | Check if the SIM card is properly inserted and activated. Ensure you have network signal. Contact your service provider if issues persist. |
| Poor call quality / Low volume. | Adjust the call volume using the side buttons. Ensure the speaker/receiver is not obstructed. If using a hearing aid, ensure HAC is enabled and properly aligned. |
| Battery drains quickly. | Reduce screen brightness. Close unused applications. Ensure the phone is not in an area with very weak signal, which can cause increased battery drain. |
| SOS button not working. | Verify that SOS contacts are correctly set up in the phone's settings. Ensure the phone has network signal to send messages and make calls. |
| Phone freezes or becomes unresponsive. | Remove the battery, wait a few seconds, and reinsert it to perform a soft reset. If the issue persists, consider a factory reset (back up data first). |
8. Specifications
| Feature | Detail |
|---|---|
| Brand | Easyfone |
| Model Name | Prime A1 Pro |
| Model Number | Prime-A1 Pro |
| Form Factor | Flip |
| Operating System | Easyfone OS |
| Cellular Technology | 4G |
| Wireless Carrier | Unlocked for All Carriers |
| Main Display Size | 2.4 Inches HD LCD |
| External Display Size | 1.44 Inches HD |
| Resolution | 720p (1280x720) |
| Processor Type | Allwinner A31 |
| Memory Storage Capacity | 16 GB |
| Optical Sensor Resolution | 2 MP |
| Battery Capacity | 1500 mAh Lithium Ion |
| Special Features | Big Volume & Big Button & Big Font, Easy-to-Use Charging Station, Hearing aid compatible, Photo speed dial, SOS Emergency Button |
| Human Interface Input | Keyboard |
| Product Dimensions | 10.4 x 5.2 x 2.3 cm; 4 g |
| Date First Available | Jan. 12 2022 |
9. Warranty and Support
Specific warranty information for the Easyfone Prime-A1 Pro is not explicitly provided in the product details. For any product-related inquiries, technical support, or warranty claims, please contact the seller directly through the platform where you purchased the device.
You can typically find seller contact information on your order details page or by visiting the Easyfone brand store on Amazon: Easyfone Store.


