
Introduction
This manual provides detailed instructions for the installation, operation, and maintenance of your Absolute CAM2100B License Plate Backup Camera. This camera is designed to enhance vehicle safety by providing a clear view of the area behind or in front of your vehicle, featuring night vision capabilities and a wide viewing angle.
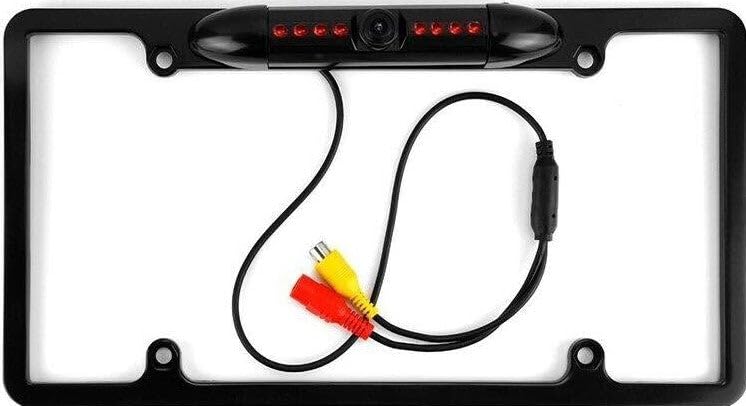
Image: The Absolute CAM2100B backup camera integrated into a license plate frame, showcasing its compact design.
Setup and Installation
Follow these steps for proper installation of your backup camera. Ensure your vehicle's power is off before beginning any wiring.
- Mounting: Securely attach the camera to your vehicle's license plate area. The camera lens angle is physically adjustable by approximately 45 degrees; loosen the screw with a wrench to set the desired angle.
- Power Connection:
- Connect the camera's power cable (red wire) to the vehicle's reversing lights positive (+) for rear view operation.
- Connect the camera's ground wire (black wire) to a suitable vehicle ground (GND).
- Video Connection:
- Connect the yellow RCA (AV) video cable from the camera to your monitor's video input. A 32.8 ft (10M) RCA cable is supplied.
- If your monitor has a trigger wire (labeled "A" in the diagram), connect it to the camera's trigger wire (labeled "B"). This ensures the monitor automatically switches to the camera view when reverse gear is engaged.
- Function Customization:
- To enable front view camera functionality, cut the WHITE cable loop. The default setting is rear view.
- To display guide lines on the screen, ensure the GREEN cable loop is intact. To remove guide lines, cut the GREEN cable loop.
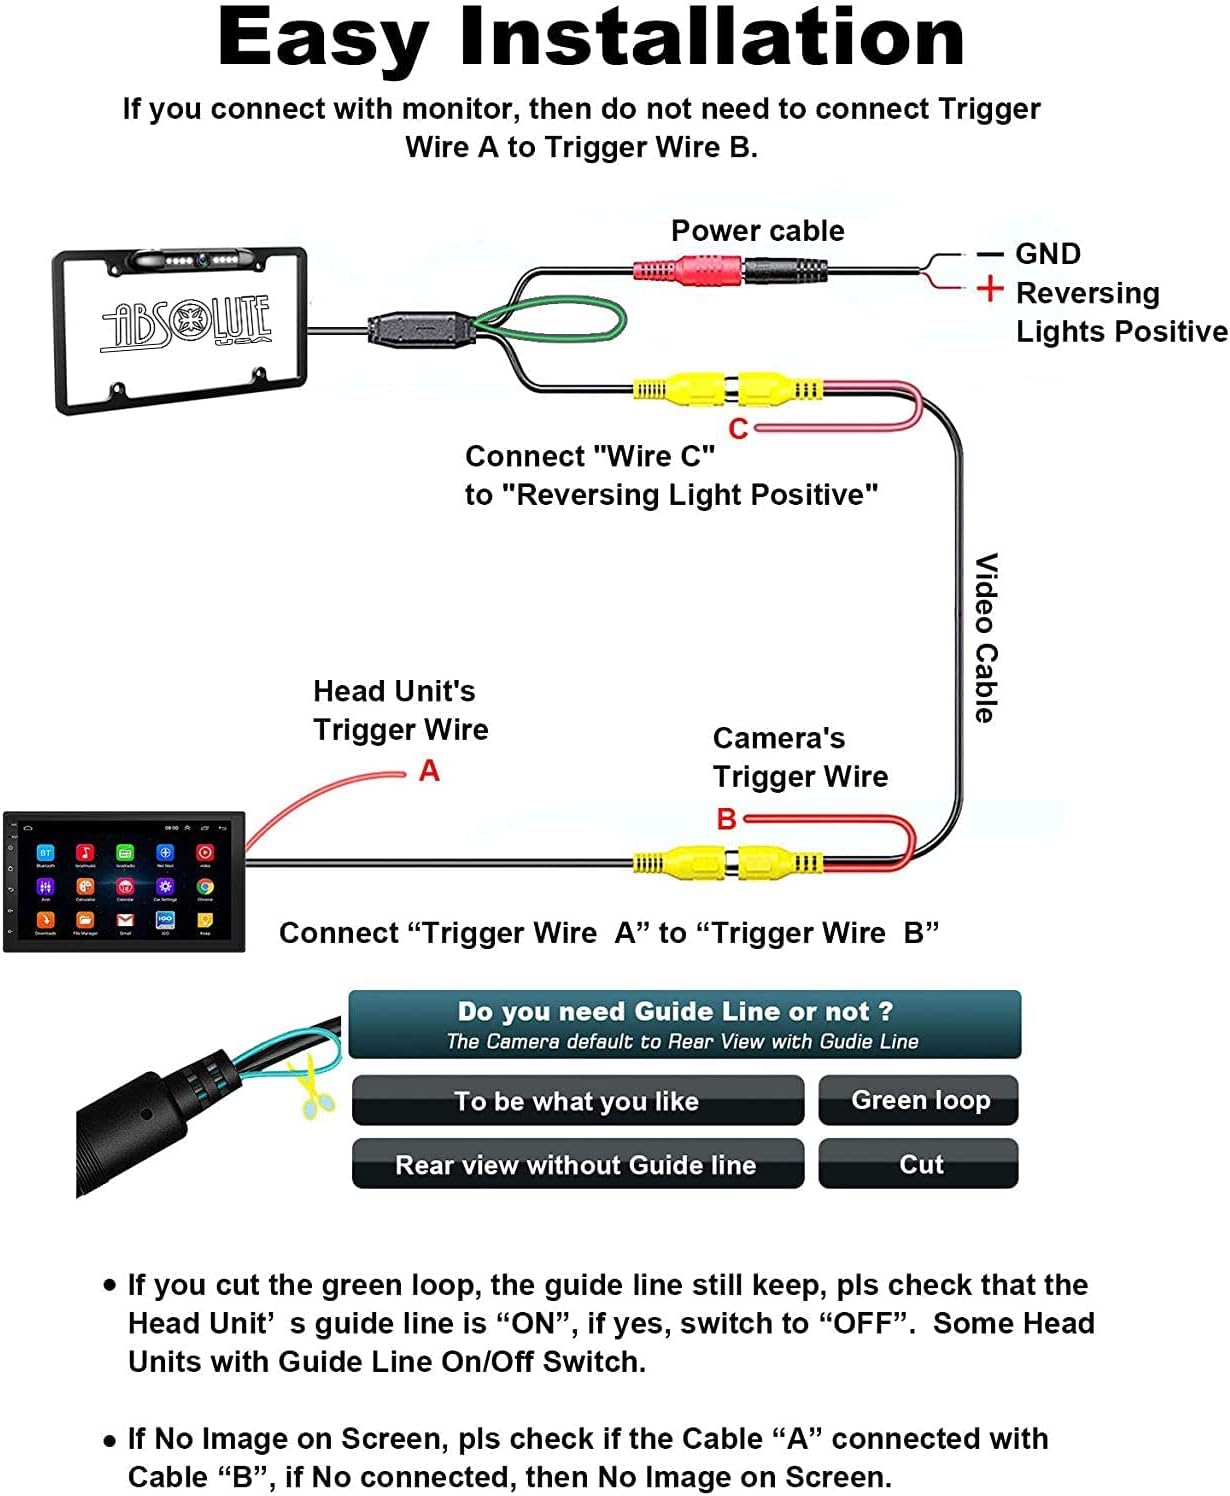
Image: Detailed wiring diagram showing connections for power, video, trigger wires, and cable loops for function customization.
Operating Instructions
Once installed, the camera operates automatically based on your vehicle's gear selection and chosen settings.
- Automatic Activation: When connected to the reversing lights, the camera will activate automatically when the vehicle is shifted into reverse, displaying the view on your connected monitor. If configured for front view, it will activate based on your monitor's settings.
- Night Vision: The camera features 7 built-in LED lights with a light-sensitive control system. These LEDs automatically turn on in low-light conditions and turn off in bright light areas, providing enhanced visibility in darkness without washing out picture colors.
- Wide Viewing Angle: The 170-degree viewing angle macro lens provides a broad perspective, helping to eliminate blind spots behind or in front of your vehicle.
- On-Screen Distance Guide: If the green cable loop was not cut during installation, the camera will display on-screen distance guide lines to assist with parking and maneuvering.

Image: Close-up of the camera unit highlighting the 7 LEDs for night vision and the approximately 45-degree adjustable rotation feature.
Maintenance
The Absolute CAM2100B camera is designed for durability and minimal maintenance.
- Cleaning: Periodically clean the camera lens with a soft, damp cloth to ensure a clear view. Avoid abrasive cleaners.
- Durability: Constructed from Aluminum Zinc Material with an IP-67 standard waterproof rating, the camera is designed to perform reliably in various weather conditions. It is resistant to fogging, moisture, cold temperatures, and vibrations.
- Inspection: Occasionally check the wiring connections to ensure they remain secure and free from corrosion.
Troubleshooting
If you encounter issues with your camera, refer to the following common problems and solutions:
| Problem | Possible Cause / Solution |
|---|---|
| No Image on Screen |
|
| Guide Lines Not Appearing |
|
| Image is Distorted or Unclear |
|
| Camera Not Switching to Front View |
|
For further assistance, please contact Absolute USA customer support.
Specifications
| Feature | Detail |
|---|---|
| Brand | Absolute USA |
| Model | CAM2100B |
| Compatible Devices | Monitor |
| Installation Type | Surface Mount |
| Voltage | 12 volts |
| Optical Sensor Technology | CMOS |
| Lens Type | Macro |
| Real Angle of View | 170 degrees |
| Connector Type | RCA |
| Optical Sensor Size | 7.3 mm |
| Field Of View | 170 degrees |
| Display Technology | LED |
| Effective Still Resolution | 960 pixels |
| Video Capture Resolution | 960x576 |
| Number of Items | 1 |
| UPC | 847169049866 |
| Unit Count | 1 Count |
| Manufacturer | Absolute USA |
Warranty and Support
Specific warranty information for the Absolute CAM2100B is not provided in this manual. Please refer to the product packaging, the manufacturer's official website, or your point of purchase for detailed warranty terms and conditions.
For technical support or inquiries, please contact Absolute USA customer service through their official channels.