
Hatteker JM-69503
Hatteker Adjustable Beard Trimmer Hair Cutting Kit User Manual
Model: JM-69503
Brand: Hatteker
Product Overview
The Hatteker 3-in-1 Hair Clipper Kit is designed for versatile grooming needs, including haircutting, body hair shaving, retouching, sculpting, and beard/sideburn design. It features durable steel blades, adjustable cutting lengths, multiple speed settings, and a washable body for easy maintenance.

Package Contents
Your Hatteker Hair Clipper Kit includes the following components:
- Main Hair Clipper Unit
- 3 Blade Head Attachments (Full-size trimmer, Precision trimmer, Body hair trimmer)
- 8 Guide Combs (3mm, 4-6mm, 7-9mm, 10-12mm, 16-18mm, 22-24mm, Thinning hair, Precision dial comb)
- USB Charging Cable
- Cleaning Brush
- Comb

Setup and Charging
Initial Charge
Before first use, fully charge the hair clipper. Connect the USB charging cable to the charging port at the bottom of the unit and plug the other end into a compatible USB power source (e.g., computer, USB wall adapter). The LED display will indicate the charging status and battery percentage.

A full charge takes approximately 1.5 hours and provides up to 2.5 hours of cordless trimming time.

Attaching and Removing Blade Heads/Combs
To change blade heads, gently pull the current head upwards to detach it. Align the desired blade head with the main unit and press down until it clicks into place. To attach a guide comb, slide it onto the blade head until it securely locks. To remove, gently pull the comb away from the blade.


Operating Instructions
Power On/Off and Speed Adjustment
Press the power button to turn the clipper on or off. The LED display will show the current battery percentage and speed mode. The clipper features three adjustable speeds. Press the "Turbo" button to cycle through the speed settings (5000, 6000, 7000 RPM) to suit different hair types and cutting needs.

Video 1: Demonstrates the Hatteker Beard Trimmer's features, including speed adjustment and waterproof design.
Adjusting Cutting Length
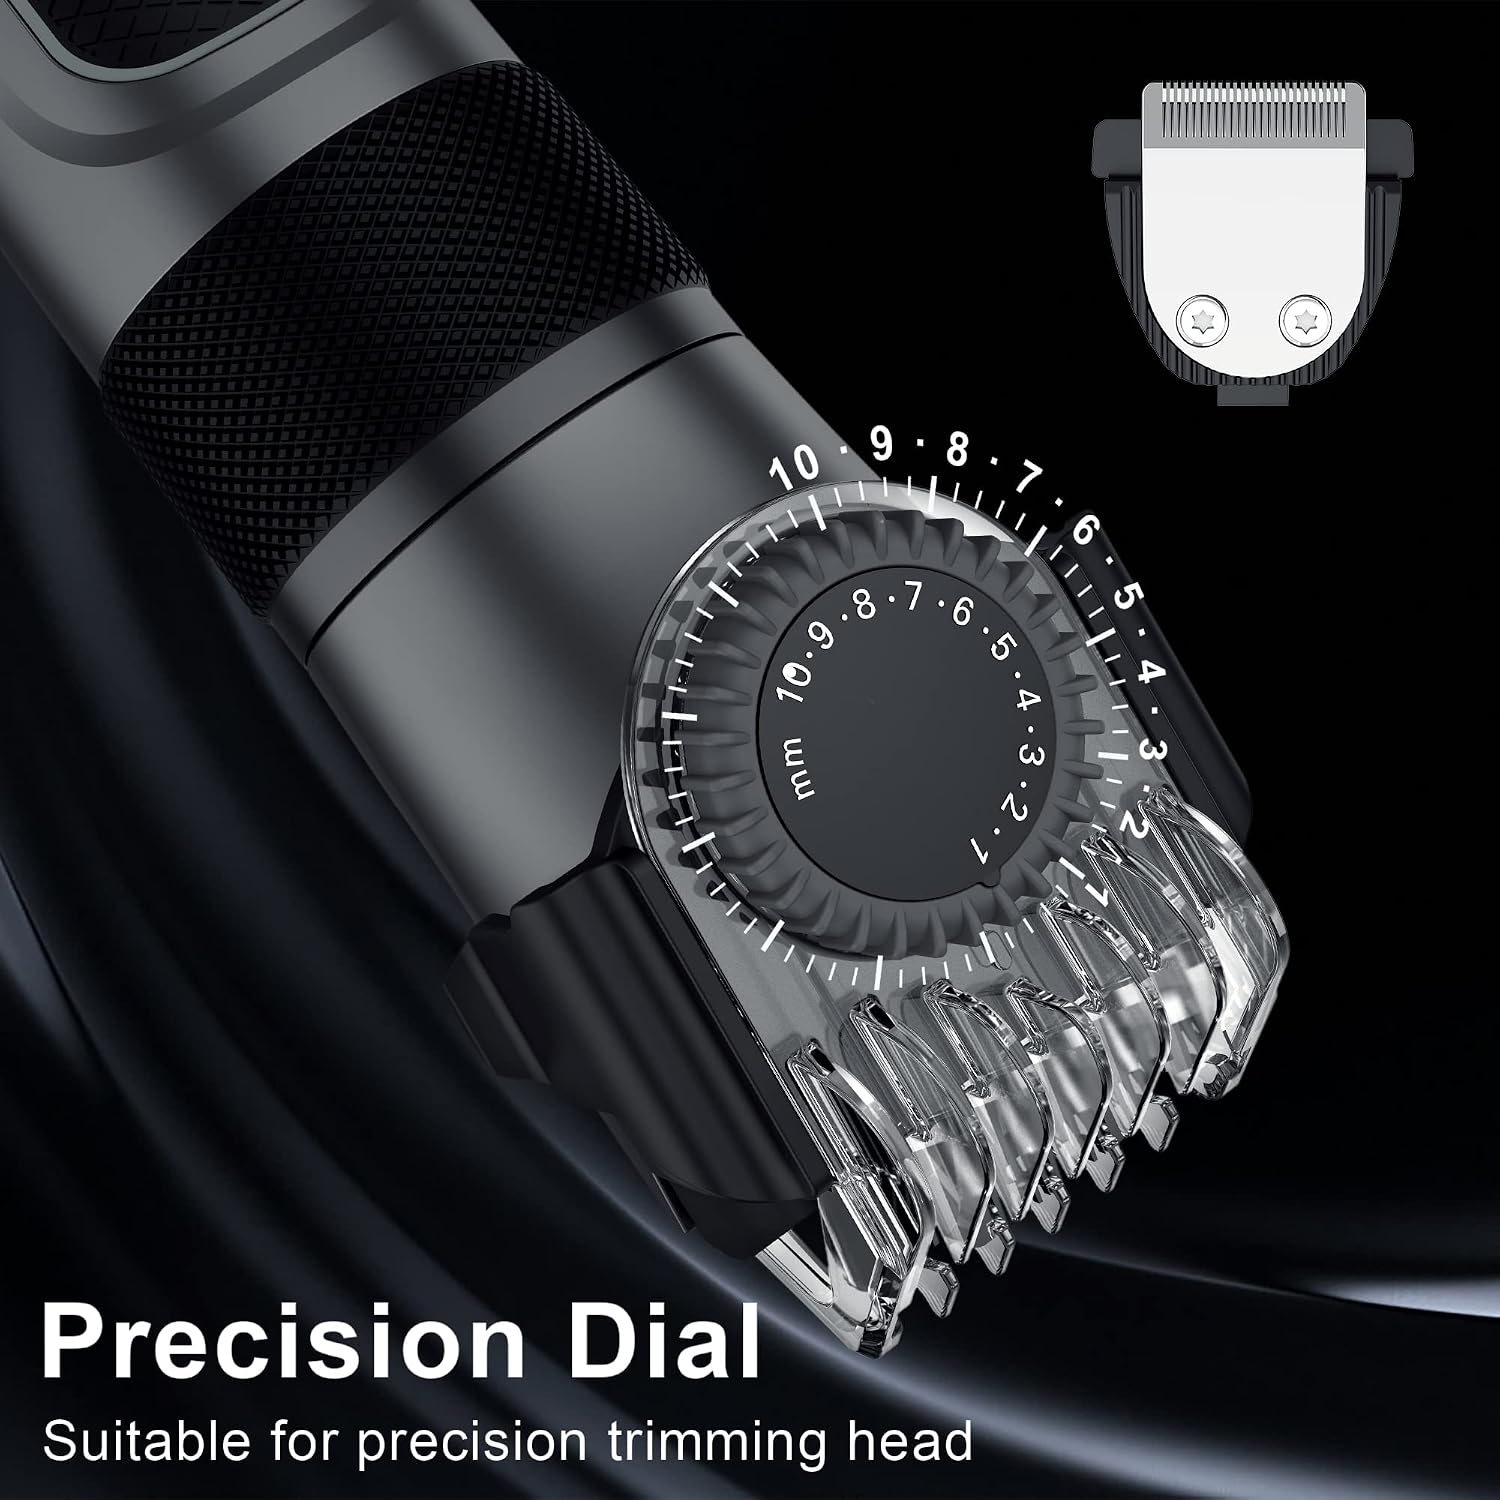
The main hair clipper features an adjustable blade from 0.5mm to 2.5mm. Rotate the precision dial located on the body of the clipper to select your desired cutting length. For longer lengths, attach one of the 7 guide combs (3mm, 4-6mm, 7-9mm, 10-12mm, 16-18mm, 22-24mm, thinning hair) or use the precision dial with the precision trimmer head.


Maintenance
Cleaning
The Hatteker hair clipper is designed with a washable body. After each use, remove the blade head and rinse it under running water to remove hair clippings. The main unit can also be rinsed under the faucet. Ensure the unit is completely dry before storage or next use.

Use the included cleaning brush to remove any stubborn hair particles from the blades and internal components before rinsing.
Lubrication
The LED display includes a "reminder lubricant" indicator. When this icon appears, apply a small amount of clipper oil (not included) to the blades to ensure smooth operation and prolong blade life. Run the clipper for a few seconds to distribute the oil evenly.
Troubleshooting
| Problem | Possible Cause | Solution |
|---|---|---|
| Clipper does not turn on. | Low battery or unit is locked. | Charge the clipper fully. If the lock-key icon is displayed, hold down the power button for 5 seconds to unlock. |
| Blades are pulling hair or cutting poorly. | Blades are dull, dirty, or require lubrication. | Clean the blades thoroughly. Apply clipper oil if the lubricant reminder is active. Consider replacing blade heads if dullness persists. |
| Clipper makes unusual noise. | Blades are not properly aligned or unit needs lubrication. | Ensure blade heads are securely attached. Lubricate the blades. If the issue persists, contact customer support. |
Specifications
- Model: JM-69503
- Input: 5V, 1000mA
- Charge Time: 1.5 hours
- Runtime: Up to 2.5 hours
- Battery Type: Lithium-Ion
- Product Dimensions: 2.64 x 8.98 x 10.67 inches
- Weight: 1.3 Pounds
- Waterproof: Yes, whole body washable
Warranty and Support
Hatteker products are manufactured with quality and performance in mind. For warranty information, technical support, or any inquiries regarding your product, please refer to the contact information provided on the product packaging or visit the official Hatteker website. Keep your purchase receipt as proof of purchase for warranty claims.
For further assistance, please contact Hatteker Customer Service.
Ask a question about this manual
Ask about setup, troubleshooting, compatibility, parts, safety, or missing instructions. Manuals+ will review the question and use this page’s manual context to help answer it.