1. Introduction
This manual provides detailed instructions for the safe and efficient operation of your Baseus Super Mini Inflator Tyre Pump, model CRCQ000001. Please read this manual thoroughly before using the device to ensure proper function and to prevent damage or injury. Keep this manual for future reference.
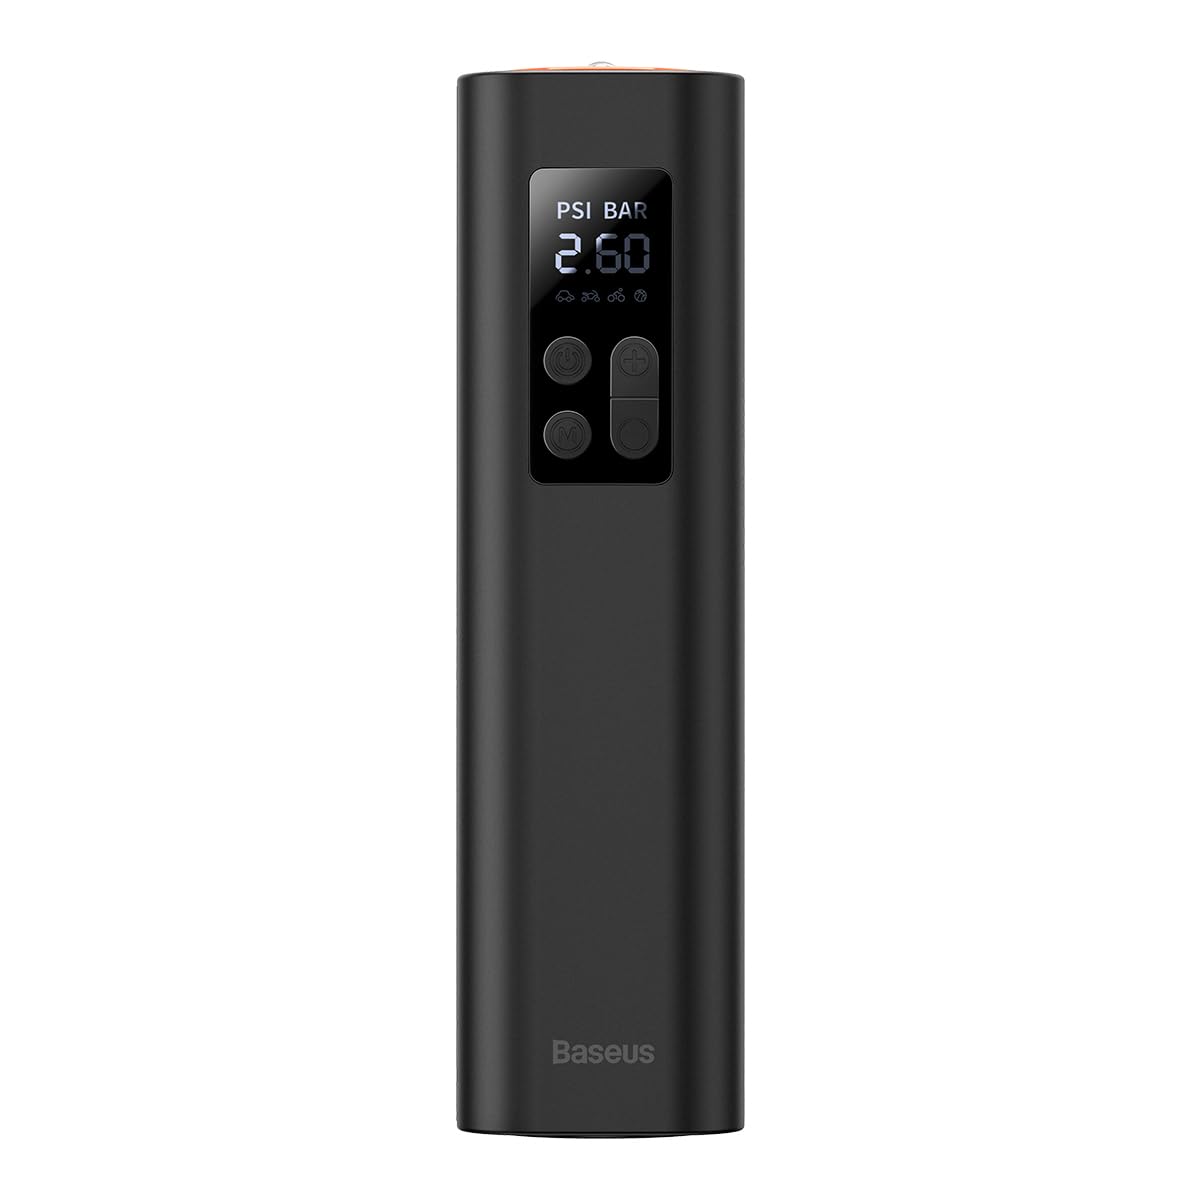
Figure 1: Front view of the Baseus Super Mini Inflator Tyre Pump, showing the digital display and control buttons.
2. Product Features
- Compact and Portable Design: Weighing approximately 480 grams with dimensions of 220x46x48mm, this inflator is designed for easy storage and transport.
- Fast Inflation: Capable of inflating at 30 liters per minute, allowing for quick tire inflation. For example, a 175/65 R15 tire can be inflated from 2.3 bar to 2.5 bar in approximately 15 seconds.
- Preset Tire Pressure: Allows users to set a desired pressure value, and the inflator will automatically stop once the target pressure is reached.
- Accurate Digital Display: Provides real-time pressure readings and allows for precise pressure setting.
- Multi-purpose Use: Equipped with various modes for different inflation needs, including car tires, motorcycle tires, bicycle tires, and sports balls.
- Integrated Pressure Gauge: Functions as both an inflator and a tire pressure gauge.

Figure 2: Overview of the inflator's key features, emphasizing its compact size, fast inflation capability, preset tire pressure function, and accurate digital display.

Figure 3: The inflator shown in hand, illustrating its compact and portable design for emergency use.
3. Safety Instructions
Observe the following safety precautions to prevent electric shock, explosion, fire, and/or property damage:
- Do not leave the inflator unattended during operation.
- Keep out of reach of children.
- Do not operate the inflator in wet conditions or near flammable liquids or gases.
- Ensure the inflation hose is securely connected to the valve before starting inflation.
- Avoid over-inflating tires. Always refer to the recommended pressure for your specific item (vehicle, bicycle, ball).
- Do not block the air vents during operation to prevent overheating.
- If the device makes unusual noises or becomes excessively hot, turn it off immediately and disconnect it.
- Store the device in a cool, dry place when not in use.
- Use only the charging cable provided or recommended by the manufacturer.
4. Setup
- Initial Charging: Before first use, fully charge the inflator. Connect the charging cable to the device's charging port and to a suitable USB power adapter. The battery indicator on the display will show charging status.
- Attach Air Hose: Screw the air hose securely onto the inflator's air outlet.
- Select Nozzle: Choose the appropriate nozzle for the item you intend to inflate (e.g., Schrader valve for car tires, Presta valve adapter for some bicycles, needle for balls). Attach it to the end of the air hose.
5. Operating Instructions

Figure 4: Side view of the inflator, highlighting the control panel with power, mode, and pressure adjustment buttons.
- Power On: Press and hold the power button (U) for a few seconds to turn on the device. The digital display will illuminate.
- Select Mode: Press the mode button (M) to cycle through different inflation modes: Car, Motorcycle, Bicycle, and Ball. Each mode has a default pressure range.
- Set Target Pressure: Use the '+' and '-' buttons to adjust the desired target pressure. The display will show the current pressure unit (PSI or BAR). Refer to your item's recommended pressure.
- Connect to Valve: Securely attach the chosen nozzle and air hose to the item's valve. Ensure there are no air leaks. The display will show the current pressure of the item.
- Start Inflation: Press the power button (U) briefly to start inflation. The pump will begin to operate, and the display will show the increasing pressure.
- Auto-Stop Function: The inflator will automatically stop once the preset target pressure is reached.
- Manual Stop: To stop inflation manually at any time, press the power button (U) again.
- Disconnect: Carefully disconnect the air hose from the valve. Some air may escape during disconnection, which is normal.
- Power Off: Press and hold the power button (U) to turn off the device.

Figure 5: The inflator in use, demonstrating the one-key preset and auto-stop inflation feature when connected to a car tire.

Figure 6: Illustration of the inflator's various modes and their typical pressure ranges for different items, including car, motorcycle, bicycle, and ball inflation.
6. Maintenance
- Cleaning: Wipe the exterior of the inflator with a soft, dry cloth. Do not use harsh chemicals or abrasive cleaners. Ensure the air vents are clear of dust and debris.
- Storage: Store the inflator in a cool, dry place, away from direct sunlight and extreme temperatures. Keep the air hose and nozzles organized to prevent damage.
- Battery Care: To prolong battery life, avoid fully discharging the battery frequently. Charge the device regularly, even if not in use for extended periods (e.g., once every 3 months).
- Hose Inspection: Periodically check the air hose for cracks, kinks, or damage. Replace if necessary to ensure efficient and safe operation.
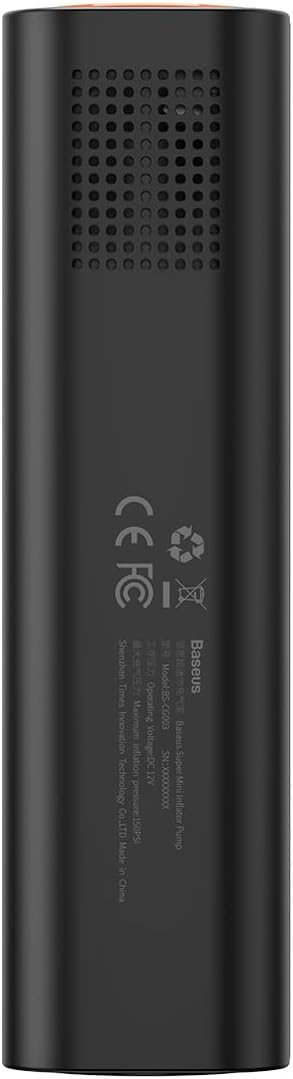
Figure 7: Rear view of the inflator, showing the air vents which should be kept clear for proper operation and cooling.
7. Troubleshooting
- Device not turning on: Ensure the battery is charged. Connect to a power source and try again. If the issue persists, contact customer support.
- Inflator not starting: Check if the target pressure is set correctly and is higher than the current pressure. Ensure the air hose is securely attached.
- Slow inflation or no air output: Verify that the nozzle is correctly attached to the valve and there are no leaks. Check if the air hose is kinked or blocked. Ensure the battery has sufficient charge.
- Inaccurate pressure reading: Ensure the hose is fully connected to the valve without leaks. Calibrate the device if a calibration option is available (refer to specific product features if applicable).
- Device overheating: Stop operation immediately and allow the device to cool down. Ensure air vents are not blocked. Avoid continuous operation for excessively long periods.
8. Specifications
| Feature | Specification |
|---|---|
| Model Number | CRCQ000001 |
| Brand | Baseus |
| Color | Black |
| Weight | 480 Grams |
| Dimensions (approx.) | 220 x 46 x 48 mm |
| Power Source | Battery Powered |
| Battery Type | 3 Lithium-polymer (included) |
| Maximum Pressure | 150 PSI |
| Inflation Speed | 30 L/min |
| Operating Mode | Electric |
9. Warranty and Support
For warranty information or technical support, please refer to the warranty card included with your product or visit the official Baseus website. Keep your purchase receipt as proof of purchase.