
1. Introduction and Overview
This manual provides detailed instructions for the installation, operation, and troubleshooting of your PEMP 8.8-inch Linux Screen. This unit is designed to upgrade the infotainment system in compatible BMW E60 and E90 vehicles equipped with the CCC system, manufactured between 2005 and 2010. It integrates modern features like Apple CarPlay and Android Auto while retaining the functionality of your original car system.
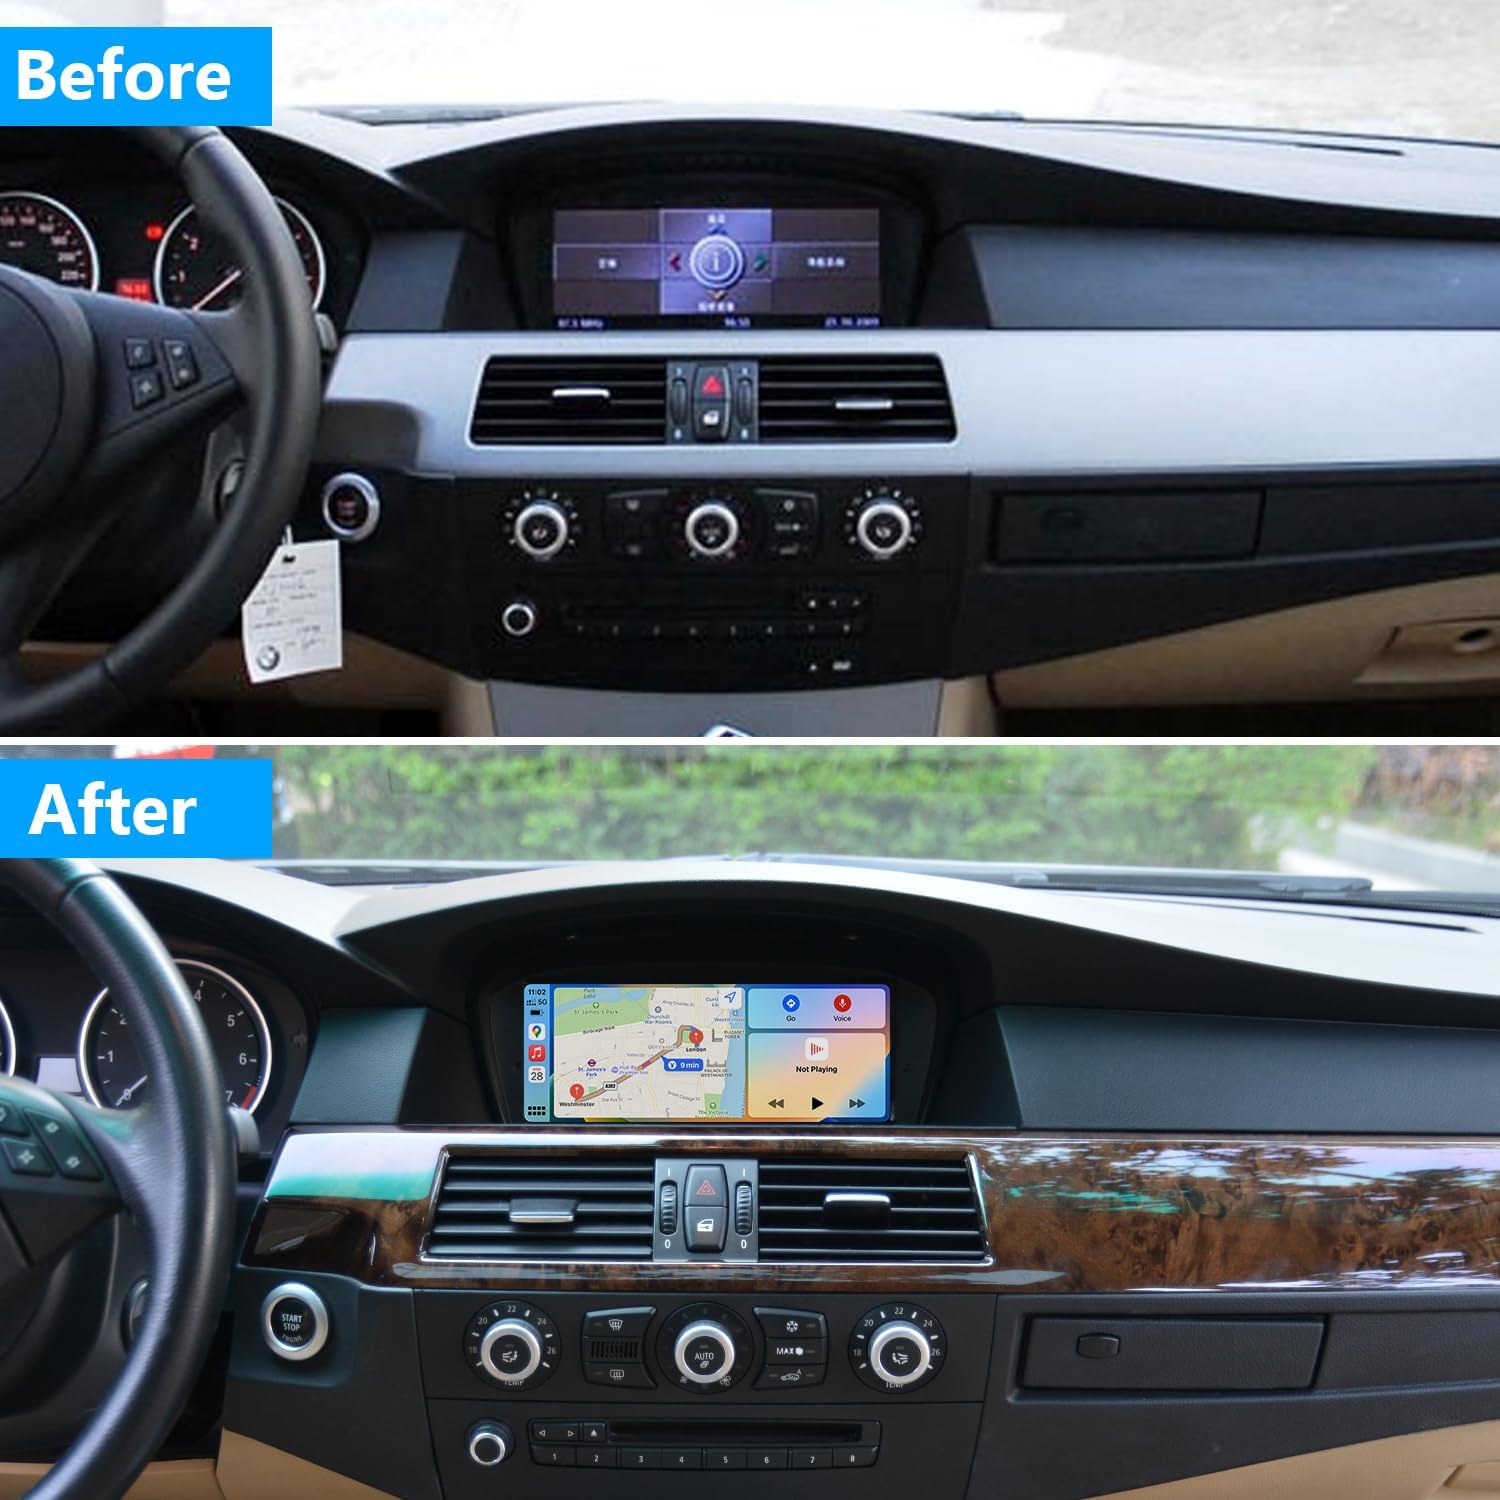
Image 1.1: Comparison of the BMW dashboard before and after installing the PEMP 8.8-inch Linux Screen.
2. Product Features
- Operating System: Linux
- Screen Size: 8.8 inches
- Resolution: 1280 x 480
- Connectivity: Wired and Wireless Apple CarPlay, Wired and Wireless Android Auto, Bluetooth 5.0, Wi-Fi
- Display Type: Capacitive Touch Screen LCD
- OEM Integration: Supports factory monitor information display; allows switching between factory OEM interface and CarPlay/Android Auto interface by long-pressing the Menu button.
- Camera Support: Compatible with OEM and aftermarket front/rear view cameras (supports up to 720P AHD format).
- Fast Boot: Quick system startup and immediate reverse camera video display (within 2 seconds).
- Control Method: Touchscreen, iDrive controller, steering wheel buttons.
- Supported Navigation: GPS (via connected smartphone apps).
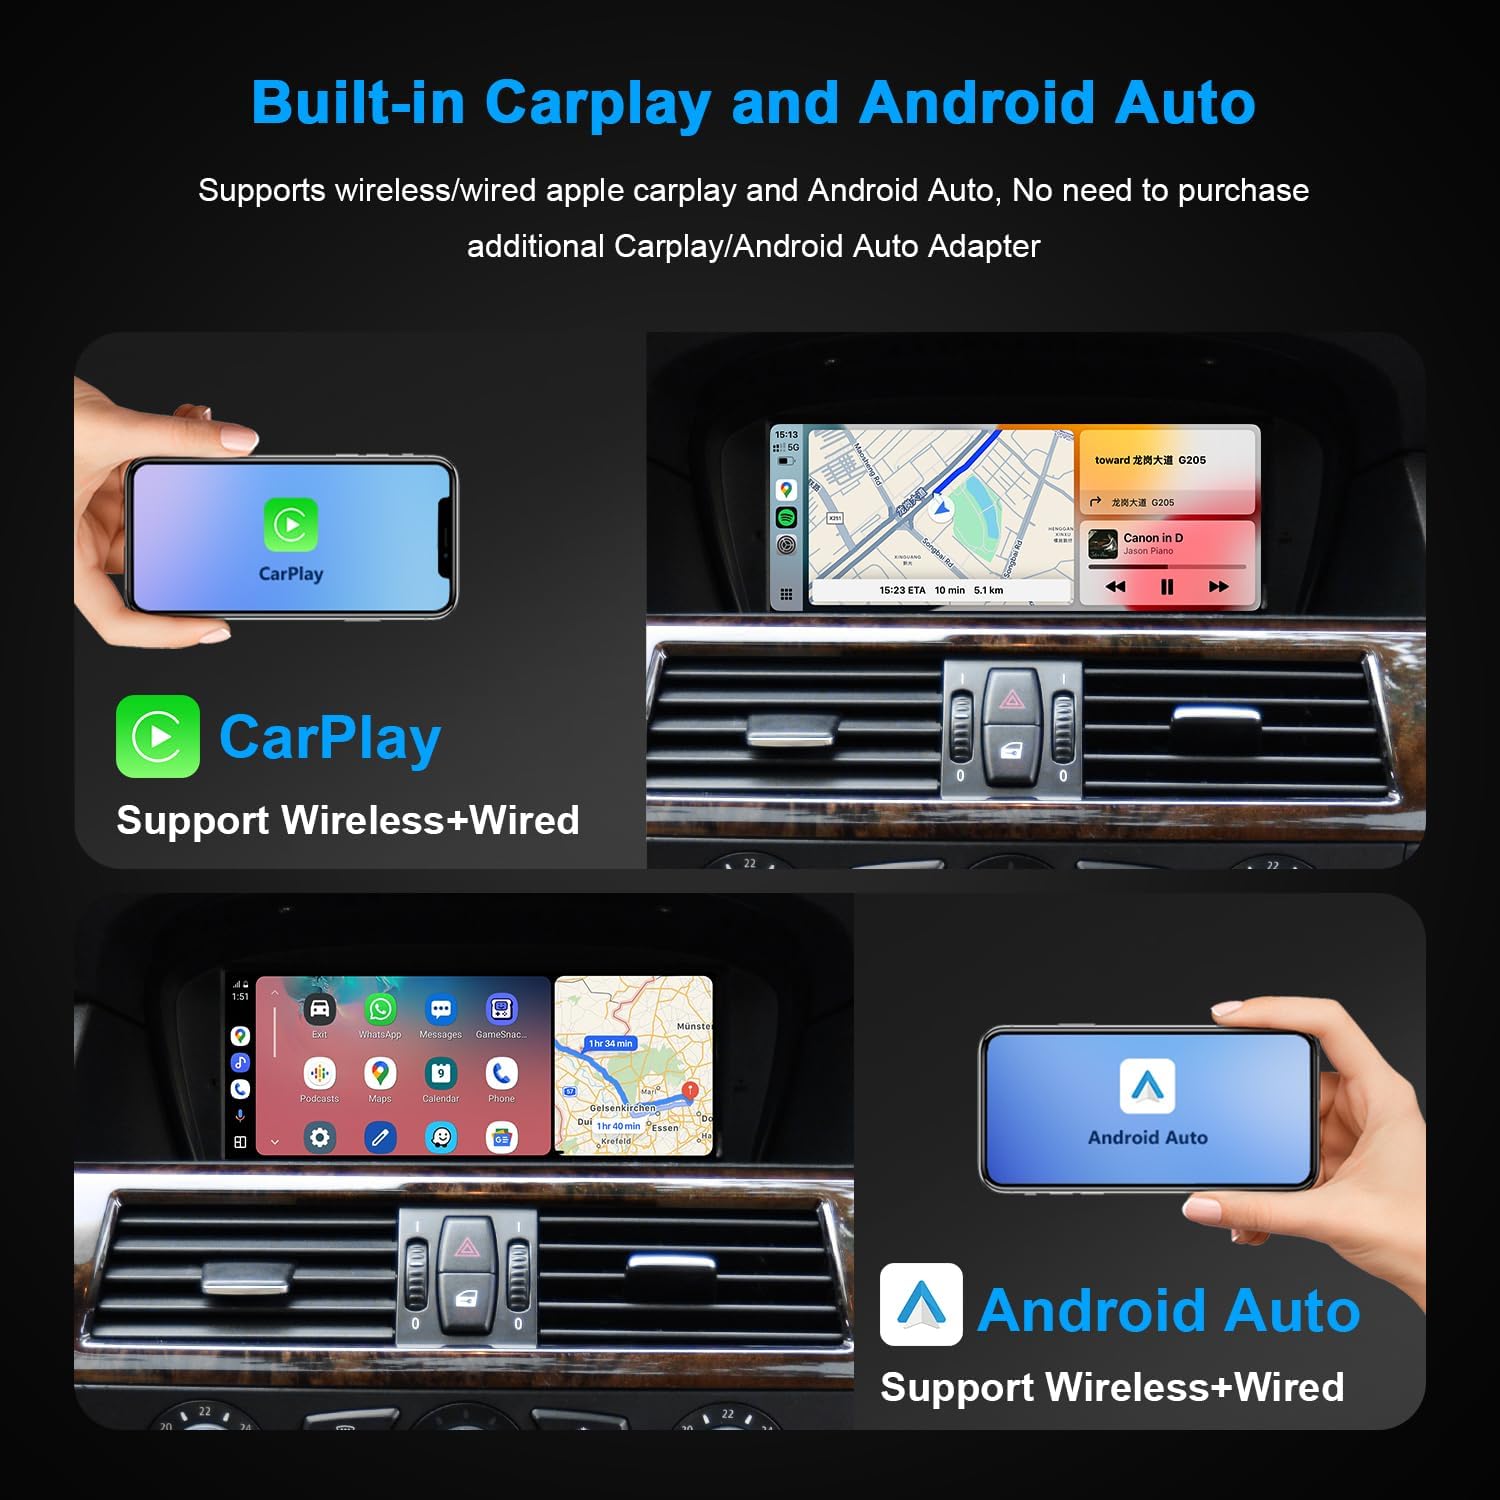
Image 2.1: Overview of built-in CarPlay and Android Auto features, supporting both wireless and wired connections.

Image 2.2: Key system capabilities including CarPlay, Linux OS, Bluetooth 5.0, Android Auto, camera support, USB, Mirror Link, and screen resolution.
3. Package Contents
Verify that all the following components are included in your package:
- 1 x PEMP 8.8-inch Linux Screen Unit
- 1 x ISO Wiring Harness
- 1 x USB Cable
- 1 x Audio Cable
- 1 x Installation Manual (Printed)
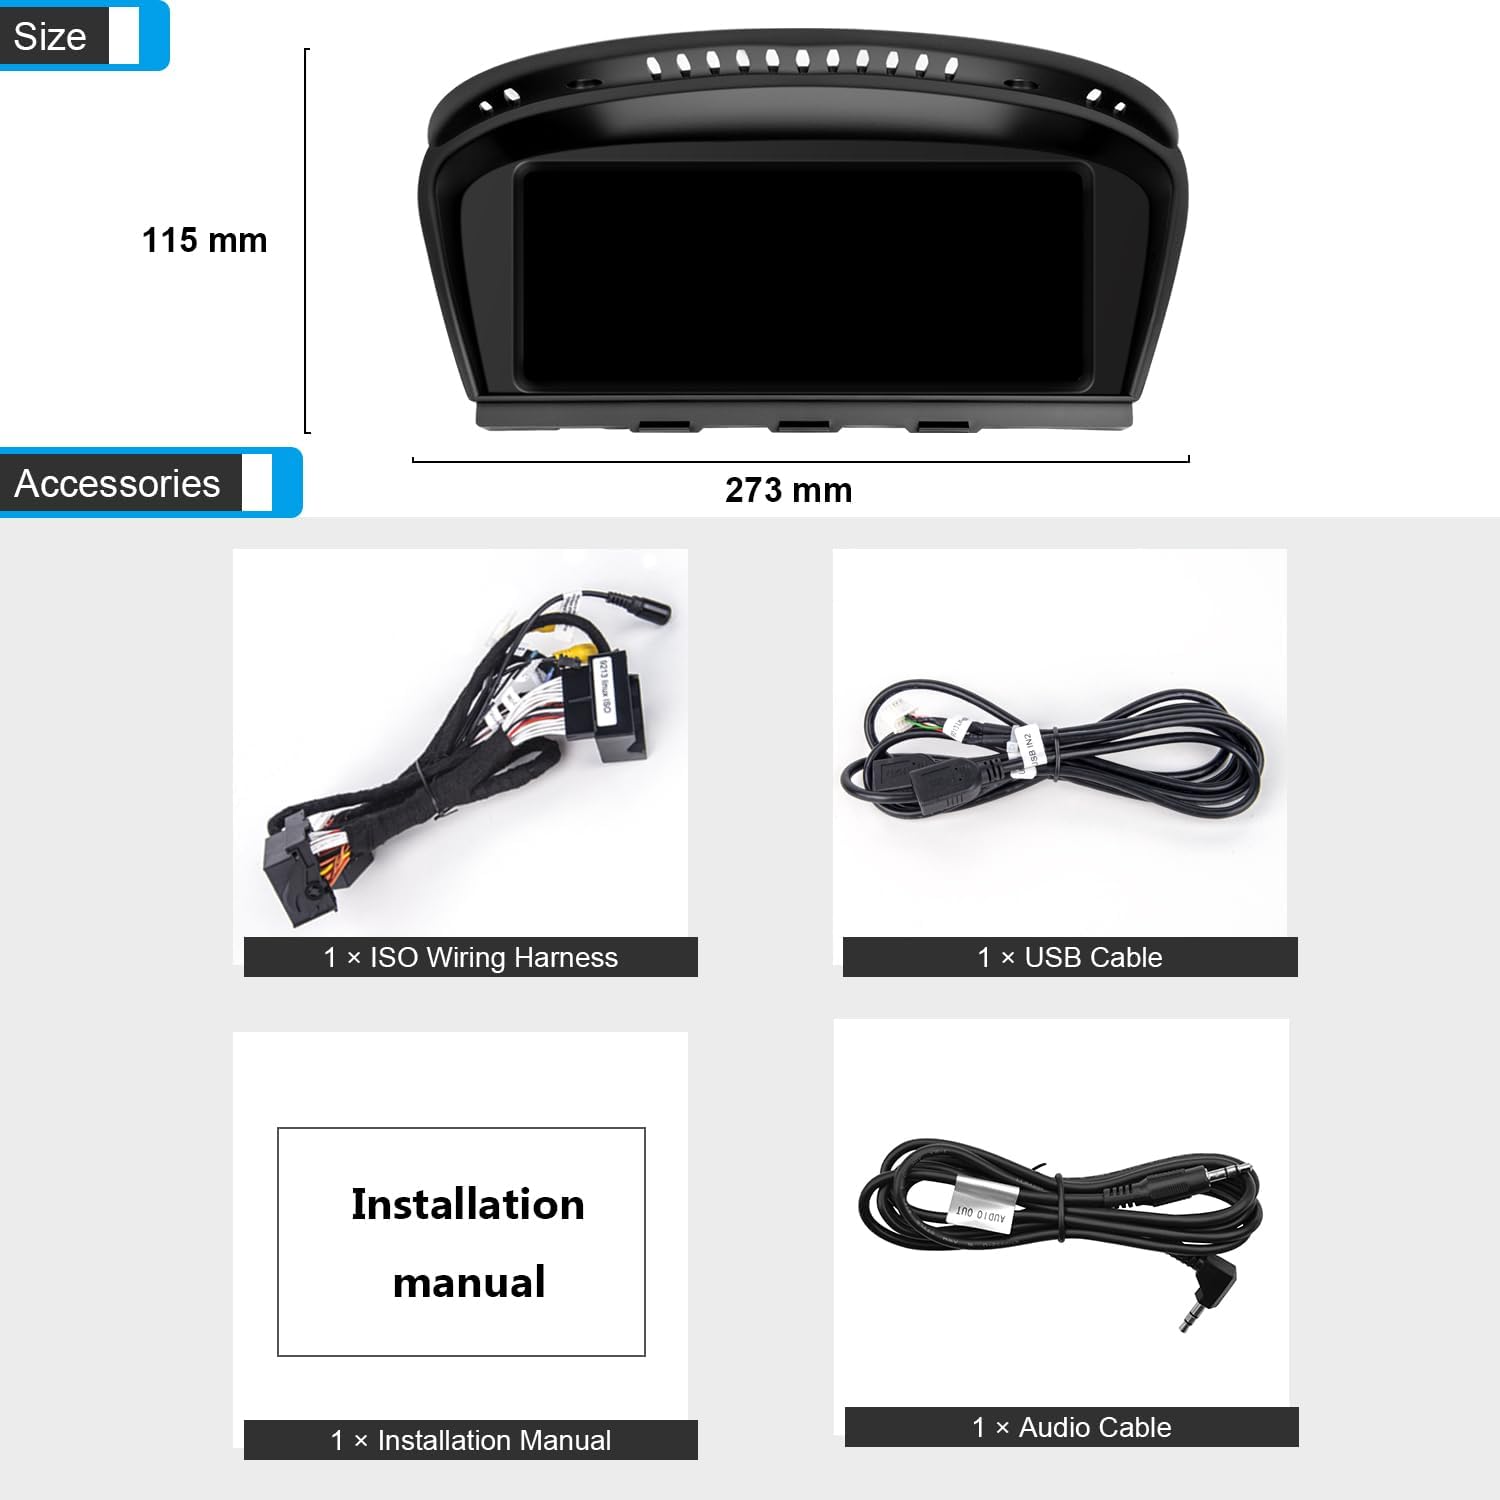
Image 3.1: The PEMP 8.8-inch Linux Screen and its standard accessories.
4. Compatibility
This PEMP 8.8-inch Linux Screen (Model PP-9210) is compatible with:
- BMW 5 Series (E60) with CCC system (2005-2010)
- BMW 3 Series (E90) with CCC system (2005-2010)
Important Note: Please verify your OEM display has the AUX audio menu. If not, an AUX activator (ASIN: B08XXF2T5Q) is required to activate AUX audio before installation.
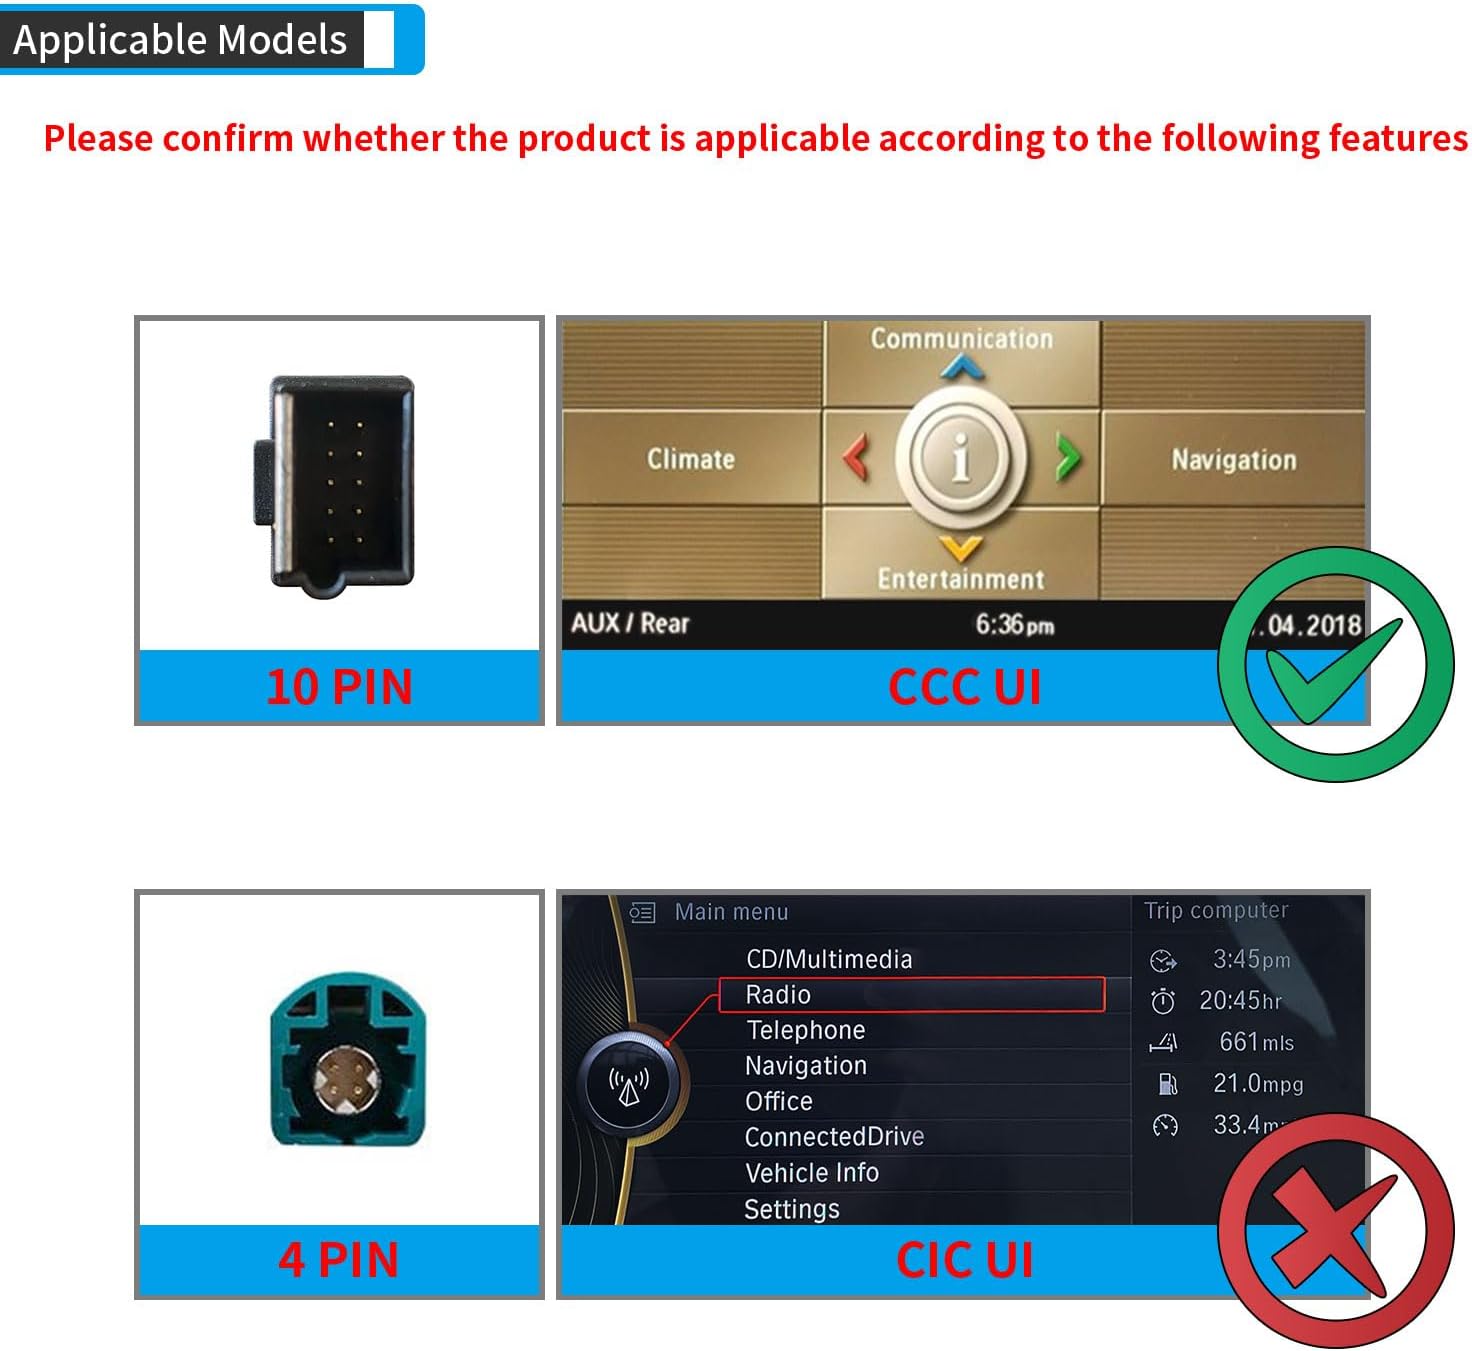
Image 4.1: Identify your car's system: The unit is compatible with CCC UI (10 PIN connector) and not with CIC UI (4 PIN connector).
5. Installation Guide
Refer to the included printed Installation Manual for detailed step-by-step instructions. The following points highlight critical aspects of the installation process:
5.1 AUX Audio Activation
If your OEM display lacks an AUX audio menu, you must activate it. This can be done by purchasing an AUX activator (ASIN: B08XXF2T5Q) or by coding the AUX input using tools like NCS Expert, if you have the necessary expertise.
5.2 Fiber Optic Cable Transfer
During installation, correctly transfer the 2-pin green optical fiber cable from the original vehicle's ISO plug to the Linux harness. This step is crucial for sound and OEM information display.
Image 5.1: Instructions for transferring the 2-pin green optical fiber cable to the Linux harness.
6. Initial Setup
6.1 Setting OEM Resolution
After installation, it is important to set the correct OEM screen resolution for optimal display. Navigate to Setup > Car Settings > Original Car's Screen Resolution and select the resolution that matches your original car's display.

Image 6.1: Screen resolution settings menu.
6.2 AUX Audio Settings
Ensure proper audio output by configuring the AUX settings. You can choose between automatic or manual AUX switching.
Automatic AUX Switching:
- Go to Setup > Car Settings.
- Find and select "Automatically switch to AUX".
- Choose "Harman Head Unit" or "Alpine Head Unit" according to your car's original audio system.
Manual AUX Setting Method:
- Go to the Main menu and select "Multimedia".
- Select "External devices".
- Long press the number key "8" until you hear a tone.
- Press "8" every time before entering the new system to activate CarPlay sound.

Image 6.2: Automatic and manual AUX audio setting methods.
7. Operating Instructions
7.1 Switching Between OEM and CarPlay/Android Auto Interface
To switch between your car's original OEM interface and the new CarPlay/Android Auto interface, long-press the Menu button on your iDrive controller.
7.2 Connecting Apple CarPlay
The unit supports both wired and wireless Apple CarPlay. For wired connection, use USB IN 1. For wireless, ensure Bluetooth and Wi-Fi are enabled on your iPhone and follow the on-screen pairing instructions.
Video 7.1: Demonstration of connecting Apple CarPlay to the PEMP Linux Screen.
7.3 Connecting Android Auto
The unit supports both wired and wireless Android Auto. For wired connection, use USB IN 1. For wireless, ensure Bluetooth and Wi-Fi are enabled on your Android phone and follow the on-screen pairing instructions.
Video 7.2: Demonstration of connecting Android Auto to the PEMP Linux Screen.

Image 7.1: Examples of CarPlay, Android Auto, and Mirror Link interfaces.
7.4 Camera Settings
The unit supports both original OEM cameras and aftermarket cameras. You can select the camera type and format in the settings menu. Note that aftermarket cameras are supported up to 720P AHD format.

Image 7.2: Camera settings interface and visual representation of camera support.
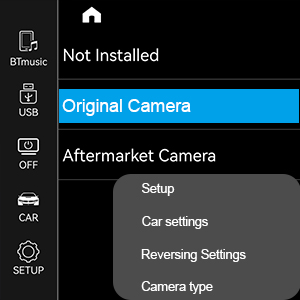
Image 7.3: Camera type selection in settings.
7.5 Fast Boot and CarPlay Connection
Video 7.4: Demonstrates the fast boot capability of the system and quick connection to CarPlay.
8. Troubleshooting
8.1 No Sound from the Unit
If you experience no sound from the PEMP Linux Screen, follow these steps:
- Check OEM Radio Sound: Press the FM/AM button on your original car radio to confirm if the OEM radio has sound.
- Set OEM Resolution: If the OEM radio has sound, ensure the correct resolution is set in Setup > Car Settings > Original Car's Screen Resolution.
- Reconnect OEM Radio Socket: If there is no sound from the OEM radio, you may need to reconnect the socket on the back of the OEM radio. Refer to the image below for guidance.
- AUX Audio Activation: Confirm that your car's original entertainment interface has an AUX AUDIO menu. If not, an AUX activator (ASIN: B08XXF2T5Q) is required to enable AUX audio.
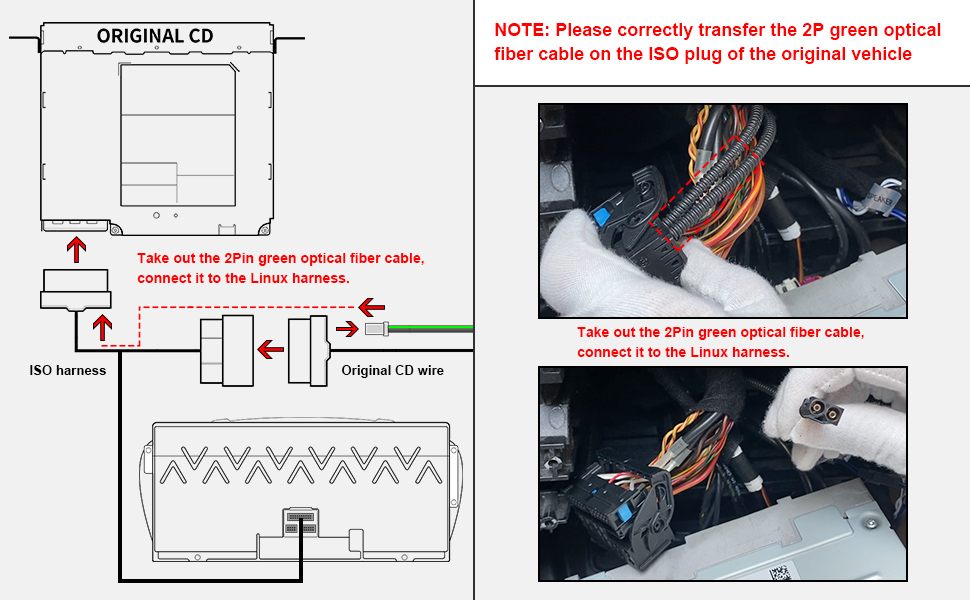
Image 8.1: Troubleshooting steps for issues with OEM car information and sound.
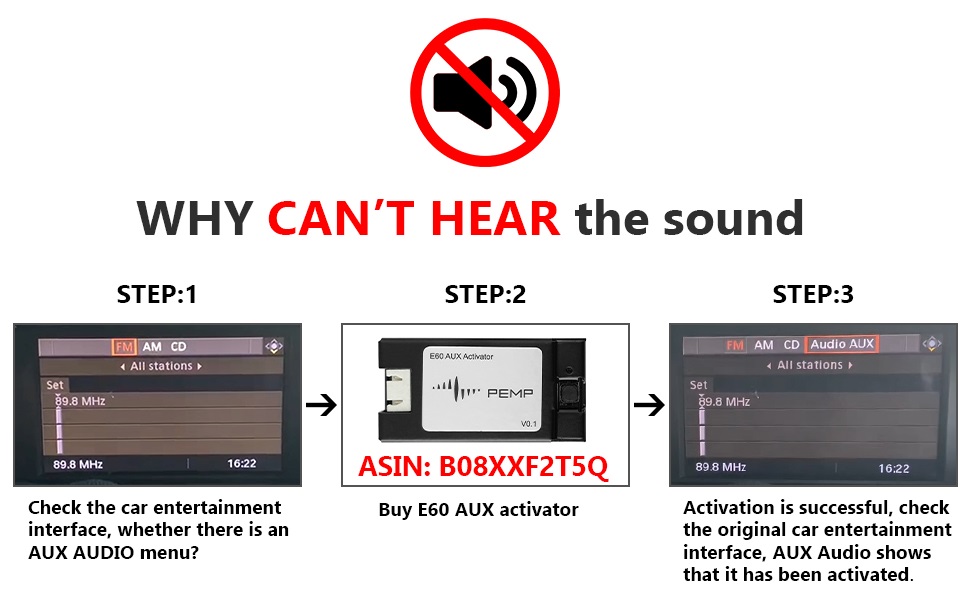
Image 8.2: Steps to resolve no sound issues, including checking for AUX menu and using an activator.
8.2 OEM Resolution Setting Video
Video 8.3: Guide on how to correctly set the OEM resolution for the display.
9. Specifications
| Feature | Specification |
|---|---|
| Brand | PEMP |
| Model Name | PEMP (9210) 8.8" Linux Screen |
| Model Number | PP-9210 |
| Operating System | Linux |
| Screen Size | 8.8 inches |
| Resolution | 1280 x 480 |
| Connectivity Technology | Bluetooth, Wi-Fi |
| Human-Interface Input | Touchscreen |
| Compatible Devices | Android Phone, iPhone |
| Supported Satellite Navigation System | GPS (via smartphone) |
| Memory Storage Capacity | 1 GB |
| Item Dimensions (L x W x H) | 8.8"L x 8.8"W x 8.8"H |
| Item Weight | 2.13 kg |
10. Warranty and Support
10.1 Warranty Policy
- Free Returns: Within 1 month of purchase (contact Amazon Customer Service).
- 1-Year Warranty: Covers non-artificial reasons within 1 year. The customer is responsible for the cost of sending the unit back and forth within the United States.
- Post-Warranty Repairs: Repairs are provided after 1 year. In addition to postage costs within the United States, additional parts replacement costs and labor costs will apply.
10.2 Customer Support
For any questions or assistance, PEMP offers professional after-sales support. Messages are typically responded to within 24 hours via email. If you have vehicle fitment questions, please send a photo of your car's dashboard and model year to avoid errors.


