
1. Introduction
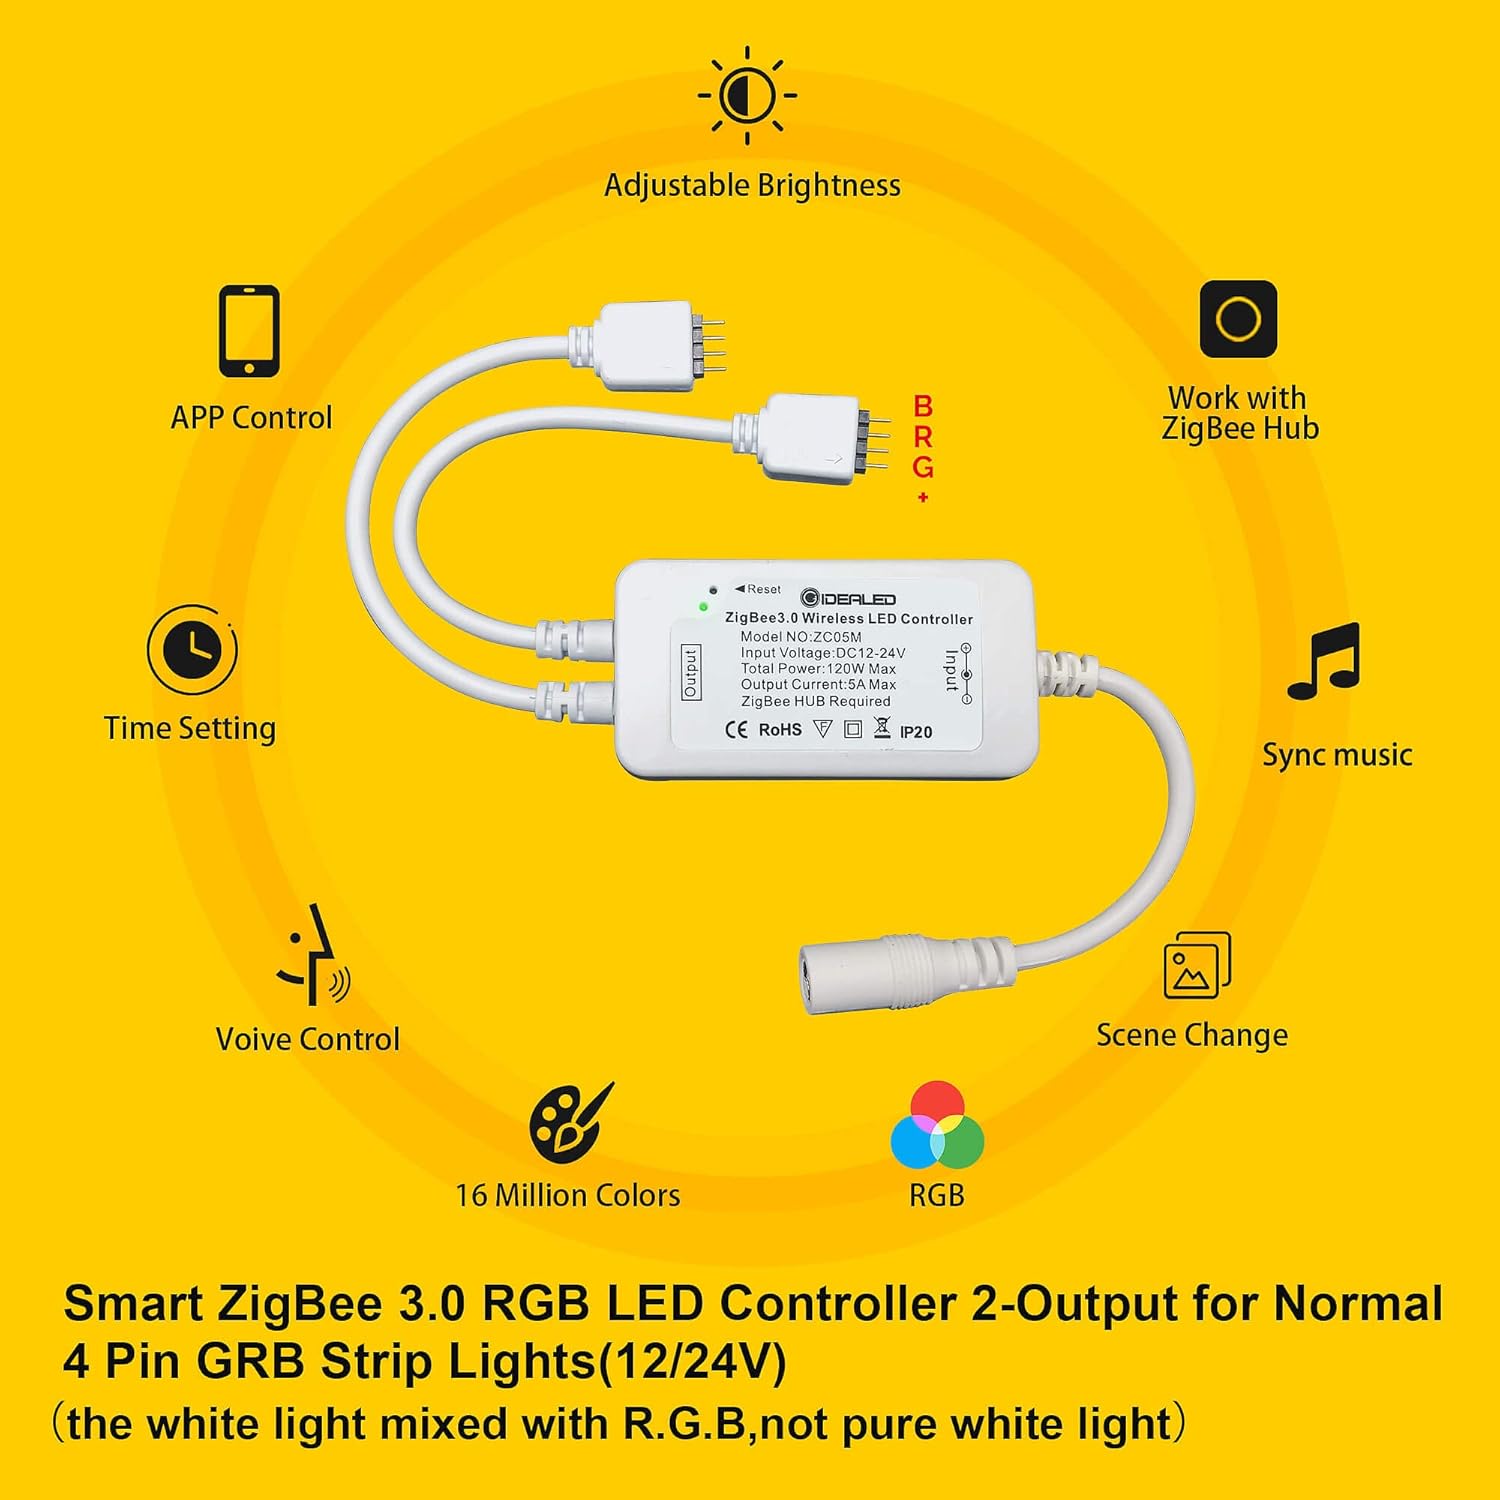
This manual provides comprehensive instructions for the installation, operation, and maintenance of your GIDEALED Smart ZigBee 3.0 LED Controller (Model ZC05M). This device is designed to enable smart control of 4-pin RGB LED strip lights, offering features such as app control, voice control, and scene customization when connected to a compatible ZigBee hub.
2. Package Contents
- 2 x GIDEALED Smart ZigBee 3.0 LED Controllers (Model ZC05M)
Note: LED strip lights and power adapters are not included in this package.

3. Specifications
| Feature | Specification |
|---|---|
| Model Number | ZC05M |
| Input Voltage | DC 12-24V |
| Total Power | 120W Max |
| Output Current | 5A Max |
| Operating Temperature | -20 to +60°C |
| Control Method | App Control, Voice Control |
| Special Feature | RGB |
| Indoor/Outdoor Usage | Indoor Use Only |
| Water Resistance Level | Not Water Resistant |
4. Setup
4.1. Requirements
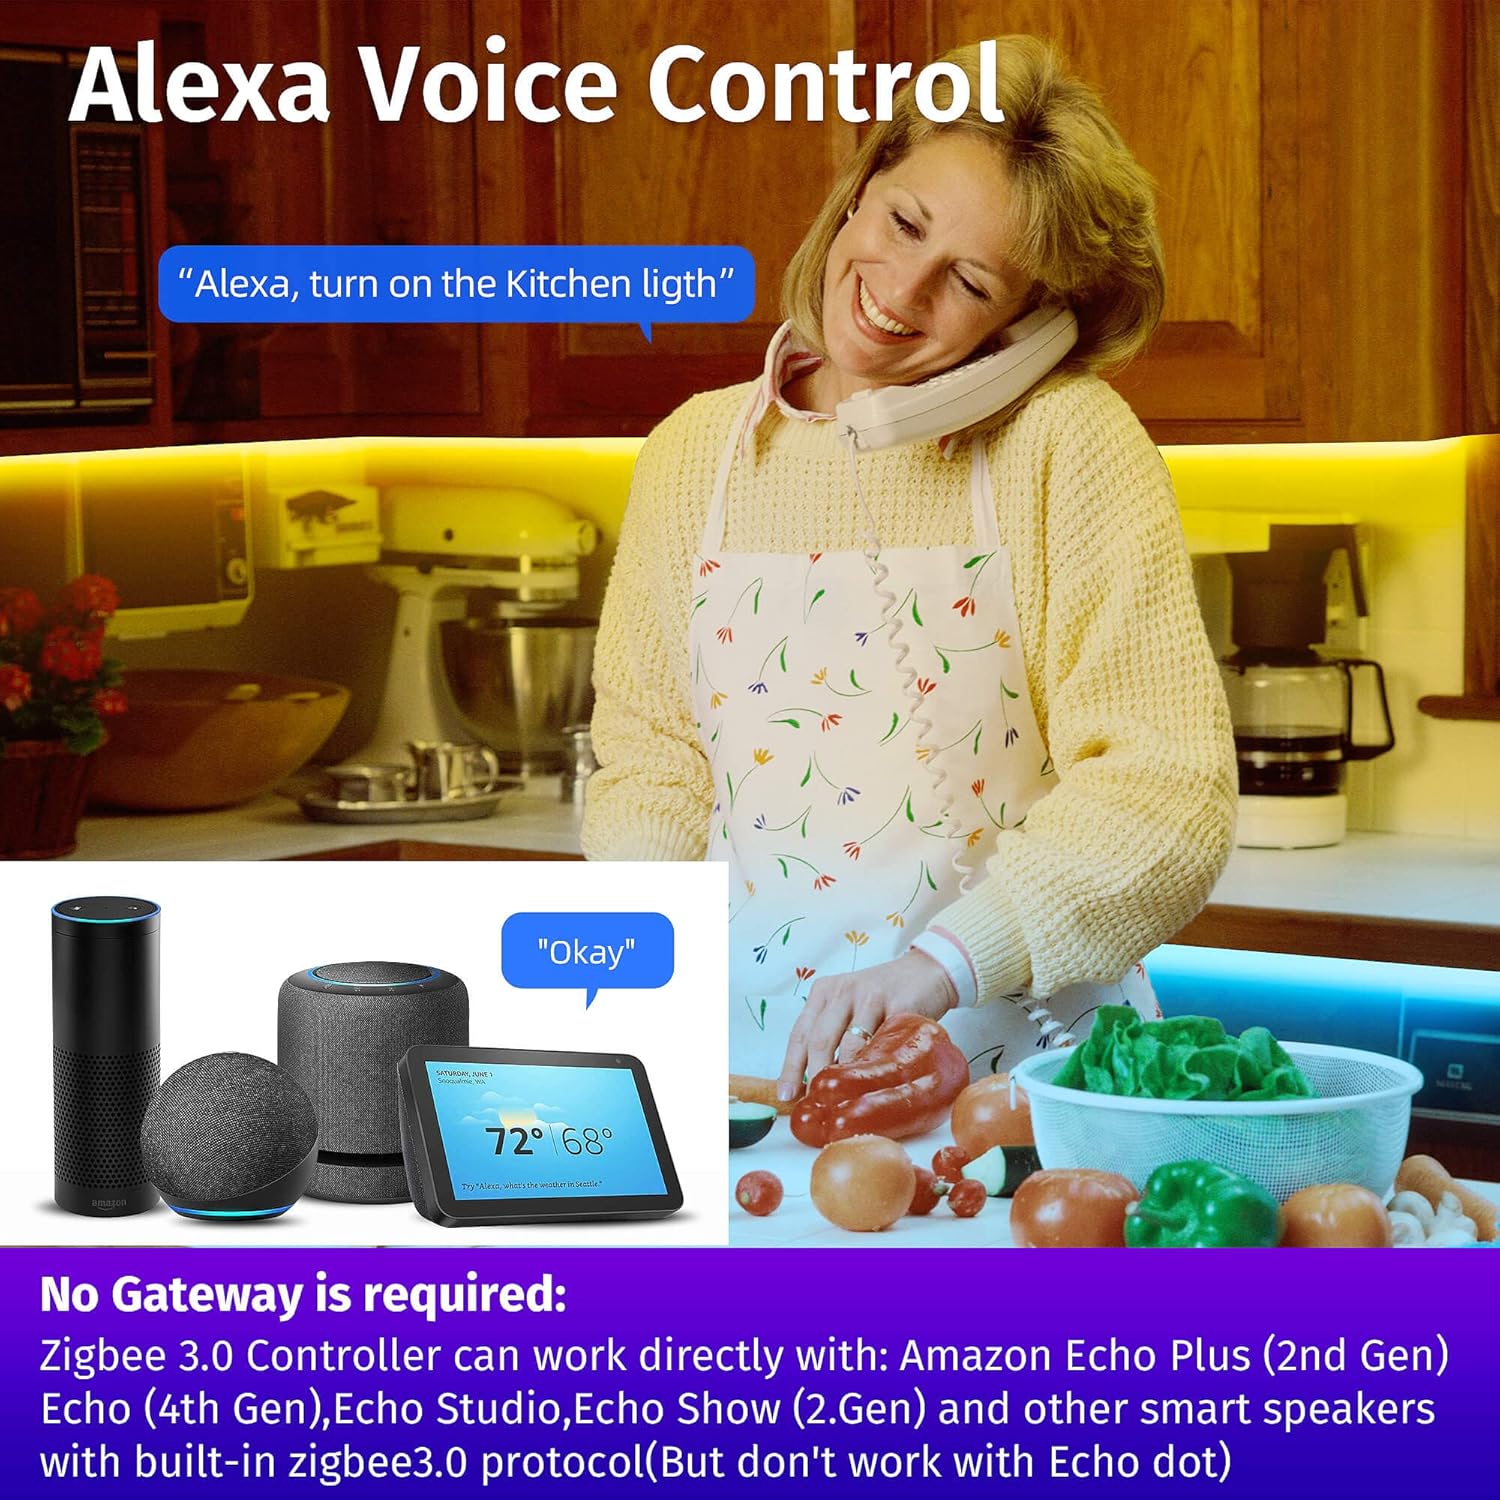
A compatible ZigBee hub is required for the GIDEALED Smart ZigBee 3.0 LED Controller to function. Compatible hubs include ZigBee Hub Bridge, Tuya Smart Hub, Amazon Echo Plus, Amazon Echo Plus (2nd Gen), Echo (4th Gen), Echo Studio, and Echo Show (2nd Gen). This controller does not work with Echo Dot without a compatible hub.

4.2. Physical Connection
- Ensure all components are powered off before making connections.
- Connect your 4-pin RGB LED strip light(s) to the 'Output' side of the GIDEALED controller. Ensure the '+' on the LED strip aligns with the '+' on the controller. The controller supports two outputs for up to two 10m RGB LED strips (12-24V).
- Connect a compatible DC 12-24V power adapter (not included) to the 'Input' side of the GIDEALED controller. The power connector size is DC5.5 * 2.5mm.
- Plug the power adapter into a power outlet.

4.3. Pairing with ZigBee Hub and App
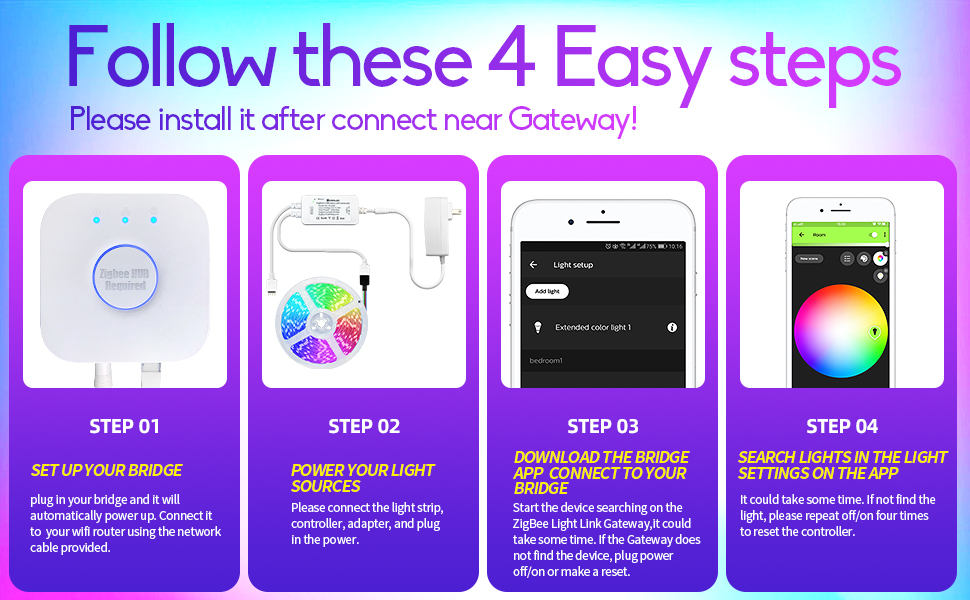
Follow these steps to connect your controller to your ZigBee gateway and control it via the app:
- Set Up Your Bridge: Plug in your ZigBee bridge/gateway and automatically power it up. Connect it to your WiFi router using the network cable provided with your bridge.
- Power Your Light Sources: Connect the LED strip light, controller, and adapter as described in Section 4.2. Ensure the controller is powered on.
- Download the Bridge App & Connect: Download the appropriate app for your ZigBee bridge (e.g., Philips Hue app, Tuya Smart app). Start the device searching process within the app. It may take some time to find the device.
- Search Lights in App Settings: If the gateway does not find the device, power the controller off/on four times or press the 'Reset' button on the controller to reset it, then try searching again.
5. Operating Instructions
5.1. Smart App Control
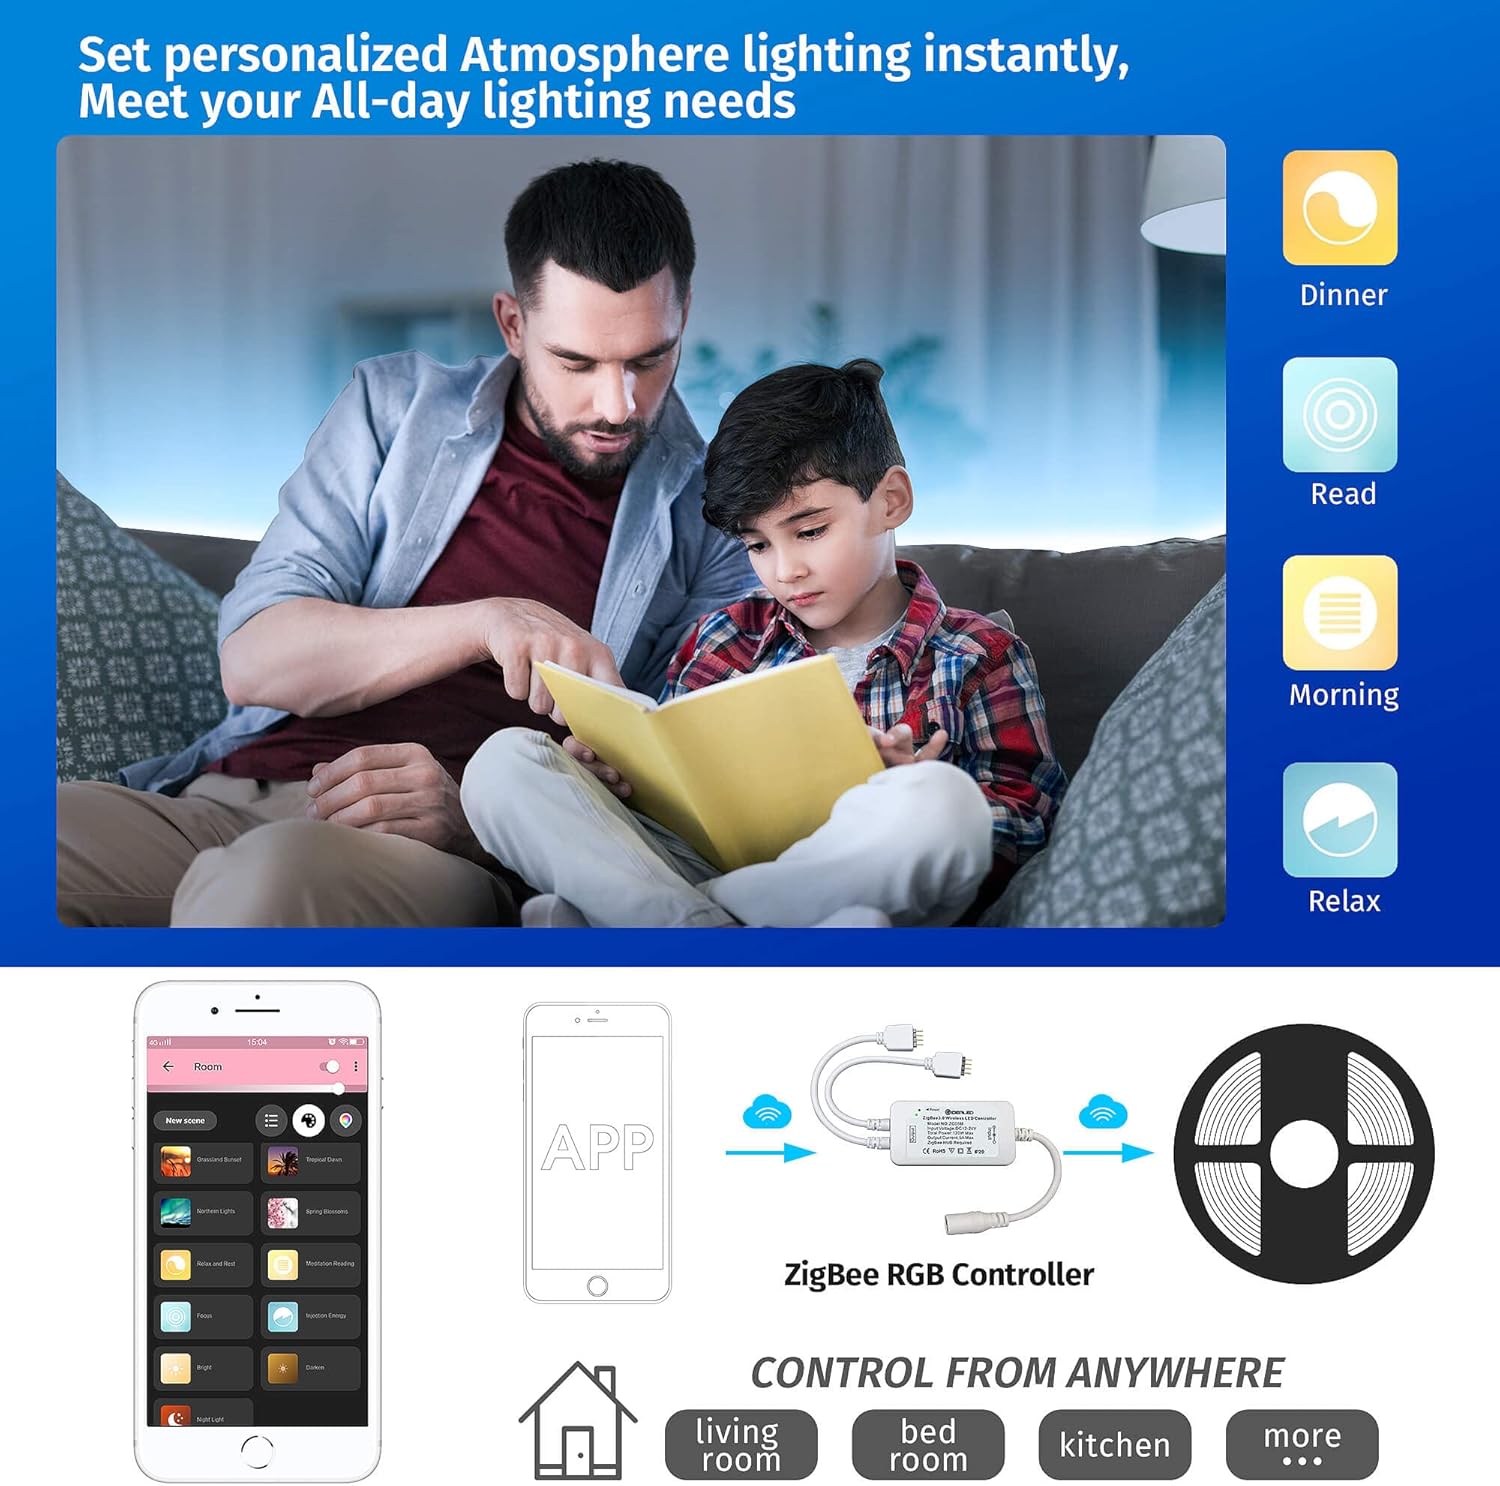
Once paired with your ZigBee hub, you can control your LED strip lights using the associated smart home app (e.g., Philips Hue, Tuya Smart). The app allows you to:
- Select from 16 million colors.
- Adjust brightness from 1% to 100%.
- Create and control multiple groups of controllers/lights simultaneously.
- Set personalized ambiance lighting for different scenes (e.g., Dinner, Read, Morning, Relax).
- Create schedules for automatic turn on/off.

5.2. Voice Control (Alexa)
The ZigBee 3.0 controller can be directly connected to Amazon Echo Plus, Echo Plus (2nd Gen), Echo (4th Gen), Echo Studio, Echo Show (2nd Gen), and other smart speakers with built-in ZigBee 3.0 protocol. This enables voice commands for:
- Turning lights on/off.
- Adjusting color.
- Adjusting brightness.
5.3. Time Setting and Scenes
Utilize the smart app to create custom lighting schedules and scenes:
- Time Setting: Program your lights to turn on or off at specific times, or to change color/brightness throughout the day.
- Scenes: Create predefined lighting settings for various activities or moods, such as 'Movie Night', 'Reading', or 'Relax'.
6. Maintenance
- Keep the controller in a dry environment. It is not water resistant and is intended for indoor use only.
- Clean the device with a soft, dry cloth. Do not use liquid cleaners or aerosols.
- Avoid exposing the controller to extreme temperatures or direct sunlight.
- Ensure proper ventilation around the controller to prevent overheating.
7. Troubleshooting
- Controller not responding:
- Check if the power adapter is securely connected and receiving power.
- Verify that the LED strip lights are correctly connected to the controller's output.
- Ensure your ZigBee hub is powered on and connected to your network.
- Try resetting the controller by powering it off and on four times, or by pressing the 'Reset' button.
- Cannot pair with ZigBee hub:
- Confirm your ZigBee hub is compatible with ZigBee 3.0 protocol.
- Ensure the controller is within range of your ZigBee hub.
- Initiate the device search function in your hub's app. If unsuccessful, reset the controller (power cycle 4 times or press reset button) and try again.
- Check for any firmware updates for your ZigBee hub.
- Lights not displaying correct colors or brightness:
- Verify that the LED strip is a 4-pin RGB type and correctly connected (positive to positive).
- Ensure the power adapter provides sufficient voltage (12-24V) and wattage for your LED strips.
- Recalibrate colors or brightness settings within your smart home app.
- Weak ZigBee connection/range:
- Relocate the controller closer to your ZigBee hub or a ZigBee repeater device.
- Ensure there are no large metal objects or other sources of interference between the controller and the hub.
8. Safety Information
- This device is for indoor use only. Do not expose to water or high humidity.
- Do not disassemble or modify the controller. This may void the warranty and pose safety risks.
- Use only compatible 12-24V DC power adapters and 4-pin RGB LED strip lights.
- Keep out of reach of children.
- Disconnect power before installation, cleaning, or maintenance.
9. Warranty and Support
For warranty information and technical support, please refer to the documentation provided with your purchase or contact GIDEALED customer service directly. Contact details can typically be found on the manufacturer's website or your purchase platform.


