
1 Hora GAR159
1 Hora 20000mAh Power Bank Instruction Manual
Model: GAR159
Introduction
Thank you for choosing the 1 Hora 20000mAh Power Bank. This portable power bank is designed to provide reliable and convenient charging for your mobile devices on the go. With its high capacity and built-in cables, it offers a versatile charging solution for various smartphones, tablets, and other electronic gadgets.
Product Overview
Key Features
- 20000mAh High Capacity: Provides multiple charges for most smartphones and tablets.
- Integrated Cables: Includes built-in Micro USB, Type-C, and IP (Lightning) cables for direct connection to various devices, eliminating the need to carry extra cables.
- Universal Compatibility: Compatible with a wide range of mobile phones, tablets, and other USB-powered devices.
- Multiple Outputs: Features built-in cables and an additional USB-A output port for simultaneous charging of multiple devices.
- Digital LED Display: Clearly shows the remaining battery percentage.
- Built-in Flashlight: Equipped with two LED beads that can be used as a convenient flashlight.
- Advanced Safety Protection: Integrated smart chip provides protection against short-circuit, over-current, over-voltage, and overheating.
Components

Front view of the 1 Hora 20000mAh Power Bank, showcasing its sleek black design and the four integrated charging cables (USB-A input, Micro USB, Type-C, and IP outputs) neatly tucked into the device. An LED display shows battery percentage.

A diagram illustrating the various input and output ports of the power bank. It highlights the built-in USB-A input cable, Type-C output cable, Micro USB output cable, IP (Lightning) output cable, an external USB-A output port, and an external Type-C input port.
Setup
Before first use, it is recommended to fully charge your 1 Hora Power Bank.
- Unpack: Carefully remove the power bank from its packaging.
- Initial Charge: Connect the built-in USB-A input cable or an external Type-C cable to a compatible USB wall adapter (not included) or a computer's USB port. The LED display will show the charging progress.
- Full Charge Indication: The power bank is fully charged when the LED display shows "100%".

Close-up view of the power bank's digital LED display, indicating the battery charge level. This display provides a clear and precise reading of the remaining power.
Operating Instructions
Charging Your Devices
The 1 Hora Power Bank offers multiple ways to charge your devices:
- Using Built-in Cables:
- Identify the correct built-in cable for your device (Micro USB, Type-C, or IP/Lightning).
- Pull out the desired cable from its slot.
- Connect the cable to your device's charging port.
- The power bank will automatically begin charging your device.
- Using External USB Cable (USB-A Output):
- Connect your device's standard USB charging cable to the USB-A output port on the power bank.
- Connect the other end of your cable to your device.
- The power bank will automatically begin charging your device.

A detailed view of the power bank highlighting its four integrated charging cables: Type-C, USB-A (input), IP (Lightning), and Micro USB. These cables are designed for convenience, allowing direct connection to various mobile devices.
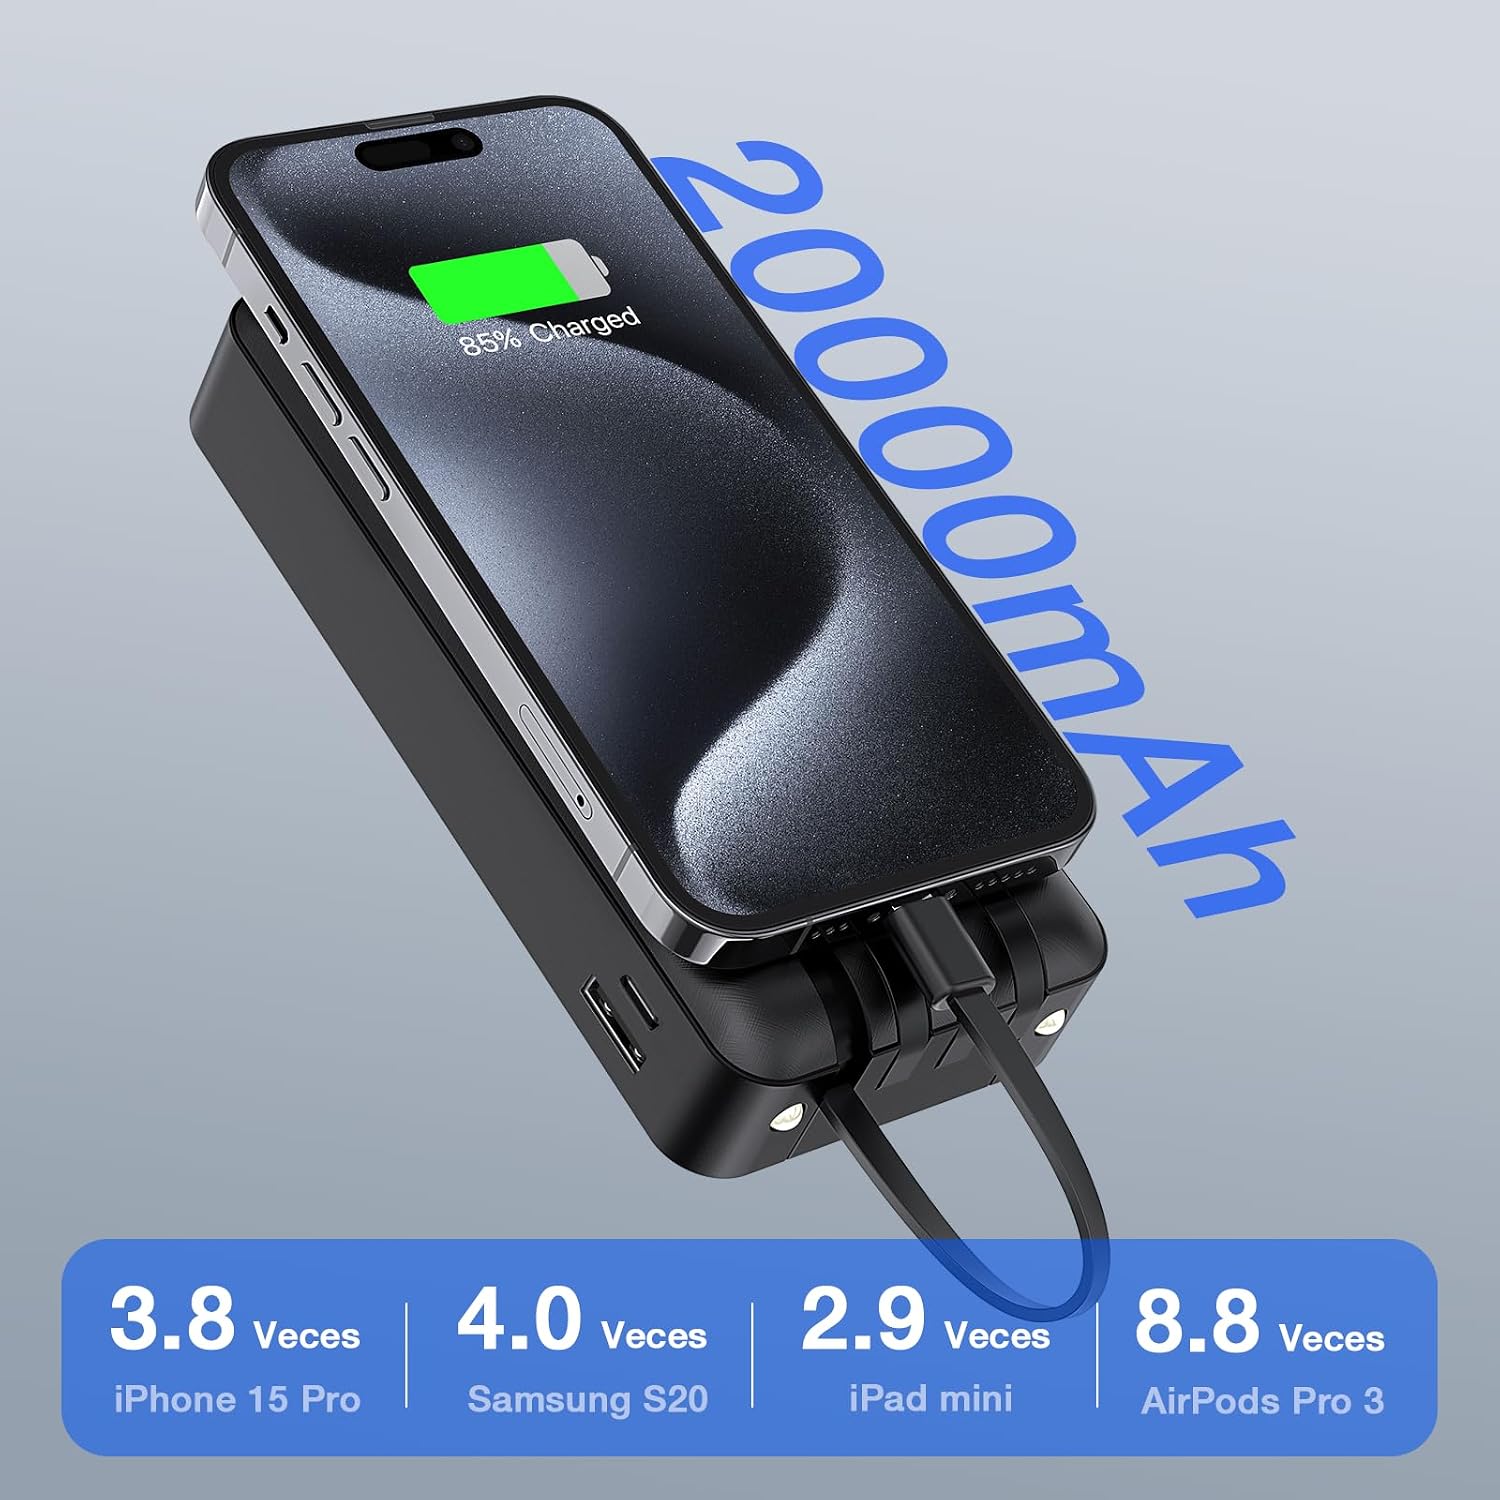
The power bank connected to a smartphone, demonstrating its 20000mAh capacity. The image also provides examples of how many times common devices like iPhone 15 Pro, Samsung S20, iPad mini, and AirPods Pro 3 can be charged.
Using the Built-in Flashlight
The power bank includes a convenient flashlight feature:
- To Turn On: Press and hold the power button for approximately 3 seconds. The two LED lights on the top of the power bank will illuminate.
- To Turn Off: Press and hold the power button again for approximately 3 seconds. The LED lights will turn off.

A hand holding the power bank in a dark setting, with its built-in LED flashlight illuminated, demonstrating its utility for nighttime security or emergency lighting.
Safety Information
To ensure safe operation and prolong the lifespan of your power bank, please observe the following safety guidelines:
- Do not expose the power bank to extreme temperatures (hot or cold), direct sunlight, or high humidity.
- Do not disassemble, modify, or attempt to repair the device.
- Keep away from water and flammable materials.
- Avoid dropping or subjecting the power bank to strong impacts.
- Use only compatible charging adapters and cables.
- Keep out of reach of children.
- Dispose of the power bank responsibly according to local regulations.

An illustration of the power bank's internal smart chip, highlighting its comprehensive safety features including protection against short-circuits, temperature fluctuations, over-voltage, and overcharge, ensuring safe operation for both the power bank and connected devices.
Maintenance
- Clean the power bank with a soft, dry cloth. Do not use abrasive cleaners or solvents.
- Store the power bank in a cool, dry place when not in use.
- If storing for extended periods, charge the power bank to approximately 50-70% every 3 months to maintain battery health.
Troubleshooting
| Problem | Possible Cause | Solution |
|---|---|---|
| Power bank not charging | Cable not properly connected; faulty adapter/cable; power bank fully charged. | Ensure cables are securely connected. Try a different adapter or cable. Check LED display for "100%". |
| Device not charging from power bank | Power bank battery low; incorrect cable used; device not compatible. | Recharge the power bank. Ensure the correct built-in cable or external cable is used. Verify device compatibility. |
| Flashlight not turning on | Power button not held long enough; power bank battery low. | Press and hold the power button for 3 seconds. Recharge the power bank. |
Specifications
- Model: GAR159
- Battery Capacity: 20000mAh (74Wh)
- Dimensions: 17 x 7 x 3.5 cm (6.7 x 2.76 x 1.38 inches)
- Weight: 440 g (0.97 lbs)
- Input Ports: Built-in USB-A cable, Type-C port
- Output Ports: Built-in Micro USB cable, Built-in Type-C cable, Built-in IP (Lightning) cable, USB-A port
- Special Features: Digital LED display, Built-in flashlight, Multi-protection safety system
Warranty and Support
For warranty information and customer support, please refer to the contact details provided with your purchase or visit the official 1 Hora brand store on Amazon:
Please retain your proof of purchase for any warranty claims.
Ask a question about this manual
Ask about setup, troubleshooting, compatibility, parts, safety, or missing instructions. Manuals+ will review the question and use this page’s manual context to help answer it.