
Intel BX8071512100
Intel Core i3 (12th Gen) i3-12100 Processor User Manual
Model: BX8071512100
Introduction
This manual provides comprehensive instructions for the installation, operation, and maintenance of your Intel Core i3-12100 Quad-core Processor. Designed for a wide range of applications, from everyday computing to demanding tasks, this 12th Generation Intel processor delivers efficient and reliable performance. Please read this manual thoroughly before proceeding with installation.

Image: The retail packaging for the Intel Core i3 12th Generation processor, featuring the Intel Core i3 branding and blue color scheme.
Product Overview
The Intel Core i3-12100 is a 12th Generation quad-core processor featuring Intel's efficient architecture. It is designed to provide robust performance for various computing needs, including multitasking, content creation, and light gaming, thanks to its integrated graphics and hyper-threading capabilities.
- Processor Type: Intel Core i3-12100
- Cores/Threads: 4 Cores / 8 Threads
- Base Clock Speed: 3.30 GHz
- Integrated Graphics: Intel UHD Graphics 730
- Socket Type: LGA 1700

Image: A close-up view of the Intel Core i3 processor chip, showing its metallic heat spreader and the Intel Core branding.
Setup and Installation
Proper installation is crucial for optimal performance and longevity of your processor. Always handle the processor by its edges and avoid touching the gold contacts or the top surface.
1. Pre-Installation Checklist
- Ensure your motherboard supports the LGA 1700 socket and 12th Generation Intel Core processors. Refer to your motherboard's manual.
- Gather necessary tools: Phillips-head screwdriver, thermal paste (if not pre-applied on cooler), anti-static wrist strap (recommended).
- Unplug your computer from the power outlet and discharge any static electricity.
2. Installing the Processor
- Prepare the Motherboard: Locate the CPU socket on your motherboard. Gently push down the load lever and pull it to the side to open the retention frame. Lift the load plate.
- Insert the Processor: Carefully align the triangular arrow on the corner of the processor with the corresponding arrow on the CPU socket. Lower the processor straight down into the socket without forcing it. The processor should sit flush.
- Secure the Processor: Close the load plate over the processor. Push down the load lever and secure it under the retention tab. This will firmly hold the processor in place.
- Apply Thermal Paste (if necessary): If your CPU cooler does not have pre-applied thermal paste, apply a small pea-sized dot of thermal paste to the center of the processor's heat spreader.
- Install the CPU Cooler: Place the CPU cooler (such as the included Intel stock cooler) onto the processor, aligning the mounting holes with those on the motherboard. Gently push down on each corner until the push-pins click into place. Connect the cooler's fan cable to the "CPU_FAN" header on the motherboard.

Image: The Intel stock CPU cooler, designed to provide adequate cooling for the i3-12100 processor, featuring a fan and heatsink.
Operating the Processor
Once installed, the Intel Core i3-12100 processor operates automatically as part of your computer system. Its performance is managed by the operating system and motherboard BIOS/UEFI settings.
Key Features and Performance
- Quad-Core Performance: With 4 cores and 8 threads, the i3-12100 handles multiple applications simultaneously, providing smooth multitasking and responsiveness.
- Intel UHD Graphics 730: The integrated graphics allow for display output without a dedicated graphics card, supporting up to four monitors for enhanced productivity or entertainment. This is suitable for everyday tasks, video playback, and light gaming.
- Efficient Power Usage: Designed to be power-efficient, contributing to lower energy consumption and reduced heat generation within your system.
- Intel Hyper-Threading Technology: Enables each processor core to run two threads simultaneously, significantly improving performance for multi-threaded applications.
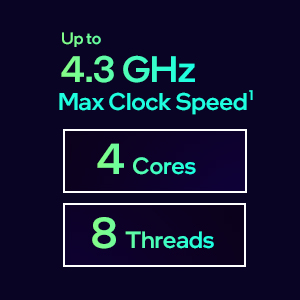
Image: A graphic highlighting key performance metrics of the 12th Gen Intel Core i3 processor, including Max Clock Speed up to 4.3 GHz, 4 Cores, and 8 Threads.

Image: An illustration of a multi-monitor gaming and streaming setup, demonstrating the capabilities of systems powered by Intel processors for entertainment and content creation.
Maintenance
Processors generally require minimal maintenance. The primary focus should be on maintaining an optimal operating environment for your computer system.
- Dust Management: Regularly clean the inside of your computer case to prevent dust buildup on the CPU cooler and other components. Dust can impede airflow and lead to overheating. Use compressed air for this purpose.
- Thermal Paste: The thermal paste applied between the CPU and its cooler typically lasts for several years. If you notice unusually high CPU temperatures, consider reapplying fresh thermal paste. This is an advanced procedure and should only be performed if you are comfortable with it.
- Cooling System: Ensure your CPU fan and case fans are functioning correctly. Proper airflow within the case is vital for heat dissipation.
Troubleshooting
If you encounter issues with your processor or system, refer to the following common troubleshooting steps:
- No Display/System Not Booting:
- Verify that the processor is correctly seated in its socket and the load lever is secured.
- Ensure the CPU cooler is properly installed and its fan cable is connected to the motherboard.
- Check that all power cables (24-pin ATX, 8-pin CPU) are securely connected to the motherboard.
- Confirm that your RAM modules are correctly seated in their slots.
- If using integrated graphics, ensure your monitor is connected to the motherboard's video output.
- System Instability/Crashes:
- Monitor CPU temperatures using system monitoring software. High temperatures can cause instability. Ensure adequate cooling.
- Update your motherboard's BIOS/UEFI to the latest version. This often includes stability improvements and better CPU compatibility.
- Ensure your operating system and drivers (especially chipset and graphics drivers) are up to date.
- Poor Performance:
- Check for background processes consuming excessive CPU resources.
- Verify that your system's power plan is set to "High Performance" (in Windows) or equivalent.
- Ensure your CPU cooler is effectively dissipating heat; thermal throttling can reduce performance.
Specifications
Detailed technical specifications for the Intel Core i3-12100 processor:
| Feature | Specification |
|---|---|
| Processor Model | Intel Core i3-12100 |
| Cores / Threads | 4 Cores / 8 Threads |
| Base Clock Speed | 3.30 GHz |
| Max Turbo Frequency | Up to 4.30 GHz |
| L3 Cache | 12 MB Intel Smart Cache |
| Integrated Graphics | Intel UHD Graphics 730 |
| Max Displays Supported | 4 |
| Processor Socket | LGA 1700 |
| Product Dimensions (Processor Only) | 1.77 x 1.77 x 0.1 inches |
| Item Weight | 15.8 ounces (approx. with packaging) |
Warranty and Support
Intel processors typically come with a standard manufacturer's warranty. For specific warranty terms and conditions, please refer to the documentation included with your retail-boxed processor or visit the official Intel support website.
For technical assistance, driver downloads, and further product information, please visit the official Intel support page:
When contacting support, please have your processor model (i3-12100) and model number (BX8071512100) readily available.
Related documentsBX8071512100


Ask a question about this manual
Ask about setup, troubleshooting, compatibility, parts, safety, or missing instructions. Manuals+ will review the question and use this page’s manual context to help answer it.