Introduction
This manual provides detailed instructions for the safe and effective use of your VAULTEK Barikade Series 2 Compact Pistol Safe. Please read all instructions carefully before operating the safe to ensure proper function and security. This safe is designed for secure storage of firearms and valuables, featuring durable construction and a Smart Sense Digital Keypad for quick access.
What's Included
Verify that all items listed below are present in your package:
- VAULTEK Barikade Series 2 Compact Pistol Safe
- Backup Manual Keys (2)
- Steel Security Cable
- Mounting Hardware (Screws)
- Instruction Manual

Image: The VAULTEK Barikade Series 2 safe shown with its included accessories: backup keys, steel security cable, and mounting hardware.
Setup
1. Initial Power-Up and Battery Installation
- Locate the battery compartment, typically on the underside or inside the safe.
- Install a 9-volt battery (not included) into the compartment, ensuring correct polarity.
- Close the battery compartment securely. The safe is now powered.
2. Setting Your Personal Combination
- With the safe open, locate the programming button inside the safe.
- Press and release the programming button. The keypad lights will illuminate.
- Enter your desired 4 to 8 digit code on the Smart Sense Digital Keypad.
- Press and hold the programming button until the keypad lights flash, confirming the new code is set.
- Test your new code with the safe door open to ensure it functions correctly before closing.

Image: Close-up of the Smart Sense Digital Keypad with illuminated buttons, used for setting and entering access codes.
3. Securing the Safe
The Barikade Series 2 safe can be secured using the included steel security cable or mounting hardware.
Using the Steel Security Cable:
- Loop the steel security cable around a fixed object (e.g., car seat frame, desk leg).
- Insert the cable end into the designated security cable port on the safe.
- Ensure the cable is securely fastened to prevent unauthorized removal of the safe.

Image: The VAULTEK Barikade safe shown secured to a car seat using the steel security cable, demonstrating its anti-theft feature.
Using Mounting Hardware:
- Identify a suitable mounting surface.
- Use the pre-drilled holes on the safe as a template to mark drilling locations.
- Secure the safe using the provided screws and appropriate tools.
Operating Instructions
Opening the Safe with Your Code:
- Touch the Smart Sense Digital Keypad to activate it.
- Enter your personal 4 to 8 digit code.
- The safe will unlock, and the lid will partially lift due to the Lid Assist System.
Opening the Safe with Backup Keys:
- Locate the front keyway on the safe.
- Insert one of the backup manual keys into the keyway.
- Turn the key to unlock the safe.

Image: A close-up view of the front keyway on the safe, used for manual key access with the provided backup keys.
Closing the Safe:
Gently close the lid until it latches securely. Ensure no items obstruct the closing mechanism.
Key Features
- Compact Design: Fits a full-size handgun up to 10.875 inches or two compact firearms.
- Smart Sense Digital Keypad: Proprietary touch-sensitive function responds with quick, simple taps for rapid access.
- Durable Construction: Constructed from precision-formed 14-gauge rugged steel for enhanced security.
- Anti-Pry Reinforced Construction: Designed to resist prying attempts, offering robust protection.
- Tamper Detection: Alerts to unauthorized access attempts.
- Interior Lid Organizer: Provides storage for small documents, cards, and other essentials.
- Lid Assist System: Partially lifts the lid upon unlocking for easier access to contents.
- Interior LED Light: Illuminates the safe's contents for visibility in low-light conditions.
- Impact Resistant Latch: Designed to withstand high impact forces.
- Micro-USB Port: Allows the safe to be powered externally if the battery dies (Micro-USB cable not included).
- Security Cable: Includes a steel security cable for securing the safe to a fixed object.

Image: The interior of the VAULTEK Barikade safe, showcasing the lid organizer for documents and cards, and the main compartment for firearms.
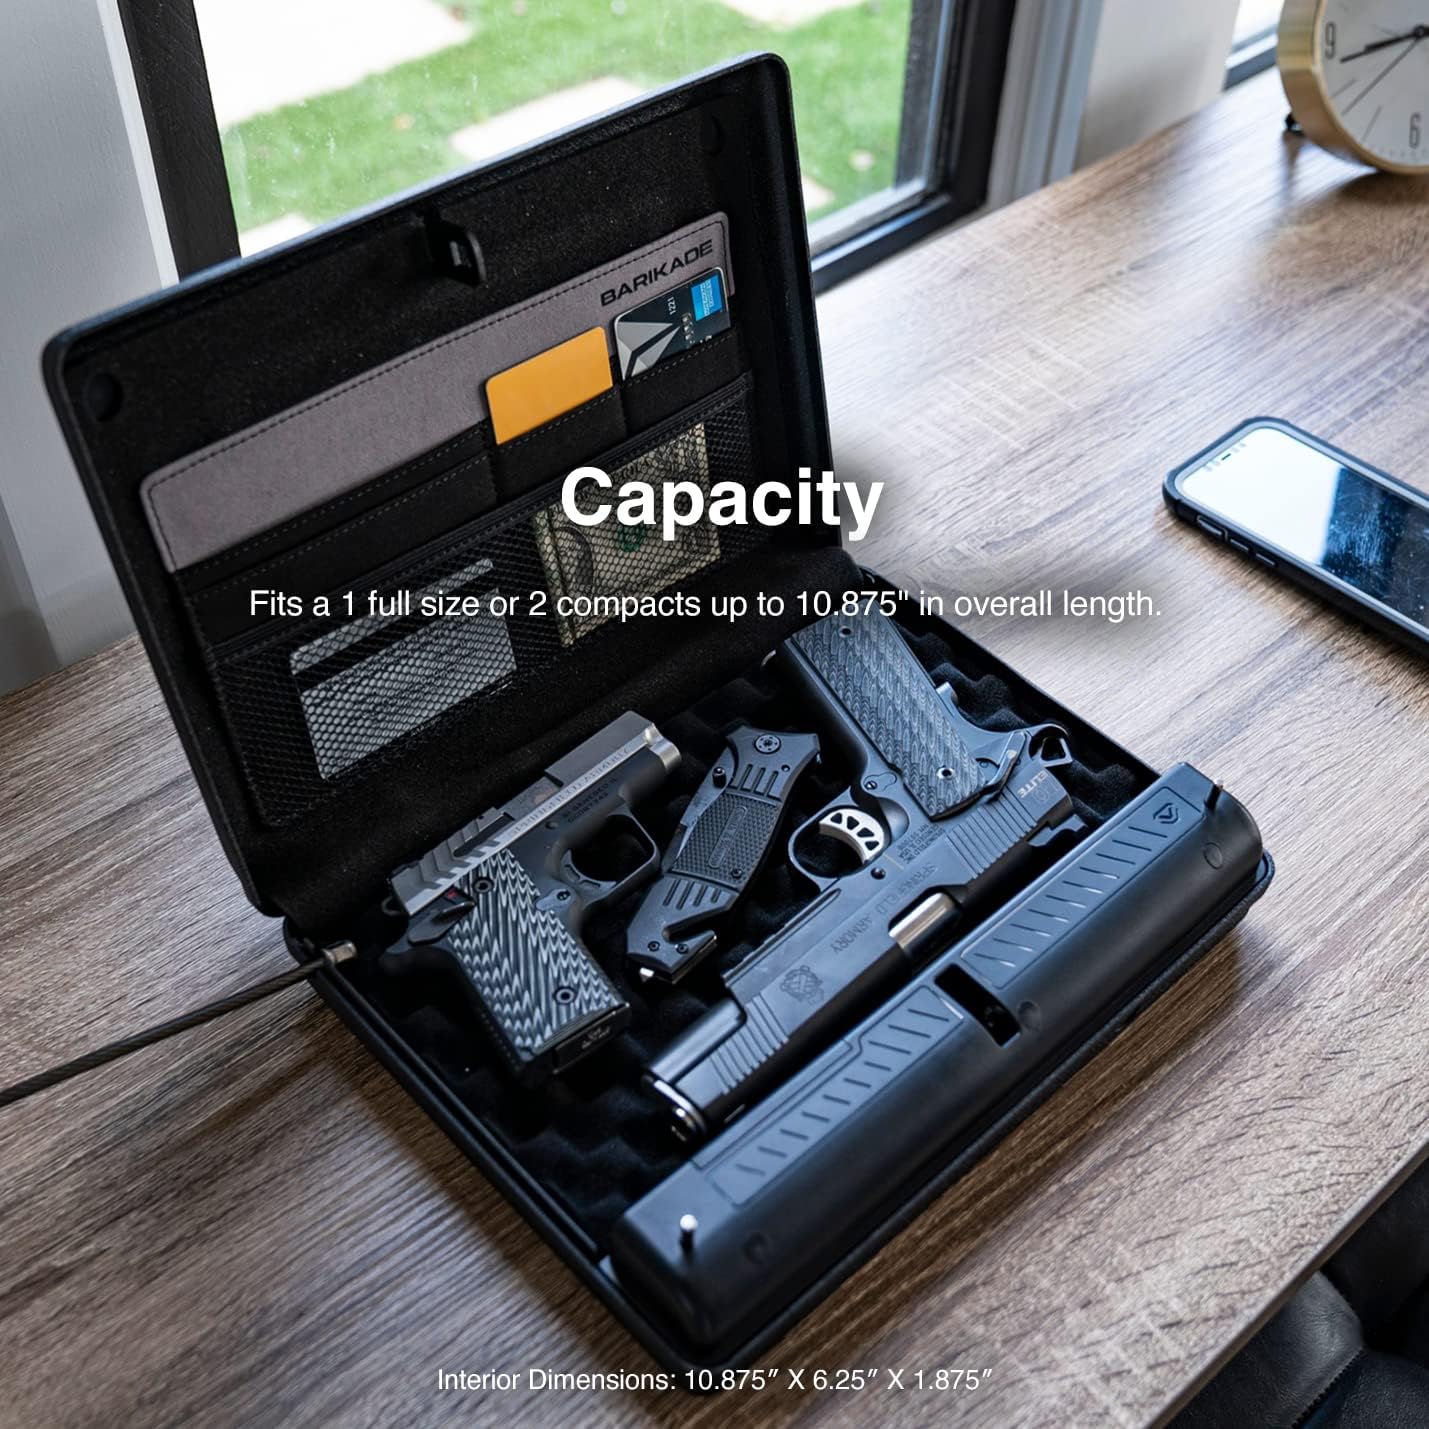
Image: The interior of the VAULTEK Barikade safe demonstrating its capacity to hold two compact firearms or one full-size handgun.
Product Overview Video
Video: An official VAULTEK video showcasing the features and functionality of the Barikade Series 2 safe, including its keypad, interior, and security options.
Specifications
| Feature | Detail |
|---|---|
| Brand | VAULTEK |
| Model Number | BKD2D-SB |
| Product Dimensions (External) | 2.5"D x 11.25"W x 9"H |
| Item Dimensions (Internal) | 10.875"L x 6.25"W x 1.875"H (Approximate) |
| Lock Type | Keypad, Key |
| Color | Black |
| Material | Alloy Steel (14-gauge) |
| Special Feature | Portable |
| Mounting Type | Freestanding, Mountable |
| Water Resistance Level | Not Water Resistant |
| Battery Life | Up to 1 year under normal use |
| UPC | 850012691297 |
Maintenance
- Battery Replacement: Replace the 9-volt battery annually or when the low battery indicator activates.
- Cleaning: Wipe the exterior with a soft, damp cloth. Avoid abrasive cleaners or solvents.
- Keypad Care: Keep the keypad clean and dry. Avoid excessive force when pressing buttons.
- Internal Components: Periodically check internal foam and lid organizer for wear and tear.
Troubleshooting
- Safe does not open with code:
- - Ensure the battery is not depleted. Replace if necessary.
- - Re-enter the code carefully, ensuring each tap registers on the Smart Sense Keypad.
- - Use the backup keys to open the safe and re-program your code.
- Keypad is unresponsive:
- - Check battery power. Connect a Micro-USB cable to an external power source if the battery is dead.
- - Ensure the keypad is clean and free from debris.
- Safe is difficult to close:
- - Check for any obstructions inside the safe that might be preventing the lid from closing completely.
- - Ensure the internal foam is properly seated.
- Tamper alert activates frequently:
- - Review the safe's placement and ensure it is not being accidentally bumped or moved.
- - If persistent, contact customer support.
Warranty and Support
VAULTEK products are designed for durability and reliability. For specific warranty information, please refer to the warranty card included with your product or visit the official VAULTEK website. For technical support, replacement parts, or any inquiries, please contact VAULTEK customer service through their official channels.
Online Support: www.vaulteksafe.com/support


