
KINGDANS B09NKZFT78
KINGDANS 180-Day Wireless Outdoor Security Camera User Manual
Model: B09NKZFT78
1. Introduction
Thank you for choosing the KINGDANS 180-Day Wireless Outdoor Security Camera. This manual provides detailed instructions for the setup, operation, maintenance, and troubleshooting of your new security camera. Please read this manual thoroughly before use to ensure proper functionality and to maximize your product experience. This camera is designed for outdoor home security, offering advanced features such as 1080P Full HD video, AI-powered detection, color night vision, two-way audio, and a long-lasting battery.
2. Product Overview
2.1 Components
- KINGDANS Wireless Outdoor Security Camera
- Mounting Bracket
- USB Charging Cable
- Mounting Screws and Wall Anchors
- User Manual
2.2 Key Features
- 1080P Full HD Video: Captures clear and detailed footage.
- 180-Day Battery Life: Extended standby time on a single charge.
- Smart AI Detection: Differentiates between humans, pets, vehicles, and packages.
- Color Night Vision: Provides clear, full-color video even in low-light conditions.
- Two-Way Audio: Allows for real-time communication through the camera.
- Siren Alarm & Spotlight: Deter intruders with audible and visual alerts.
- IP65 Waterproof: Designed to withstand various weather conditions.
- Flexible Storage: Supports both SD card (not included) and cloud storage options.
- Wireless Connectivity: Operates on 2.4GHz Wi-Fi for easy placement.

Image: The KINGDANS Wireless Outdoor Security Camera, showcasing its sleek design and waterproof exterior with water droplets.
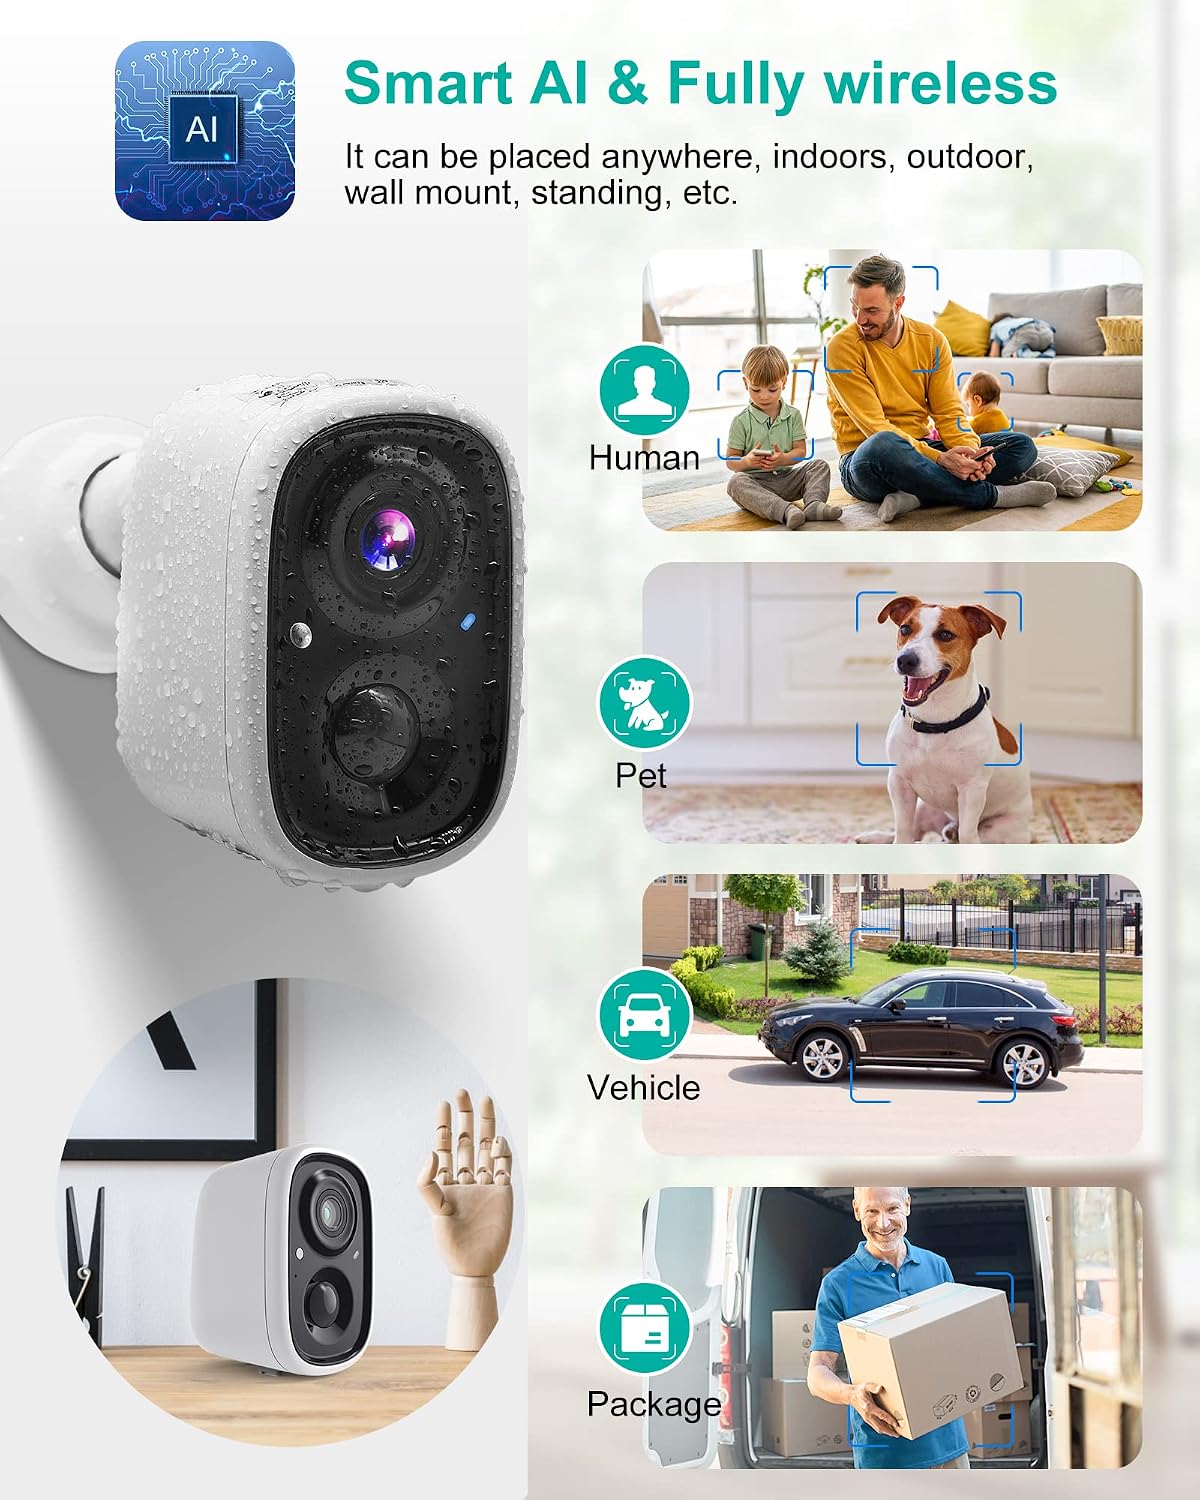
Image: Diagram illustrating the camera's Smart AI capabilities, distinguishing between humans, pets, vehicles, and packages, highlighting its fully wireless nature for flexible placement.
3. Setup
3.1 Initial Charging
Before first use, fully charge the camera using the provided USB cable. A full charge typically takes about 10 hours and provides up to 180 days of standby time, depending on usage and motion detection frequency.
3.2 App Download and Account Creation
- Scan the QR code in the manual or on the product packaging to download the official app (available on App Store for iOS and Google Play Store for Android).
- Install the app and create a new user account.
3.3 Wi-Fi Connection Steps
- Open the app and select "Add Camera" or the '+' icon.
- Follow the on-screen prompts to select your 2.4GHz Wi-Fi network and enter the password. (Note: This camera only supports 2.4GHz Wi-Fi networks).
- The app will generate a QR code. Hold the camera lens approximately 6-8 inches (15-20 cm) in front of your phone screen until you hear a confirmation sound.
- Once connected, the camera's status indicator will change, and you can name your device in the app.

Image: Visual guide for IP65 waterproof rating and efficient installation, including wall-mount steps and Wi-Fi connection process via the mobile app.
3.4 Installation (Wall Mount)
- Choose a suitable location for installation, ensuring good Wi-Fi signal strength.
- Fix the bracket base to the wall using the provided screws. If installing on masonry, use the wall anchors.
- Attach the adjustable part of the bracket to the base and adjust it to the desired angle.
- Mount the camera onto the bracket, ensuring it is securely fastened.
4. Operating Instructions
4.1 Live View and Recording
- Open the app and select your camera to view the live feed.
- You can manually record video or take screenshots from the live view interface.
4.2 Two-Way Audio
From the live view, tap the microphone icon to activate two-way audio. You can speak through your phone, and your voice will be projected through the camera's speaker, allowing you to communicate with visitors or deter unwanted guests.

Image: Illustration of the two-way audio feature, showing a person at the door communicating with someone inside via the camera and app.
4.3 Motion Detection & Alerts
- The camera uses PIR infrared sensing to detect motion.
- Customize activity zones within the app to focus detection on specific areas.
- Enable push notifications to receive instant alerts on your smartphone when motion is detected.
- Adjust motion sensitivity settings to minimize false alarms.

Image: Graphic demonstrating PIR infrared sensing and custom activity zone setup, showing how the camera triggers recording and sends notifications upon detecting movement within a defined area.
4.4 Night Vision
The camera automatically switches to night vision mode in low-light conditions, providing clear 1080P Full HD footage. It features infrared LED lights for enhanced visibility up to 50 feet.

Image: Comparison showing a daytime view and a clear infrared night vision view of a street, illustrating the camera's 1080P Full HD and night vision capabilities.
4.5 Device Sharing
You can share access to your camera's live feed and recordings with family and friends through the app. This allows multiple users to monitor the property simultaneously.
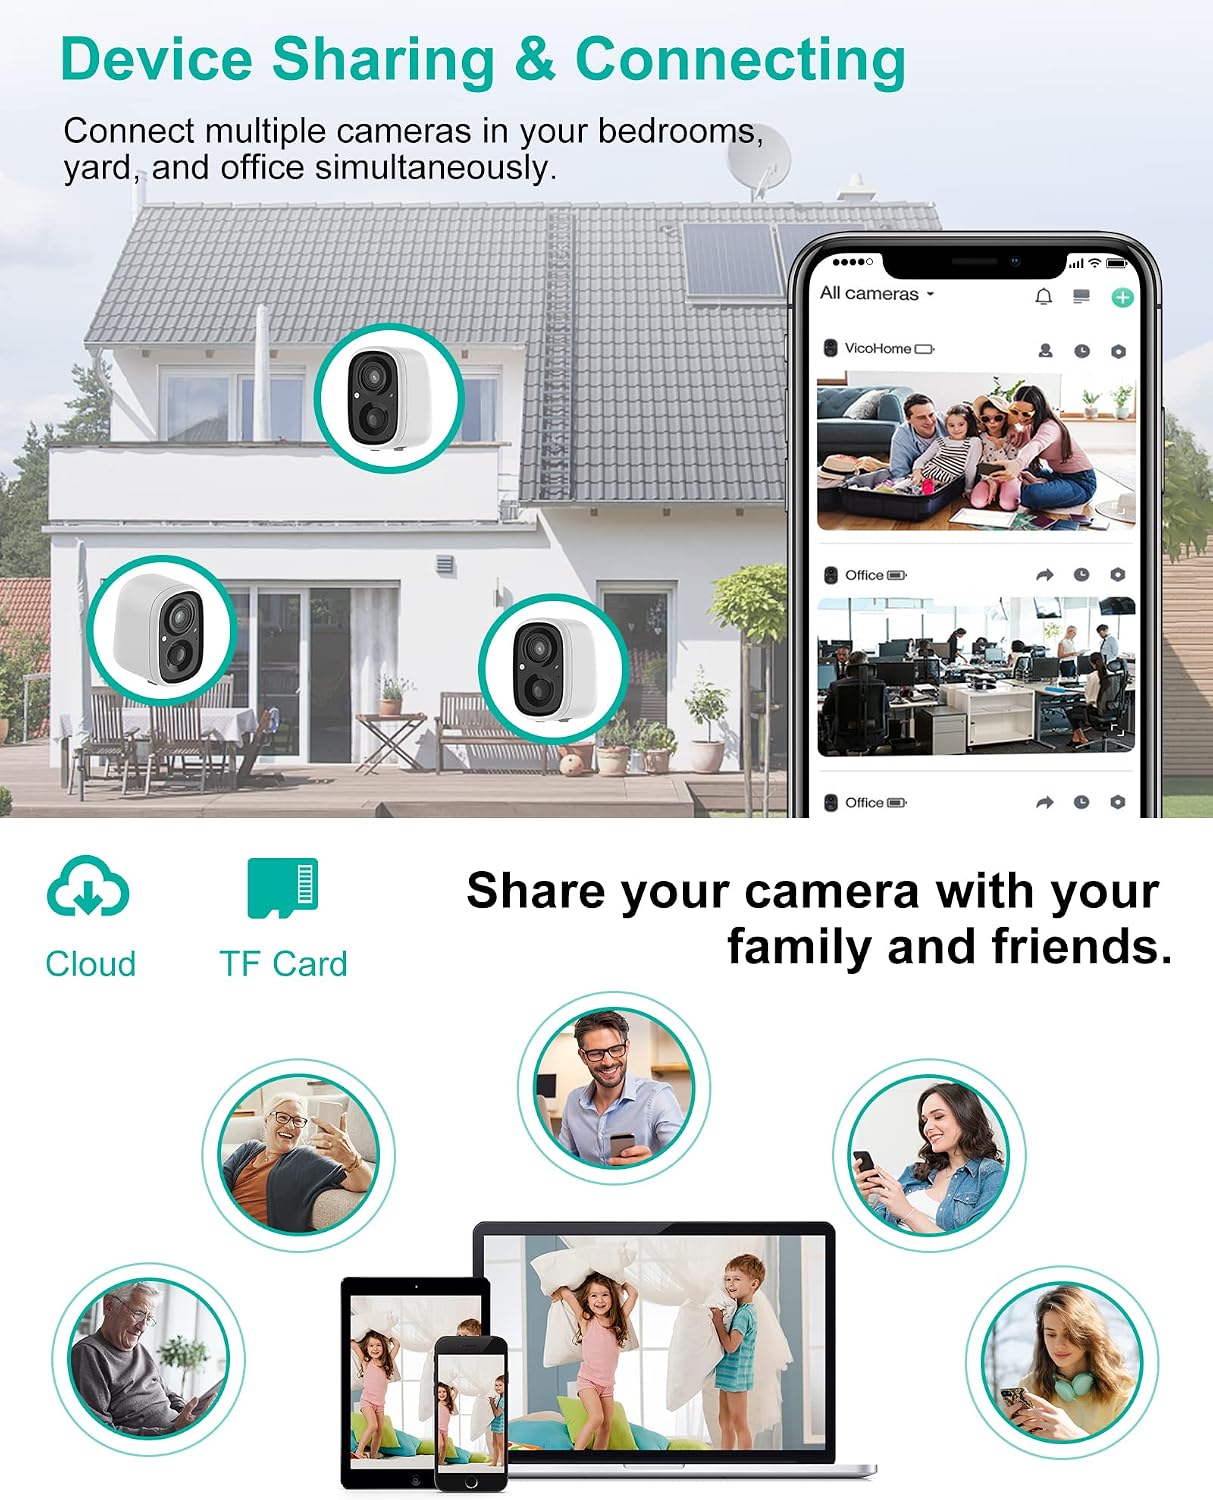
Image: Diagram illustrating how multiple cameras can be connected and shared among various family members and devices, including smartphones, tablets, and laptops.
5. Maintenance
5.1 Battery Charging
When the battery level is low, the app will notify you. Recharge the camera using the provided USB cable. For continuous power, the camera is compatible with external solar panels (not included).

Image: Graph showing low power consumption and 180-day standby, along with illustrations of the two charging methods: USB charging and optional solar charging.
5.2 Storage Management
The camera supports local storage via a Micro SD card (up to 128GB, not included) and cloud storage (subscription may be required). Manage your recordings and storage preferences through the app.
5.3 Cleaning
Periodically clean the camera lens and body with a soft, dry cloth to ensure optimal image clarity and performance. Do not use harsh chemicals or abrasive cleaners.
6. Troubleshooting
6.1 Common Issues and Solutions
| Problem | Possible Cause | Solution |
|---|---|---|
| Camera won't connect to Wi-Fi | Incorrect Wi-Fi password; 5GHz network selected; camera too far from router. | Ensure correct 2.4GHz Wi-Fi password. Move camera closer to router. Restart router and camera. |
| Poor video quality | Dirty lens; weak Wi-Fi signal; insufficient lighting. | Clean the lens. Improve Wi-Fi signal strength. Ensure adequate lighting for optimal night vision. |
| Battery drains quickly | Frequent motion detection; live view accessed often; extreme temperatures. | Reduce motion sensitivity; limit live view access; consider solar panel for continuous charging. |
| No motion detection alerts | Notifications disabled; incorrect activity zone settings; low sensitivity. | Enable app notifications. Adjust activity zones and sensitivity. |
7. Specifications
| Feature | Specification |
|---|---|
| Video Capture Resolution | 1080p |
| Connectivity Protocol | Wi-Fi (2.4GHz only) |
| Battery Power | 5200 mAh |
| Night Vision Range | 50 Feet |
| International Protection Rating | IP65 |
| Storage Options | Micro SD Card (up to 128GB), Cloud Storage |
| Control Method | Remote (via Smartphone App) |
| Item Weight | 15.2 ounces |
| Dimensions | 5.59 x 5 x 3.19 inches |
8. Warranty and Support
KINGDANS products are manufactured with high-quality standards. For warranty information or technical support, please refer to the contact details provided on the product packaging or visit the official KINGDANS website. Our customer service team is available to assist you with any questions or issues you may encounter.
For further assistance, please contact KINGDANS customer support through the contact information available on the official KINGDANS brand store page on Amazon or the manufacturer's website.
Ask a question about this manual
Ask about setup, troubleshooting, compatibility, parts, safety, or missing instructions. Manuals+ will review the question and use this page’s manual context to help answer it.