1. Introduction
The Behringer BC1200 Professional 7-piece Drum Microphone Set is designed to provide high-quality audio capture for drum kits in both studio and live environments. This set includes a specialized kick drum microphone, four microphones for snare and tom drums, and two overhead microphones for cymbals, along with all necessary accessories for a complete setup. This manual will guide you through the proper use and care of your new microphone set to ensure optimal performance and longevity.
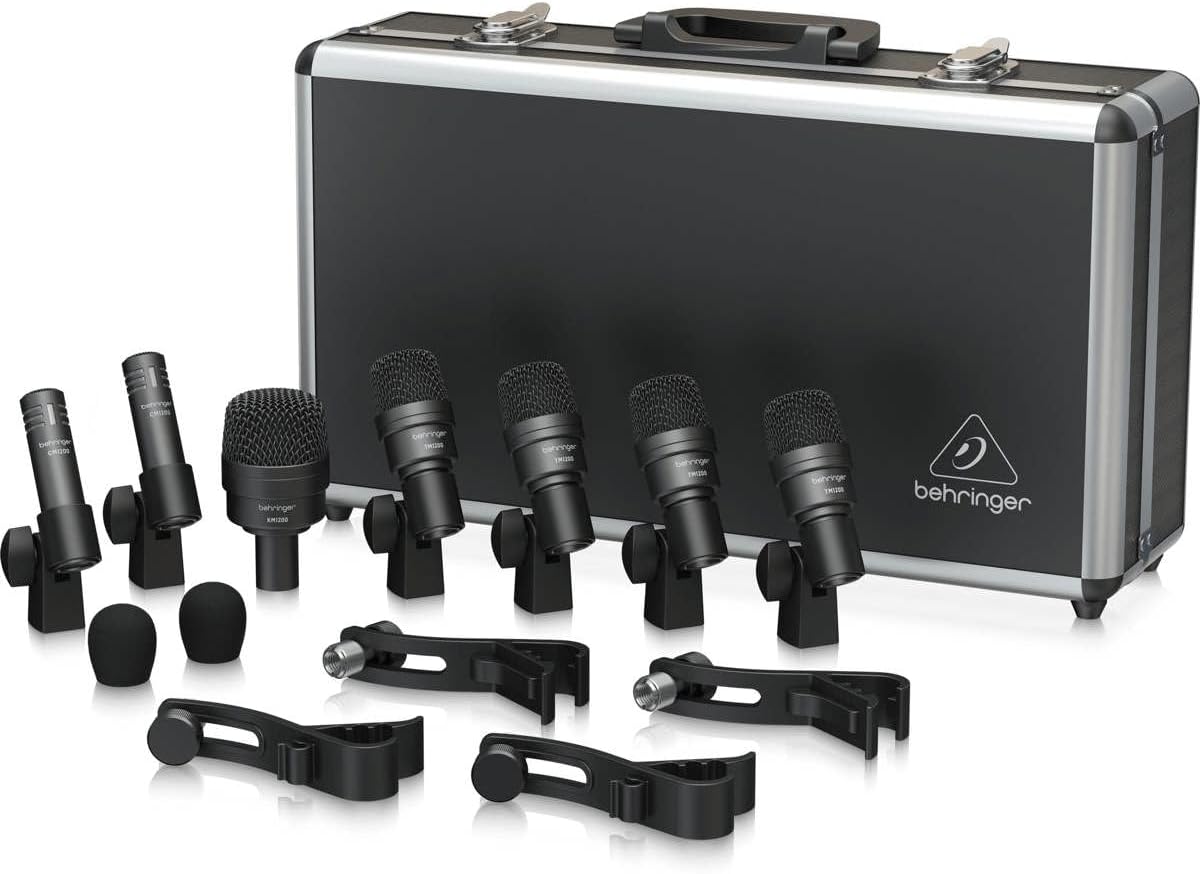
2. Package Contents
Please verify that all items listed below are present in your package:
- 1 x KM1200 Kick Drum Microphone
- 4 x TM1200 Snare/Tom Microphones
- 2 x CM1200 Overhead Microphones
- 4 x Drum Rim Microphone Clips
- 2 x Windscreen Foams for CM1200
- 1 x Durable Carrying Case


3. Setup
Follow these steps to set up your Behringer BC1200 microphone set:
- KM1200 Kick Drum Microphone:
- Position the KM1200 microphone on a sturdy microphone stand (not included) inside or just outside the kick drum's resonant head.
- Aim the microphone towards the beater for a punchier sound, or towards the center of the drum for more resonance.
- Connect an XLR cable from the KM1200 to an available input on your audio interface or mixer.
- TM1200 Snare/Tom Microphones:
- Attach the provided drum rim clips to the rim of your snare drum and tom drums.
- Securely mount each TM1200 microphone into its respective clip.
- Position the microphone approximately 1-2 inches above the drum head, angled towards the center.
- Connect XLR cables from each TM1200 to separate inputs on your audio interface or mixer.
- CM1200 Overhead Microphones:
- Mount the CM1200 microphones onto two separate microphone stands (not included).
- Place the windscreen foams onto the CM1200 microphones to reduce plosives and wind noise.
- Position these microphones above the drum kit, typically one over the hi-hat/snare side and one over the floor tom/ride cymbal side, to capture the overall sound of the cymbals and the kit's ambience.
- Ensure they are equidistant from the snare drum for phase coherence.
- Connect XLR cables from each CM1200 to separate inputs on your audio interface or mixer.
- Cable Management:
- Route all XLR cables neatly to avoid tripping hazards and to maintain a clean setup.
- Secure cables with cable ties if necessary.
4. Operating Instructions
To achieve the best sound quality from your BC1200 microphone set, consider the following operational guidelines:
- Gain Staging: Adjust the gain on your audio interface or mixer for each microphone individually. Start with the gain low and gradually increase it until you reach a healthy signal level without clipping (distortion). The KM1200 for the kick drum may require less gain due to its high output.
- Microphone Placement: Experiment with small adjustments to microphone positions. Even an inch can significantly alter the sound. Listen carefully to the nuances captured by each microphone.
- Phase Alignment: When using multiple microphones on a drum kit, phase issues can occur, leading to a thin or hollow sound. Ensure overheads are equidistant from the snare. For close mics, if phase issues are detected, try reversing the phase on your mixer or audio interface for the problematic channel.
- Isolation: The TM1200 and KM1200 microphones are designed to minimize bleed from other drums. Proper placement will enhance this isolation.
- Monitoring: Use high-quality headphones or studio monitors to accurately assess the sound being captured.
5. Maintenance
Proper maintenance will extend the life and performance of your microphones:
- Cleaning: Use a soft, dry cloth to wipe down the microphone bodies after each use. Avoid using harsh chemicals or abrasive materials. For the mesh grilles, a soft brush can be used to gently remove dust or debris.
- Storage: Always store the microphones in their provided durable carrying case when not in use. This protects them from dust, moisture, and physical damage. Ensure the foam inserts are properly aligned to secure each microphone.
- Handling: Handle microphones with care. Avoid dropping them or exposing them to extreme temperatures or humidity. Do not attempt to disassemble the microphones, as this will void the warranty.
- Cable Care: Store XLR cables neatly coiled to prevent kinks and damage to the internal wiring.
6. Troubleshooting
If you encounter issues with your microphone set, refer to the following common problems and solutions:
| Problem | Possible Cause | Solution |
|---|---|---|
| No sound from microphone | Cable not connected, faulty cable, gain too low, incorrect input selected on mixer/interface. | Check all cable connections. Try a different XLR cable. Increase gain. Ensure correct input is selected and active. |
| Distorted sound | Gain too high (clipping), microphone too close to sound source, faulty cable. | Reduce gain. Increase distance between microphone and drum. Try a different XLR cable. |
| Hum or buzzing noise | Ground loop, faulty cable, electromagnetic interference. | Ensure all equipment is properly grounded. Try a different XLR cable. Move cables away from power sources. |
| Weak or thin sound | Incorrect microphone placement, phase issues (for multiple mics). | Adjust microphone position. Check phase alignment on your mixer/interface. |
7. Specifications
Key technical specifications for the Behringer BC1200 Professional 7-piece Drum Microphone Set:
| Feature | Detail |
|---|---|
| Microphone Form Factor | Drum |
| Audio Sensitivity | 54 dB |
| Polar Pattern | Unidirectional |
| Connectivity Technology | XLR |
| Connector Type | XLR |
| Item Weight | 5.44 pounds |
| Product Dimensions | 18 x 13.9 x 5.2 inches |
| Recommended Uses | Studio Recording |
| Compatible Devices | Personal Computer, Laptop, Audio Interface |
8. Warranty and Support
Behringer products are manufactured to the highest quality standards. For detailed warranty information and support, please refer to the official Behringer website or contact their customer service. You can also visit the Behringer Store on Amazon for additional product information and resources.


