
1. Introduction
Thank you for purchasing the IKIFLY Queen Size LED Bed Frame. This manual provides detailed instructions for the safe assembly, operation, and maintenance of your new bed frame. Please read all instructions carefully before beginning assembly and retain this manual for future reference.
Important Safety Information:
- Keep all small parts and packaging materials away from children.
- Ensure all connections are secure before use. Periodically check and re-tighten fasteners.
- Do not stand on the bed frame.
- Maximum weight capacity: 550 lbs. Do not exceed this limit.
- Use only the provided power adapter for the LED lights.
2. Package Contents
Verify that all components are present before assembly. If any parts are missing or damaged, please contact customer support.

Image: Necessary Product Accessories including wireless remote, RF controller, and power adapter.
- Headboard with integrated LED strip
- Side Rails (Left and Right)
- Footboard
- Center Support Bar
- Wooden Slats
- Support Legs
- Hardware Pack (screws, bolts, washers, Allen wrench)
- LED Remote Controller
- RF Controller for LED lights
- Power Adapter for LED lights

Image: All components of the bed frame laid out for assembly.
3. Setup and Assembly
Assembly is designed to be straightforward. All necessary tools are included. It is recommended to assemble the bed frame with two people.
- Unpack Components: Carefully remove all parts from the packaging. Lay them out on a clean, soft surface to prevent scratches. Identify each part using the provided labels.
- Attach Side Rails to Headboard: Connect the side rails to the headboard using the designated bolts and washers. Do not fully tighten screws until all parts are aligned.
- Attach Side Rails to Footboard: Connect the other end of the side rails to the footboard. Ensure proper alignment before partially tightening.
- Install Center Support Bar: Secure the metal center support bar to the designated brackets on the headboard and footboard. This provides crucial stability. Tip: Some users find it easier to install the center support bar before fully attaching the second side rail.
- Attach Support Legs: Screw the support legs into the pre-drilled holes on the frame and center support bar.
- Place Wooden Slats: Lay the wooden slats across the bed frame. The slats are designed to support your mattress directly, eliminating the need for a box spring. Secure them using the provided fasteners or Velcro strips if applicable. Ensure even distribution.
- Final Tightening: Once all components are in place and aligned, fully tighten all screws and bolts. Ensure all connections are firm and secure.

Image: Close-up view of bed frame construction details, including leg attachment and slat support.

Image: Assembled bed frame structure with wooden slats and center support bar.
4. Operating Instructions (LED Lights)
The integrated LED lights in the headboard offer customizable ambiance for your bedroom.
- Connect Power: Locate the LED light strip cable from the headboard. Connect it to the RF controller, then connect the RF controller to the power adapter. Plug the power adapter into a standard electrical outlet.
- Using the Remote Control: The bed frame comes with a wireless remote control to manage the LED lights.
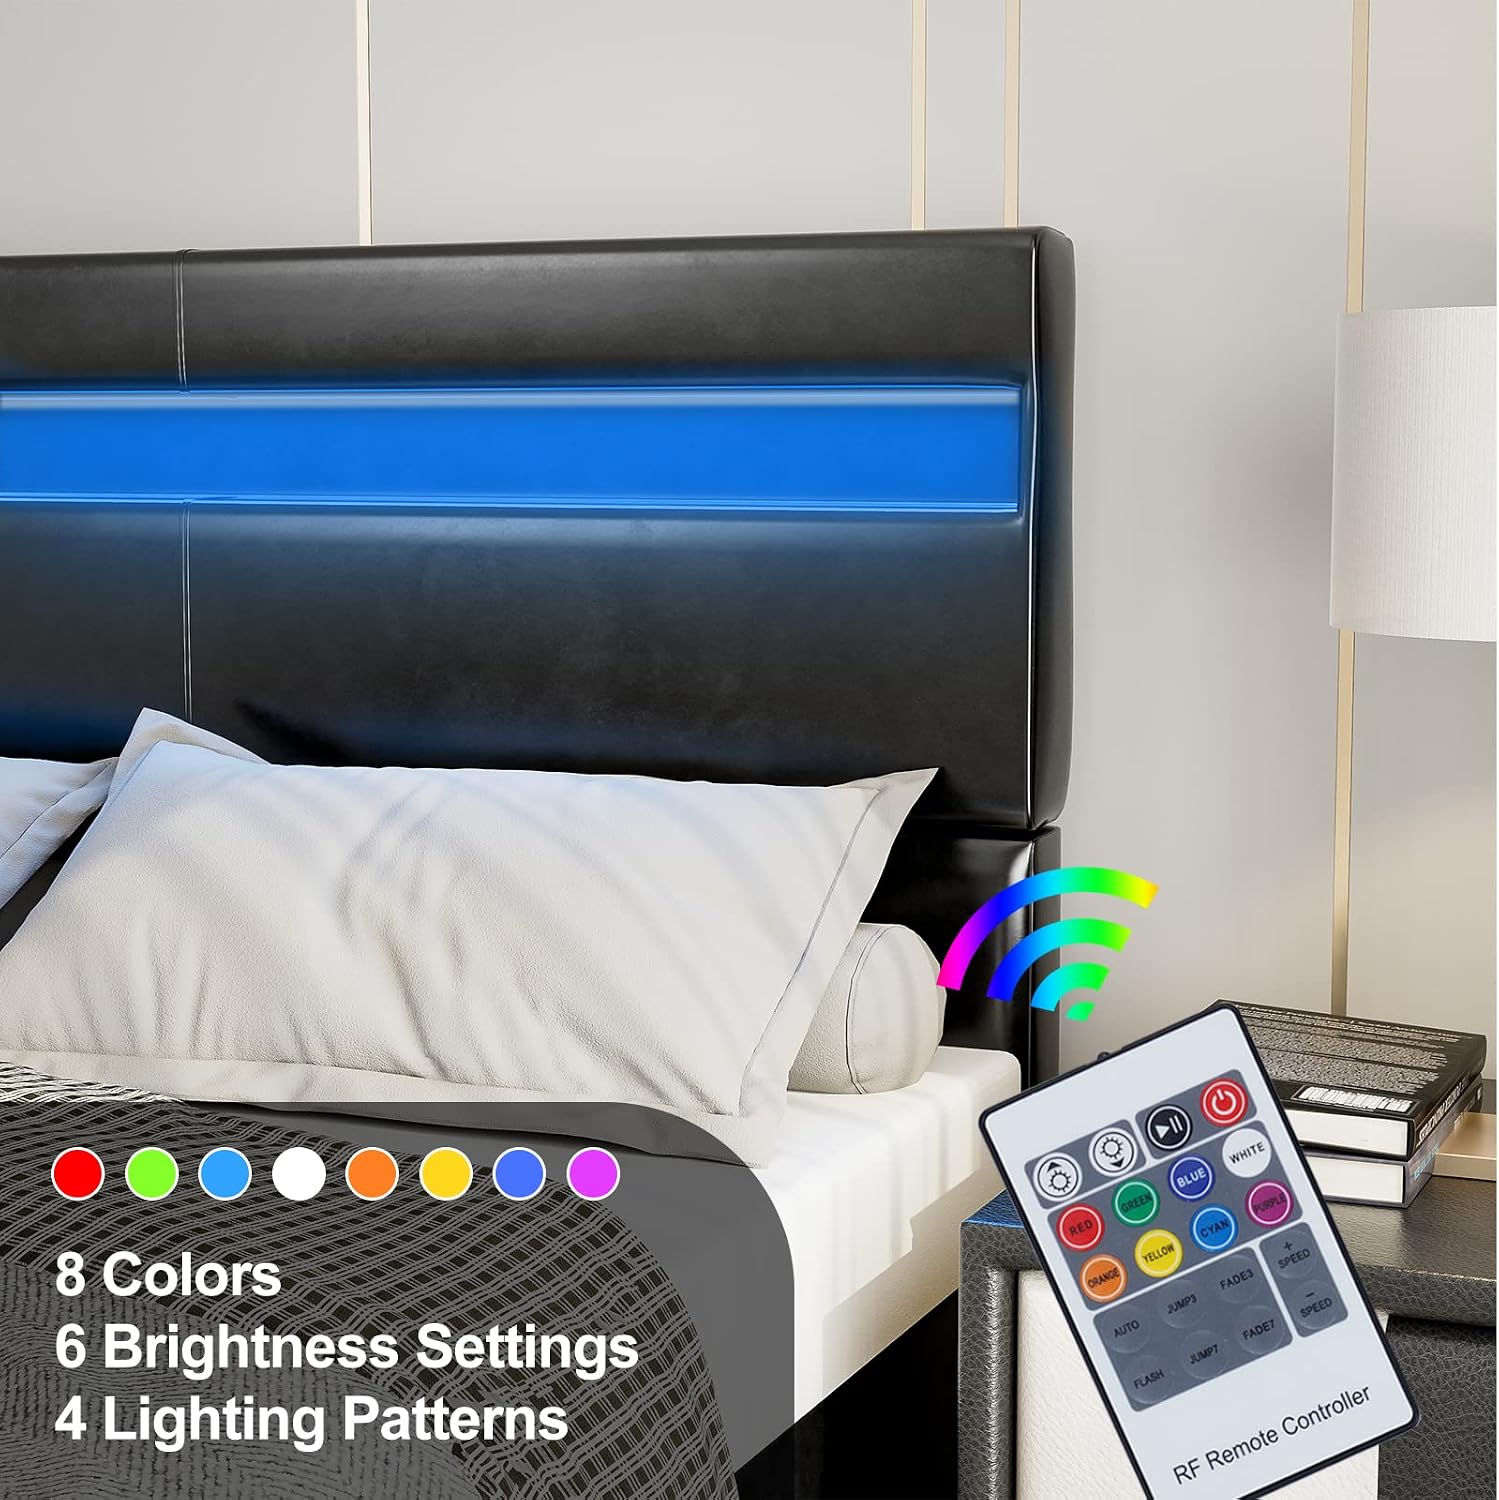
Image: LED remote control showing various color and mode buttons.
- Power On/Off: Press the power button to turn the lights on or off.
- Color Selection: Choose from 8 available colors (Red, Green, Blue, White, Orange, Yellow, Cyan, Purple) by pressing the corresponding color button.
- Brightness Adjustment: Use the brightness up/down buttons to adjust the light intensity across 6 settings.
- Lighting Patterns: Select from 4 dynamic lighting patterns (Flash, Strobe, Fade, Smooth) to create different effects.
- Speed Adjustment: For dynamic patterns, use the speed up/down buttons to control the transition speed.
Video: Demonstration of the IKIFLY Modern LED Bed Frame's lighting features and color changes.
5. Maintenance
Proper care will extend the life and appearance of your bed frame.
- Cleaning the Faux Leather: Wipe the upholstered surfaces with a soft, damp cloth. For tougher spots, use a mild soap solution and immediately wipe dry. Avoid harsh chemicals or abrasive cleaners.
- Cleaning the LED Strip: Gently wipe the LED strip with a dry, soft cloth. Do not use liquids directly on the LED components.
- Hardware Check: Periodically check all bolts and screws to ensure they remain tight. Re-tighten as necessary to maintain structural integrity and prevent squeaking.
- Slats Inspection: Inspect wooden slats for any signs of damage or wear. Replace any broken slats to ensure proper mattress support.
6. Troubleshooting
Refer to this section for common issues and their solutions.
| Problem | Possible Cause | Solution |
|---|---|---|
| LED lights do not turn on. | Power adapter not plugged in; loose connection; remote battery dead. | Ensure power adapter is securely plugged into outlet and RF controller. Check all cable connections. Replace remote control battery. |
| LED lights flicker or change colors unexpectedly. | Loose connection; interference. | Check all cable connections to the LED strip, RF controller, and power adapter. Ensure no other electronic devices are causing interference. |
| Bed frame is unstable or squeaks. | Loose bolts/screws; uneven assembly; damaged slats. | Re-tighten all assembly hardware. Ensure the bed frame is on a level surface. Inspect wooden slats for damage and replace if necessary. Ensure the center support bar is correctly installed and secured. |
| Remote control not responding. | Remote battery dead; RF controller not connected. | Replace the remote control battery. Ensure the RF controller is properly connected to the LED strip and power source. |
7. Specifications
| Feature | Detail |
|---|---|
| Model | Queen Size LED Bed Frame |
| Dimensions (L x W x H) | 83.3" x 62.6" x 46.0" (211.5 cm x 158 cm x 117 cm) |
| Material | Faux Leather, Wood Slats, Metal Frame |
| Color | Black |
| Maximum Weight Capacity | 550 lbs |
| LED Light Features | 8 Colors, 6 Brightness Settings, 4 Lighting Patterns |
| Assembly Required | Yes |
| Box Spring Required | No |

Image: Diagram showing the dimensions and capacity of the Queen Size LED Bed Frame.
8. Warranty and Support
For warranty information or technical support, please refer to the contact details provided at the point of purchase or visit the official IKIFLY website. Please have your product model and purchase date available when contacting support.