1. Introduction
Thank you for choosing an Indesit appliance. This user manual provides essential information for the safe and efficient operation, installation, and maintenance of your Indesit BWE91485XWSSPTN washing machine. Please read these instructions carefully before using your appliance and keep them for future reference.
This manual covers important safety guidelines, detailed operating instructions, maintenance tips, and troubleshooting advice to ensure optimal performance and longevity of your washing machine.
2. Safety Information
Your safety and the safety of others are paramount. This manual contains important safety messages that must be read and observed at all times.
- Always disconnect the appliance from the power supply before performing any cleaning or maintenance.
- This appliance is not intended for use by persons (including children) with reduced physical, sensory or mental capabilities, or lack of experience and knowledge, unless they have been given supervision or instruction concerning use of the appliance by a person responsible for their safety.
- Children should be supervised to ensure that they do not play with the appliance.
- Do not use extension cords or multiple adapters.
- Ensure the washing machine is properly grounded.
- Do not open the detergent dispenser drawer while the machine is operating.
- Never force the porthole door open.
- In case of malfunction, do not attempt to repair the appliance yourself. Contact qualified technical assistance.
3. Product Overview
Familiarize yourself with the main components of your Indesit BWE91485XWSSPTN washing machine.
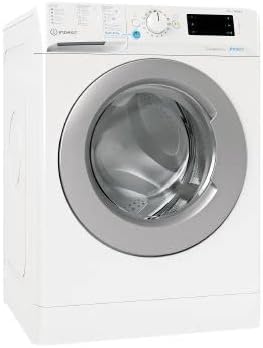
Figure 1: Front view of the Indesit BWE91485XWSSPTN washing machine. This image displays the main body of the washing machine, including the front-loading door, the control panel with a program selector knob and digital display, and the detergent dispenser drawer.
Main Components:
- A. Control Panel: Features the program selector knob, function buttons, and a digital display for cycle information.
- B. Detergent Dispenser Drawer: For adding detergent and fabric softener.
- C. Porthole Door: Front-loading door for loading and unloading laundry.
- D. Drum: Stainless steel interior where laundry is washed.
- E. Filter/Drain Pump Access: Located at the bottom front, for maintenance.
4. Setup and Installation
4.1 Unpacking and Leveling
- Remove all packaging materials.
- Remove the transport bolts located at the rear of the machine. These bolts secure the drum during transit and must be removed before use to prevent damage.
- Place the machine on a flat, stable floor.
- Adjust the adjustable feet to ensure the machine is perfectly level. Use a spirit level to verify. Proper leveling reduces vibration and noise during operation.
4.2 Water Connection
- Connect the water inlet hose to a cold water tap with a 3/4" thread. Ensure the connection is tight to prevent leaks.
- Position the drain hose into a standpipe or over the edge of a sink, ensuring it is securely fixed to prevent displacement during draining. The height of the drain hose should be between 65 cm and 100 cm from the floor.
4.3 Electrical Connection
- Plug the power cord into a properly grounded electrical outlet.
- Ensure the voltage and frequency match the specifications on the appliance rating plate.
4.4 First Wash Cycle
Before washing laundry, run an empty wash cycle to clean the drum and remove any manufacturing residues.
- Add a small amount of detergent to the main wash compartment of the dispenser drawer.
- Select a short program (e.g., "Rinse & Spin" or a quick wash program) without any laundry.
- Start the cycle.
5. Operating Instructions
5.1 Preparing Laundry
- Sort laundry by fabric type, color, and degree of soiling.
- Check garment care labels for washing instructions.
- Empty pockets and close zippers and buttons.
5.2 Loading Laundry
- Open the porthole door.
- Load laundry loosely into the drum, ensuring not to overload the machine. Overloading can lead to poor washing results and increased wear on the appliance.
- Close the porthole door firmly until it clicks shut.
5.3 Adding Detergent and Additives
Open the detergent dispenser drawer and add detergent and any additives to the appropriate compartments:
- Compartment I: Pre-wash detergent (if applicable for selected program).
- Compartment II: Main wash detergent.
- Compartment III (often marked with a flower symbol): Fabric softener. Do not exceed the 'MAX' level.
Refer to the detergent manufacturer's instructions for recommended dosages based on water hardness and laundry load.
5.4 Selecting a Program
- Turn the program selector knob to the desired wash program (e.g., Cotton, Synthetics, Delicates, Eco, Quick Wash).
- The display will show the default temperature and spin speed for the selected program.
- If available, use the corresponding buttons to adjust the temperature and spin speed according to your laundry needs.
- Select any additional functions (e.g., Extra Rinse, Easy Iron) if desired.
5.5 Starting and Pausing a Cycle
- Press the "Start/Pause" button to begin the wash cycle. The indicator light will illuminate.
- To pause a running cycle, press the "Start/Pause" button again. The indicator light will flash.
- To resume, press the "Start/Pause" button once more.
5.6 End of Cycle
At the end of the cycle, the machine will stop, and the "End" indicator will light up. The porthole door will unlock automatically or after a short delay. Unload the laundry and leave the door slightly ajar to allow the drum to dry and prevent odors.
6. Maintenance and Care
Regular maintenance ensures the efficient operation and extends the lifespan of your washing machine.
6.1 Cleaning the Detergent Dispenser Drawer
- Pull out the drawer completely.
- Remove any removable inserts and rinse all parts under running water.
- Clean the drawer housing with a brush.
- Reinsert the components and push the drawer back into place.
6.2 Cleaning the Drain Pump Filter
This filter collects lint and small objects. Clean it regularly (e.g., every 2-3 months).
- Ensure the machine is unplugged.
- Open the cover at the bottom front of the machine.
- Place a shallow container beneath the filter to collect residual water.
- Slowly unscrew the filter counter-clockwise until water starts to drain.
- Once all water has drained, fully unscrew and remove the filter.
- Clean the filter under running water and remove any debris.
- Screw the filter back in clockwise until it is tight. Close the cover.
6.3 Cleaning the Drum and Exterior
- Run a "Drum Clean" program (if available) or a hot wash cycle with a washing machine cleaner or a cup of white vinegar periodically to prevent odors and limescale buildup.
- Wipe the exterior of the machine with a soft, damp cloth. Do not use abrasive cleaners or solvents.
- Clean the rubber seal around the porthole door regularly to remove lint and residue.
6.4 Winter Care
If the machine is to be left in an unheated room for an extended period, drain all water from the hoses and pump to prevent freezing damage.
7. Troubleshooting
Before contacting customer service, refer to this section for solutions to common issues.
| Problem | Possible Cause | Solution |
|---|---|---|
| Machine does not start | Power cord not plugged in; door not closed properly; program not selected; "Start/Pause" button not pressed. | Check power connection; ensure door is latched; select a program; press "Start/Pause". |
| Water not filling | Water tap closed; inlet hose kinked or blocked; water pressure too low. | Open water tap; straighten hose; check water supply. |
| Water not draining | Drain hose kinked or blocked; drain pump filter clogged. | Straighten hose; clean drain pump filter (refer to Section 6.2). |
| Excessive vibration/noise | Machine not level; transport bolts not removed; laundry unevenly distributed. | Adjust feet to level machine; ensure transport bolts are removed; redistribute laundry. |
| Poor washing results | Overloading; insufficient detergent; incorrect program selection; water temperature too low. | Reduce load; use correct detergent amount; select appropriate program; check temperature settings. |
If the problem persists after checking these points, please contact Indesit customer service.
8. Specifications
| Brand | Indesit |
| Model Name | BWE91485XWSSPTN |
| Manufacturer Model Number | 8050147637937 |
| Dimensions (H x W x D) | 85 x 60 x 60 cm |
| Product Weight | 50 kg |
| Material | Stainless Steel (drum) |
| Loading Type | Front Load |
| Maximum Spin Speed | 1000 RPM |
| Manufacturer | INDESIT |
9. Warranty and Support
Your Indesit washing machine comes with a manufacturer's warranty. Please refer to the warranty card provided with your appliance for specific terms and conditions, including warranty period and coverage details.
For technical assistance, spare parts, or further information, please contact Indesit customer service. You can usually find contact details on the Indesit official website or in the documentation supplied with your appliance. When contacting support, please have your appliance's model name (BWE91485XWSSPTN) and serial number ready.
For more information, you may visit the official Indesit store: Indesit Store on Amazon.es.


