
1. Introduction
The Ecowitt HP2553 is a comprehensive Wi-Fi weather station designed to provide accurate and real-time weather information for your home and garden. It features a large color display console, an advanced ultrasonic anemometer for wind measurements, and a self-emptying rain gauge. This manual will guide you through the setup, operation, maintenance, and troubleshooting of your weather station, enabling you to monitor various environmental parameters and share data online.

Image: The Ecowitt HP2553 Wi-Fi Weather Station, showing the indoor display console and the outdoor multi-sensor unit.
2. Package Contents
Please verify that all components are present and in good condition upon unpacking:
- 1 x Indoor Display Console
- 1 x Solar-powered Ultrasonic Anemometer (integrated with light, UV, air temperature, and humidity sensor)
- 1 x Self-Emptying Rain Gauge
- 1 x Set of U-bolts for pole mounting (2 pieces)
- 1 x Set of 4 threaded nuts for U-bolts (M6 size)
- 1 x Mounting arm for ultrasonic anemometer
- 1 x Mounting strap for ultrasonic anemometer
- 1 x User Manual (this document)
- 1 x 3m Extension Cable
- 1 x 5V DC Power Adapter (for console)
Note: 2 x AA 1.5V Lithium batteries for the outdoor sensor are not included and must be purchased separately.
3. Product Overview
The Ecowitt HP2553 system consists of an indoor display console and an outdoor multi-sensor array. The outdoor sensor measures various parameters and transmits data wirelessly to the indoor console.
3.1 Outdoor Multi-Sensor Unit
This unit combines several sensors into one compact, solar-powered device:
- Ultrasonic Anemometer: Measures wind speed, wind direction, and wind gusts without moving parts.
- Light Sensor: Detects ambient light and UV index, and solar radiation.
- Temperature & Humidity Sensor: Measures outdoor air temperature and relative humidity.

Image: Detailed view of the 6-in-1 outdoor sensor, highlighting its integrated components.
3.2 Self-Emptying Rain Gauge
The wireless rain collector is designed to accurately measure rainfall and automatically empties itself, ensuring continuous operation without manual intervention.

Image: Breakdown of the self-emptying rain gauge, illustrating its parts and mounting hardware.
3.3 Indoor Display Console
The console features a large, high-resolution 7-inch TFT color display. It presents all collected weather data in an easy-to-read format and allows for Wi-Fi configuration and data management. Two background themes (dark/light) are selectable.

Image: The indoor display console showing a comprehensive overview of current weather conditions.
4. Setup
4.1 Outdoor Sensor Assembly and Mounting
- Assemble the Sensors: Attach the ultrasonic anemometer and rain gauge components according to the diagrams in the included quick start guide.
- Install Backup Batteries: Open the battery compartment on the outdoor sensor unit and insert 2 x AA 1.5V Lithium batteries (not included). These batteries provide backup power when solar power is insufficient.
- Choose a Mounting Location: Select an outdoor location that is open and unobstructed to ensure accurate readings for wind and rain. Avoid placing the sensor near large buildings, trees, or other structures that could interfere with wind flow or block rainfall.
- Mount the Sensor: Use the provided U-bolts, mounting arm, and strap to securely attach the sensor unit to a pole or suitable structure. Ensure the unit is level using a spirit level for accurate rain measurements.

Image: Assembly steps for the outdoor multi-sensor unit.
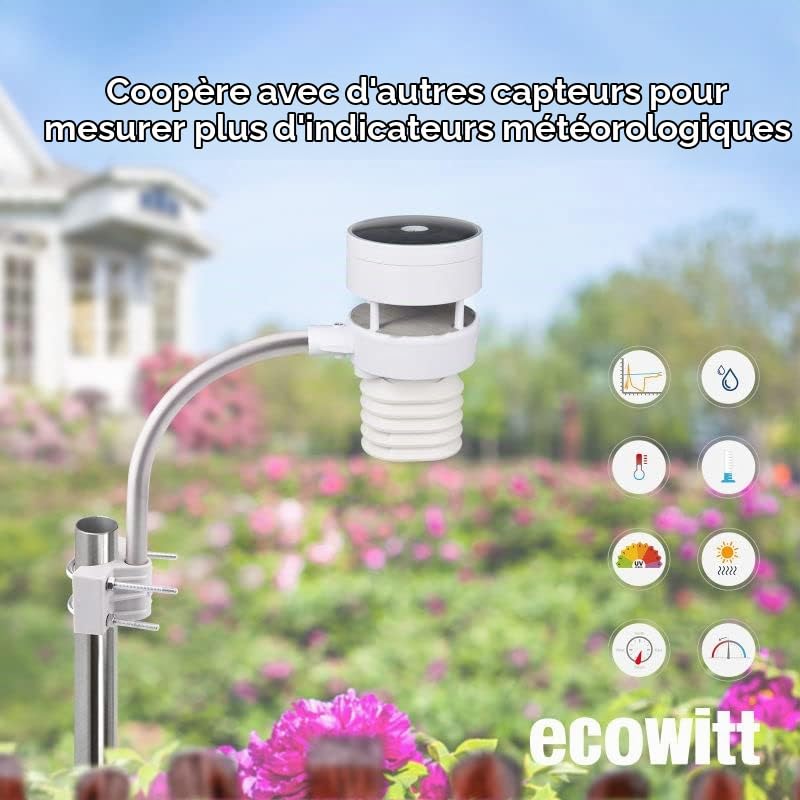
Image: The outdoor sensor unit correctly mounted on a pole.
4.2 Indoor Console Power-Up
- Connect the 5V DC power adapter to the indoor display console and plug it into a power outlet.
- The console will power on and begin searching for the outdoor sensor. Ensure the outdoor sensor is powered on and within range (up to 150m in open field).
4.3 Wi-Fi Configuration
To enable online data sharing and remote monitoring, connect your console to your Wi-Fi network:
- On the console, navigate to the Wi-Fi setup menu (refer to the console's on-screen instructions or the quick start guide).
- Use the Ecowitt app (available for iOS and Android) to facilitate the Wi-Fi connection process. The app will guide you through connecting the console to your 2.4GHz Wi-Fi network.
- Once connected, the console will display a Wi-Fi icon, indicating a successful connection.
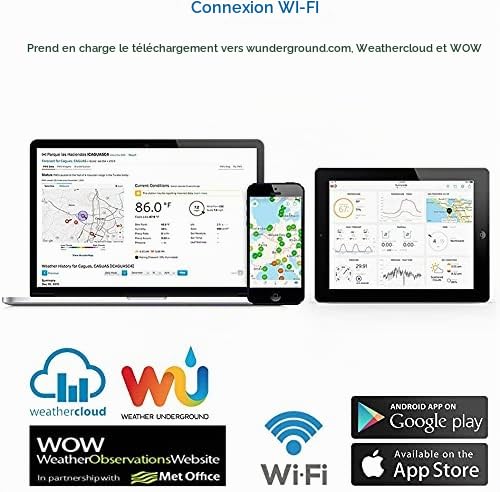
Image: Wi-Fi connection and data sharing capabilities.
5. Operation
5.1 Display Console Interface
The console provides a comprehensive display of current and historical weather data:
- Indoor/Outdoor Temperature & Humidity: Current readings and trends.
- Wind Data: Current wind speed, average wind direction, and maximum wind gust.
- Rainfall: Daily, hourly, weekly, monthly, and yearly precipitation totals.
- Barometric Pressure: Absolute and relative pressure readings with historical graphs.
- UV Index & Solar Radiation: Current levels.
- Calculated Values: Dew point, wind chill, heat index.
- Astronomical Data: Moon phase, sunrise/sunset times.
- Weather Forecast: Icon-based forecast for upcoming conditions.
- Alarms: Customizable alarms for various weather parameters.
You can view historical sensor records and graphs directly on the console. The console also allows switching between dark and light background themes for optimal viewing.
5.2 Online Data Services
Your Ecowitt HP2553 can upload weather data to several online platforms:
- Ecowitt.net: Ecowitt's free weather server, supporting a wide range of sensors.
- Weather Underground: A popular free weather service for real-time data, graphs, and mobile apps.
- Weathercloud: A real-time social network for weather observers worldwide.
- WOW (Weather Observations Website): In partnership with the Met Office.
- Custom Website: Supports uploading to your own custom website if it uses a compatible protocol.
These services allow you to view your weather data remotely via web browsers or dedicated mobile applications, access historical data, and receive alerts.
5.3 Adding Optional Sensors
The HP2553 console supports integration with various additional Ecowitt wireless sensors (sold separately) to expand your weather monitoring capabilities. These include:
- Up to 8 x WH31 Multi-channel Temperature and Humidity Sensors
- Up to 8 x WH51/WN51 Soil Moisture Sensors
- Up to 4 x WH41/WH43 PM2.5 Air Quality Sensors
- Up to 4 x WH55 Water Leak Sensors
- 1 x WH57 Lightning Sensor
- Up to 8 x WN34 Temperature Sensors
Refer to the individual sensor manuals for pairing instructions. The console provides a sensor ID management function and calibration features for all supported sensors.

Image: Compatible optional sensors that can be paired with the HP2553 console.
6. Maintenance
- Cleaning the Rain Gauge: Periodically check and clean the rain gauge funnel to remove leaves, insects, or debris that could obstruct water flow and affect accuracy.
- Cleaning the Outdoor Sensor: Gently wipe the surfaces of the ultrasonic anemometer and other sensors with a soft, damp cloth to remove dirt or dust. Avoid using abrasive cleaners.
- Battery Replacement: The outdoor sensor uses solar power as its primary source, with 2 x AA lithium batteries as backup. Replace these batteries approximately every 1-2 years, or when the console indicates low battery for the outdoor sensor.
- Firmware Updates: Check the Ecowitt website or app for available firmware updates for your console and gateway. Applying updates can improve performance and add new features.
7. Troubleshooting
- No Outdoor Sensor Data on Console:
- Ensure the outdoor sensor has fresh backup batteries installed.
- Verify the outdoor sensor is powered on (check solar panel exposure).
- Confirm the outdoor sensor is within the wireless transmission range (150m open field) and there are no major obstructions.
- Try power cycling both the outdoor sensor and the indoor console.
- Wi-Fi Connection Failure:
- Ensure your Wi-Fi network is 2.4GHz. The station does not support 5GHz networks.
- Double-check your Wi-Fi password.
- Move the console closer to your Wi-Fi router during setup.
- Restart your router and try connecting again.
- Inaccurate Readings:
- Wind: Ensure the anemometer is mounted in an open area, free from obstructions like buildings or trees.
- Rain: Verify the rain gauge is level and its funnel is clear of debris.
- Temperature/Humidity: Ensure the outdoor sensor is not in direct sunlight for prolonged periods (though it has a radiation shield, extreme conditions can affect readings) and has good airflow.
- Pressure: Calibrate the relative barometric pressure if necessary, using a local weather station's reading as a reference.
- Console Display Issues:
- If the display is blank or frozen, unplug the power adapter, wait a few seconds, and plug it back in.
8. Specifications
| Feature | Specification |
|---|---|
| Model Number | HP2553AE |
| Dimensions (Package) | 31.6 x 25.4 x 18.7 cm; 2.37 kg |
| Power Source (Outdoor Sensor) | Solar-powered (integrated 6.5V/4mA panel), 2 x AA 1.5V Lithium batteries (backup, not included) |
| Power Source (Console) | 5V DC Adapter (included) |
| Connectivity Technology | Wi-Fi (2.4GHz) |
| Wireless Frequency | 868 MHz |
| Transmission Distance | 150m (open field) |
| Sensor Reporting Interval | 4.8 seconds (wind detection varies: 1s if ≥5m/s, 2s if ≥3m/s and <5m/s) |
| Display Type | 7-inch TFT Color Display |
| Temperature Range (Outdoor) | -40 °C to 60 °C |
| Temperature Accuracy | ±1 °C |
| Temperature Resolution | 0.1 °C |
| Humidity Range | 1% to 99% |
| Humidity Accuracy | ±5% |
| Humidity Resolution | 1% |
| Wind Speed Range | 0 to 40 m/s |
| Wind Speed Accuracy | <10m/s: ±0.5m/s; ≥10m/s: ±5% |
| Wind Speed Resolution | 0.1 m/s |
| Wind Direction Range | 0 to 359 ° |
| Wind Direction Accuracy | <10m/s: TBA; ≥10m/s: ±15 ° |
| Wind Direction Resolution | 1 ° |
| Light Range | 0 to 200 Klux |
| Light Accuracy | ±15% |
| Light Resolution | 10 Lux |
| UVI Range | 1 to 15 |
| UVI Accuracy | ±2 |
| UVI Resolution | 1 |
9. Warranty and Support
Ecowitt products are designed for reliability and performance. For warranty information, technical support, or to purchase additional sensors and accessories, please visit the official Ecowitt website or contact their customer service directly. Keep your purchase receipt for warranty claims.


