
MARVO GT-52
MARVO Scorpion GT-52 Multi-Platform Gamepad Controller User Manual
Model: GT-52
Introduction
This manual provides detailed instructions for the setup, operation, and maintenance of your MARVO Scorpion GT-52 Multi-Platform Gamepad Controller. Please read this manual thoroughly before using the product to ensure proper functionality and to maximize your gaming experience.

Figure 1: MARVO Scorpion GT-52 Gamepad Controller - Front View. This image displays the ergonomic design of the controller, highlighting the placement of the dual analog sticks, directional pad, and action buttons, along with the central HOME and TURBO buttons.
Setup Guide
Charging the Controller
The GT-52 controller features a built-in 400mAh rechargeable battery. Before first use, it is recommended to fully charge the controller.
- Connect the supplied USB Type-C cable to the charging port on the top of the controller.
- Connect the other end of the USB Type-C cable to a USB power source (e.g., computer USB port, USB wall adapter).
- The LED indicators on the controller will show charging status. Refer to the LED indicator section for details.
- A full charge typically takes approximately 2-3 hours and provides up to 8 hours of continuous playtime.

Figure 2: USB Type-C Charging Port. This image shows the location of the USB Type-C port on the top edge of the controller, used for both charging and wired connection.
Connecting to Devices
The MARVO GT-52 supports both wireless (Bluetooth 4.0) and wired (USB Type-C) connections.
Wireless Connection (Bluetooth 4.0)
The controller can connect wirelessly to Nintendo Switch and Android devices.
- Ensure the controller is sufficiently charged.
- On the controller, press and hold the HOME button for 3 seconds to enter pairing mode. The LED indicators will flash rapidly.
- On your Nintendo Switch:
- Go to System Settings > Controllers and Sensors > Change Grip/Order.
- The Switch will search for available controllers. Select the GT-52 when it appears.
- Once connected, the corresponding player LED on the controller will light up solid.
- On your Android device:
- Go to Bluetooth Settings and turn Bluetooth ON.
- Scan for new devices. Select "GT-52" or "MARVO GT-52" from the list of available devices.
- Confirm pairing if prompted. Once connected, the LED indicator will light up solid.
Wired Connection (USB Type-C)
The controller can be connected via USB Type-C to PC and Nintendo Switch for a stable, low-latency connection.
- Connect one end of the USB Type-C cable to the controller's port.
- Connect the other end of the USB Type-C cable to a free USB port on your PC or Nintendo Switch dock.
- The controller will automatically be recognized by the system. For PC, drivers may install automatically.
- The LED indicators will show a solid light once connected.
Operating Instructions
Button Layout and Functions
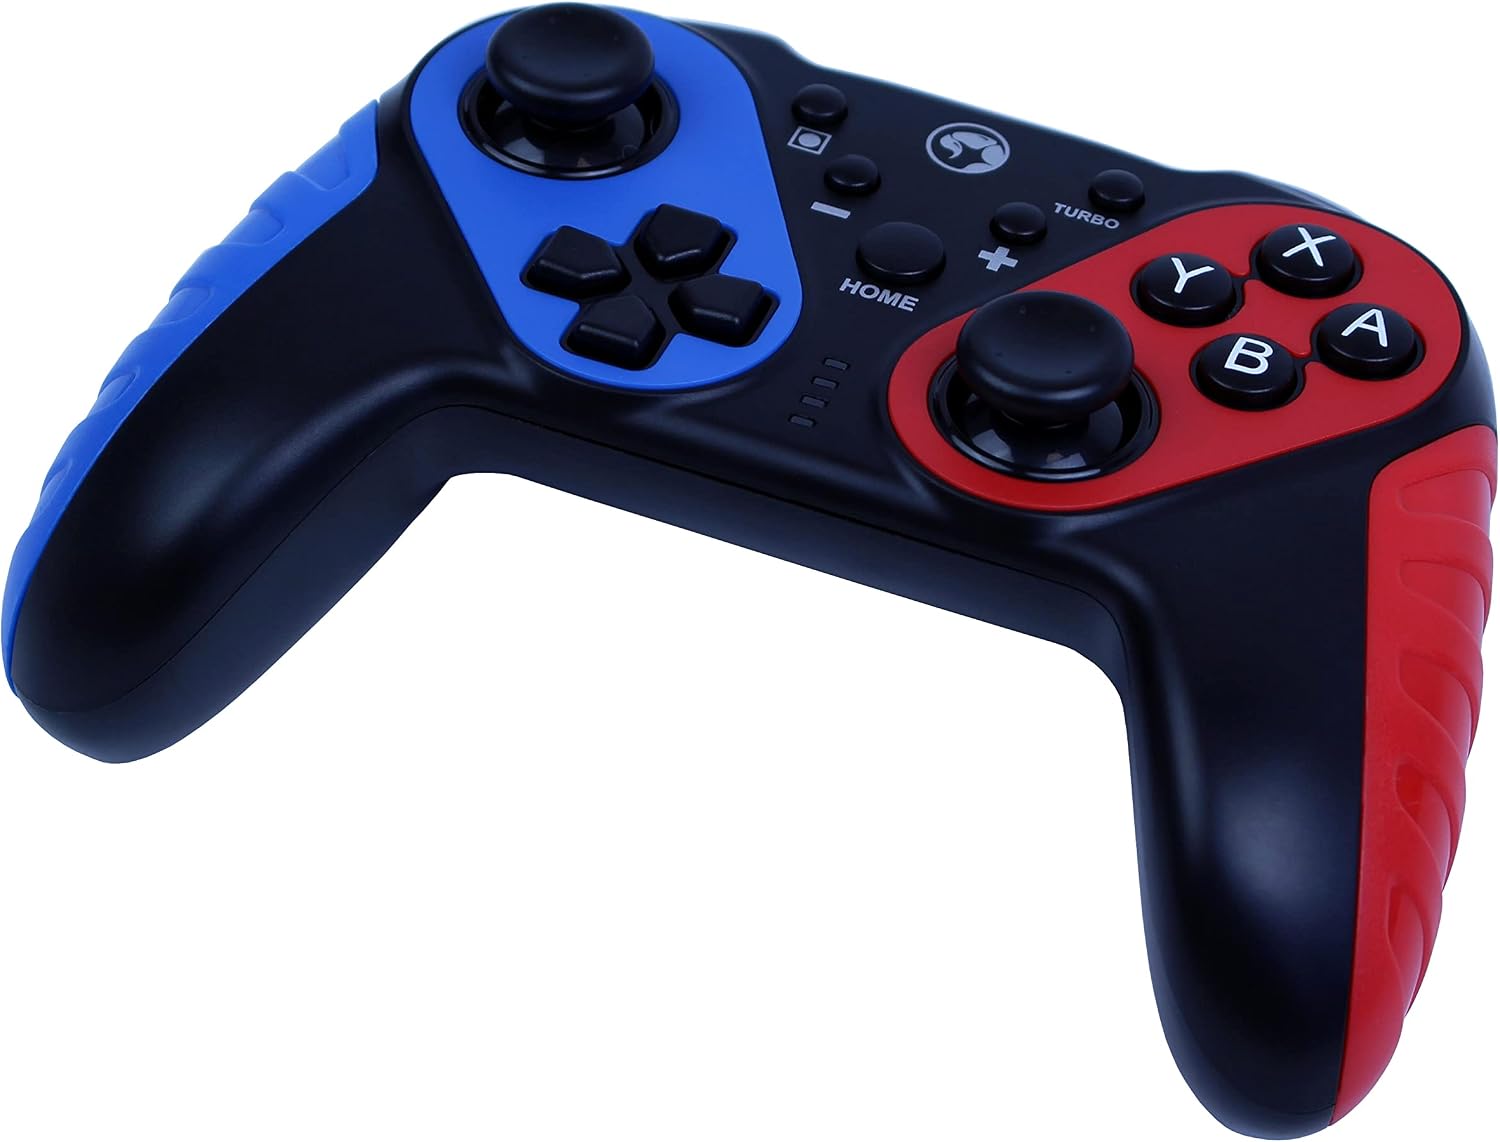
Figure 3: Controller Button Layout. This image provides an angled view, emphasizing the comfortable grip design and the accessible placement of all 17 buttons, including the shoulder buttons and triggers.
- Left Analog Stick: Movement and camera control.
- Right Analog Stick: Camera control and aiming.
- D-Pad (Directional Pad): Precise directional input.
- Action Buttons (X, Y, A, B): Primary game actions.
- L/R Buttons (Shoulder Buttons): Secondary game actions.
- ZL/ZR Triggers: Analog input for various game functions.
- HOME Button: Returns to system home screen, power on/off.
- TURBO Button: Activates Turbo function for selected buttons.
- +/- Buttons: Equivalent to Start/Select or Plus/Minus buttons.
- Screenshot Button: Captures screenshots (Nintendo Switch).
Special Functions
Turbo Function
The Turbo function allows a button to be pressed repeatedly as long as it is held down, useful for rapid-fire actions.
- Press and hold the TURBO button.
- While holding TURBO, press the action button you wish to assign the Turbo function to (e.g., A, B, X, Y, L, R, ZL, ZR).
- Release both buttons. The selected button now has Turbo enabled.
- To disable Turbo for a specific button, repeat the process.
- To clear all Turbo settings, press and hold the TURBO button for 5 seconds.
Auto Function
The Auto function allows a button to automatically repeat presses without needing to be held down.
- First, enable Turbo for the desired button as described above.
- Press the TURBO button once, then press the button that already has Turbo enabled.
- The button will now automatically repeat presses.
- To disable Auto, press the TURBO button once, then press the button again.
Vibration Feedback
The GT-52 controller features dual vibration motors for an immersive gaming experience. Vibration intensity is typically controlled by the game or system settings.
Maintenance
Cleaning
- Use a soft, dry cloth to wipe the surface of the controller.
- For stubborn dirt, slightly dampen the cloth with water. Do not use harsh chemicals or abrasive cleaners.
- Avoid getting liquid into the button gaps or ports.
Storage
- Store the controller in a cool, dry place away from direct sunlight and extreme temperatures.
- If storing for an extended period, ensure the battery is partially charged (around 50%) to prolong its lifespan.
Troubleshooting
| Problem | Possible Cause | Solution |
|---|---|---|
| Controller does not turn on. | Battery is depleted. | Charge the controller using the supplied USB Type-C cable. |
| Cannot connect wirelessly. | Not in pairing mode; Bluetooth interference; device Bluetooth off. | Ensure controller is in pairing mode (flashing LEDs). Check device Bluetooth settings. Move closer to the device. Try re-pairing. |
| Buttons or joysticks are unresponsive. | Connection issue; software glitch; physical damage. | Reconnect the controller (wired or wireless). Restart the controller and the gaming device. If problem persists, contact support. |
| Vibration not working. | Game or system settings have vibration disabled. | Check in-game settings and system settings to ensure vibration is enabled. |
Technical Specifications
- Model: GT-52
- Connection: Wireless (Bluetooth 4.0) / Wired (USB Type-C)
- Wireless Distance: Up to 10 meters (Bluetooth 4.0)
- Buttons: 17
- Cable Length: 1.0 meter
- Vibration: Dual vibration motors
- Special Features: Turbo and Auto function, 6-axis sensor
- Battery Capacity: 400mAh rechargeable
- Compatibility: Nintendo Switch, PC (X-INPUT), Android
- Weight: 190g
- Package Dimensions: 18.3 x 15.8 x 6.7 cm

Figure 4: Product Packaging with Specifications. This image shows the rear of the product box, which lists key technical specifications and features of the GT-52 controller.
Warranty and Support
MARVO products are designed and manufactured to the highest quality standards. For information regarding warranty coverage, technical support, or service inquiries, please refer to the warranty card included with your product or visit the official MARVO website.
For further assistance, you may also contact MARVO customer support through their official channels. Please have your product model (GT-52) and purchase details ready when contacting support.
Official MARVO Store: Visit the MARVO Store on Amazon
Related documentsGT-52

Ask a question about this manual
Ask about setup, troubleshooting, compatibility, parts, safety, or missing instructions. Manuals+ will review the question and use this page’s manual context to help answer it.