
Introduction
This instruction manual provides detailed guidance for using your ELISWEEN Wireless Switch Controller, designed for Nintendo Switch, Switch Lite, and Switch OLED consoles. This controller offers an enhanced gaming experience with advanced features and ergonomic design, ensuring comfort and precision during gameplay.

Image: Front view of the black ELISWEEN Wireless Switch Controller with red and blue accents on the joysticks.
Key Features
- Programmable Buttons: Two back programming buttons (M1/M2) for single or multi-programming (A+B+Y+L+ZL+R+ZR+D-pad) to optimize gameplay.
- One-Button Wake-Up: Conveniently wake up your Switch console by simply pressing the HOME button after initial pairing.
- Vibration Function: Dual vibration motors with 3-level precise vibration (weak, medium, strong) for enhanced game immersion.
- 6-Axis Gyro Sensor: Detects controller inclination for quick and precise response in motion-sensing games.
- Ergonomic Design: Non-slip design ensures stable control and comfortable grip during extended gaming sessions.
- Turbo Function: Adjustable auto or manual TURBO mode with 3 speeds (5, 12, 20 shots/s). Customizable TURBO buttons (A/B/X/Y/L/ZL/R/ZR).
- Screenshot Function: Continuous screenshot capability for capturing in-game moments.
- High-Performance Battery: Built-in 600mAh rechargeable battery providing 10-15 hours of play time with 2-3 hours full charge.

Image: Visual representation of the controller highlighting Programmable, TURBO Function, 6-Axis Gyro, and Dual Shock features.
Package Contents
- 1 x ELISWEEN Wireless Switch Controller (Model: B18)
- 1 x USB Charging Cable
- 1 x User Manual
Setup
Initial Pairing with Nintendo Switch/Lite/OLED
- Ensure your Nintendo Switch console is powered on and updated to the latest system version.
- From the HOME Menu, select "Controllers" > "Change Grip/Order".
- On the ELISWEEN controller, press and hold the "Y + HOME" buttons simultaneously for 3-5 seconds until the LED indicators start flashing rapidly.
- Once the controller is successfully paired, the player LED(s) on the controller will light up solid.
Waking Up the Console
After the initial pairing, simply press the "HOME" button on the controller to wake up your Nintendo Switch console from sleep mode. The controller will automatically reconnect.

Image: A user demonstrating the one-button wake-up function for the Nintendo Switch console using the controller.
Operating Instructions
Programmable Buttons (M1/M2)
The controller features two programmable back buttons, M1 and M2, which can be assigned to single or multiple button inputs (A+B+Y+L+ZL+R+ZR+D-pad). This allows for more comfortable and efficient gameplay by reducing finger strain.
- Press and hold the M1 or M2 button you wish to program.
- While holding M1/M2, press the button(s) you want to assign (e.g., A, B, Y, L, ZL, R, ZR, D-pad).
- Release the M1/M2 button. The programming is now complete.
- To clear a programmed button, press and hold the M1/M2 button, then press the assigned button(s) again, and release.

Image: Close-up view of the back of the controller showing the M1 and M2 programmable buttons and their potential assignments.
Turbo Function
The Turbo function allows for rapid, continuous input of a button. It has 3 adjustable speeds: 5 shots/s, 12 shots/s, and 20 shots/s. You can set Turbo for A/B/X/Y/L/ZL/R/ZR buttons.
- Setting Turbo: Press and hold the desired button (e.g., A) and then press the Turbo button (T). The button will now continuously input when held.
- Adjusting Turbo Speed: While holding the Turbo button (T), move the right joystick up or down to cycle through the 3 speeds.
- Clearing Turbo: Press and hold the desired button and then press the Turbo button (T) again.
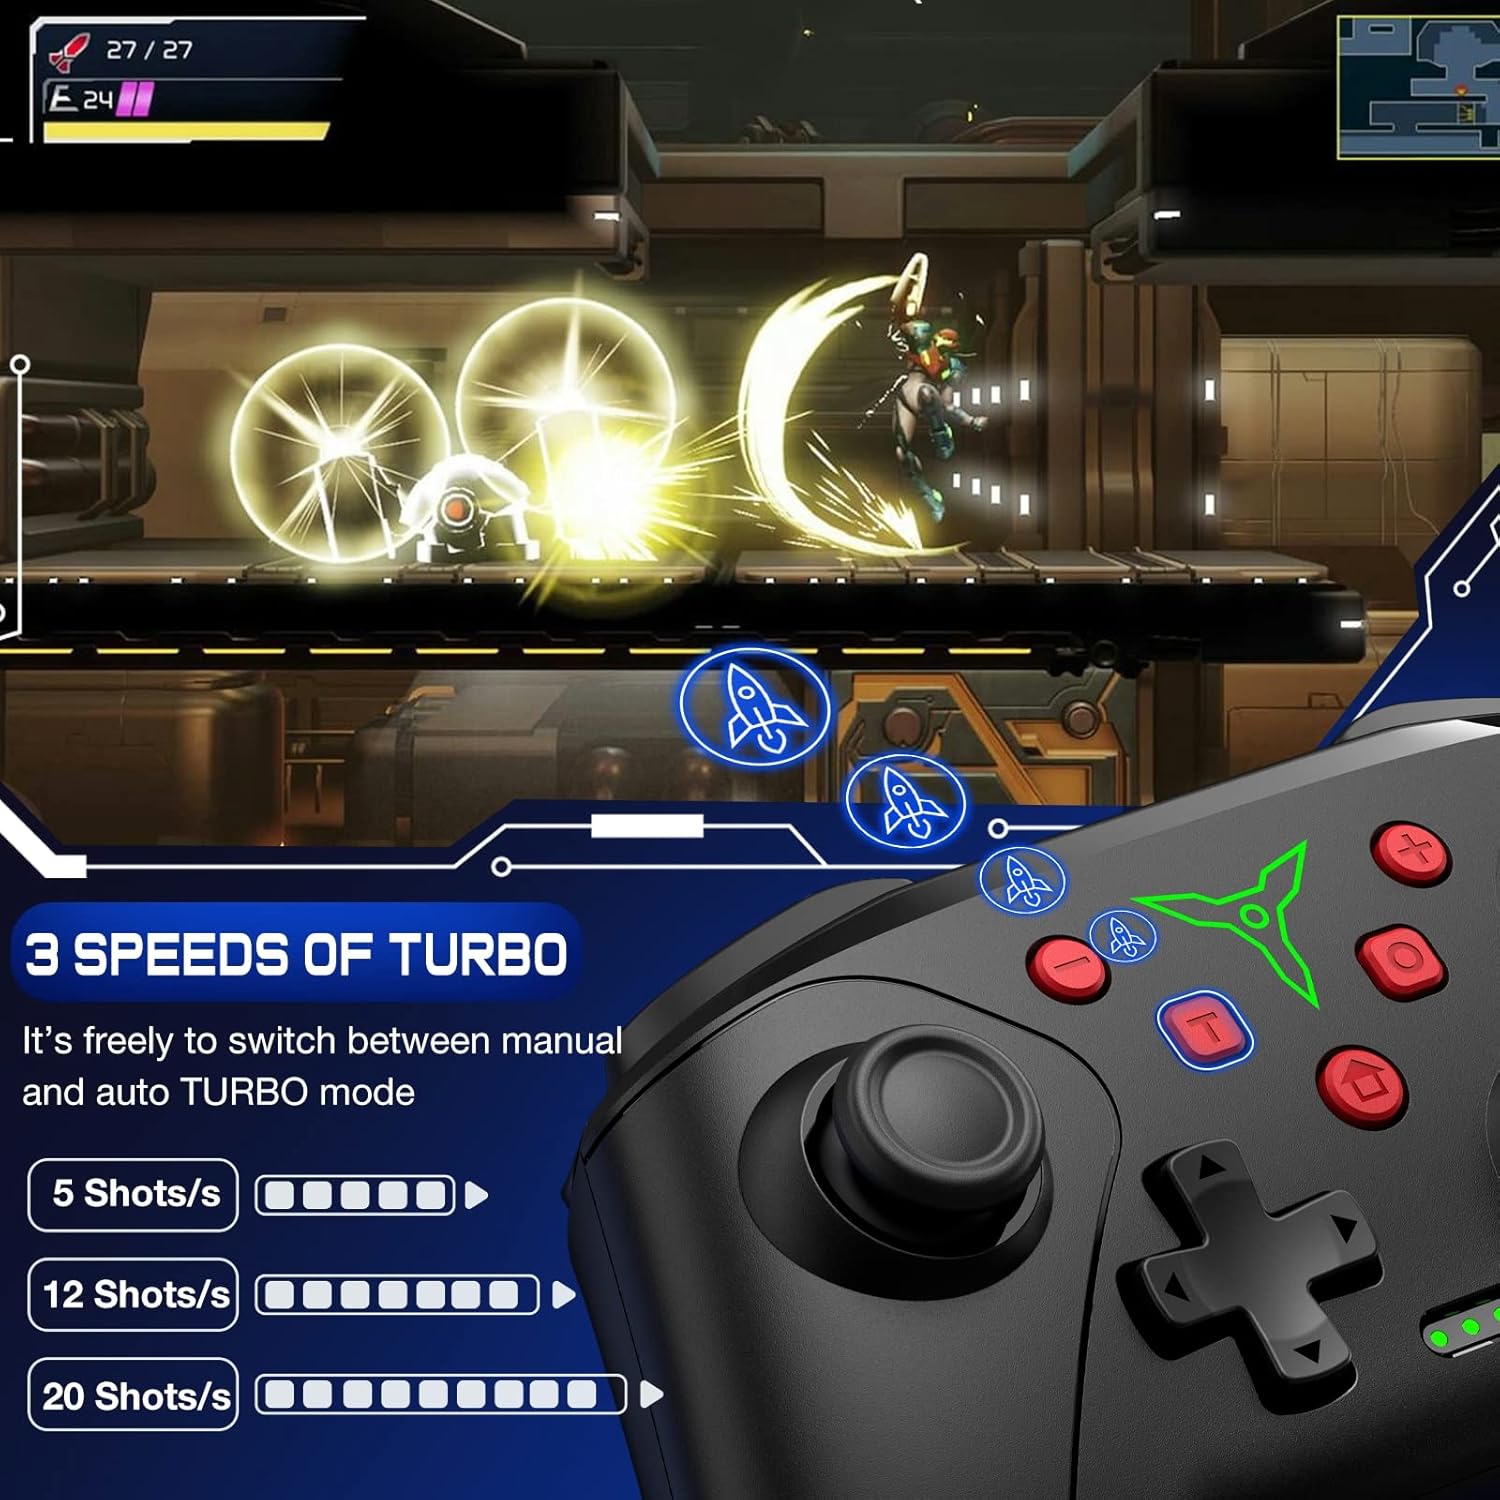
Image: The controller displaying the three adjustable Turbo speeds (5, 12, 20 shots/s) and how they are activated.
Vibration Adjustment
The dual vibration motors offer 3 levels of intensity: weak, medium, and strong. This allows you to customize the haptic feedback to your preference.
- To adjust vibration, press and hold the Vibration Adjustment button (refer to specific button layout in the included manual if unsure).
- While holding, move the left joystick up or down to cycle through the vibration levels.

Image: The controller illustrating the 3-level vibration feature with visual cues for weak, medium, and strong feedback.
6-Axis Gyro Sensor
The built-in 6-axis gyro sensor allows for precise motion control in compatible games. Simply tilt and move the controller to interact with the game environment.

Image: The controller demonstrating the 6-axis gyro sensor's ability to control direction and view in a game.
Screenshot Function
Press the dedicated Screenshot button (usually located near the HOME button) to capture in-game screenshots instantly.
Charging
The controller is equipped with a 600mAh rechargeable battery. To charge, connect the controller to a USB power source (e.g., Nintendo Switch dock, USB wall adapter, PC) using the provided USB charging cable.
- Charging Time: Approximately 2-3 hours for a full charge.
- Play Time: Up to 10-15 hours on a full charge, depending on usage and vibration settings.
- LED Indicators: The LED indicators on the controller will show charging status and battery level.

Image: The controller connected via USB-C cable, illustrating its large capacity battery and charging details.
Maintenance
- Keep the controller dry and away from moisture.
- Avoid extreme temperatures.
- Clean the controller with a soft, dry cloth. Do not use harsh chemicals or abrasive materials.
- Store in a safe place to prevent accidental drops or damage.
Troubleshooting
Controller Not Connecting/Pairing
- Ensure the controller is charged.
- Verify the Switch console is in "Change Grip/Order" mode.
- Try resetting the controller by inserting a small pin into the reset hole on the back (if available).
- Move closer to the Switch console to ensure a strong wireless signal.
- Restart the Switch console and try pairing again.
Input Lag or Unresponsive Buttons
- Check for any interference from other wireless devices.
- Ensure the controller is fully charged.
- Reset the controller and re-pair it with the console.
Specifications
| Attribute | Detail |
|---|---|
| Model No. | B18 |
| Brand | ELISWEEN |
| Connectivity | Wireless |
| Battery Capacity | 600 mAh |
| Charging Time | 2-3 hours |
| Play Time | 10-15 hours |
| Gyro Sensor | 6-Axis |
| Vibration | Dual Motors, 3 Levels |
| Dimensions | 6.18 x 4.49 x 2.52 inches |
| Item Weight | 9.6 ounces |
| Manufacturer | Qixun Tech |
Warranty and Support
For warranty information and customer support, please refer to the contact details provided on the product packaging or the official ELISWEEN website. Keep your purchase receipt for warranty claims.
