
1. Introduction
Thank you for purchasing the RCA RPJ264 Portable Home Theater Projector. This manual provides essential information for the safe and efficient operation of your device. Please read it thoroughly before use and retain it for future reference.
2. Package Contents
Verify that all items listed below are included in your package:
- RCA RPJ264 Portable Home Theater Projector
- Remote Control
- Power Adapter
- User Manual (this document)
3. Product Overview
Familiarize yourself with the projector's components and controls.
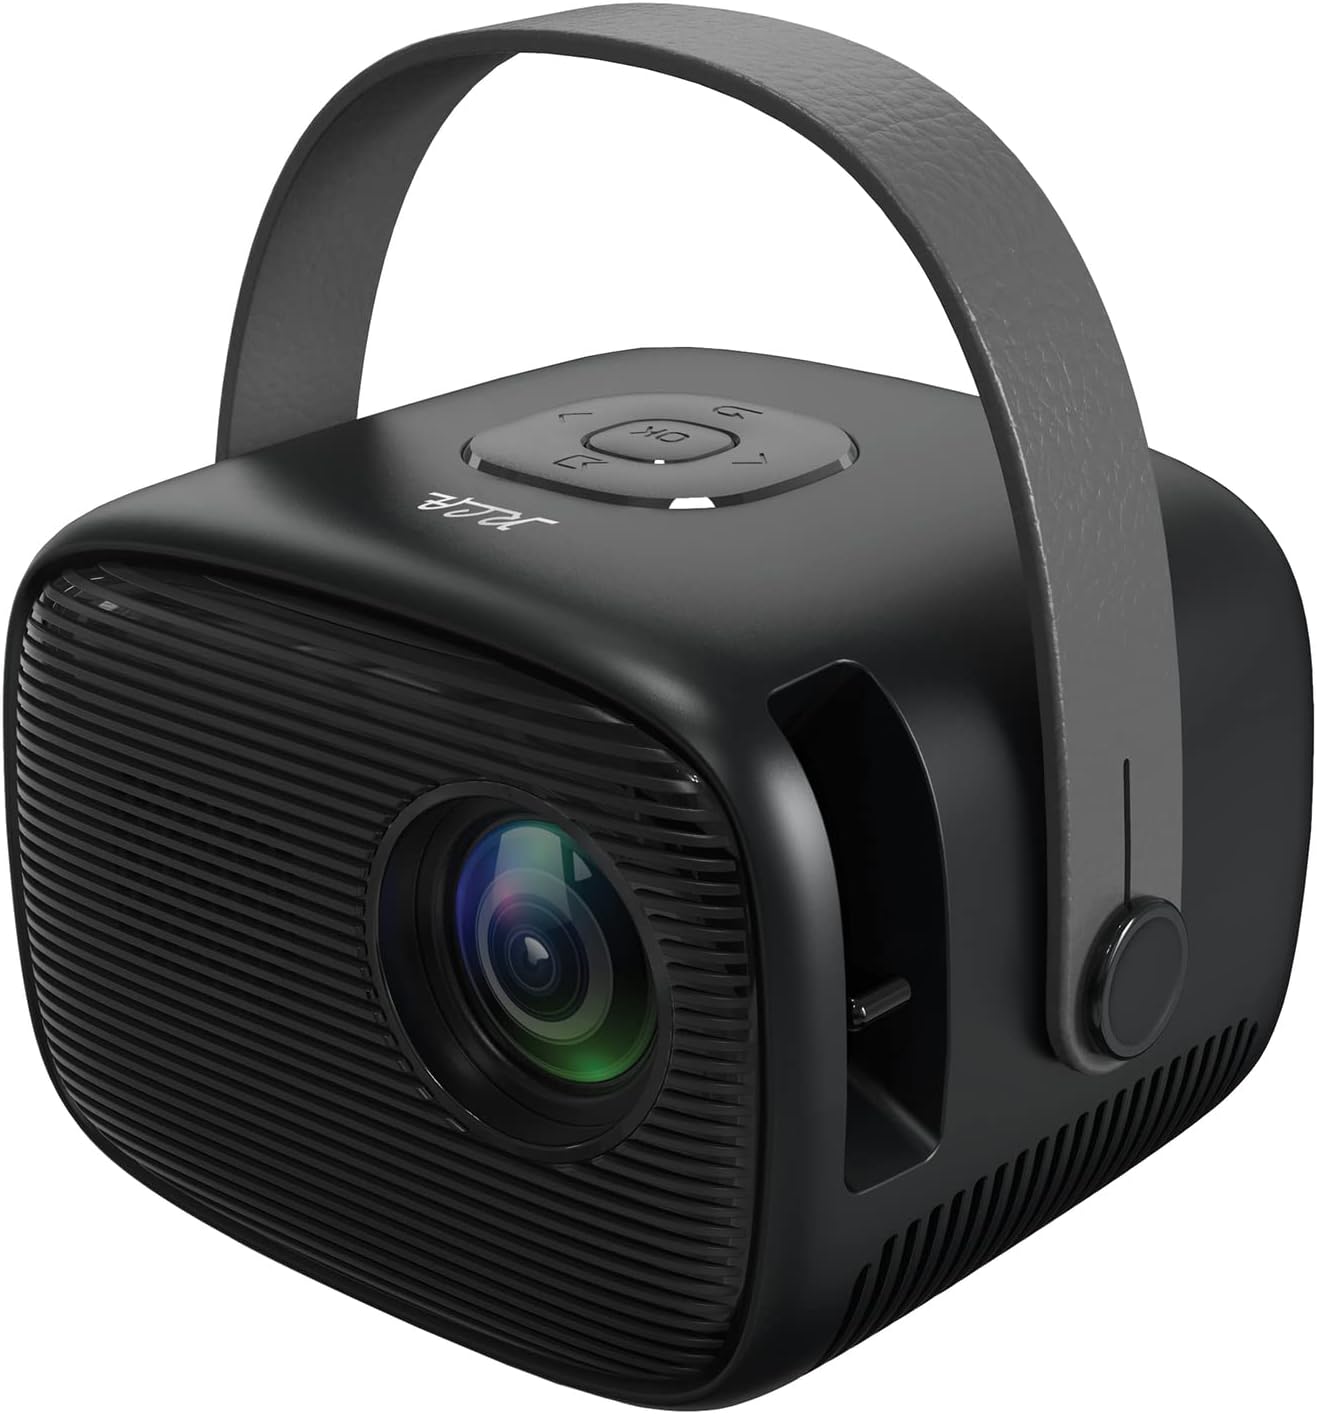
Image 3.1: Front-right view of the RCA RPJ264 Portable Home Theater Projector, showcasing the lens, speaker grille, and carrying handle.

Image 3.2: Close-up of the top control panel, featuring navigation buttons and an 'OK' button.

Image 3.3: Detail of the built-in focusing wheel, used for adjusting image clarity.

Image 3.4: Diagram illustrating the projector's features including 480p resolution, LED display, 100-inch maximum picture size, HDMI port, USB/Micro SD port, two built-in speakers, leather handle, remote control, AV port, and headphone port.
4. Setup
4.1 Placement
Position the projector on a stable, flat surface. Ensure there is adequate ventilation around the unit. For optimal viewing, place the projector at a distance that achieves your desired screen size. The recommended viewing distance for best results is 6.5 feet (approximately 2 meters).
4.2 Power Connection
- Connect the power adapter to the DC IN port on the projector.
- Plug the power adapter into a standard electrical outlet.
4.3 Input Connections
The projector supports various input sources:
- HDMI: Connect to devices such as TV boxes, TV sticks, PCs, laptops, gaming consoles (PS3, PS4, Xbox One, Wii), or Blu-ray players.
- USB: Insert a USB drive for media playback.
- VGA: Connect to computers or other VGA-compatible devices.
- AV: Use the AV port for older devices with composite video and stereo audio output.
- Micro SD: Insert a Micro SD card for media playback.

Image 4.1: The projector connected to various multimedia devices, illustrating its HDMI, USB, and other connectivity options for streaming, gaming, and media playback.

Image 4.2: Visual representation of the projector's capability to support 1080p HD playback through its HDMI input, along with other resolutions like 480p, 720p, and 576i.
5. Operating Instructions
5.1 Power On/Off
Press the power button on the projector or the remote control to turn the unit on or off.
5.2 Focus Adjustment
Rotate the focusing wheel located near the lens to achieve a clear and sharp image on your projection surface.
5.3 Input Source Selection
Use the 'Source' button on the remote control or the projector's control panel to cycle through available input sources (HDMI, USB, VGA, AV, Micro SD).
5.4 Menu Navigation
Use the navigation buttons (up, down, left, right) and the 'OK' button on the projector or remote control to navigate the on-screen menu for settings adjustments.
5.5 Audio Output
The projector features two built-in speakers. For external audio, connect headphones or external speakers to the 3.5mm headphone jack.

Image 5.1: The projector displaying a large image, demonstrating its capability to project up to a 100-inch picture size for an immersive viewing experience.
6. Troubleshooting
If you encounter issues with your projector, refer to the following common problems and solutions:
| Problem | Possible Cause | Solution |
|---|---|---|
| No image displayed | Power not connected, incorrect input source, loose cable connection | Check power cable, select correct input source, ensure cables are securely connected. |
| Image is blurry | Focus not adjusted | Adjust the focusing wheel until the image is clear. |
| No sound | Volume too low, external audio device not connected, audio settings incorrect | Increase volume, check external audio connections, verify audio settings in the menu. |
| Remote control not working | Batteries depleted, obstruction between remote and projector | Replace batteries, remove any obstructions, ensure direct line of sight. |
7. Specifications
- Model: RPJ264
- Product Dimensions: 7 x 8 x 6 inches
- Item Weight: 1.5 pounds
- Display Resolution: 800 x 480 (supports 1080p HD playback via HDMI)
- Connectivity Technology: HDMI, USB, VGA, AV, Micro SD
- Special Feature: Built-in Speakers, Portable with Carrying Handle
- Recommended Uses: Indoor/Outdoor Home Entertainment
- Projection Size: 32" to 170"
- Projection Distance: 4.9ft to 16.4ft (Recommended: 6.5ft)
8. Maintenance
8.1 Cleaning the Lens
Use a soft, lint-free cloth specifically designed for optical lenses to gently wipe the projector lens. Avoid using abrasive cleaners or cloths that could scratch the lens surface.
8.2 Cleaning the Projector Body
Wipe the exterior of the projector with a soft, dry cloth. Do not use liquid cleaners or solvents.
8.3 Storage
When not in use, store the projector in a cool, dry place, away from direct sunlight and extreme temperatures. If possible, use the original packaging or a protective case to prevent dust accumulation and damage.
9. Important Safety Information
WARNING: This product contains chemicals known to the State of California to cause cancer and birth defects or other reproductive harm.
Always operate the projector in a well-ventilated area. Do not block ventilation openings. Avoid direct eye exposure to the projector lens when the lamp is on. Keep the projector away from water or other liquids. Do not attempt to disassemble or repair the projector yourself; refer all servicing to qualified personnel.
10. Warranty and Support
For warranty information or technical support, please refer to the documentation provided at the time of purchase or visit the official RCA website. Keep your purchase receipt as proof of purchase for warranty claims.


