
1. Introduction
This manual provides essential information for the safe and effective operation, maintenance, and troubleshooting of your INGCO High Pressure Washer, model HPWR15028. Please read these instructions carefully before using the appliance to ensure optimal performance and user safety. Keep this manual for future reference.
2. Safety Instructions
Always observe basic safety precautions when using electrical appliances to reduce the risk of fire, electric shock, and personal injury.
- Electrical Safety: Ensure the power supply matches the voltage specified on the pressure washer. Do not operate the unit with damaged cords or plugs. Always use a ground fault circuit interrupter (GFCI) for protection.
- Water Pressure: The high-pressure jet can be dangerous if misused. Never direct the water jet at people, pets, electrical equipment, or the unit itself.
- Personal Protective Equipment: Wear appropriate eye protection, hearing protection, and protective clothing during operation.
- Stable Surface: Operate the pressure washer on a stable, level surface to prevent tipping.
- Children and Bystanders: Keep children and bystanders away from the operating area.
- Maintenance: Disconnect the power supply before performing any maintenance or cleaning.
3. Package Contents
Carefully unpack the pressure washer and check that all items are present and undamaged. If any parts are missing or damaged, contact your retailer.
- INGCO High Pressure Washer Unit
- High-Pressure Spray Gun
- 8-Meter High-Pressure Hose
- Water Inlet Filter
- Quick Connector
- 4.5-Meter PVC Hose (for water intake)
- User Manual
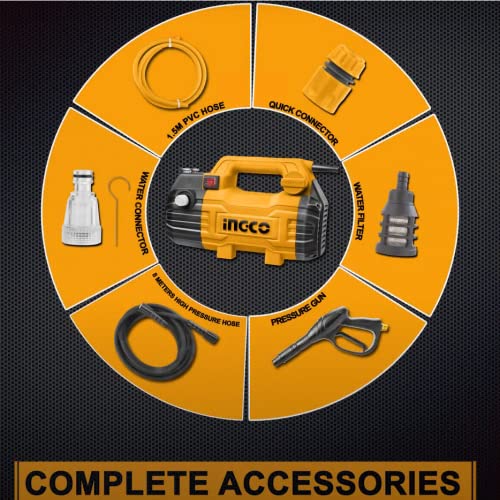
Figure 3.1: Complete Accessories. This diagram illustrates all components included with your INGCO High Pressure Washer, such as the main unit, various hoses, connectors, and the spray gun.
4. Assembly and Setup
Follow these steps to assemble your pressure washer before first use.
- Attach Water Inlet Filter: Screw the water inlet filter onto the water inlet connection of the pressure washer unit.
- Connect Quick Connector: Attach the quick connector to the water inlet filter.
- Connect Water Supply Hose: Connect your garden hose (4.5M PVC hose provided or similar) to the quick connector. Ensure a secure fit to prevent leaks.
- Connect High-Pressure Hose: Connect one end of the 8-meter high-pressure hose to the high-pressure outlet on the pressure washer unit and the other end to the high-pressure spray gun. Tighten all connections firmly.
- Connect Power: Plug the power cord into a suitable grounded electrical outlet.
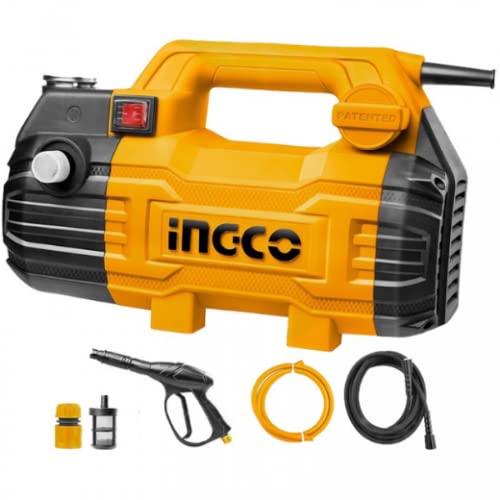
Figure 4.1: Pressure Washer and Accessories. This image displays the main INGCO pressure washer unit along with its accompanying accessories, including the spray gun, hoses, and connectors, ready for assembly.
5. Operating Instructions
Before starting, ensure all connections are secure and the water supply is turned on.
- Purge Air from System: Before turning on the power, squeeze the trigger on the spray gun to allow water to flow through the system and expel any trapped air. Continue until a steady stream of water emerges from the nozzle.
- Start the Unit: Turn the power switch to the 'ON' position. The motor will start.
- Begin Cleaning: Aim the spray gun at the surface to be cleaned, maintaining a safe distance. Squeeze the trigger to activate the high-pressure jet. Release the trigger to stop the water flow.
- Adjusting Spray: The spray gun may feature an adjustable nozzle to change the spray pattern from a concentrated jet to a wider fan spray. Adjust as needed for different cleaning tasks.
- Stopping Operation: To stop the unit, release the spray gun trigger and turn the power switch to the 'OFF' position. Turn off the water supply.
- Relieve Pressure: After turning off the unit and water supply, squeeze the spray gun trigger to release any remaining pressure in the system before disconnecting hoses.
6. Maintenance
Regular maintenance ensures the longevity and efficient operation of your pressure washer.
- Clean Water Inlet Filter: Periodically check and clean the water inlet filter to prevent debris from entering the pump. Rinse it under running water.
- Nozzle Cleaning: If the nozzle becomes clogged, use a small pin or wire to clear any obstructions.
- Storage: Before storing, ensure all water is drained from the pump and hoses, especially in freezing temperatures. Store the unit in a dry, frost-free location.
- Motor Care: The unit features a 100% pure copper motor designed for durability and longer service life. No specific user maintenance is required for the motor itself, but ensuring proper water flow and preventing overheating will contribute to its lifespan.
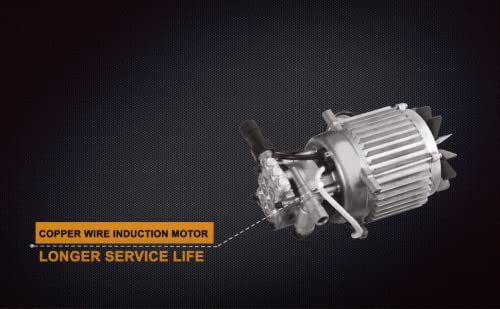
Figure 6.1: Copper Wire Induction Motor. This internal view emphasizes the copper wire induction motor, a key component contributing to the pressure washer's durability and extended operational life.
7. Troubleshooting
Refer to this section for common issues and their solutions.
- Unit does not start:
- Check power connection and ensure the outlet is functional.
- Verify the power switch is in the 'ON' position.
- Check for tripped circuit breakers or blown fuses.
- Low pressure:
- Ensure the water supply is fully open and adequate.
- Clean the water inlet filter for obstructions.
- Check the nozzle for clogs and clear if necessary.
- Inspect hoses for kinks or leaks.
- Water leaks:
- Tighten all hose connections.
- Check O-rings and seals for damage and replace if needed.
- Motor stops during operation:
- The thermal protector may have activated due to overheating. Turn off the unit and allow it to cool for 15-30 minutes before restarting.
- Ensure proper ventilation around the unit.
8. Specifications
| Feature | Specification |
|---|---|
| Model Number | HPWR15028 (HFB4301) |
| Power Source | Corded Electric |
| Motor Power | 1500W |
| Motor Type | 100% Pure Copper Induction Motor |
| Maximum Pressure | 135 Bar |
| Maximum Flow Rate | 420 Liters Per Hour (7 Liters Per Minute) |
| High-Pressure Hose Length | 8 Metres |
| Item Weight | 5.5 Kilograms |
| Product Dimensions (LxWxH) | 38 x 55 x 29 Centimeters |
| Color | Yellow/Black |
| Certifications | CE, CSA |
| Country of Origin | India |
9. Warranty and Support
For warranty information, service, or technical support, please refer to the warranty card included with your product or contact INGCO customer service directly. Keep your purchase receipt as proof of purchase.
Manufacturer: INGCO
Date First Available: 9 November 2021


