1. Introduction and Overview
The TOTAL TSDLI0402 Lithium-Ion Cordless Screwdriver is a compact and versatile tool designed for various screw driving tasks. Its lightweight design and cordless operation provide convenience and portability for both household and light professional use. This manual provides essential information for the safe and efficient operation, maintenance, and care of your new cordless screwdriver.
2. Package Contents
Carefully unpack your new TOTAL TSDLI0402 Cordless Screwdriver and ensure all items are present and in good condition. The package should contain:
- 1 x TOTAL TSDLI0402 Cordless Screwdriver
- 10 x Screwdriver bits
- 1 x Magnetic holder
- 1 x USB charger cable
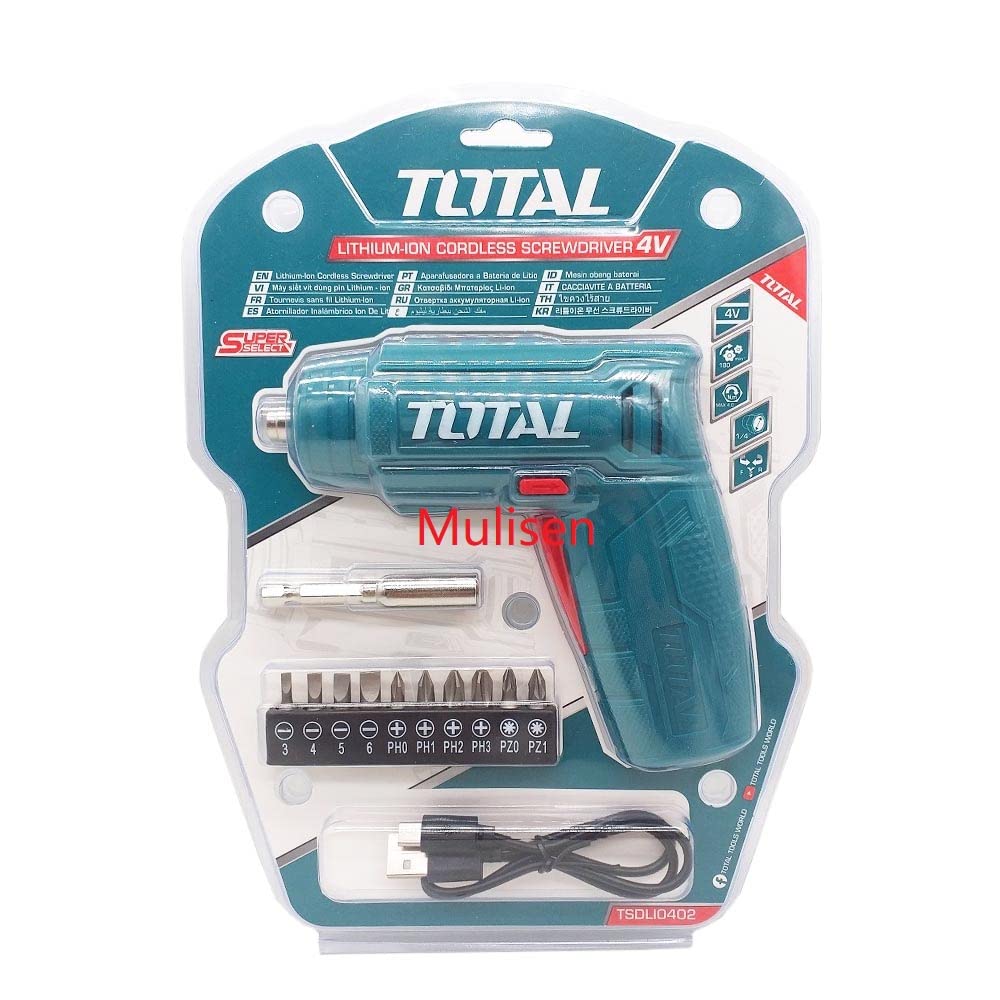
An image showing the TOTAL TSDLI0402 cordless screwdriver, its integrated Li-ion battery, a magnetic bit holder, and a set of various screwdriver bits.
3. Safety Instructions
Always observe basic safety precautions to reduce the risk of fire, electric shock, and personal injury when using power tools. Read and understand all instructions before operating this tool.
- Work Area Safety: Keep your work area clean and well-lit. Cluttered or dark areas invite accidents. Do not operate power tools in explosive atmospheres, such as in the presence of flammable liquids, gases, or dust.
- Electrical Safety: Do not expose power tools to rain or wet conditions. Water entering a power tool will increase the risk of electric shock.
- Personal Safety: Always wear appropriate eye protection. Use safety glasses or goggles. Stay alert, watch what you are doing, and use common sense when operating a power tool. Do not use a power tool while you are tired or under the influence of drugs, alcohol, or medication.
- Tool Use and Care: Do not force the power tool. Use the correct power tool for your application. Do not use the power tool if the switch does not turn it on and off. Disconnect the plug from the power source and/or the battery pack from the power tool before making any adjustments, changing accessories, or storing power tools.
- Battery Pack Use and Care: Recharge only with the charger specified by the manufacturer. Do not use a battery pack or tool that is damaged or modified.
4. Setup
4.1. Charging the Battery
The screwdriver is powered by an integrated Lithium-Ion battery. Ensure the battery is fully charged before initial use and whenever the power diminishes.
- Locate the USB charging port on the screwdriver.
- Connect the provided USB charger cable to the screwdriver's charging port.
- Plug the other end of the USB charger cable into a compatible USB-A power source (e.g., a computer, wall adapter, or power bank).
- The charging indicator light will illuminate. The battery charges in approximately 1.5 hours.
- Once fully charged, disconnect the USB charger cable.
4.2. Attaching Screwdriver Bits
The screwdriver features a 1/4" (6.35mm) chuck for quick and easy bit changes.
- Select the appropriate screwdriver bit for your task from the included set.
- For enhanced stability, insert the selected bit into the magnetic holder first, then insert the magnetic holder into the screwdriver's chuck.
- Push the bit firmly into the chuck until it is securely seated.
- To remove a bit, simply pull it out of the chuck.
5. Operating Instructions
5.1. Selecting Rotation Direction
The screwdriver features a left and right rotation key to control the direction of rotation for screwing or unscrewing.
- To drive screws (forward rotation), press the appropriate side of the rotation key.
- To remove screws (reverse rotation), press the opposite side of the rotation key.
- Ensure the rotation key is fully engaged in the desired position before operating the tool.
5.2. Activating the Screwdriver
Once the bit is installed and the rotation direction is selected:
- Position the screwdriver bit onto the screw head.
- Press the trigger switch to activate the screwdriver. The front LED light will illuminate the work area.
- Apply steady, even pressure while driving or removing the screw.
- Release the trigger switch to stop the screwdriver.
5.3. Front LED Light
The integrated front LED light automatically turns on when the trigger is pressed, providing illumination for improved visibility in dimly lit work areas.
6. Maintenance
Proper maintenance ensures the longevity and optimal performance of your screwdriver.
- Cleaning: Keep the tool's ventilation openings clean and free from dust. Use a soft, damp cloth to wipe down the exterior. Do not use harsh chemicals or abrasive cleaners.
- Bit Inspection: Regularly inspect screwdriver bits for wear or damage. Replace worn bits to ensure efficient and safe operation.
- Storage: Store the screwdriver and its accessories in a dry, secure place, out of reach of children. Avoid storing in direct sunlight or extreme temperatures.
- Battery Care: Do not store the battery in a discharged state for extended periods. Recharge periodically if not in use.
7. Troubleshooting
If you encounter issues with your screwdriver, refer to the following common problems and solutions:
- Screwdriver does not turn on:
- Check if the battery is sufficiently charged. Recharge if necessary.
- Ensure the rotation key is fully engaged in either the forward or reverse position, not in the neutral (locked) position.
- Screwdriver bits are slipping:
- Ensure the bit is correctly inserted and fully seated in the chuck.
- Check if the bit is worn or damaged. Replace if necessary.
- Ensure you are using the correct bit type and size for the screw head.
- Reduced power or speed:
- The battery may be low. Recharge the battery fully.
- Ensure the tool is not being overloaded.
If the problem persists after attempting these solutions, please contact customer support.
8. Specifications
| Model No. | TSDLI0402 |
| Voltage | 4V |
| No-load Speed | 180 r/min |
| Max. Torque | 4 Nm |
| Chuck Capacity | 1/4" (6.35mm) |
| Battery Charge Time | Approx. 1.5 hours |
| Front LED Light | Yes |
| Rotation Key | Left and Right |
| Item Weight | 209 g (0.21 kg) |
| Product Dimensions | 1 x 1 x 1 cm |
| Material | Plastic |
| Power Source Type | Battery Powered |
| Battery Cell Type | Lithium Ion |
9. Warranty and Support
For information regarding the product warranty, technical support, or service, please refer to the documentation provided with your purchase or contact your retailer or the manufacturer directly. Keep your proof of purchase for any warranty claims.


