Introduction
This manual provides instructions for the operation and maintenance of your SHIDU T7 Karaoke Machine. This portable audio system features a 40W Hi-Fi speaker, a wireless microphone, and multiple connectivity options for an enhanced audio experience.

Figure 1: SHIDU T7 Karaoke Machine, wireless microphone, and remote control.
Package Contents
Please check the box for the following items:
- 1 x SHIDU T7 Host Unit
- 1 x UHF Wireless Microphone
- 1 x Remote Control
- 1 x 15V-2A Charger
- 1 x Neutral Black Audio Cable (3.5mm)
- 1 x Neutral Red Live Wire (3.5mm)
- 1 x Microphone USB Charging Cable
- 1 x User Manual/Warranty Card
- 1 x Qualification Certificate
- 1 x Hang Tag
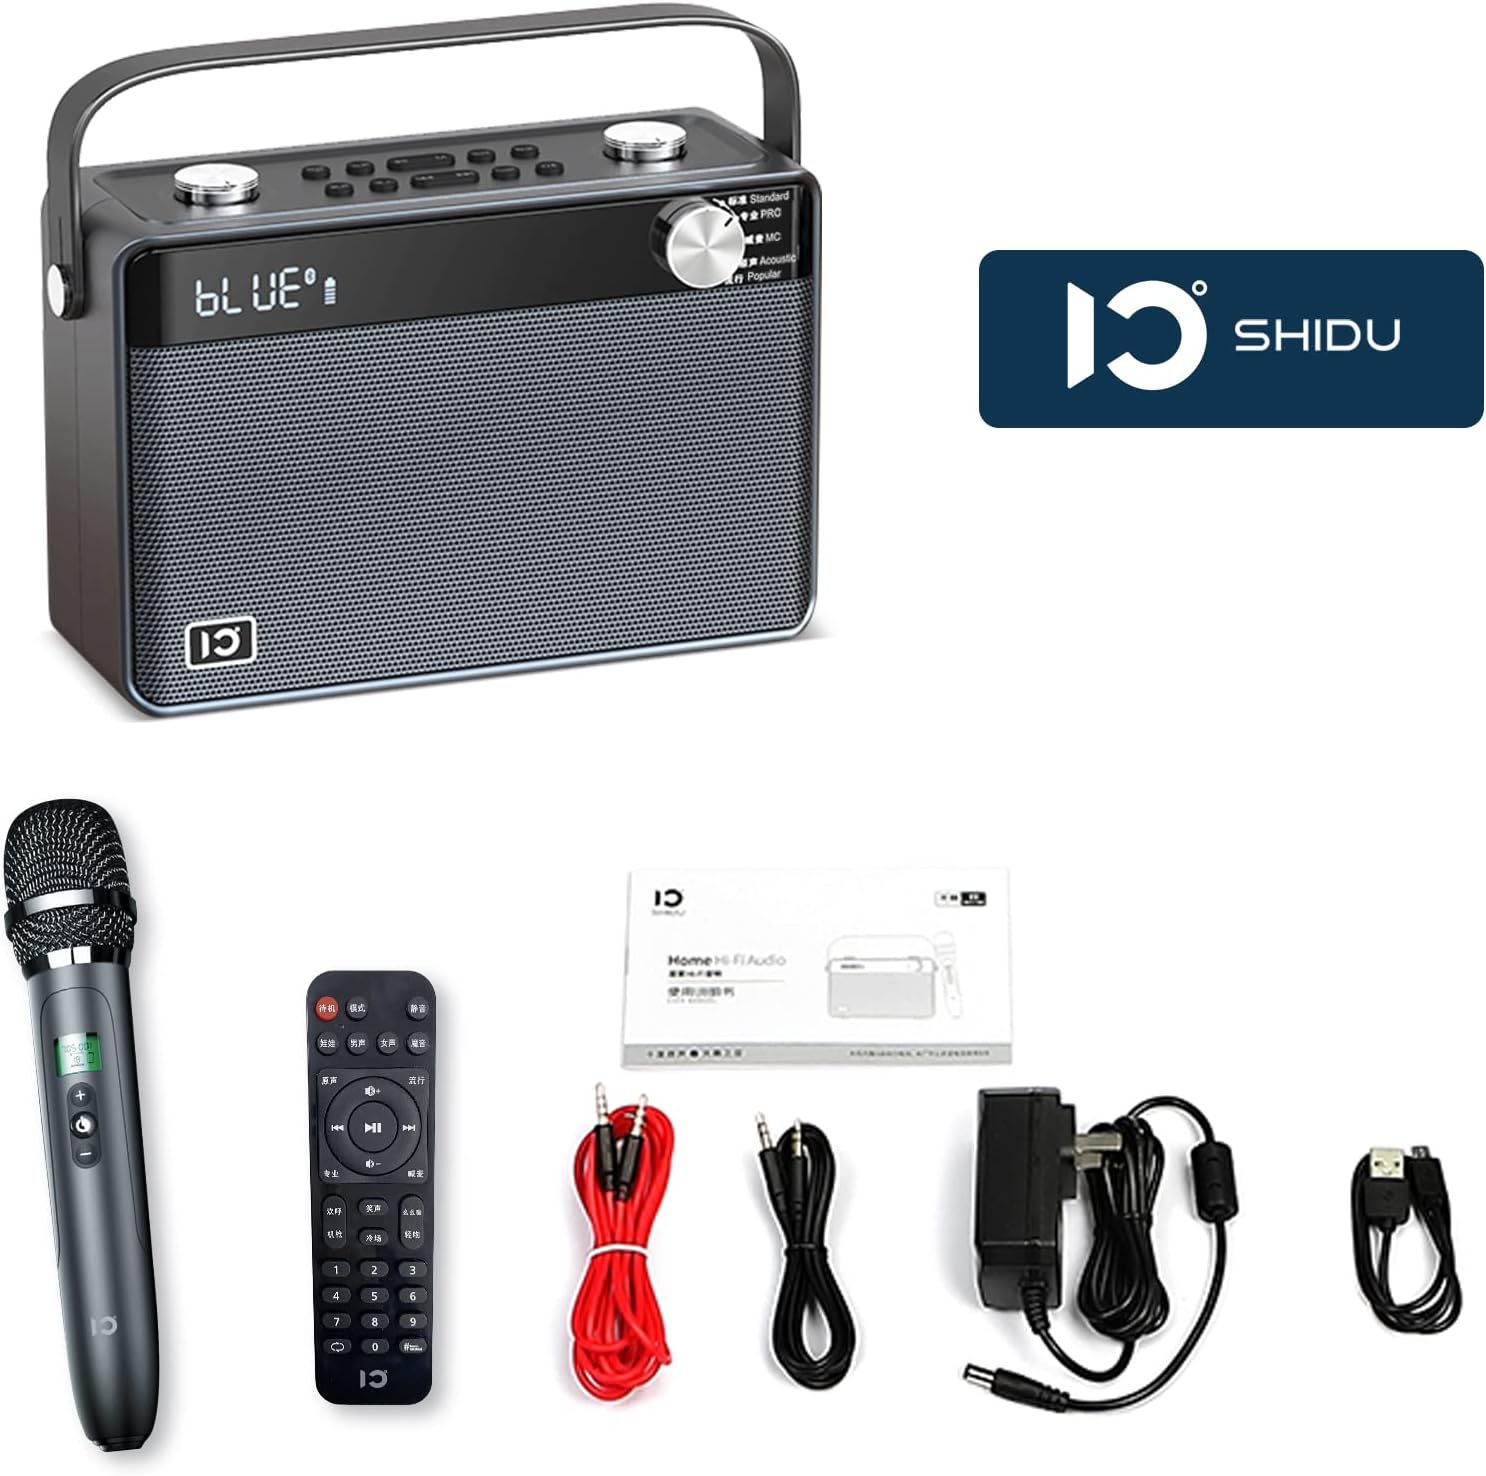
Figure 2: All items included in the SHIDU T7 package.
Product Overview
Main Unit Controls and Ports

Figure 3: Front panel with equalizer presets and display.
- Equalizer Dial: Select from 5 presets: Standard, Pro, MC, Acoustic, and Popular.
- Volume Dials (Top): Separate controls for microphone and speaker volume.
- Playback Controls (Top): Track navigation and play/pause.
- Voice Presets (Top): 4 voice variations (Baby, Lady, Man, Aged).
- Sound Effects (Top): 3 ambient sound effects (Cheer, Clap, Whistle).
- Phone Controls (Top): For call management when connected via Bluetooth.

Figure 4: Rear panel with various input/output ports.
- ¼” Line In (x2): For connecting external instruments or microphones.
- Micro SD Card Slot: For playing audio from a TF card.
- USB A Port: For playing audio from a USB drive.
- 3.5mm AUX In (x2): For connecting external audio sources.
- 3.5mm AUX Out (x2): For connecting to headphones or other audio output devices.
- DC 15V Power In: For charging the unit.
- On/Off Switch: Main power switch.
Wireless Microphone

Figure 5: The wireless microphone with charging indicator.
- On/Off Button: Power for the microphone.
- Up/Down Buttons: Adjust microphone volume or other settings.
- USB Micro Charging Port: Located at the bottom for recharging the microphone's internal battery.
Remote Control
The included remote control provides convenient access to various functions. Note that the remote control labels may be in Chinese. Refer to the main unit's display and buttons for corresponding functions.
Setup
1. Charging the Unit and Microphone
- Main Unit: Connect the provided 15V-2A charger to the "DC 15V Power In" port on the rear of the main unit. Plug the charger into a power outlet. The unit will indicate charging status on its display.
- Wireless Microphone: Connect the microphone USB charging cable to the USB Micro charging port at the bottom of the microphone. Connect the other end to a USB power source (e.g., a computer USB port or a USB wall adapter). The microphone will indicate charging status.
Note: Fully charge both devices before first use for optimal battery life. The main unit's 4400mAh lithium battery provides approximately 6-8 hours of playtime.

Figure 6: Visual representation of the main unit's battery capacity and the rechargeable microphone.
2. Powering On
Flip the On/Off switch on the rear panel of the main unit to the "On" position. The display will light up.
Press the On/Off button on the wireless microphone to power it on.
Operating Instructions
1. Connecting via Bluetooth
- Ensure the SHIDU T7 unit is powered on.
- On your smartphone or other Bluetooth-enabled device, navigate to the Bluetooth settings.
- Search for available devices and select "SHIDU T7" (or similar name) from the list.
- Once connected, the unit's display will indicate a successful Bluetooth connection.
- You can now play audio from your device through the SHIDU T7 speaker.

Figure 7: Connecting the SHIDU T7 to a smartphone via Bluetooth.
2. Using Other Audio Input Modes
- AUX Input: Connect an external audio device (e.g., TV, tablet, MP3 player) to the 3.5mm AUX In port(s) on the rear panel using the provided audio cable. The unit will automatically switch to AUX mode or you may need to select it via the mode button (if available).
- USB/TF Card Playback: Insert a USB flash drive or a TF (Micro SD) card containing audio files into the respective ports on the rear panel. The unit will automatically detect and play the audio files.
Figure 8: Rear panel showing USB, TF card, and AUX input ports.
3. Using the Wireless Microphone
- Ensure the microphone is charged and powered on. It will automatically connect to the main unit via UHF wireless.
- Adjust the microphone volume using the dedicated dial on the top of the main unit or the Up/Down buttons on the microphone.
- Experiment with the Voice Presets (Baby, Lady, Man, Aged) and Sound Effects (Cheer, Clap, Whistle) buttons on the top panel for various vocal enhancements.
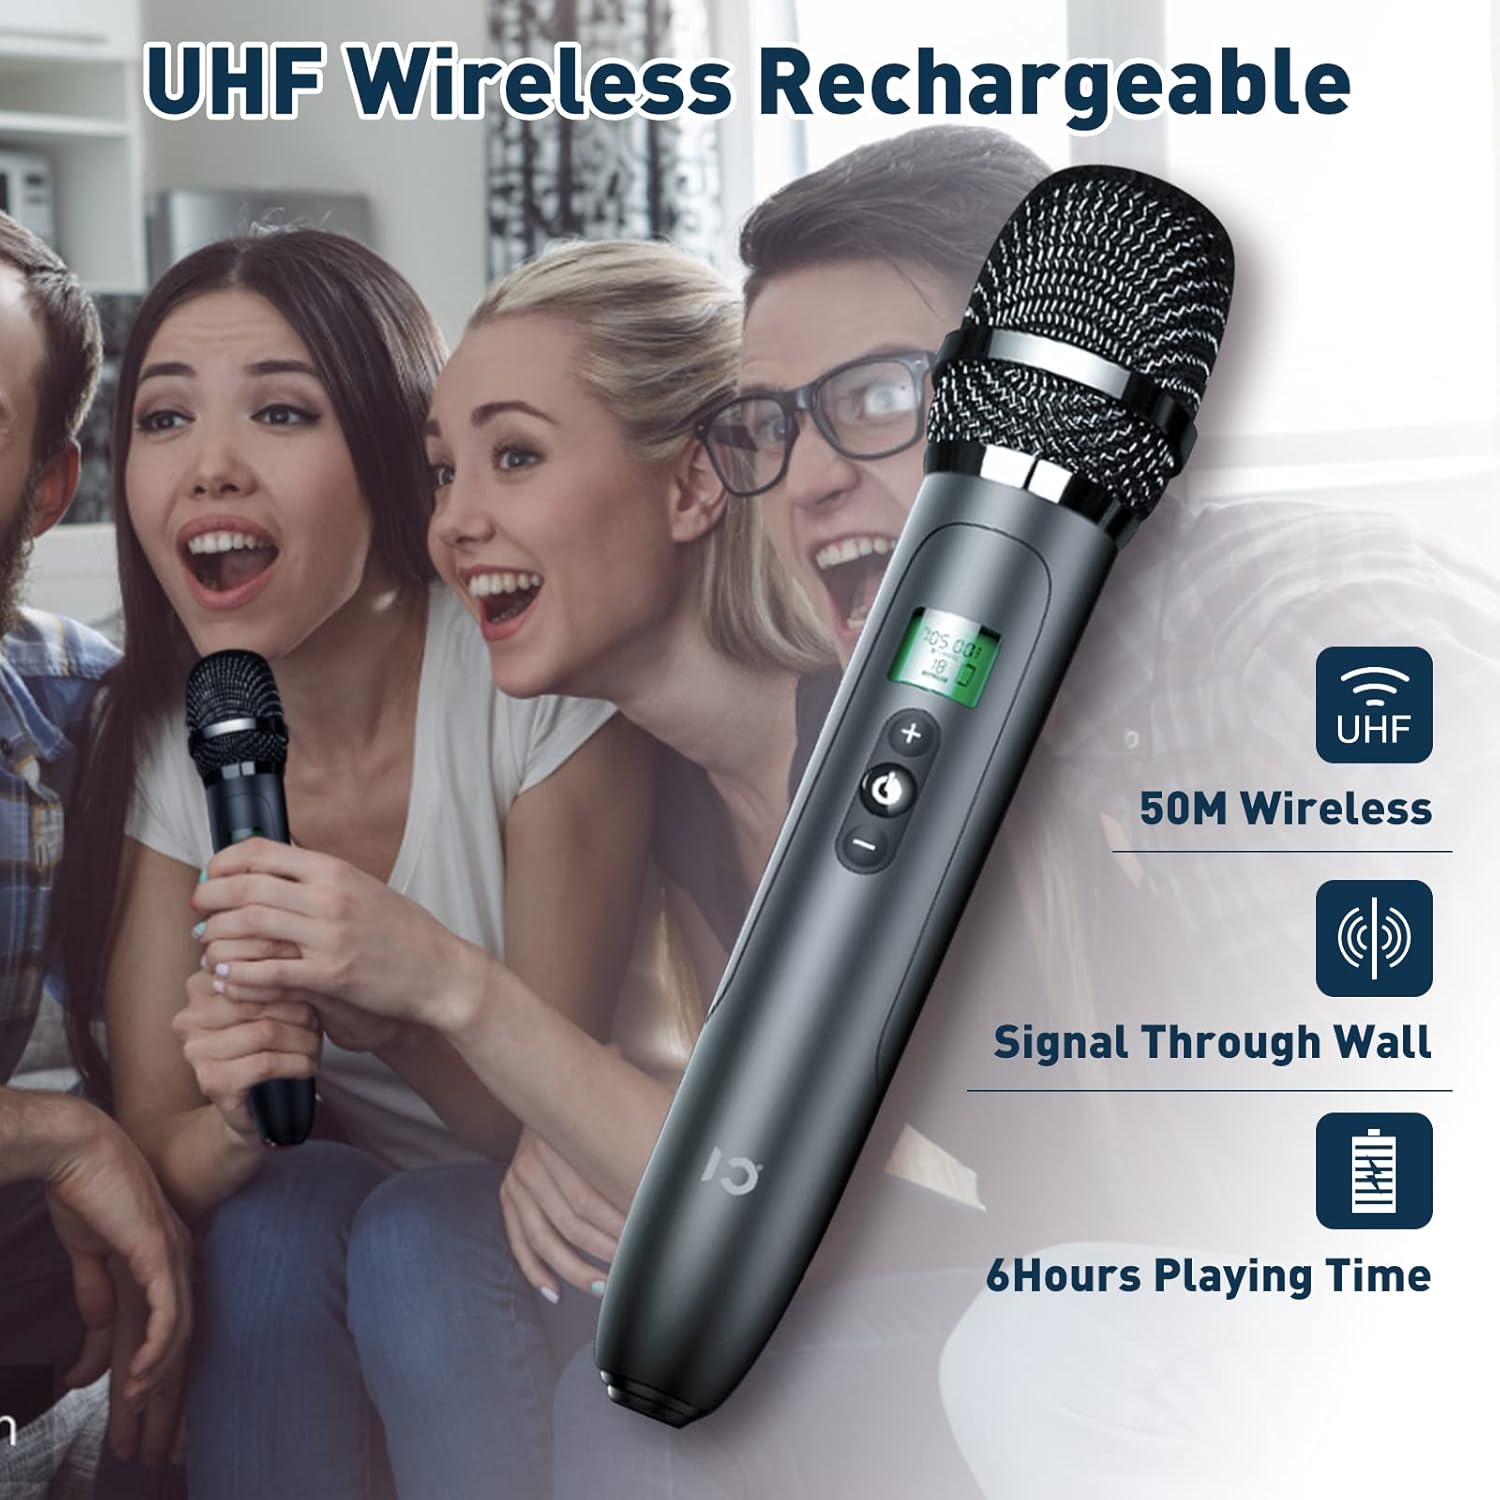
Figure 9: The UHF wireless microphone offers a stable connection up to 15 meters.
4. Adjusting Sound Settings
- Speaker Volume: Use the main speaker volume dial on the top panel to adjust the overall output volume.
- Equalizer Presets: Rotate the Equalizer Dial on the front panel to select from different sound modes:
- Standard: General audio playback.
- Pro: Enhanced professional sound.
- MC: Optimized for vocal clarity.
- Acoustic: Natural sound reproduction.
- Popular: Boosted bass and treble for popular music.
Maintenance
- Cleaning: Use a soft, dry cloth to clean the exterior of the unit and microphone. Do not use liquid cleaners or abrasive materials.
- Storage: Store the unit in a cool, dry place away from direct sunlight and extreme temperatures.
- Battery Care: To prolong battery life, avoid fully discharging the unit and microphone frequently. Recharge them regularly, even if not in use for extended periods.
Troubleshooting
| Problem | Possible Cause | Solution |
|---|---|---|
| No power | Battery is depleted; Power switch is off. | Charge the unit; Ensure the power switch is in the "On" position. |
| No sound from speaker | Volume too low; Incorrect input mode selected; Device not connected properly. | Increase speaker volume; Select the correct input mode (Bluetooth, AUX, USB, TF); Reconnect your audio source. |
| Microphone not working | Microphone is off or uncharged; Microphone volume too low; Out of range. | Charge and power on the microphone; Increase microphone volume; Ensure microphone is within 15m of the main unit. |
| Bluetooth connection issues | Device too far; Bluetooth not enabled on source device; Interference. | Move device closer to the unit; Enable Bluetooth on your device; Disconnect other Bluetooth devices. |
| Remote control not responding | Remote battery depleted; Obstruction between remote and unit. | Replace remote batteries; Ensure clear line of sight to the unit's IR receiver. |
Specifications
| Feature | Detail |
|---|---|
| Model Number | T7 |
| Brand | SHIDU |
| Output Power | 40W |
| Speaker Configuration | 2 x 4.0-inch woolen cone woofer, 2 x 1.5-inch silk diaphragm tweeter |
| Connectivity | Bluetooth 5.0, AUX, USB, TF/SD Card, UHF Wireless Microphone |
| Bluetooth Range | Up to 49 ft (15m) |
| Main Unit Battery | 4400mAh Lithium Ion (6-8 hours playtime) |
| Microphone Battery | Rechargeable (details not specified, but included) |
| Product Dimensions (L x W x H) | 9.45 x 6.69 x 3.54 inches |
| Item Weight | 7.52 pounds (approx. 3.42 kg) |
| Mounting Type | Tabletop |
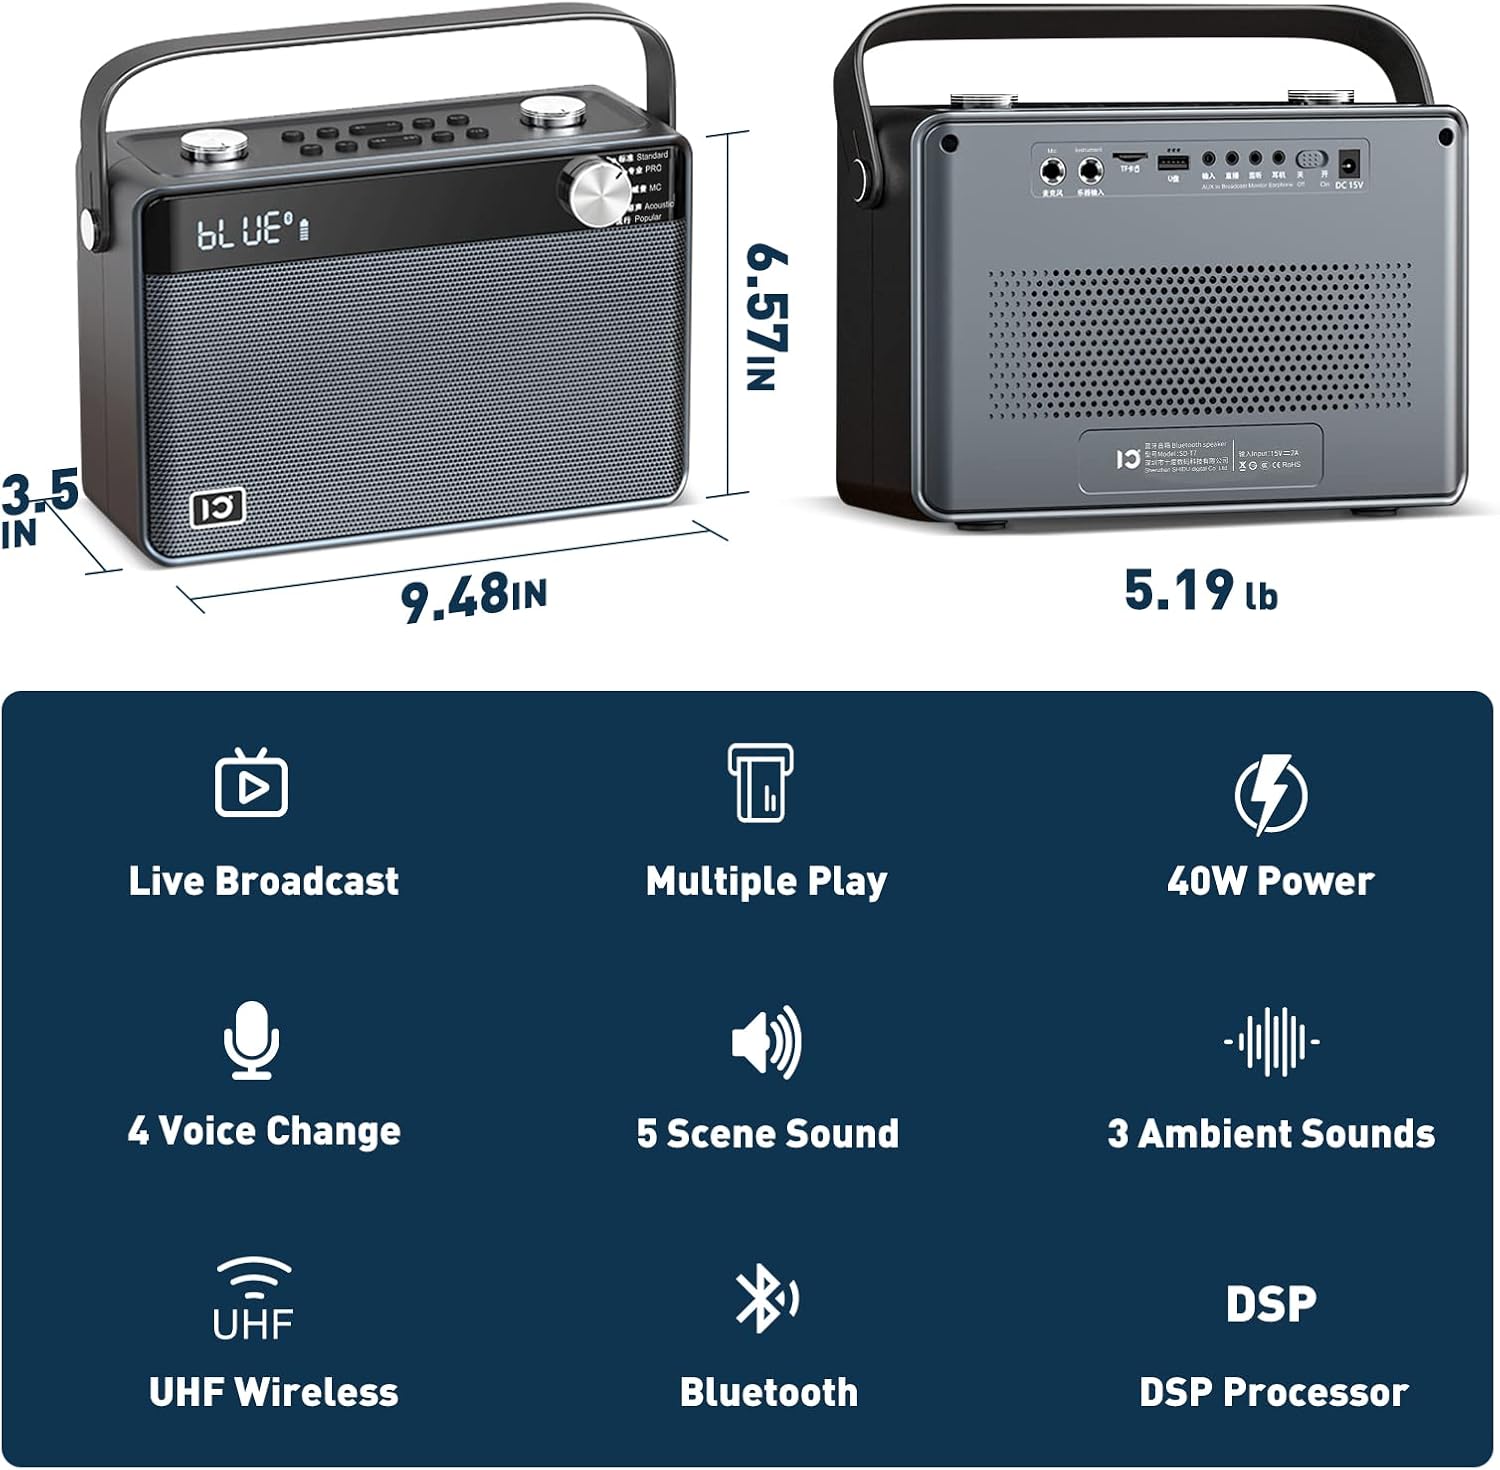
Figure 10: Physical dimensions of the SHIDU T7 main unit.
Warranty and Support
The SHIDU T7 Karaoke Machine comes with a standard manufacturer's warranty. Please refer to the included Warranty Card in your package for specific terms and conditions.
For technical support, troubleshooting assistance, or warranty claims, please contact SHIDU customer service through the retailer where you purchased the product or visit the official SHIDU website.
You can also visit the SHIDU Brand Store on Amazon for more information and support resources.


