
Introduction
Thank you for choosing the JULIAQUA Submersible Aquarium Heater. This manual provides essential information for the safe and efficient operation of your heater. Please read these instructions carefully before installation and use, and retain them for future reference.
This heater is designed to maintain a stable temperature in your aquarium, suitable for both freshwater and saltwater environments. It features a precise temperature display and an adjustable thermostat for optimal aquatic conditions.
Safety Information
- Always inspect the heater for any damage before initial use. Do not use if damaged.
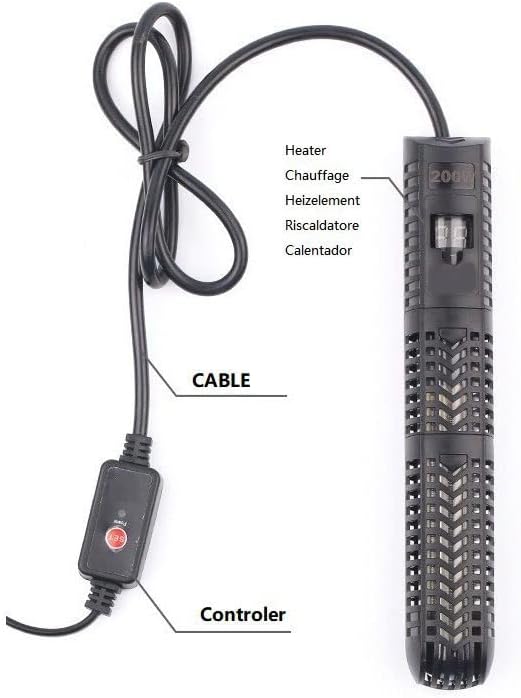
- The controller unit is not waterproof. Do not immerse it in water or wash it. Ensure it remains dry at all times.
- Ensure the heater is fully submerged in water before plugging it into a power outlet.
- Unplug the heater from the power source before performing any maintenance on the aquarium or the heater itself.
- This appliance is designed for indoor aquarium use only.
- Keep out of reach of children.
Product Components
The JULIAQUA Submersible Aquarium Heater package includes the following components:
- Submersible Heating Element
- External Temperature Controller with Display
- Suction Cups for mounting
Specifications
The JULIAQUA Submersible Aquarium Heater is available in various wattages to suit different tank sizes. The Y5-500W model is designed for tanks between 65 to 90 gallons.
| Tank Capacity (Gallons) | Power (Watts) | Size (mm) | Cable Length (m) | Temperature Range (°F) |
|---|---|---|---|---|
| < 12 Gal | 50W | 30x165mm | 1.15m | 63°F~94°F |
| < 22 Gal | 100W | 30x165mm | 1.15m | 63°F~94°F |
| < 40 Gal | 200W | 30x215mm | 1.15m | 63°F~94°F |
| < 65 Gal | 300W | 30x275mm | 1.7m | 63°F~94°F |
| < 90 Gal | 500W | 30x325mm | 1.7m | 63°F~94°F |
- Rated Voltage: AC100-130V, 60HZ
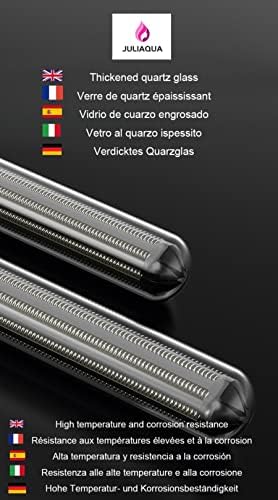
- Heating Element Material: Thickened quartz glass for high temperature and corrosion resistance.
Setup
- Unpack and Inspect: Carefully remove the heater from its packaging. Check for any visible damage to the heating element, cable, or controller. Do not proceed with installation if any damage is found.
- Mounting: Use the provided suction cups to securely attach the heating element to the inside wall of your aquarium. Ensure the heater is fully submerged in water.
- Optimal Placement: For the most accurate temperature control, position the heater horizontally near the water outlet or in an area with good water circulation. This helps distribute heat evenly throughout the tank.
- Controller Placement: Position the external controller in a dry location where it will not come into contact with water.
- Power Connection: Once the heater is securely installed and fully submerged, plug the power cord into a suitable electrical outlet (AC100-130V, 60HZ).

Operating Instructions
- Power On: After plugging in the heater, the display on the controller will illuminate, showing the current water temperature.
- Set Temperature: Press the 'SET' button on the controller to adjust the desired target temperature. Each press will cycle through the available temperature settings. Release the button when your desired temperature is displayed. The heater will automatically begin heating if the current water temperature is below the set temperature.
- Automatic Operation: The heater is thermostatically controlled. It will automatically turn on when the water temperature drops below the set point and turn off once the target temperature is reached, conserving electricity.
- Temperature Display: The controller continuously displays both the current water temperature and the set target temperature.
- Overtemperature Protection: The heater is equipped with an overtemperature protection feature to prevent overheating and ensure the safety of your aquatic life.

Maintenance
- Regular Cleaning: Periodically unplug the heater and remove it from the aquarium. Gently clean any algae or mineral deposits from the heating element using a soft brush or cloth. Do not use harsh chemicals or abrasive materials.
- Controller Care: Ensure the controller remains dry. Do not immerse it in water or wash it. Wipe with a dry cloth if needed.
- Cable Inspection: Regularly check the power cable for any signs of wear, cuts, or damage. Replace the unit if the cable is damaged.
Troubleshooting
- Error Codes (E1, E2, 04):
- If the display shows E1, E2, or 04 and does not return to normal operation, perform the following reset procedure:
- Hold down the controller button for 20 seconds. The display will show a flashing number (e.g., 66).
- Quickly press the button three times.
- Stop pressing. The display should show a new number (e.g., if it flashed 66, it should show 69).
- Wait 2 seconds for the heater to return to normal operation.
Note: If the display flashes 67, set to 70. If it flashes 68, set to 71, and so on.
- Heater Not Feeling Hot to Touch:
- The human body temperature is approximately 36°C (98.6°F). If the set aquarium temperature is lower than your body temperature, the water may feel cool to the touch, even if the heater is functioning correctly. Verify the temperature reading on the display against a separate aquarium thermometer for accurate measurement.
- Inaccurate Temperature Reading:
- Ensure the heater is placed in an area with good water circulation. Poor circulation can lead to localized temperature readings that do not reflect the overall tank temperature. Horizontal placement often provides higher accuracy.

Warranty and Support
The JULIAQUA Submersible Aquarium Heater comes with a 1-year warranty from the date of purchase.
If you encounter any issues, have questions, or require assistance with your product, please do not hesitate to contact JULIAQUA customer support. Provide your model number (Y5-500W) and a detailed description of the issue for prompt service.