
Generi TLTS02A
Generi Table Saw User Manual
Model: TLTS02A
1. Introduction
This manual provides essential information for the safe operation, maintenance, and troubleshooting of your Generi Table Saw, Model TLTS02A. This powerful tool is designed for precise cutting of various wood materials, MDF, particle board, and laminate. Please read this manual thoroughly before operating the saw to ensure safe and efficient use.
The Generi Table Saw features a 2000W motor, 5000 RPM speed, and an integrated dust extraction system with up to 98% chip suction rate. It includes an extendable aluminum table and a 216mm x 60T blade, making it suitable for both hobbyists and home maintenance tasks.
2. Safety Instructions
Always prioritize safety when operating power tools. Failure to follow these instructions may result in serious injury or property damage.
2.1 General Safety Rules
- Read all instructions before operating the tool.
- Keep the work area clean and well-lit. Cluttered or dark areas invite accidents.
- Do not operate power tools in explosive atmospheres, such as in the presence of flammable liquids, gases, or dust.
- Keep children and bystanders away while operating a power tool. Distractions can cause you to lose control.
2.2 Electrical Safety
- Power tool plugs must match the outlet. Never modify the plug in any way.
- Avoid body contact with earthed or grounded surfaces, such as pipes, radiators, ranges, and refrigerators.
- Do not expose power tools to rain or wet conditions. Water entering a power tool will increase the risk of electric shock.
- Do not abuse the cord. Never use the cord for carrying, pulling, or unplugging the power tool.
2.3 Personal Safety
- Always wear eye protection, hearing protection, and a dust mask.
- Dress properly. Do not wear loose clothing or jewelry. Keep your hair and clothing away from moving parts.
- Stay alert, watch what you are doing, and use common sense when operating a power tool.
- Do not overreach. Keep proper footing and balance at all times.
2.4 Table Saw Specific Safety
- Always use the blade guard and splitter when operating the saw.
- Ensure the blade is sharp and clean. A dull blade can cause kickback.
- Never reach over or behind the spinning blade.
- Use a push stick or push block when making narrow cuts.
- Disconnect power before changing blades or performing maintenance.
3. Product Overview
Familiarize yourself with the components of your Generi Table Saw.
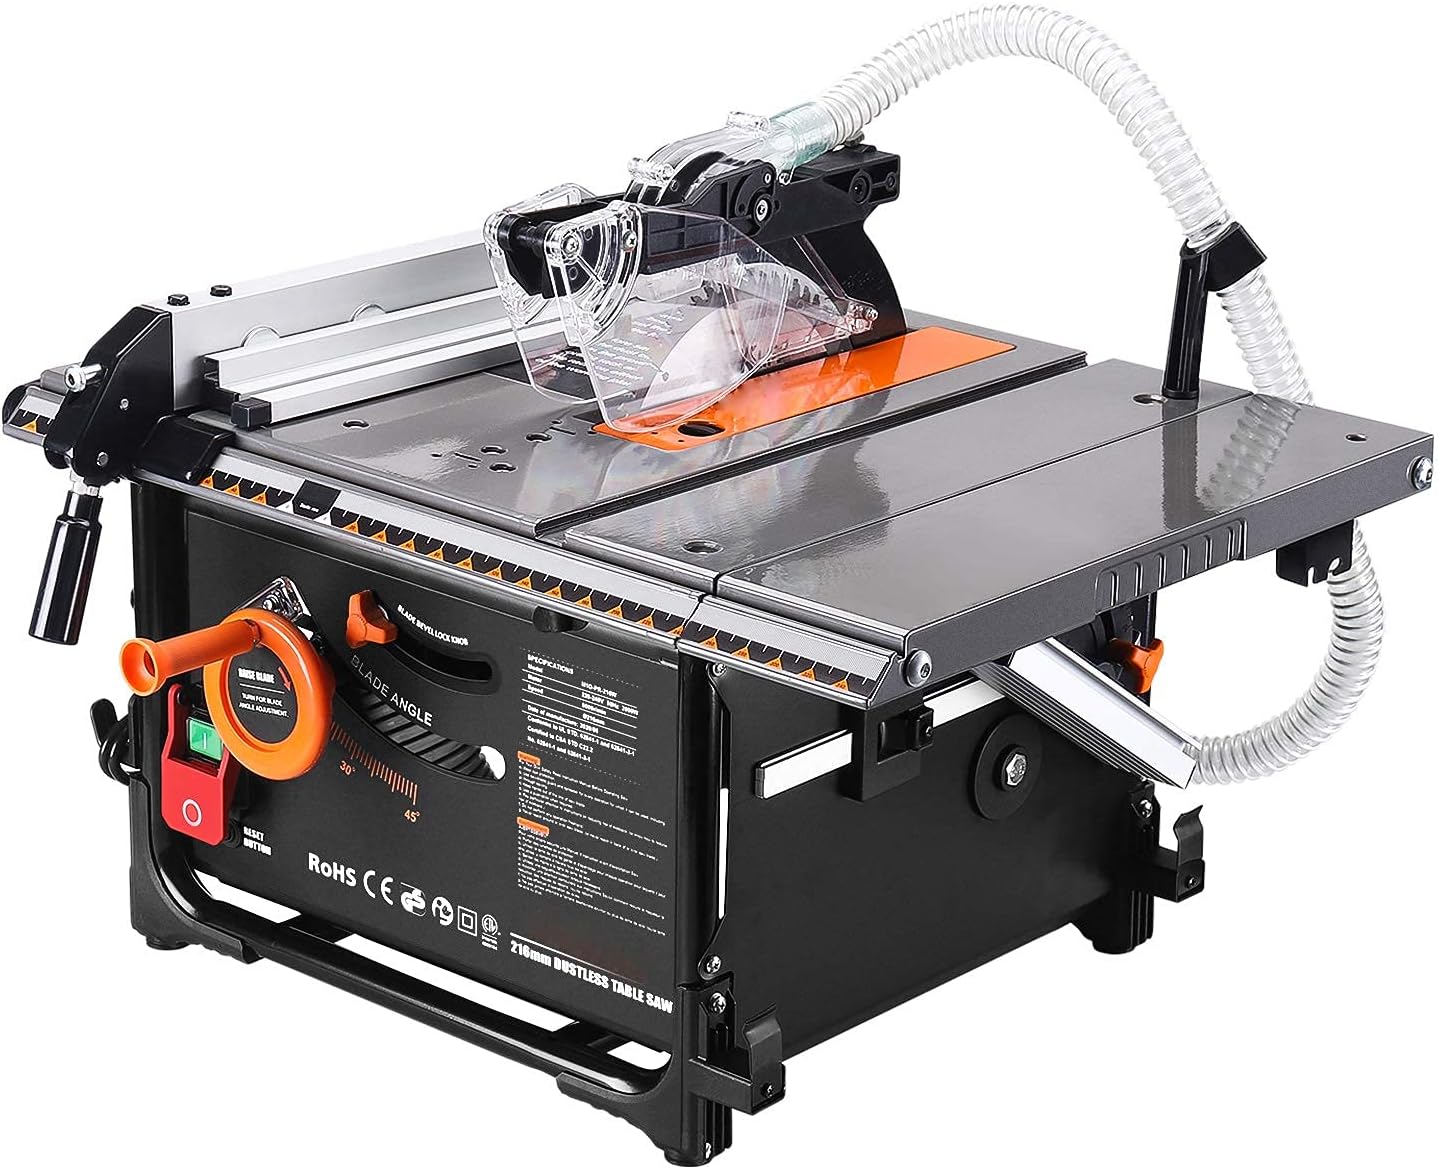
Figure 3.1: Overall view of the Generi Table Saw, showing the main unit, extendable table, blade guard, and dust extraction hose.

Figure 3.2: Key components of the table saw, including the blade lock button, cutting height adjustment, ON/OFF switch, and angle guide. Also shown are on-board storage, removable dust hose, and dust collection bag.
Key Components:
- Main Table: The primary work surface.
- Extendable Table: Aluminum extensions to increase work surface for larger materials.
- Blade Guard: Transparent cover over the blade for safety.
- Splitter (Riving Knife): Prevents kickback by keeping the kerf open.
- Rip Fence: Adjustable guide for making straight cuts parallel to the blade.
- Miter Gauge: Used for making accurate cross-cuts and angled cuts.
- Blade Height Adjustment Wheel: Adjusts the blade's height above the table.
- Blade Angle Adjustment Lever: Tilts the blade for bevel cuts.
- ON/OFF Switch: Power control for the saw.
- Dust Extraction Port: Connects to the internal dust extractor and external collection bag/hose.
4. Setup
Your Generi Table Saw comes largely pre-assembled. Follow these steps for initial setup.
4.1 Unpacking and Inspection
Carefully remove the table saw and all accessories from the packaging. Inspect for any damage that may have occurred during shipping. Report any damage to your supplier immediately.
4.2 Table Extension
The aluminum table can be extended from 600x455mm to 800x455mm to accommodate larger workpieces.

Figure 4.1: Demonstration of the extendable table, showing the increased work surface from 600mm to 800mm for cutting larger wood pieces.
To extend the table, loosen the locking knobs/levers located on the underside or sides of the extension wings. Pull the extension wings outwards until they reach the desired length, then tighten the locking mechanisms securely.
4.3 Blade Installation/Check
The 216mm x 60T blade is typically pre-installed. Ensure it is securely fastened and the teeth are facing the correct direction for cutting. If the blade needs replacement or adjustment, refer to the Maintenance section.

Figure 4.2: Illustration highlighting the powerful 2000W motor operating at 5000 RPM and the 216mm 60T carbide-tipped blade designed for clean cuts.
4.4 Dust Collection System
Connect the provided dust collection bag or hose to the dust extraction port. The integrated dust extractor ensures up to 98% chip suction, providing a cleaner work environment.

Figure 4.3: Visual comparison demonstrating the high efficiency (98% chip suction rate) of the built-in dust extractor compared to a traditional table saw.
5. Operating Instructions
5.1 Powering On/Off
To turn the saw ON, press the green ON button. To turn the saw OFF, press the red OFF button. Note: Due to the powerful motor, minor sparks may occur during startup and shutdown. This is normal and does not affect safety or machine operation.
5.2 Adjusting Blade Height
Rotate the blade height adjustment wheel to raise or lower the blade. For optimal cutting, the blade should extend approximately 1/8 inch (3mm) above the workpiece.
5.3 Adjusting Blade Angle (Bevel Cuts)
The blade can be tilted from 0° to 45° for bevel cuts. Loosen the blade angle adjustment lever, set the desired angle using the scale, and then tighten the lever securely. Maximum cutting depth at 90° is 60mm, and at 45° is 40mm.

Figure 5.1: Illustration demonstrating the ability to perform bevel cuts from 0° to 45° to the left, with maximum cutting depths indicated for both 45mm and 90mm angles.
If the blade is slightly tilted, it can be adjusted using the two screw holes located in front of the blade.
5.4 Using the Rip Fence
The rip fence can be fixed on both sides of the table for parallel cuts. Position the fence at the desired distance from the blade and lock it firmly in place. Ensure the fence is parallel to the blade before cutting.
5.5 Using the Miter Gauge
Insert the miter gauge into the table slot. Adjust the angle for cross-cuts or angled cuts. Hold the workpiece firmly against the miter gauge and feed it slowly through the blade.
5.6 Cutting Procedures
- Straight Cuts: Use the rip fence. Ensure the workpiece is flat on the table and firmly against the fence. Use a push stick for the last part of the cut.
- Bevel Cuts: Adjust the blade angle. Use the rip fence or miter gauge as appropriate.
- Blind Cuts (Dado/Groove): The saw is equipped with two splitter knives for normal and blind cuts. Ensure proper setup for blind cuts.
6. Maintenance
Regular maintenance ensures the longevity and safe operation of your table saw. Always disconnect the power supply before performing any maintenance.
6.1 Cleaning
- After each use, clean sawdust and debris from the table, blade guard, and motor housing.
- Empty the dust collection bag regularly to maintain optimal suction performance.
- The special coating on the aluminum table helps improve cutting smoothness; keep it clean for best results.
6.2 Blade Replacement
When replacing the blade, ensure the saw is unplugged. Use the provided blade wrench to loosen the arbor nut. Carefully remove the old blade and install the new 216mm blade, ensuring the teeth are oriented correctly. Tighten the arbor nut securely.
6.3 General Inspection
Periodically check all nuts, bolts, and screws for tightness. Inspect the power cord for any damage. Ensure all safety features, such as the blade guard and splitter, are in good working order.
7. Troubleshooting
| Problem | Possible Cause | Solution |
|---|---|---|
| Saw does not start | No power supply; ON/OFF switch faulty; internal wiring issue. | Check power connection and circuit breaker. Ensure switch is fully engaged. If problem persists, contact qualified service personnel. |
| Excessive vibration or noise | Loose blade; damaged blade; unstable saw base. | Check blade for tightness and damage, replace if necessary. Ensure saw is on a stable, level surface. |
| Poor dust extraction | Dust bag full; clogged hose/port; improper connection. | Empty dust bag. Clear any blockages in the hose or port. Ensure all connections are secure. |
| Blade not cutting cleanly or burning wood | Dull blade; incorrect blade for material; improper feed rate. | Replace or sharpen blade. Use appropriate blade for the material. Adjust feed rate. |
8. Specifications
| Feature | Detail |
|---|---|
| Model Number | TLTS02A |
| Voltage | 220/240V~50Hz |
| Power | 2000W |
| No-Load Speed | 5000 RPM |
| Blade Diameter | Ø216 mm |
| Arbor Size | Ø30 mm |
| Number of Teeth | 60T |
| Blade Tilt | 0° - 45° |
| Max Cutting Height at 90° | 60 mm |
| Max Cutting Height at 45° | 40 mm |
| Height Adjustment Range | 0-60 mm |
| Work Table Dimensions (Standard) | 600 x 455 mm |
| Work Table Dimensions (Extended) | 800 x 455 mm |
| Weight | 20.5 Kg |
| Sound Level | 105 dB |
| Cord Length | 2 Meters |
| Blade Material | Tungsten Carbide |
| Recommended Surfaces | Wood, MDF, Particle Board, Laminate |
9. Warranty and Support
This Generi Table Saw is covered by a standard manufacturer's warranty against defects in materials and workmanship. For specific warranty terms and conditions, please refer to the documentation included with your purchase or contact Generi customer support.
For technical assistance, parts, or service inquiries, please contact Generi customer support through the contact information provided on the product packaging or official website. Please have your model number (TLTS02A) and purchase date available when contacting support.
Ask a question about this manual
Ask about setup, troubleshooting, compatibility, parts, safety, or missing instructions. Manuals+ will review the question and use this page’s manual context to help answer it.