Introduction
Thank you for choosing the Aubric Universal Ceiling Fan Remote Control Kit. This kit is designed to convert traditional ceiling fans with lights into remote-controllable units, offering convenience and enhanced functionality. It features 3-speed fan control, light ON/OFF, and dimming capabilities for compatible bulbs. Please read this manual thoroughly before installation and operation to ensure proper use and safety.
Package Contents
Verify that all components listed below are included in your package:
- 2 x Remote Control
- 2 x Receiver
- 10 x Wire Nuts
- 2 x Remote Wall Mount
- 4 x Screw
- 4 x Expansion Screw
- 1 x User Manual (this document)

Image: The complete kit contents, including two remote controls, two receivers, wire nuts, and mounting hardware.
Specifications
| Feature | Detail |
|---|---|
| Model Number | 53T Remote 28R Receiver |
| Input Voltage | AC 110-120V, 60Hz |
| Fan Speed Control | 3 Speeds (High, Medium, Low) |
| Light Control | ON/OFF, Dimmable |
| Compatible Bulbs (Dimmable) | Incandescent, Halogen, Dimmable LED/CFL |
| Remote Battery (NOT INCLUDED) | 1 x 9V battery required |
| Receiver Dimensions | Approx. 4.56in (L) x 2.12in (W) x 1.14in (H) |
| Remote Dimensions | Approx. 5.03in (L) x 2.16in (W) x 1.02in (H) |
| Item Weight | 15.5 ounces (total package) |

Image: Detailed dimensions of the remote control and receiver units.
Safety Information
- WARNING: To avoid possible electrical shock, be sure electricity is turned off at the main fuse box or circuit breaker before wiring.
- Do not use with wall-mounted fans or exhaust-type fans.
- Ensure the receiver fits within your fan canopy before installation.
- Always follow local electrical codes and regulations. If you are unsure about wiring, consult a qualified electrician.
- The remote control requires a 9V battery, which is not included. Ensure correct polarity when inserting the battery.
Setup and Installation
1. DIP Code Pairing
Before installation, ensure the DIP switch settings on both the remote control and the receiver match. This prevents interference from other remote-controlled devices in your vicinity.
- Locate the DIP switches on the receiver. These are typically small red switches labeled 1-4.
- Open the battery compartment of the remote control. The DIP switches are located inside.
- Set the switches on both the receiver and the remote to the exact same ON/OFF positions. The default code is 0000 (all OFF), which is not recommended due to potential interference.
- If your fan turns on/off unexpectedly, change the DIP code to a different combination.

Image: Matching DIP switch settings on the remote and receiver for proper pairing.
2. Wiring Connection
IMPORTANT: Turn off power at the circuit breaker before proceeding with wiring.
The installation process does not require removing the light kit or fan blades. Follow the wiring diagram carefully:
- Input Live Wire (Black): Connect to the AC live line from your main power supply.
- Input Neutral Wire (White): Connect to the AC neutral line from your main power supply.
- Output Neutral Wire (White): Connect to the neutral wire of your ceiling fan.
- Light Load Wire (Blue): Connect to the live wire of your fan's light fixture.
- Fan Load Wire (Black): Connect to the live wire of your fan motor.
- Antenna (Brown): This wire is for signal reception; ensure it is not obstructed.
Use the provided wire nuts to secure all connections. Ensure all connections are tight and insulated.

Image: Detailed wiring connection diagram for the receiver.
After wiring, carefully tuck the receiver into the fan canopy, ensuring there is enough space and no wires are pinched. Secure the canopy.
3. Remote Wall Mount Installation
The kit includes a wall mount for convenient storage of your remote control. Use the provided screws and expansion screws to fix the wall mount to a desired location on your wall.
Operating Instructions
Once installed and powered on, you can control your ceiling fan and light using the remote control.
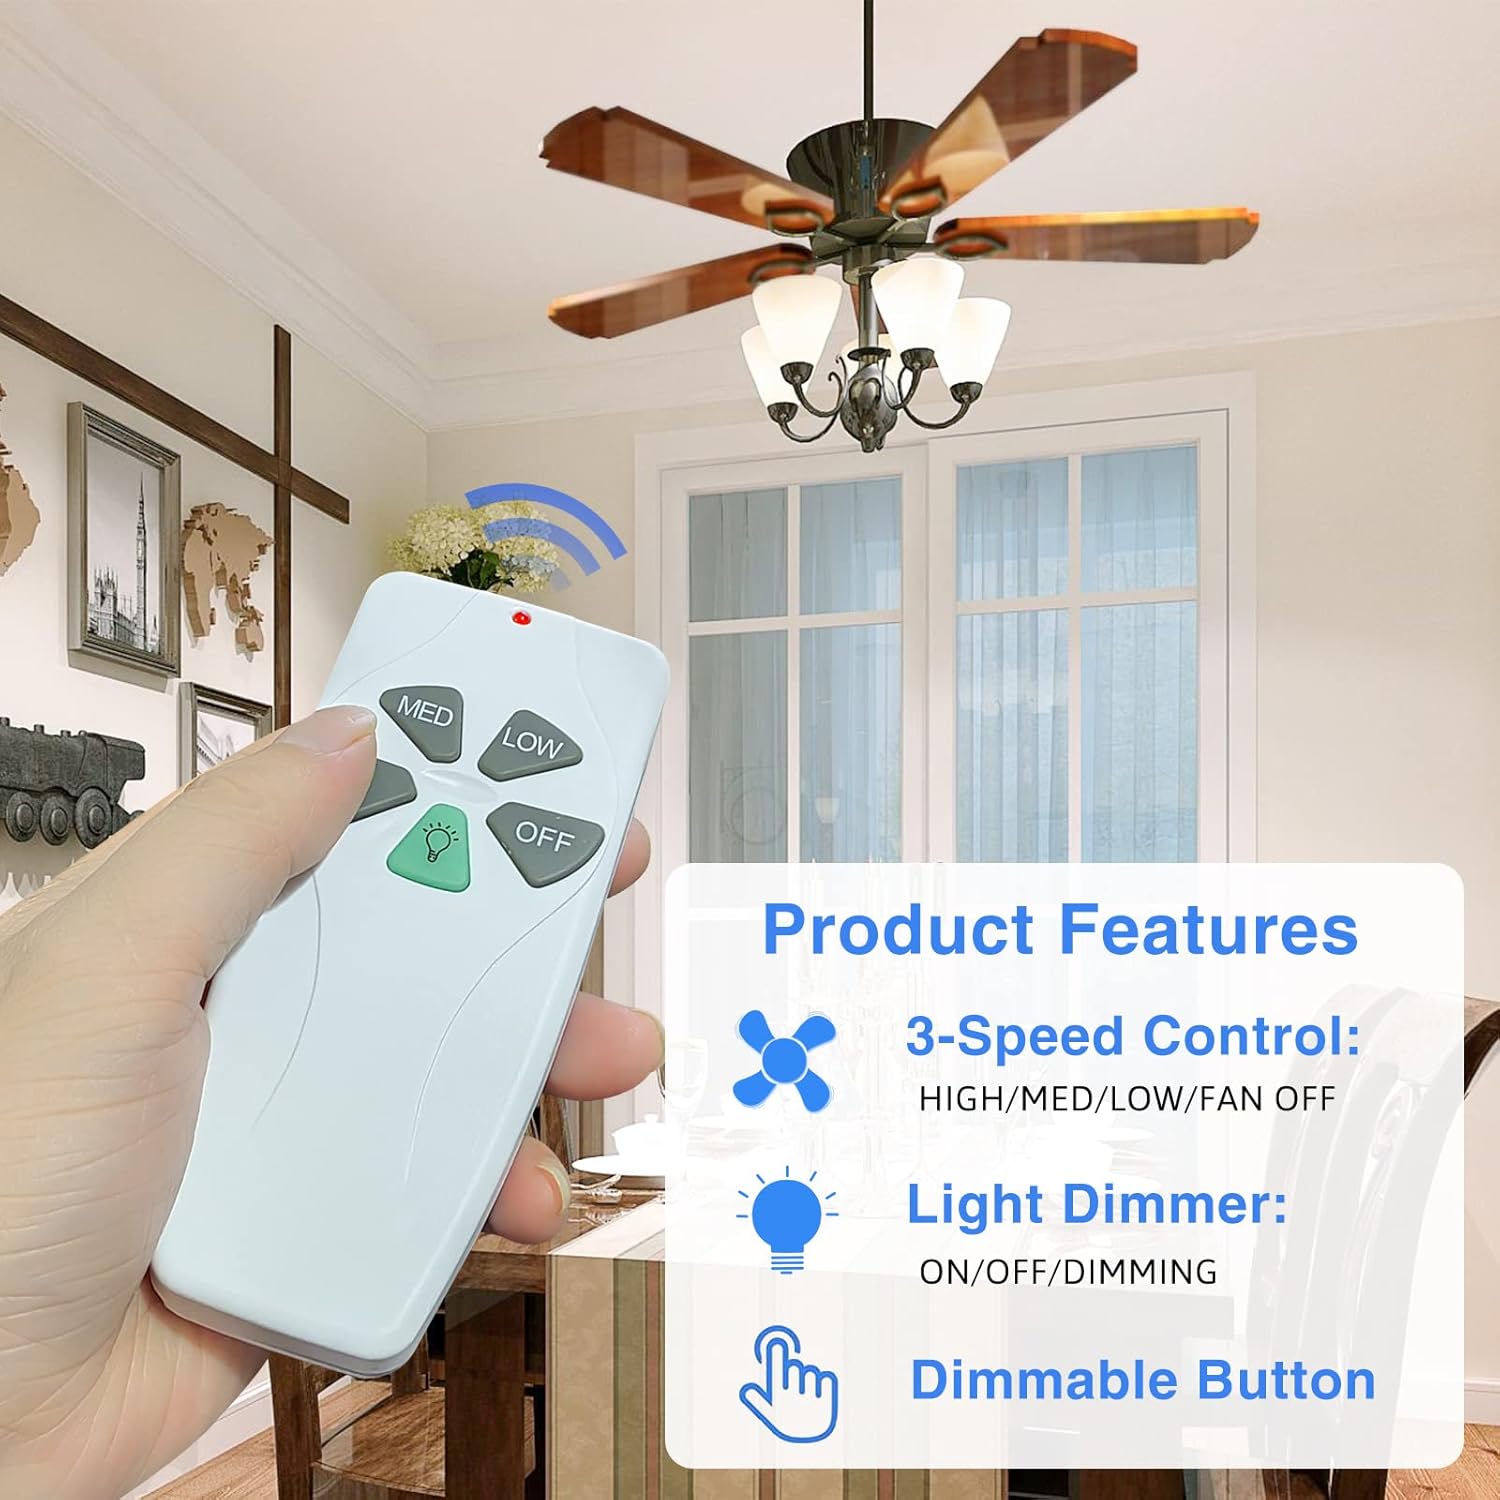
Image: Remote control with labeled buttons for fan speed and light control.
- HI: Sets fan speed to High.
- MED: Sets fan speed to Medium.
- LOW: Sets fan speed to Low.
- OFF (Fan): Turns the fan off.
- Light Button (Bulb Icon):
- Press once to turn the light ON/OFF.
- Press and hold to dim the light (for compatible dimmable bulbs). Release when desired brightness is reached.

Image: Remote control in use, demonstrating wireless operation of a ceiling fan.
Compatibility
This universal remote control kit is compatible with most ceiling fan brands, including Hunter, Harbor Breeze, Westinghouse, Honeywell, and others. It is designed for downrod style fans.
Light Bulb Compatibility:
- Works with incandescent and halogen bulbs for dimming functionality.
- Works with dimmable LED/CFL lamps for dimming functionality.
- Non-dimmable LED/CFL lamps will only have ON/OFF functionality.

Image: Visual guide to fan and bulb compatibility, including dimming capabilities.
Troubleshooting
| Problem | Possible Cause | Solution |
|---|---|---|
| Fan/Light does not respond to remote. | No power to receiver; Incorrect DIP code; Dead remote battery. | Check circuit breaker; Verify DIP codes match; Replace 9V battery in remote. |
| Fan turns on/off unexpectedly. | DIP code interference from nearby devices. | Change the DIP code on both the remote and receiver to a new, unique combination. |
| Light does not dim. | Non-dimmable bulbs installed. | Ensure you are using incandescent, halogen, or dimmable LED/CFL bulbs. |
| Remote signal range is poor. | Antenna obstructed or damaged. | Ensure the receiver's antenna wire is not pinched or covered by metal. |
Maintenance
- Clean the remote control with a soft, dry cloth. Do not use abrasive cleaners or solvents.
- Replace the 9V battery in the remote control when its performance degrades.
- Ensure the receiver area within the fan canopy remains free of dust and debris.
Warranty and Support
Aubric provides a 30-day money-back guarantee and a 1-year replacement warranty for this product.
For any issues or inquiries, please contact Aubric customer service. We offer 7 days a week, 24 hours a day online customer service support to assist you effectively.
For support, please visit the Aubric Store on Amazon or refer to your purchase documentation for direct contact information.


