
1. Introduction
This manual provides essential information for the installation, operation, and maintenance of your LIRUIDA 2-barrel carburetor, models 16010-13W00 and 16010-NK2445. Please read these instructions carefully before proceeding with installation or use to ensure proper function and longevity of the product. Professional installation is highly recommended.
2. Product Overview
The LIRUIDA 2-barrel carburetor is a precision-engineered component designed to deliver the correct air-fuel mixture to your engine. It features a manual choke and is built to meet or exceed OEM specifications for the specified applications.
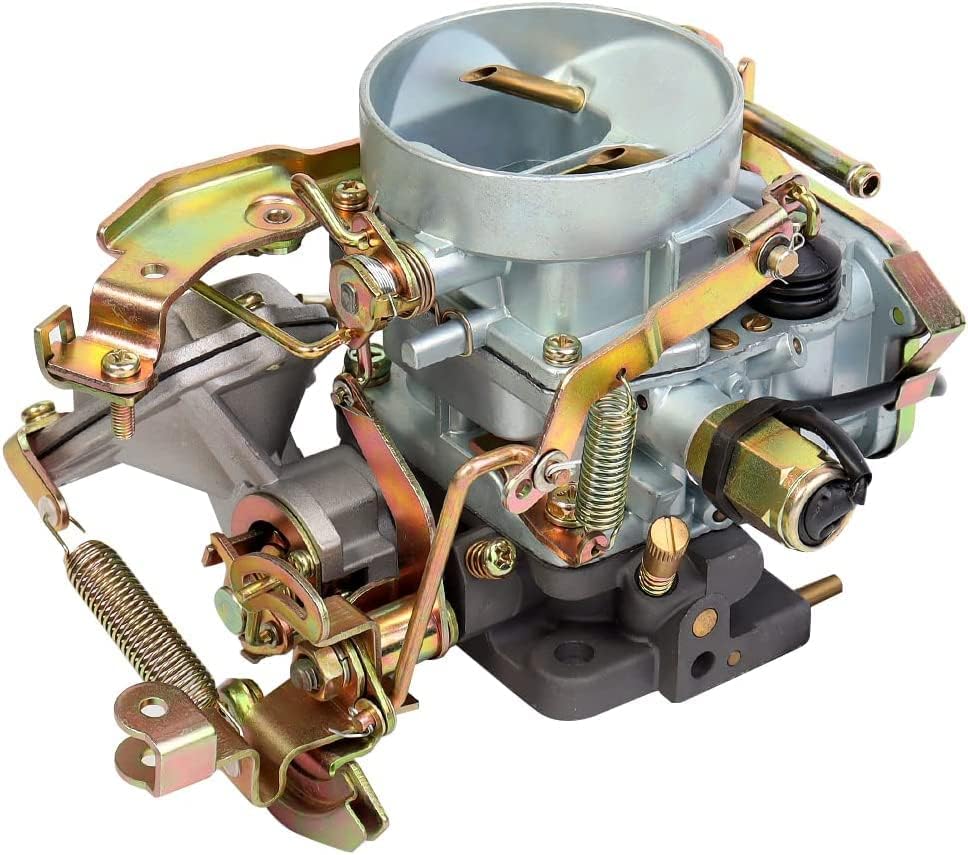
Figure 2.1: Front-side view of the LIRUIDA 2-Barrel Carburetor, highlighting its main body and linkage components.

Figure 2.2: Front view of the carburetor, showing the transparent fuel level window for easy inspection.
3. Compatibility and Fitment
This carburetor is a direct replacement for part numbers 16010-13W00 and 16010-NK2445. It is compatible with the following NISSAN L18 (1.8L SOHC) and Z20 (2.0L SOHC) engines and vehicle models:
- 1973-1976 Datsun 610 L18 1.8L SOHC
- 1974–1979 Datsun 620 Pickup L18 1.8L SOHC
- 1974–1976 Datsun 710 L18 1.8L SOHC
- 1974–1978 Nissan Sunny (B210) L18 1.8L SOHC
- 1977–1979 Datsun Bluebird 810 L18/L20
- 1981–1982 Nissan 720 Pickup Z20 2.0L SOHC
NOTE: This carburetor is NOT compatible with 1983-1984 Nissan 720 Pickup models equipped with 2.2L or 2.4L engines.
4. Specifications
| Part Numbers | 16010-13W00, 16010-NK2445, NK2445 |
| Engine Compatibility | NISSAN L18 (1.8L SOHC), Z20 (2.0L SOHC) |
| Base Plate Dimensions | 44 x 80 MM |
| Barrel Diameter (Main) | φ30 |
| Barrel Diameter (Second) | φ34 |
| Choke Type | Manual |
| Fuel Type | Gasoline |
| Flange Type | Bolt On |
5. Installation and Setup
Installing a carburetor requires mechanical knowledge and specific tools. If you are not experienced with automotive repairs, it is strongly advised to seek professional assistance.
5.1. Safety Precautions
- Ensure the engine is cool and the vehicle's battery is disconnected before starting work.
- Work in a well-ventilated area.
- Have a fire extinguisher nearby.
- Wear appropriate personal protective equipment (gloves, eye protection).
5.2. Installation Steps (General Guide)
- Preparation: Disconnect the fuel line, vacuum lines, throttle linkage, and choke cable from the old carburetor. Label all lines for correct reinstallation.
- Removal: Unbolt and carefully remove the old carburetor from the intake manifold. Clean the manifold surface thoroughly.
- Gasket Placement: Place a new carburetor gasket onto the intake manifold. Ensure it is correctly aligned.
- New Carburetor Installation: Carefully position the new LIRUIDA carburetor onto the gasket and manifold studs. Secure it with the mounting nuts, tightening them evenly to prevent warping.
- Connections: Reconnect the fuel line, vacuum lines, throttle linkage, and manual choke cable. Ensure all connections are secure and free of leaks.
- Initial Adjustments: Perform initial adjustments for idle speed and mixture as per your vehicle's service manual or general carburetor tuning guidelines.
- Final Checks: Reconnect the battery. Start the engine and check for fuel leaks, proper idle, and smooth acceleration. Adjust as necessary.
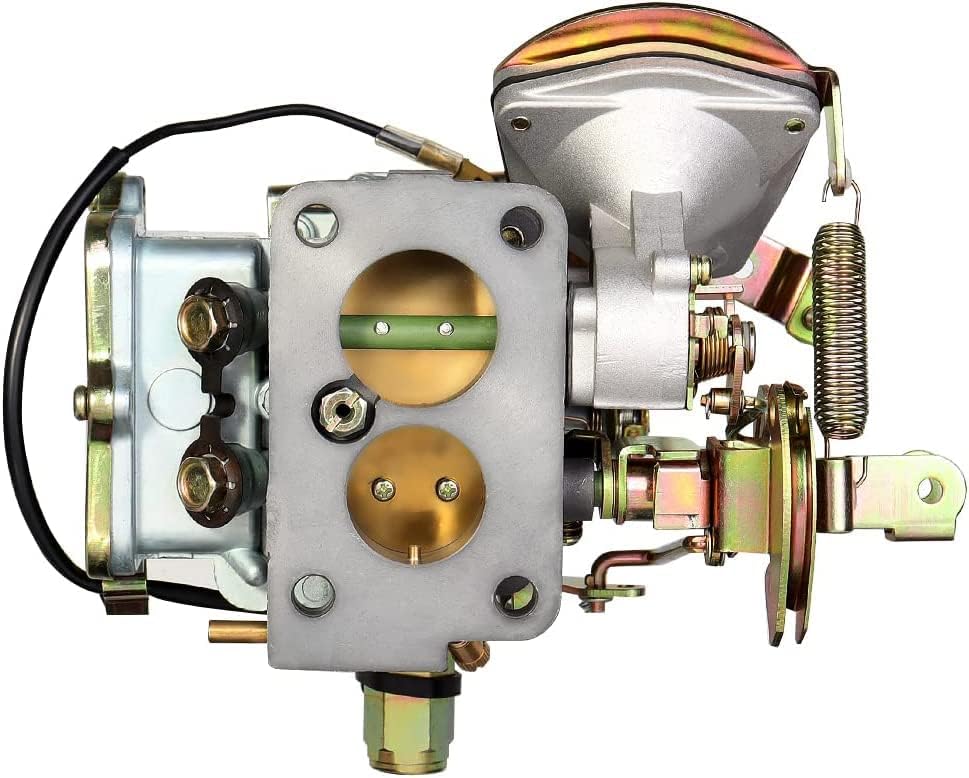
Figure 5.1: Bottom view of the carburetor, illustrating the bolt-on flange for mounting to the intake manifold.
6. Operation
This carburetor features a manual choke. Proper use of the choke is crucial for cold starts.
- Cold Start: Pull the choke knob fully out before starting a cold engine. Once the engine starts, gradually push the choke knob in as the engine warms up, maintaining a smooth idle.
- Warm Start: The choke should not be necessary for a warm engine. If the engine is warm, ensure the choke is fully disengaged (pushed in).
- Driving: Ensure the choke is fully disengaged during normal driving conditions to prevent excessive fuel consumption and carbon buildup.
7. Maintenance
Regular maintenance helps ensure optimal performance and extends the life of your carburetor.
- Fuel Filter: Regularly check and replace your fuel filter to prevent contaminants from reaching the carburetor.
- Air Filter: Ensure your engine's air filter is clean and in good condition to prevent dirt and debris from entering the carburetor.
- Linkage Lubrication: Periodically lubricate the throttle and choke linkages with a suitable lubricant to ensure smooth operation.
- Visual Inspection: Routinely inspect the carburetor for any signs of fuel leaks, loose connections, or damaged components.
- Cleaning: If performance issues arise, a professional carburetor cleaning may be necessary. Avoid using harsh chemicals that could damage seals or coatings.
8. Troubleshooting
This section addresses common issues you might encounter with your carburetor.
8.1. Engine Cranks but Won't Start
- Check Fuel Supply: Ensure there is fuel in the tank and the fuel pump is operating correctly.
- Choke Position: Verify the manual choke is properly engaged for a cold start.
- Spark: Confirm spark plugs are firing.
- Fuel Filter: A clogged fuel filter can restrict fuel flow.
8.2. Rough Idle or Stalling
- Vacuum Leaks: Inspect all vacuum lines for cracks or loose connections.
- Idle Mixture/Speed: Adjust the idle mixture screw and idle speed screw according to vehicle specifications.
- Dirty Jets: Contaminants in the fuel system can clog carburetor jets.
8.3. Poor Acceleration or Hesitation
- Accelerator Pump: Ensure the accelerator pump is functioning correctly and delivering a squirt of fuel when the throttle is opened.
- Main Jets: Clogged or incorrect main jets can cause poor performance under load.
- Timing: Incorrect engine timing can also affect acceleration.
8.4. Excessive Fuel Consumption
- Float Level: An incorrect float level can cause the carburetor to run rich.
- Choke Operation: Ensure the choke is fully opening when the engine is warm.
- Mixture Adjustment: The idle mixture may be set too rich.
For persistent issues, consult a qualified automotive technician.
9. Warranty and Support
LIRUIDA stands behind the quality of its products. This carburetor comes with a 12-Month Warranty. We also offer a worry-free return and refund policy.
For technical support, warranty claims, or any questions regarding your LIRUIDA carburetor, please contact our customer service department through the retailer where the product was purchased.
Please have your purchase details and product model number ready when contacting support.