
WAINLUX JL3 Laser Engraving Machine User Manual
Model: JL3-5.5
1. Introduction
This user manual provides essential information for the safe and effective operation of your WAINLUX JL3 Laser Engraving Machine. Please read this manual thoroughly before operating the device to ensure proper setup, usage, and maintenance. Adhering to these guidelines will help you achieve optimal results and extend the lifespan of your machine.
2. Safety Precautions
Operating a laser engraving machine involves potential hazards. Always prioritize safety to prevent injury or damage to the equipment.
- Eye Protection: Always wear the provided laser eye shield or equivalent certified laser safety glasses when the machine is in operation. The laser beam can cause severe eye damage.
- Ventilation: Ensure adequate ventilation in your workspace. Laser engraving can produce smoke and fumes, especially when working with certain materials.
- Fire Hazard: Keep a fire extinguisher nearby. Some materials can ignite during engraving. Never leave the machine unattended while operating.
- Material Compatibility: Only engrave materials specified as safe. Avoid engraving PVC, vinyl, or other materials that produce toxic fumes when burned.
- Children and Pets: Keep children and pets away from the operating area.
- Power Supply: Use only the specified DC12V/5A power supply. Disconnect power before performing any maintenance or assembly.

3. Product Overview and Components
The WAINLUX JL3 is a versatile laser engraving machine designed for precision work on various materials. It features a high-strength aluminum body and acrylic components, ensuring durability and stability.
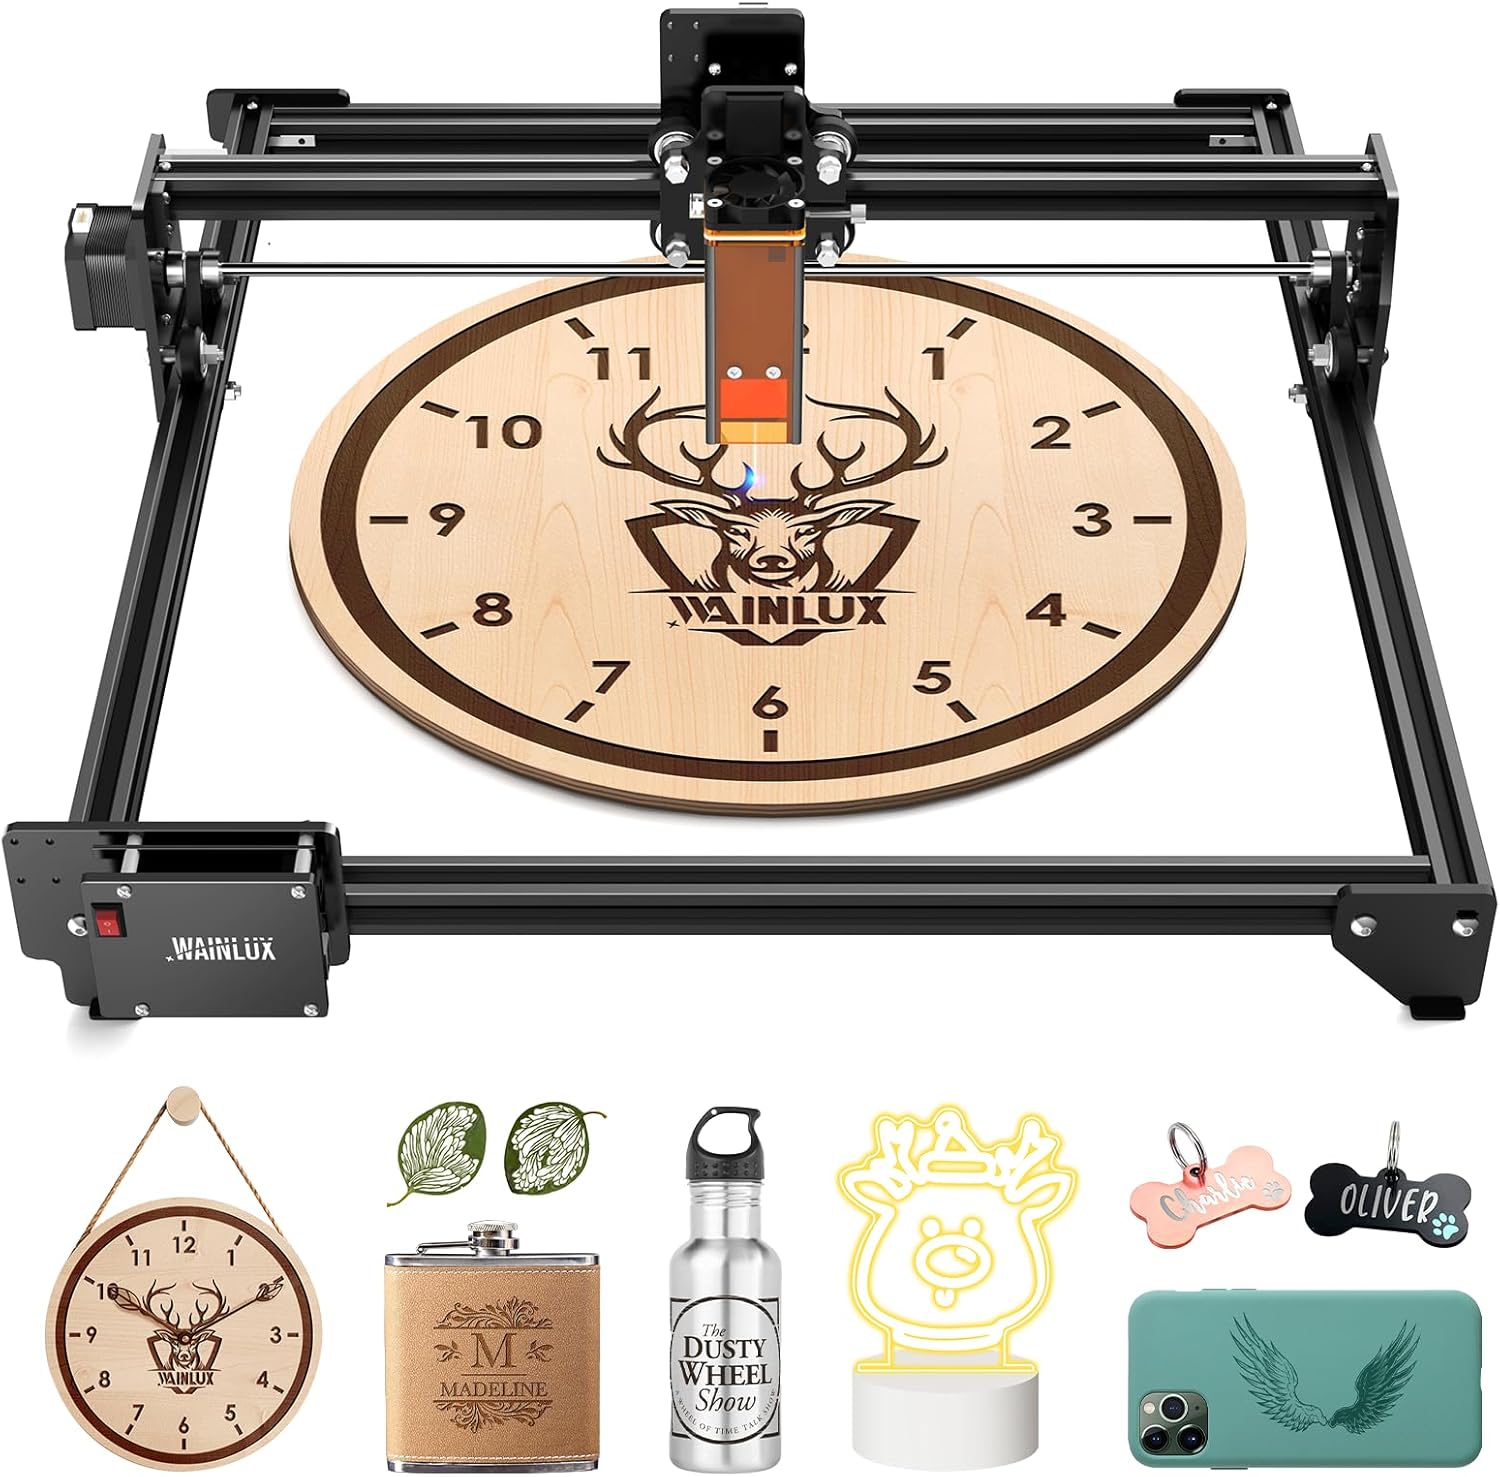
Key Components:
- Laser Module: The core component, featuring a 5.5W laser output with fixed focus and spot compression technology.
- Lifting Frame: Allows for flexible adjustment of the laser module's height for optimal focusing.
- High-Strength Aluminum Body: Provides a stable and durable framework for precise movement.
- Control Unit: Houses the 32-bit ARM high-precision high-speed master for controlling engraving operations.
- Data Interfaces: USB Type-B port and Bluetooth for connectivity.
4. Setup
4.1 Assembly
Refer to the included toolkit and assembly guide for detailed instructions on assembling the machine frame and attaching the laser module. Ensure all screws are tightened securely for stability.
4.2 Power and Data Connection
- Connect the DC12V/5A power adapter to the machine's DC005 power input.
- For wired connection, connect the machine to your computer using the provided USB Type-B cable.
- For wireless connection, ensure Bluetooth is enabled on your device and pair with the WAINLUX JL3.
4.3 Software Installation
The WAINLUX JL3 is compatible with various engraving software. A self-developed free application is provided on the included USB flash drive, suitable for beginners. The machine also supports popular software such as LaserGRBL and LightBurn.
- Supported Operating Systems: Windows (Win7/Win8/Win10), macOS, iOS, Android.
- Supported Image Formats: JPEG, BMP, GIF, PLT, PNG, DXF, JPG, XJ, HPGL.

5. Operation
5.1 Preparing for Engraving
- Place the material to be engraved flat on the working surface within the 370mm x 410mm engraving area.
- Adjust the laser module height using the lifting frame to achieve the optimal fixed focus of 4.7mm. The laser spot size is 0.05mm².
- Ensure proper ventilation is active.
- Wear your laser safety glasses.
5.2 Engraving Process
- Open your chosen engraving software (e.g., LaserGRBL, LightBurn, or WAINLUX app).
- Import your desired image or design file.
- Adjust engraving parameters such as power, speed (up to 80mm/s for engraving, 300mm/s for movement), and passes according to your material and desired outcome.
- Initiate the engraving process from the software. Monitor the machine closely during operation.

5.3 Offline Engraving
The JL3 Pro supports offline engraving, allowing you to execute pre-loaded designs without a continuous connection to a computer. This feature streamlines repetitive tasks and enhances convenience.
5.4 Engravable Materials
The 5.5W laser module is capable of engraving and cutting a wide range of materials, including:
- Metal (engraving)
- Paper
- Wood chips (can cleanly cut 9mm pine boards)
- Non-transparent glass (engraving)
- Plastics
- Stone (engraving)
- Cloth
- Leather
- Bamboo
- PCB board
- Aluminum oxide


5.5 Rotary Engraving (Optional Accessory)
The WAINLUX JL3 supports engraving on cylindrical objects with the use of an optional rotary roller accessory. This expands the machine's capabilities to items like cups, bottles, and pens.

6. Maintenance
Regular maintenance ensures the longevity and optimal performance of your WAINLUX JL3.
- Clean the Laser Lens: Periodically clean the laser lens with a soft, lint-free cloth and lens cleaning solution to remove any dust or debris that may affect laser performance.
- Keep Rails Clean: Wipe down the guide rails and moving parts to prevent dust accumulation, which can hinder smooth operation.
- Power Off When Not In Use: Always disconnect the power supply when the machine is not in use or during maintenance.
7. Troubleshooting
If you encounter issues with your WAINLUX JL3, refer to the following common problems and solutions:
- Machine Not Powering On: Check the power cable connection and ensure the power adapter is securely plugged into a working outlet.
- Laser Not Firing: Verify that the laser module is correctly installed and connected. Check software settings to ensure the laser is enabled and power is set appropriately.
- Poor Engraving Quality: Adjust the laser focus, power, and speed settings. Ensure the material is flat and the lens is clean.
- Connection Issues (USB/Bluetooth): Restart the machine and your computer/mobile device. Reinstall drivers if necessary for USB connection. For Bluetooth, ensure it's enabled and paired correctly.
- Machine Not Moving: Check for any obstructions on the rails. Ensure all cables are securely connected.
For persistent issues, please contact WAINLUX customer support.
8. Specifications
| Parameter | Value |
|---|---|
| Model | JL3 Pro / JL3-5.5 |
| Body Material | High-strength aluminum body + acrylic |
| Laser Focusing | Fixed Focus Module + Lifting Frame |
| Fixed Focus Distance | 4.7mm |
| Laser Spot Size | 0.05mm² |
| Power Supply | DC12V/5A |
| Data Interface | USB Type-B & Bluetooth Connection |
| Cooling Method | Air cooling |
| Machine Power | <60W |
| Laser Output Power | ≈ 5.5W |
| Laser Wavelength | 455nm±5nm |
| Laser Life | >10000H |
| Engraving Area | 16.14''x15.74'' (approx. 410mm x 370mm) |
| Engraving Accuracy | 0.05mm |
| Engraving Speed | Up to 80mm/s (Moving speed up to 300mm/s) |
| Supported Systems | Win7/Win8/Win10/MAC/IOS/Android |
| Supported Image Formats | JPEG/BMP/GIF/PLT/PNG/DXF/JPG/XJ/HPGL |
| Product Dimensions | 590mm x 510mm x 210mm |
| Product Net Weight | 2.65kg |
| Included Components | Laser eye shield, Toolkit, Manual, Power cable, Laser engraving machine |
9. Warranty and Support
WAINLUX provides comprehensive support for your JL3 Laser Engraving Machine:
- Warranty: Enjoy a 2-year warranty service from the date of purchase.
- Technical Support: Our after-sales team is available to provide technical assistance and will respond to your email inquiries within 24 hours.
- Returns Policy: We support 30-day unreasonable returns, which includes replacement of wearing parts and replacement of new machines for non-human-caused failures.
For any inquiries or support, please refer to the contact information provided with your purchase or visit the official WAINLUX website.


