1. Product Overview
The WulaWindy Mini Digital Alarm Clock is a compact and stylish timekeeping device featuring a wood-grain finish and an LED display. It offers multiple functionalities designed for convenience and ease of use in various indoor settings.

Image: Front view of the WulaWindy Mini Digital Alarm Clock displaying the current time.
Key Features:
- Digital LED display with adjustable brightness.
- Three independent alarm settings with weekday mode option.
- Adjustable alarm volume with five levels.
- 12-hour or 24-hour time format selection.
- Snooze function.
- Sound control and power-saving mode (display activates by sound or touch).
- Internal battery for time memory during power outages (clock is corded electric).
2. Setup
2.1 Unpacking and Power Connection
Carefully remove the alarm clock from its packaging. Connect the provided power cord to the input port on the back of the clock and plug the other end into a standard electrical outlet. The clock is designed for corded electric operation and is not battery-operated for primary function.

Image: The WulaWindy Mini Digital Alarm Clock connected to a power source via its cord.
2.2 Controls Overview
The back of the clock features several buttons and switches for configuration:

Image: Detailed view of the back panel of the alarm clock, highlighting control buttons and input port.
- SET: Used to enter and confirm settings.
- UP/DOWN buttons: Adjust values (time, alarm, brightness, volume).
- ALARM 1-2-3 switches: Individually enable or disable alarms.
- 12H/24H switch: Toggles between 12-hour and 24-hour time formats.
- SOUND CONTROL switch: Activates or deactivates sound control/power-saving mode.
- BRIGHTNESS ADJUSTMENT dial: Manually adjusts display brightness.
2.3 Initial Time Setting
- Press and hold the SET button until the hour digits begin to flash.
- Use the UP/DOWN buttons to adjust the hour.
- Press SET again to move to the minute setting. Use UP/DOWN to adjust minutes.
- Continue pressing SET to cycle through year, month, and day settings, adjusting each with UP/DOWN.
- Press SET one last time to exit the time setting mode.
2.4 12/24 Hour Format
Slide the 12H/24H switch on the back of the clock to select your preferred time display format.
3. Operating Instructions
3.1 Setting Alarms (A1, A2, A3)
The clock allows for three independent alarm settings.

Image: Visual representation of setting and activating multiple alarms.
- Press the SET button repeatedly until 'A1' appears on the display.
- Press and hold SET until the hour digits for A1 flash. Use UP/DOWN to set the hour.
- Press SET again, then use UP/DOWN to set the minutes.
- Press SET to confirm. You can then choose to set the alarm for everyday (ON), Monday-Friday (E), or turn it off (OFF). Use UP/DOWN to select.
- Repeat steps for A2 and A3 if desired.
- To activate an alarm, slide the corresponding ALARM 1-2-3 switch on the back of the clock to the 'ON' position.
3.2 Snooze Function
When an alarm sounds, press any button on the top or back of the clock (except the ALARM switches) to activate the snooze function. The alarm will temporarily stop and sound again after a few minutes.
3.3 Adjusting Brightness
The display brightness can be adjusted to suit your preference.

Image: Display showing various brightness levels from dim to bright.
- Use the BRIGHTNESS ADJUSTMENT dial on the back of the clock to manually increase or decrease the LED display brightness.
- The clock also features an automatic brightness adjustment option, which can be enabled or disabled via the settings.
3.4 Adjusting Alarm Volume
The alarm volume has five levels. To adjust:
- While in normal time display mode, press the DOWN button. The current volume level ('VOLS' followed by a number) will appear.
- Use the UP/DOWN buttons to select the desired volume level (1-5).
- The setting will automatically save after a few seconds.
3.5 Sound Control / Power Saving Mode
This mode allows the display to turn off automatically and activate when sound (e.g., a clap) or touch is detected.
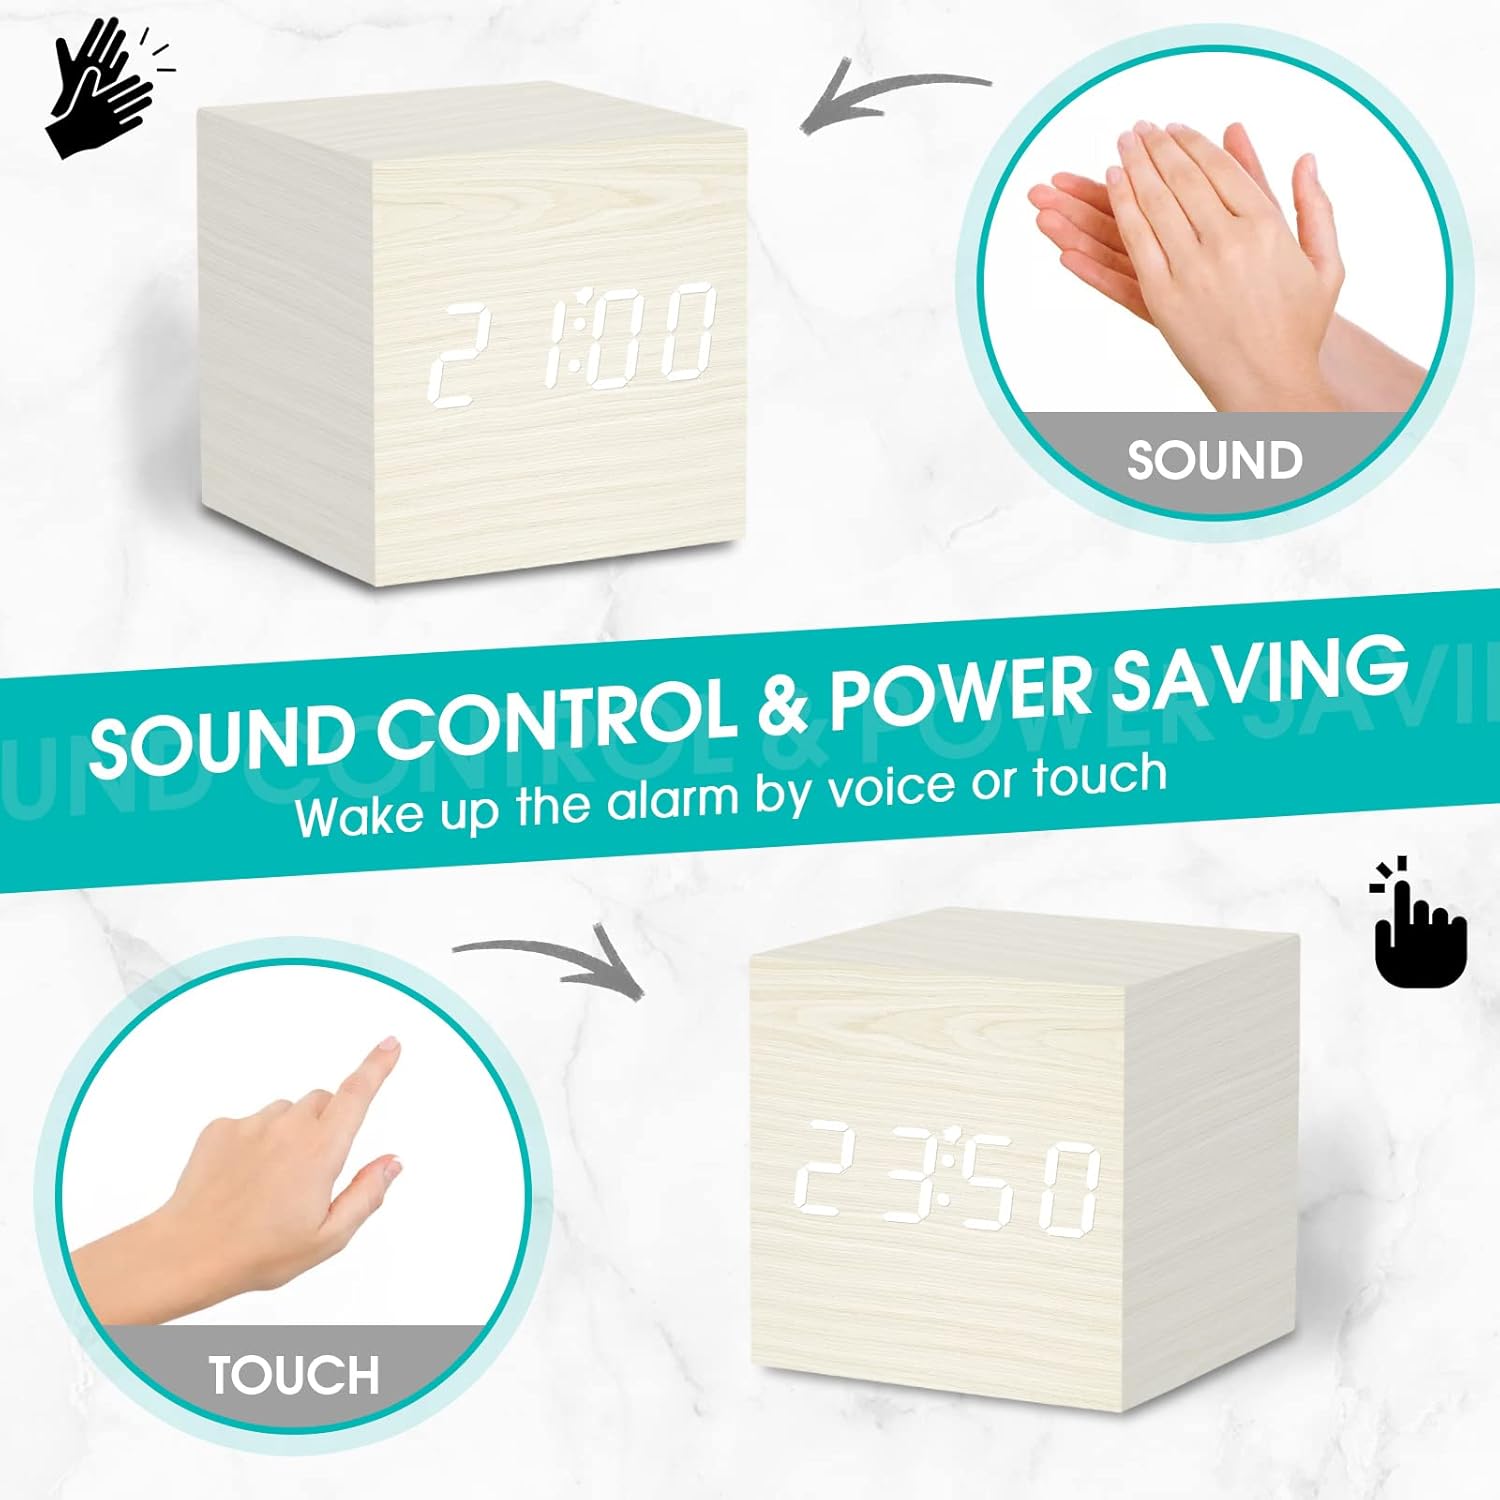
Image: Demonstrating how sound or touch can activate the clock display in power-saving mode.
Slide the SOUND CONTROL switch on the back of the clock to 'ON' to enable this feature, or 'OFF' to keep the display continuously on.
3.6 Video Demonstration
Video: This video provides a review of the WulaWindy Mini Digital Alarm Clock, demonstrating its features and functionality, including setting the time, alarms, and adjusting brightness and volume.
4. Maintenance
4.1 Cleaning
To clean the clock, gently wipe the surface with a soft, dry cloth. Avoid using abrasive cleaners, solvents, or excessive moisture, as these can damage the wood finish or electronic components.
4.2 Power Source Care
Ensure the power cord is not bent, twisted, or placed under heavy objects. Always unplug the device by grasping the plug, not the cord, when disconnecting from the power outlet.
5. Troubleshooting
5.1 Display Not Showing
- Check if the power cord is securely plugged into both the clock and the wall outlet.
- Ensure the SOUND CONTROL switch is not in the 'ON' position, which would turn off the display until activated by sound or touch.
- Adjust the BRIGHTNESS ADJUSTMENT dial to ensure the brightness is not set to 0%.
5.2 Alarm Not Sounding
- Verify that the specific alarm switch (A1, A2, or A3) on the back of the clock is in the 'ON' position.
- Check the alarm time setting to ensure it is correctly configured.
- Ensure the alarm volume is not set to level 0. Adjust using the DOWN button.
5.3 Time Inaccuracy
- If the time becomes inaccurate, reset the time following the instructions in Section 2.3.
- Ensure the clock is receiving consistent power. Power fluctuations can sometimes affect timekeeping.
6. Specifications
| Brand | WulaWindy |
| Model | Mini Digital Alarm Clock |
| Color | White |
| Display Type | Digital |
| Style | Modern |
| Special Feature | Alarm, Snooze |
| Product Dimensions | 2.5"W x 2.5"H |
| Power Source | Corded Electric |
| Room Type | Bedroom |
| Indoor/Outdoor Usage | Indoor |
| Material | Wood |
| Frame Material | Wood |
| Batteries Included | No (Internal battery for memory only) |
| Mounting Type | Tabletop |
| Item Weight | 5 ounces |
7. Warranty and Support
For warranty information or technical support, please refer to the product packaging or contact WulaWindy customer service directly. Contact details can typically be found on the manufacturer's website or within the product documentation.


