
1. Important Safety Instructions
Please read these instructions carefully before using the appliance and keep them for future reference. Failure to follow these instructions may result in electric shock, fire, or serious injury.
- Always ensure the radiator is placed on a stable, flat surface.
- Do not cover the radiator. Covering the radiator can lead to overheating and fire hazards.
- Maintain a safe distance of at least 1 meter (3 feet) from walls, furniture, curtains, and other flammable materials.
- Do not use the radiator in bathrooms, laundry areas, or similar indoor locations where it may come into contact with water.
- Keep the appliance out of reach of children and individuals with reduced physical, sensory, or mental capabilities.
- Unplug the radiator from the power outlet when not in use or before cleaning.
- Do not operate the radiator with a damaged cord or plug, or after the appliance malfunctions or has been dropped or damaged in any manner.
- The radiator is equipped with an Overprotect System and AutoOff System which automatically shut down the unit in case of overheating. If this occurs, unplug the unit and allow it to cool before attempting to restart.
2. Product Overview
The Cecotec ReadyWarm 9000 Space oil radiator is designed for efficient heating of rooms up to 20 m². It features 9 heating modules, a control panel for power and temperature adjustment, and integrated wheels for easy mobility.

Image 2.1: Front view of the Cecotec ReadyWarm 9000 Space oil radiator, showing its 9 heating modules and control panel.
Components:
- Heating Modules: 9 oil-filled fins for heat distribution.
- Control Panel: Includes power switches and a thermostat knob.
- Power Switches: Two switches to select different power levels.
- Thermostat Knob: Used to adjust the desired room temperature.
- Power Cord Storage: Integrated area for tidy cable management.
- Wheels: Multi-directional wheels for easy transport.

Image 2.2: Close-up view of the control panel, highlighting the power switches and thermostat knob.

Image 2.3: Detail of the multi-directional wheels, designed for easy movement of the radiator.

Image 2.4: View of the integrated cable storage feature, located at the base of the control panel.
3. Setup
Follow these steps to prepare your radiator for first use:
- Unpacking: Carefully remove the radiator from its packaging. Retain the packaging for storage or future transport.
- Wheel Assembly (if required): If the wheels are not pre-assembled, attach them to the base of the radiator using the provided hardware. Ensure they are securely fastened for stability.
- Placement: Position the radiator on a firm, level surface. Ensure there is adequate clearance around the unit (at least 1 meter from furniture, curtains, and other objects) to allow for proper heat circulation and to prevent fire hazards. Do not place it directly under a power outlet.
- Power Connection: Ensure the radiator is switched off (both power switches in the '0' position) before plugging it into a suitable 230V AC power outlet.

Image 3.1: Example of proper radiator placement in a room, maintaining distance from objects.
4. Operating Instructions
The radiator offers three power levels and a thermostat for precise temperature control.
- Power On: Plug the radiator into a grounded electrical outlet.
- Select Power Level: Use the two power switches on the control panel to choose your desired heating output:
- Switch 1 (I): Activates minimum power (800 W - Eco mode).
- Switch 2 (II): Activates medium power (1200 W).
- Both Switches (I + II): Activates maximum power (2000 W).
- Set Thermostat: Turn the thermostat knob clockwise to increase the desired temperature or counter-clockwise to decrease it. The radiator will cycle on and off to maintain the set temperature.
- Power Off: To turn off the radiator, set both power switches to the '0' position and then unplug the unit from the wall outlet.
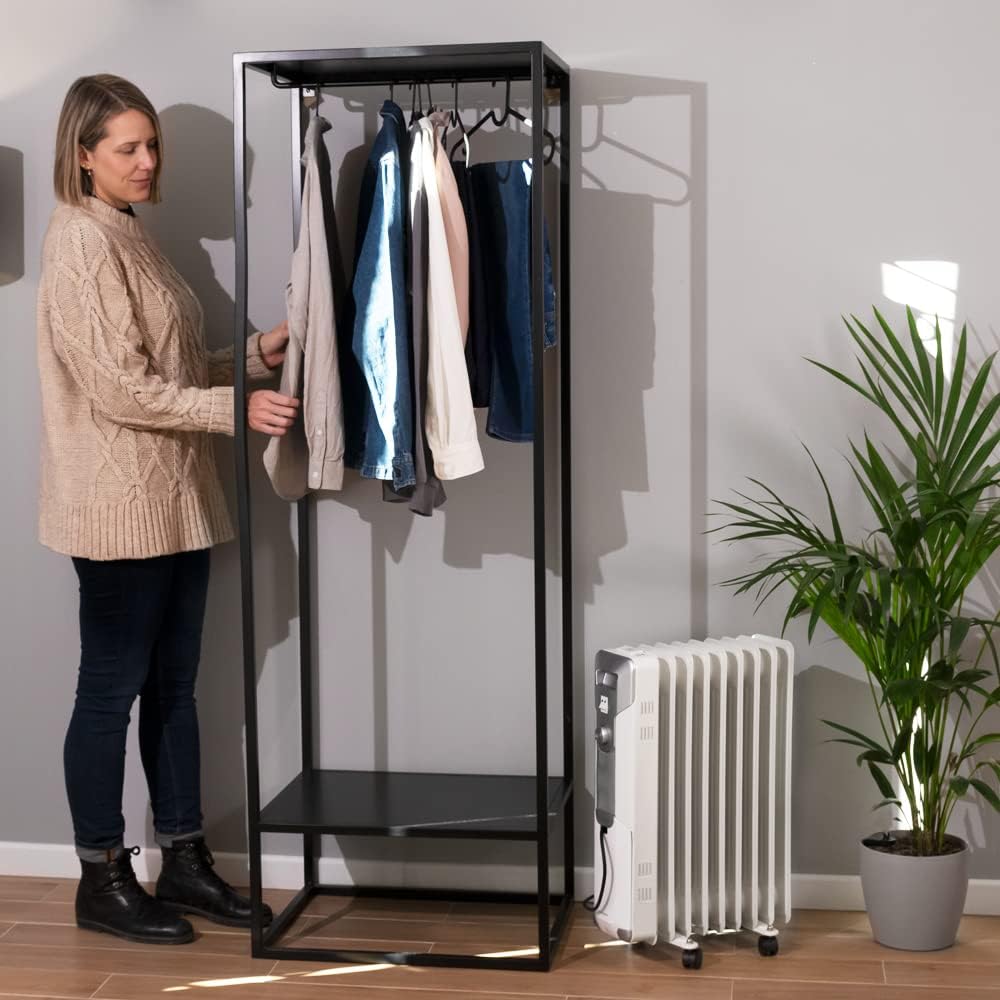
Image 4.1: Radiator operating in a room, demonstrating its portability and use in various settings. Ensure safe distances are maintained.
5. Maintenance
Regular maintenance ensures optimal performance and longevity of your radiator.
- Cleaning: Before cleaning, always unplug the radiator and allow it to cool completely. Wipe the exterior surfaces with a soft, damp cloth. Do not use abrasive cleaners or solvents. Ensure no water enters the internal components.
- Storage: When not in use, especially during off-season, store the radiator in a cool, dry place. Utilize the integrated cable storage to wrap the power cord neatly around the designated area.
- Inspection: Periodically check the power cord and plug for any signs of damage. If damage is found, do not use the radiator and contact qualified service personnel.
6. Troubleshooting
If you encounter issues with your radiator, refer to the following common problems and solutions:
| Problem | Possible Cause | Solution |
|---|---|---|
| Radiator does not turn on. | No power supply, power switches off, or thermostat set too low. | Check if the unit is plugged in and the outlet is functional. Ensure power switches are 'ON' and the thermostat knob is set higher than the current room temperature. |
| Radiator is not heating effectively. | Low power setting, thermostat set too low, or room size exceeds coverage. | Select a higher power level (e.g., 2000 W). Increase the thermostat setting. Ensure the room size is within the recommended 20 m² coverage. |
| Radiator turns off unexpectedly. | Overheating protection activated (Overprotect System / AutoOff System). | Unplug the radiator and allow it to cool down for at least 30 minutes. Check for any obstructions covering the unit. Ensure proper ventilation. If the issue persists, contact support. |
| Unusual noises or smells. | First use (minor burning smell is normal), or internal malfunction. | A slight odor during first use is normal and should dissipate. If strong or persistent odors/noises occur, immediately unplug the unit and contact customer support. |
If the problem persists after attempting these solutions, please contact Cecotec customer support.
7. Specifications
Key technical details for the Cecotec ReadyWarm 9000 Space oil radiator:
| Feature | Detail |
|---|---|
| Brand | Cecotec |
| Model Number | 05882 |
| Color | White |
| Power | 2000 W (3 levels: 800 W, 1200 W, 2000 W) |
| Voltage | 230 Volts |
| Number of Modules | 9 |
| Dimensions (L x W x H) | 45.5 x 16 x 65 cm |
| Product Weight | 9.56 kg |
| Recommended Coverage Area | Up to 20 m² |
| Special Features | Low consumption, Portable, Overheating protection, Wheels, Adjustable thermostat |

Image 7.1: Dimensional diagram of the radiator, indicating height (65.5cm), width (45.2cm), and depth (16cm).
8. Warranty and Support
This Cecotec product comes with a standard manufacturer's warranty. For specific warranty terms and conditions, please refer to the documentation included with your purchase or visit the official Cecotec website.
For technical assistance, spare parts, or any questions not covered in this manual, please contact Cecotec customer support:
- Online Support: Visit the Cecotec official website for FAQs and contact information.
- Customer Service: Refer to your product packaging or the Cecotec website for regional contact numbers.


