
Tefal FW2018
Tefal Easy Fry Grill and Steam XXL 3-in-1 Air Fryer
Model: FW2018
1. Introduction
Welcome to the user manual for your new Tefal Easy Fry Grill and Steam XXL 3-in-1 Air Fryer. This versatile appliance combines the functions of an air fryer, grill, and steamer, offering a wide range of healthy cooking options. Please read this manual thoroughly before first use to ensure safe and optimal operation of your appliance.

Image: The Tefal Easy Fry Grill and Steam XXL 3-in-1 Air Fryer highlighting its three primary functions: Air Fry, Grill, and Steam.
2. Important Safety Instructions
Always follow basic safety precautions when using electrical appliances to reduce the risk of fire, electric shock, and/or injury to persons.
- Do not immerse the appliance, power cord, or plug in water or other liquids.
- Ensure the voltage indicated on the appliance corresponds to your local mains voltage before connecting.
- Keep the appliance and its cord out of reach of children.
- Do not operate any appliance with a damaged cord or plug, or after the appliance malfunctions or has been damaged in any manner.
- Always unplug the appliance after use and before cleaning. Allow it to cool down completely before handling.
- Do not block any ventilation openings.
- Use only accessories recommended by the manufacturer.
- Do not place the appliance against a wall or other appliances. Leave at least 10 cm free space on the back and sides and 10 cm free space above the appliance.
- Hot steam is released during operation, especially during steaming. Keep hands and face clear of steam.
3. Product Components
Familiarize yourself with the parts of your Tefal Easy Fry Grill and Steam XXL.
- Main Unit with Digital Control Panel
- Removable Non-Stick Basket
- Die-Cast Aluminum Grill Plate
- Removable Water Tank (for steaming)
- Removable Drip Tray
- Non-Stick Tray

Image: An exploded view of the appliance, illustrating the main unit, removable non-stick basket, grill plate, water tank, and drip tray, highlighting its 6.5L capacity.
4. Setup and First Use
4.1 Unpacking
Carefully remove all packaging materials and promotional labels from the appliance. Keep packaging for future storage or disposal.
4.2 Cleaning Before First Use
- Wipe the main unit with a damp cloth.
- Wash the removable basket, grill plate, non-stick tray, water tank, and drip tray with hot water, dish soap, and a non-abrasive sponge. These parts are also dishwasher safe.
- Rinse thoroughly and dry all parts completely.
4.3 Placement
Place the appliance on a stable, heat-resistant, and level surface, away from walls or other appliances to allow for proper ventilation.
5. Operating Instructions
5.1 Digital Control Panel
The appliance features an intuitive digital touchscreen panel for easy operation.

Image: A close-up of the intuitive digital touchscreen panel, showing various cooking mode icons and temperature display.
- Power Button: Turns the appliance on/off.
- Temperature Control: Adjusts cooking temperature.
- Timer Control: Sets cooking duration (up to 60 minutes).
- Mode Selection: Choose between Air Fry, Grill, Steam, or combined programs.
5.2 Air Fry Mode
For crispy results with little to no oil.
- Place food in the non-stick basket.
- Insert the basket into the appliance.
- Select 'Air Fry' mode on the digital panel.
- Adjust temperature and time as needed, or select a pre-set program.
- Press start. The appliance will automatically shut off when the timer expires.
5.3 Grill Mode
Utilizes the die-cast aluminum grill plate for tender, juicy results.
- Place the grill plate inside the non-stick basket.
- Place food directly on the grill plate.
- Insert the basket into the appliance.
- Select 'Grill' mode.
- Adjust temperature and time, then press start.
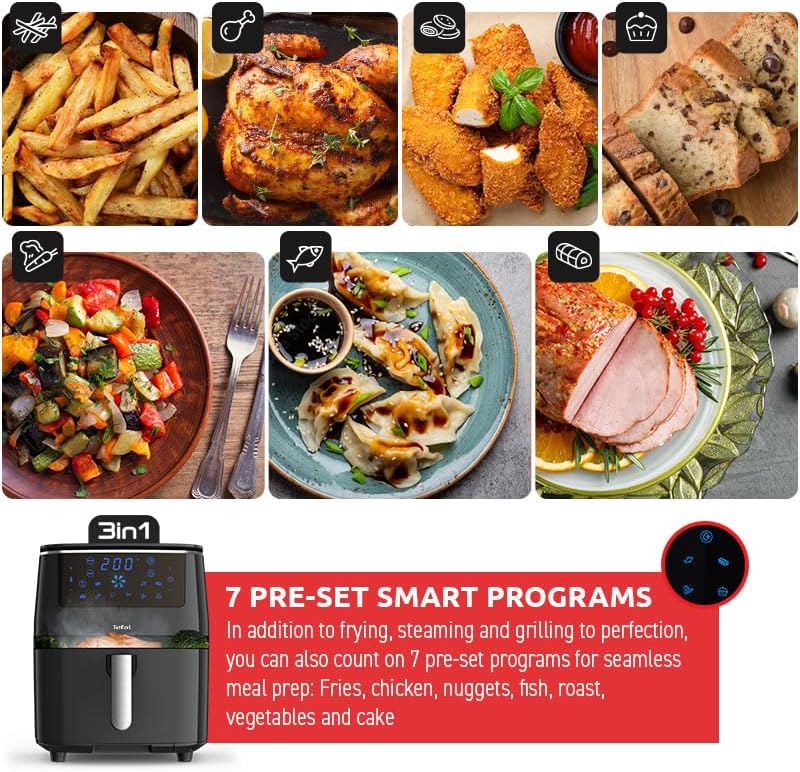
Image: A perfectly grilled piece of meat resting on the unique die-cast aluminum sizzling grill plate, designed to mimic barbecue grilling.
5.4 Steam Mode
Preserves vitamins and nutrients in your ingredients.
- Fill the removable water tank with water.
- Place the water tank into its designated slot on top of the appliance.
- Place food in the non-stick basket.
- Insert the basket into the appliance.
- Select 'Steam' mode.
- Adjust time, then press start.

Image: A hand placing the removable water tank onto the top of the appliance, indicating its use for the steaming function.
5.5 Combined Steam+Fry Function
Allows for juicy interiors and crispy exteriors.
- Follow steps for filling the water tank (5.4).
- Place food in the non-stick basket.
- Insert the basket into the appliance.
- Select a combined program (e.g., Fish, Roasted Meat) or use manual mode to combine steam and air fry.
- Adjust settings and press start.

Image: Cooked salmon and crispy fries, demonstrating the results of the Steam+Fry function which combines steaming for moisture and air frying for crispiness.
5.6 Automatic Programs
The appliance includes 7 pre-set programs for convenience:
- Fries
- Nuggets
- Chicken
- Vegetables
- Dessert
- Fish (combined)
- Roasted Meat (combined)

Image: A visual representation of the 7 pre-set smart programs, showing icons and examples of food items like fries, chicken, nuggets, fish, roast, vegetables, and dessert.
5.7 Manual Modes
For personalized cooking, you can use the 3 manual modes to set your own temperature and time combinations.
6. Maintenance and Cleaning
Regular cleaning ensures the longevity and optimal performance of your appliance. Always unplug the appliance and allow it to cool completely before cleaning.
6.1 General Cleaning
- Wipe the exterior of the appliance with a damp cloth. Do not use abrasive cleaners.
- Clean the interior of the appliance with a damp cloth and mild detergent.
6.2 Cleaning Removable Parts
The non-stick basket, grill plate, non-stick tray, water tank, and drip tray are dishwasher safe for easy cleaning.
- Non-Stick Basket and Grill Plate: Wash with hot water, dish soap, and a non-abrasive sponge, or place in the dishwasher.
- Removable Drip Tray: This tray collects water from steaming. Empty and clean it regularly.

Image: A close-up of the removable drip tray, which collects condensation and water during steaming, indicating it should be emptied regularly.
7. Troubleshooting
If you encounter issues with your appliance, refer to the following common problems and solutions:
| Problem | Possible Cause | Solution |
|---|---|---|
| Appliance does not turn on. | Not plugged in; power outlet issue. | Ensure the plug is securely inserted into a working power outlet. |
| Food is not cooked evenly. | Overcrowding; insufficient shaking/turning. | Do not overload the basket. Shake or turn food halfway through cooking. |
| White smoke coming from appliance. | Greasy food residue; excessive oil. | Clean the basket and interior thoroughly. Use less oil if air frying. |
| Steam function not working. | Water tank empty or not properly inserted. | Fill the water tank and ensure it is correctly seated. |
8. Specifications
| Feature | Detail |
|---|---|
| Model Number | FW2018 |
| Capacity | 6.5 Litres (XXL) |
| Power/Wattage | 1900W |
| Product Dimensions (L x W x H) | 39.9 x 32.4 x 40.7 cm |
| Item Weight | 7.9 kg |
| Material | Aluminium (Grill Plate), Plastic (Housing) |
| Colour | Black |
| Special Features | Programmable, Auto Shut-off |
9. Warranty and Support
This Tefal Easy Fry Grill and Steam XXL 3-in-1 Air Fryer comes with a 1-year warranty from the date of purchase, covering manufacturing defects. Please retain your proof of purchase for warranty claims.
For technical support, service, or warranty inquiries, please contact Tefal customer service through their official website or the retailer where the product was purchased. Do not attempt to repair the appliance yourself.
Related documentsFW2018


Ask a question about this manual
Ask about setup, troubleshooting, compatibility, parts, safety, or missing instructions. Manuals+ will review the question and use this page’s manual context to help answer it.