
Introduction
This manual provides instructions for the assembly, operation, and maintenance of the PEMENOL 12.4 Inch Musical Christmas Tree Soldering Project Kit. This DIY kit is designed to enhance soldering skills and provide an engaging electronic building experience, resulting in a musical 3D RGB LED flashing Christmas tree.
Safety Information
Always observe the following safety precautions when working with this soldering kit:
- Wear appropriate eye protection to prevent injury from solder splatter or fumes.
- Work in a well-ventilated area to avoid inhaling solder fumes.
- Use a soldering iron stand to prevent accidental burns.
- Ensure the soldering iron is unplugged and cooled before storage.
- Keep all components and tools out of reach of children and pets.
- Do not touch hot components or solder joints.
- Always verify component polarity and placement before soldering to prevent damage.
Package Contents
The PEMENOL Musical Christmas Tree Soldering Project Kit includes the following components:
- Printed Circuit Boards (PCBs) for the tree structure
- Various electronic components (resistors, transistors, LEDs, buzzer, etc.)
- USB power cable
- Battery box (batteries not included)
- Small hardware (screws, nuts)
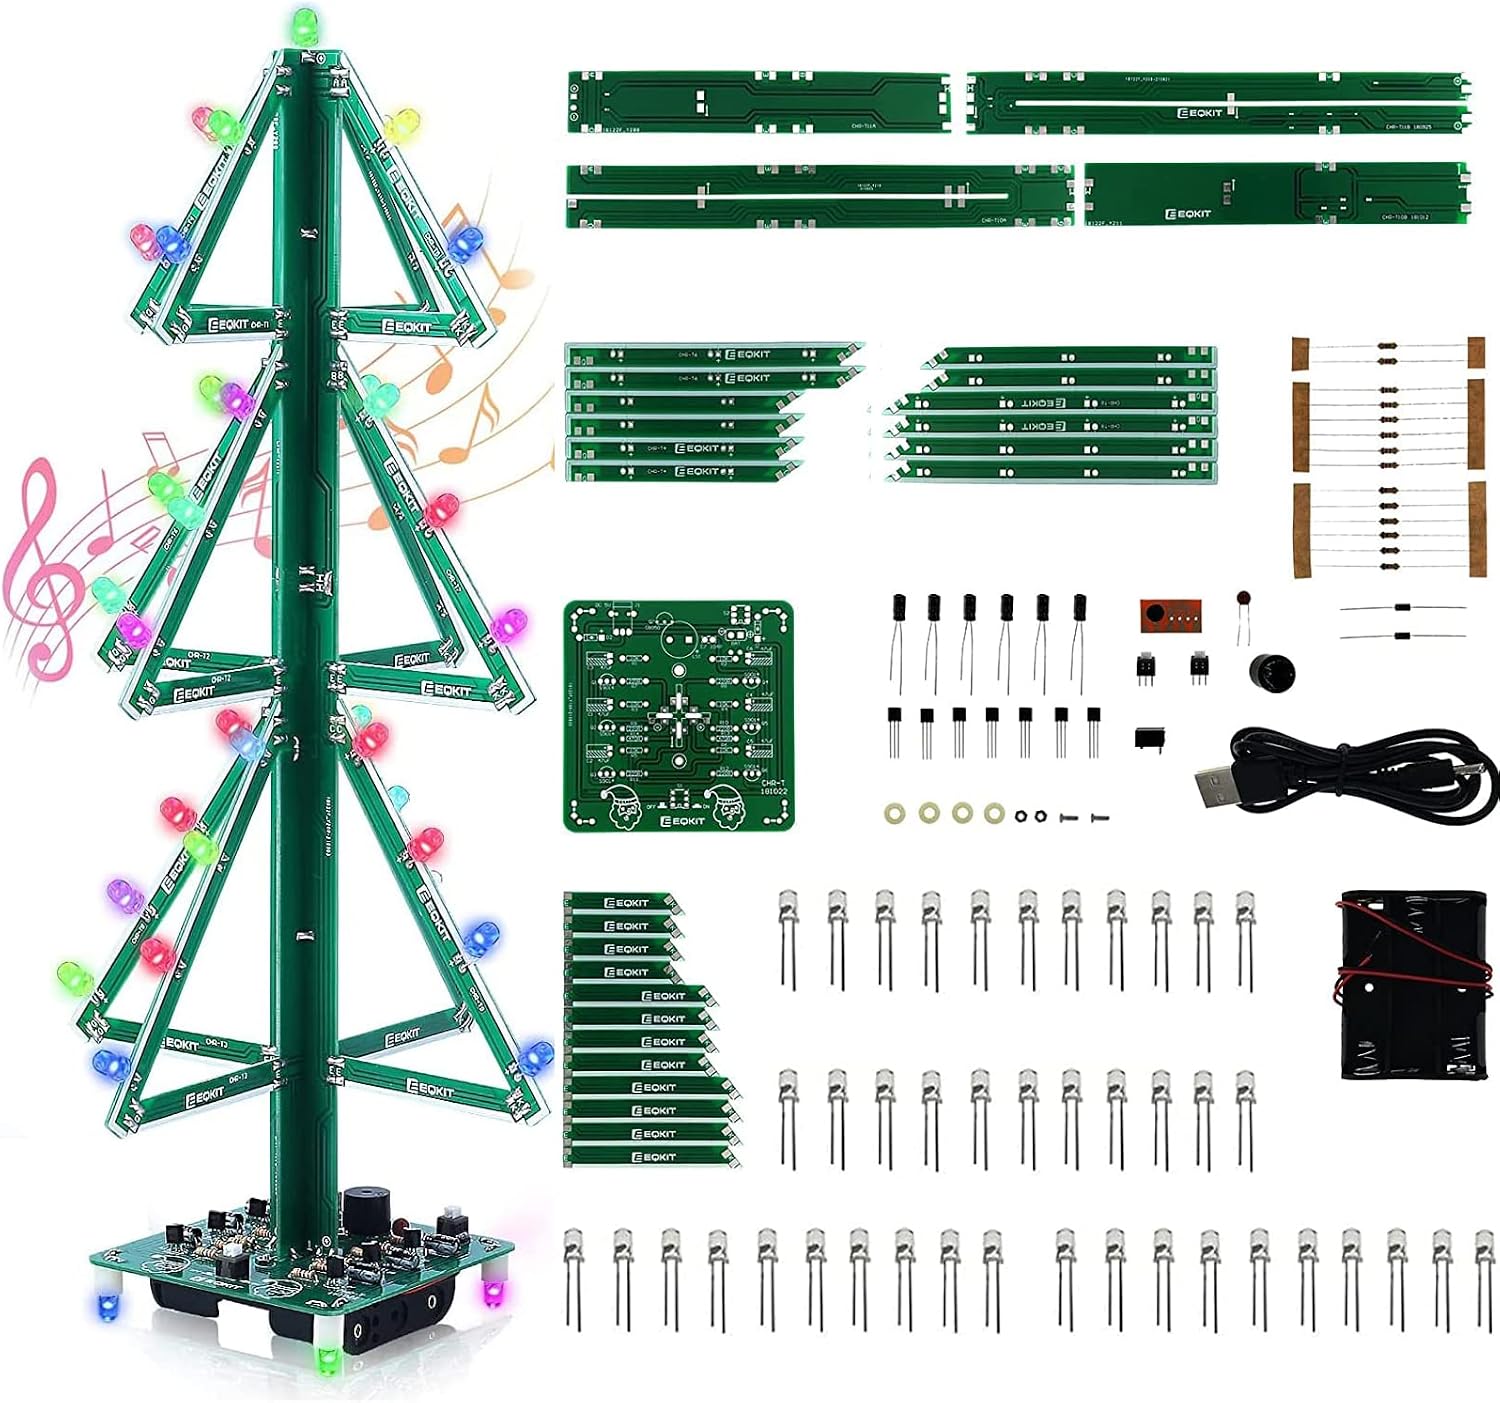
Image: All components included in the PEMENOL Musical Christmas Tree Soldering Project Kit.
Setup and Assembly
The assembly process involves soldering electronic components onto the provided PCBs and then connecting the PCB sections to form the 3D Christmas tree structure. A detailed PDF installation manual is available for step-by-step guidance. Please refer to it for specific component placement and soldering techniques.
Pre-installation Tips:
- Read the entire installation manual carefully before beginning.
- Organize all components and verify quantities against the parts list.
- Ensure your soldering iron is clean and properly tinned.
- Install complex components first, followed by simpler ones.
- Pay close attention to the polarity of components like LEDs and diodes.
- Avoid prolonged contact of the soldering iron with components (limit to 1.0 seconds) to prevent damage.
- Wear anti-static gloves or wristbands when handling electronic components.

Image: Overview of the kit components and the assembly steps for the Christmas tree.

Image: Detailed view of the Christmas tree building kit components.
Operating Instructions
Once assembled, your PEMENOL Musical Christmas Tree can be powered and operated as follows:
Power Supply:
The kit supports two power supply methods:
- USB Power: Connect the provided USB cable to the 3.5mm power socket on the base of the tree and to a 5V USB power source (e.g., computer, USB wall adapter).
- Battery Power: Insert three AA batteries (not included) into the battery box and connect it to the designated port on the tree's base.

Image: The Christmas tree powered by either a battery box or a USB cable.
Controls:
The base of the Christmas tree features two switches:
- One switch controls the power (ON/OFF).
- The other switch controls the music playback. When powered on, the tree will play "Jingle Bells" and the RGB LEDs will flash automatically. You can toggle the music on or off using the dedicated switch.
Video: Demonstration of the 3D RGB Electronic Christmas Tree Kit in operation, showcasing its flashing lights and musical feature.
Video: A brief overview of the DIY Christmas Tree Soldering Kit, highlighting its assembly and functionality.
Maintenance
To ensure the longevity and proper functioning of your Christmas tree kit, follow these maintenance guidelines:
- Keep the tree clean and free from dust. Use a soft, dry cloth for cleaning.
- Avoid exposing the tree to excessive moisture or extreme temperatures.
- When not in use, store the tree in a dry, safe place.
- If using batteries, remove them during extended periods of non-use to prevent leakage.
Troubleshooting
If you encounter issues with your PEMENOL Musical Christmas Tree, consider the following troubleshooting steps:
- Tree does not power on:
- Check if the power switch is in the ON position.
- If using USB power, ensure the cable is securely connected and the power source is active.
- If using battery power, verify that the batteries are correctly inserted with the correct polarity and are not depleted.
- Inspect all power connections for loose solder joints.
- LEDs are not lighting up:
- Ensure the power is on.
- Check the polarity of each LED. LEDs are diodes and must be installed in the correct direction.
- Inspect solder joints for any LEDs that are not lighting. Cold joints or bridges can prevent proper function.
- Verify that all components are installed in their correct positions as per the detailed manual.
- Music is not playing:
- Ensure the music switch is in the ON position.
- Check the connection and soldering of the passive buzzer.
- Verify all related circuit components (e.g., resistors, capacitors, ICs) are correctly installed and soldered.
- Intermittent operation:
- Re-examine all solder joints for any signs of looseness or poor connection.
- Ensure no short circuits are present on the PCB.
For more detailed troubleshooting or complex issues, please refer to the comprehensive PDF installation manual or contact PEMENOL customer support.
Specifications
| Feature | Specification |
|---|---|
| Product Name | 3D Flash RGB Music Christmas Tree DIY Kit |
| Model Number | GY19939 |
| Work Voltage | DC 4.5V ~ 5.0V |
| Work Current | 500mA |
| Power Type | DC 3.5mm Power Socket or AA*3 Battery Box |
| LED Color | RGB |
| Work Temperature | -40℃ ~ 85℃ |
| Work Humidity | 5% ~ 85% RH |
| Installed Size | 153 * 153 * 315mm (approx. 6 x 6 x 12.4 inches) |
| Item Weight | 5.4 ounces |
| Number of Pieces | 37 |
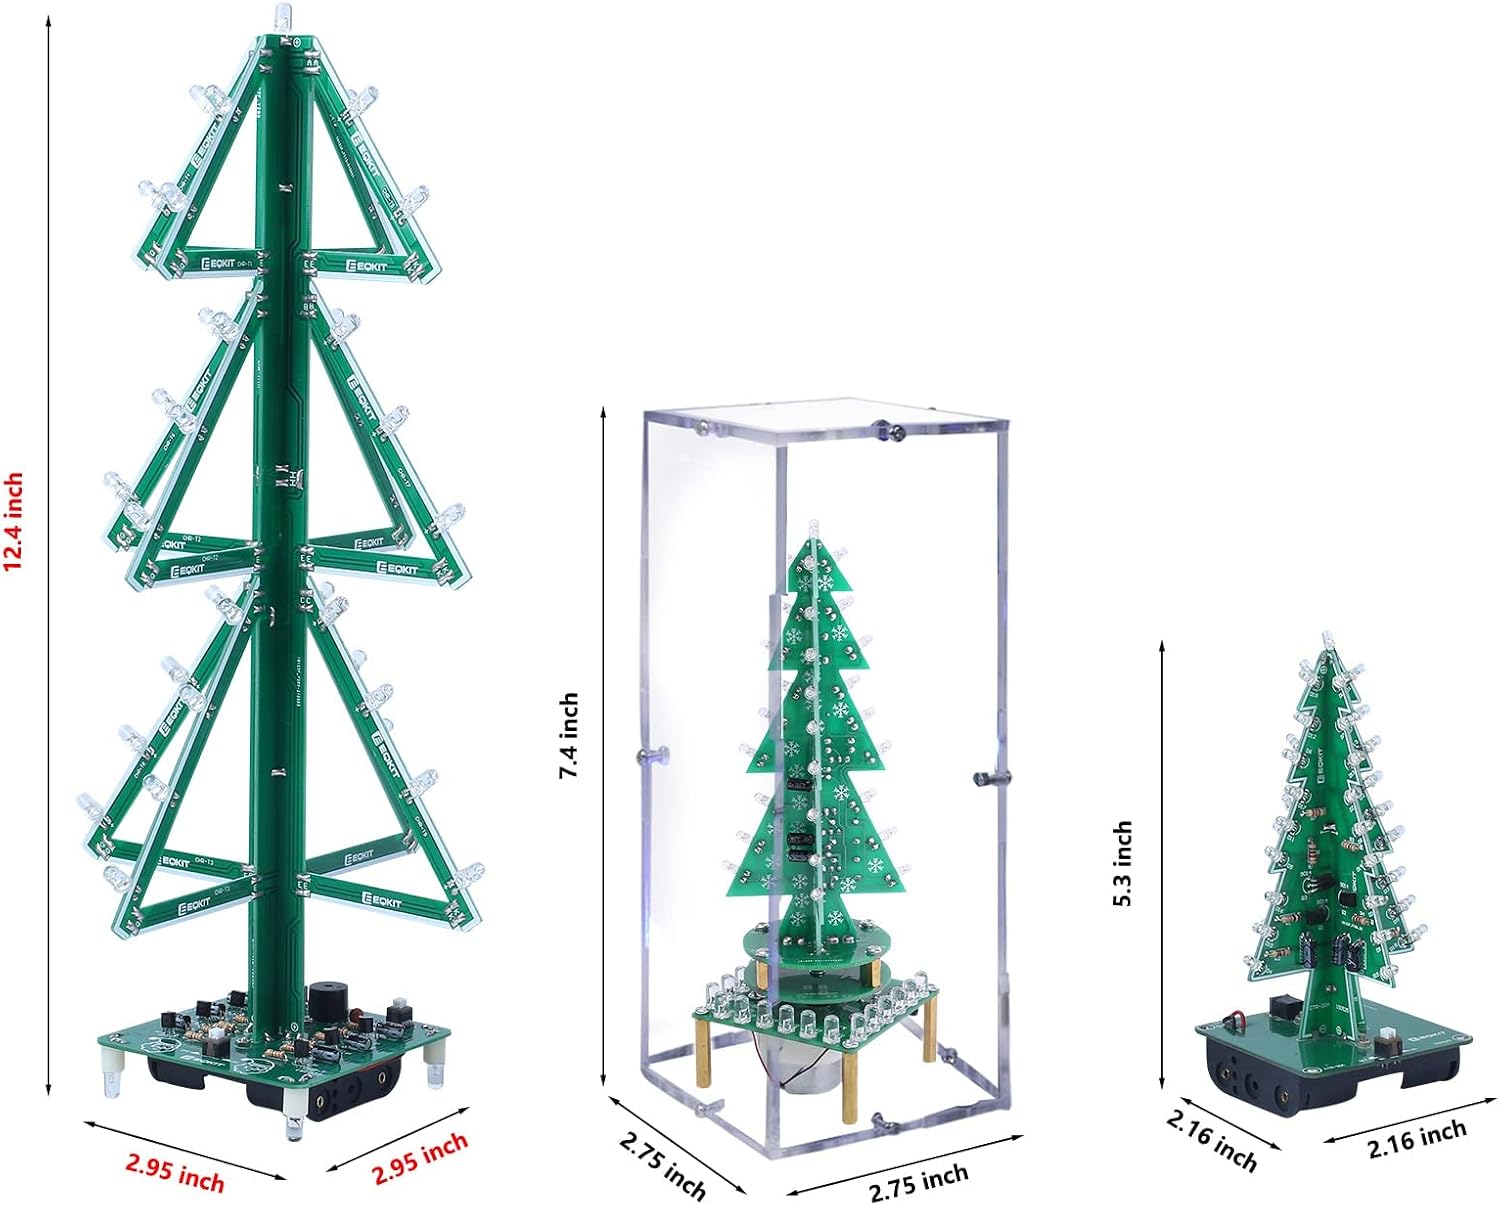
Image: Dimensions of the assembled PEMENOL Musical Christmas Tree.
Warranty and Support
For warranty information or technical support, please refer to the product packaging or contact PEMENOL customer service through the retailer where the product was purchased. Keep your purchase receipt as proof of purchase.


