
Introduction
Thank you for choosing the ASHATA Digital LED Clock DIY Kit. This kit provides an engaging project to assemble a multifunctional digital clock featuring time and temperature display, an alarm function, and automatic brightness adjustment. Designed with plug-in components, this kit aims for a high success rate in production, making it suitable for enthusiasts and educational purposes. This manual will guide you through the assembly, operation, and maintenance of your new digital clock.
Product Overview
Key Features:
- Digital Tube Display: Utilizes a digital tube display principle for clear time and temperature readings.
- Multifunctional Display: Alternates between displaying the current time and ambient temperature.
- Alarm Function: Includes an alarm to assist with daily routines.
- Automatic Brightness Adjustment: The display brightness adjusts automatically based on ambient light conditions.
- Time Animations: Features six distinct time display animations.
- Offline Animations: Includes seven offline animations for visual interest.
- Power-Off Memory: Retains time settings after a power outage, eliminating the need for re-adjustment.
- Pre-configured Program: The clock's program is pre-configured for direct use after assembly.
Package Contents:
The ASHATA Digital LED Clock DIY Kit includes all necessary components for assembly. Please verify that all items listed below are present in your package.
- 1x Light Control Clock Kit with installation accessories
- 1x USB Cable
- Optional: Case (if purchased with case option)

Image: All components included in the ASHATA Digital LED Clock DIY Kit, laid out for assembly. This includes the main circuit board, digital display, LEDs, resistors, integrated circuits, and a USB power cable.
Setup and Assembly
This section provides general guidance for assembling your ASHATA Digital LED Clock DIY Kit. While the kit is designed for ease of assembly with plug-in components, basic knowledge of electronics and careful attention to detail are recommended.
- Component Identification: Before starting, carefully identify all components against the provided list and the image below. Familiarize yourself with the main circuit board (PCB), digital display, LEDs, resistors, and integrated circuits.
- PCB Preparation: Ensure the PCB is clean and free from any debris.
- Component Placement: Insert components into their designated positions on the PCB. Pay close attention to polarity for LEDs and integrated circuits (ICs). The kit uses plug-in components, which simplifies the process.
- Soldering (if applicable): If any components require soldering, ensure proper soldering techniques are used to create strong, clean connections. Avoid cold solder joints or solder bridges.
- LED Installation: Install the LEDs around the circular pattern on the PCB. Ensure they are oriented correctly.
- Digital Display Installation: Securely attach the 4-digit 7-segment display to its designated area on the PCB.
- Final Checks: After all components are installed, visually inspect the PCB for any misplaced components, incorrect polarity, or poor connections.
- Case Assembly (Optional): If your kit includes a case, carefully assemble it around the finished circuit board, ensuring all buttons and displays align correctly.

Image: A detailed view of the circuit board components and electronic parts, including the green PCB, a yellow circular element, and connecting wires, illustrating the assembly sequence. This image helps in identifying parts during the setup process.

Image: The assembled ASHATA Digital LED Clock showing its compact dimensions of 8.1 cm by 8.1 cm. This provides a visual reference for the final product size.
Operating Instructions
Once assembled, connect the clock to a 5V power source using the provided USB cable (e.g., a mobile phone charger, USB power adapter). The clock's program is pre-configured, so it should start functioning upon power-up.
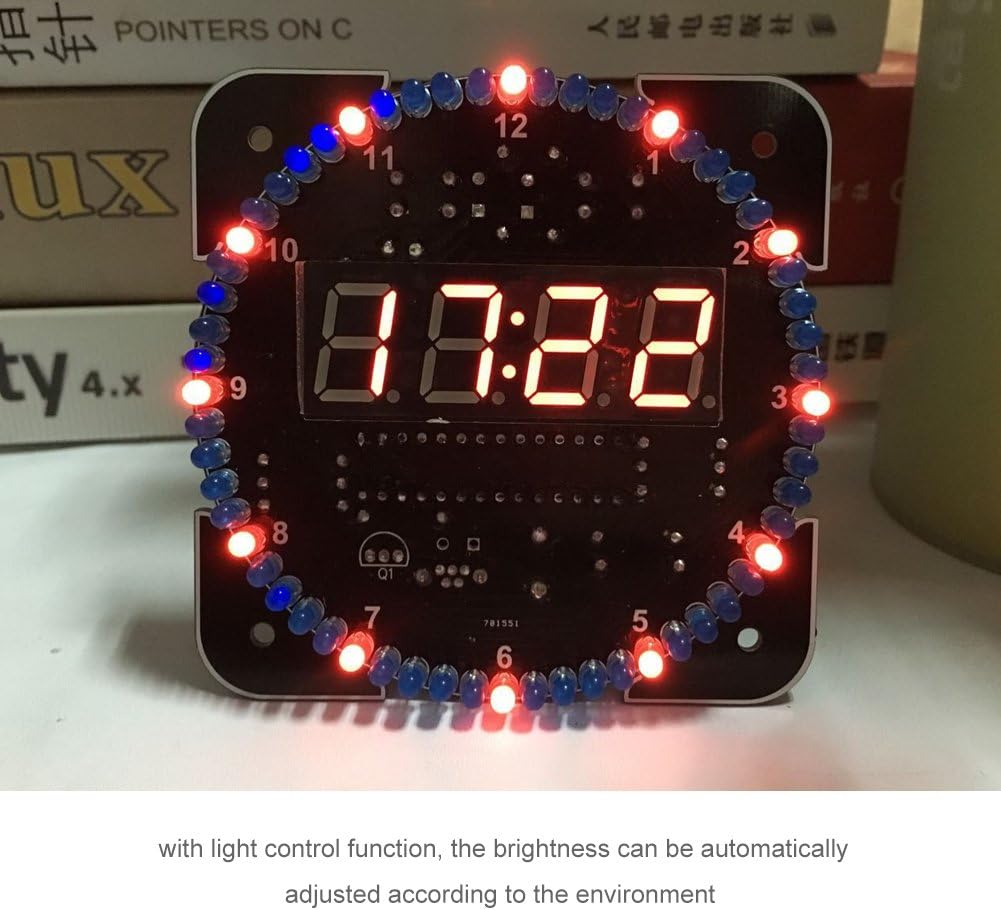
Image: The ASHATA Digital LED Clock displaying the time "07:22" with surrounding LEDs illuminated. This demonstrates the clock in active operation.
Basic Functions:
- Time and Temperature Display: The clock will automatically alternate between displaying the current time and the ambient temperature.
- Setting Time: Specific buttons or methods for setting the time are typically present on the PCB or case. Refer to the markings on your assembled unit for "SET" or "ADJUST" buttons. Pressing these buttons usually allows you to cycle through hours, minutes, and other settings.
- Alarm Function: The clock includes an alarm. Look for an "ALARM" button or a combination of "SET" and other buttons to activate and set the alarm time. The alarm can typically be disabled.
- Brightness Control: The clock features an automatic light control function, adjusting its display brightness according to the surrounding environment. This function can usually be disabled if manual control is preferred.
- Display Animations: The clock cycles through various time and offline animations. These are pre-programmed and provide dynamic visual effects.
- Power Loss Memory: In the event of a power interruption, the clock is designed to retain its time settings, so you will not need to reset it when power is restored.
Note: Due to the DIY nature, specific button labels and exact operation sequences may vary slightly. Please refer to the markings on your assembled circuit board or case for precise control.
Maintenance
To ensure the longevity and optimal performance of your ASHATA Digital LED Clock, follow these simple maintenance guidelines:
- Cleaning: Use a soft, dry cloth to gently wipe the display and casing. Avoid using abrasive cleaners, solvents, or excessive moisture, which can damage the electronic components.
- Environment: Operate the clock in a dry environment, away from direct sunlight, extreme temperatures, and high humidity.
- Power Supply: Always use a stable 5V power supply via the USB cable. Avoid using uncertified or damaged power adapters.
- Handling: Handle the assembled clock with care to prevent damage to the circuit board or components.
Troubleshooting
If you encounter issues with your ASHATA Digital LED Clock, please refer to the following troubleshooting tips:
| Problem | Possible Cause | Solution |
|---|---|---|
| Clock does not power on. |
|
|
| Display is dim or flickering. |
|
|
| Time or temperature display is incorrect. |
|
|
| Alarm does not sound. |
|
|
Specifications
| Feature | Detail |
|---|---|
| Brand | ASHATA |
| Model Number | ASHATAeukbnpf7g3-05 |
| Material | Plastic (for PCB and optional case) |
| PCB Dimensions (L x W) | 8.1 cm x 8.1 cm |
| Weight (Clock + USB Cable) | 68 grams |
| Weight (Clock + USB Cable + Case) | 136 grams (if case option is chosen) |
| Operating Voltage | 5V (via USB) |
| Display Type | Digital LED Tube |
| Special Features | Temperature Display, Alarm, Automatic Light Control, Power-Off Memory |
| Movement Type | Quartz (electronic) |
| Indoor/Outdoor Use | Indoor |
Warranty and Support
For information regarding warranty, returns, or technical support for your ASHATA Digital LED Clock DIY Kit, please refer to the purchase platform or contact ASHATA customer service directly. Keep your proof of purchase for any warranty claims.