
1. Introduction
This manual provides detailed instructions for the safe and proper installation, operation, and maintenance of your Raptor Series Magnum Rear Bumper RT Style. This bumper is designed for 2018-2026 Jeep Wrangler JL and JLU models, offering enhanced protection and functionality. Please read all instructions carefully before beginning installation.
2. Safety Information
- Always wear appropriate personal protective equipment, including safety glasses and gloves, during installation.
- Ensure the vehicle is securely supported on a level surface using jack stands before working underneath.
- Disconnect the vehicle's battery before performing any electrical work.
- Exercise caution when lifting and positioning heavy components to prevent injury.
- Keep all fasteners and small parts away from children.
- If you are unsure about any step, consult a qualified professional.
3. Package Contents
Verify that all components are present and undamaged before proceeding with installation. If any parts are missing or damaged, contact customer support immediately.
- Magnum Rear Bumper RT Style (Model RBM45JPN)
- Integrated LED Brake Light (pre-installed or separate)
- LED License Plate Light and Bracket
- Mounting Hardware Kit (bolts, washers, nuts)
- Wiring Harness for LED lights
- Installation Instructions (this manual)
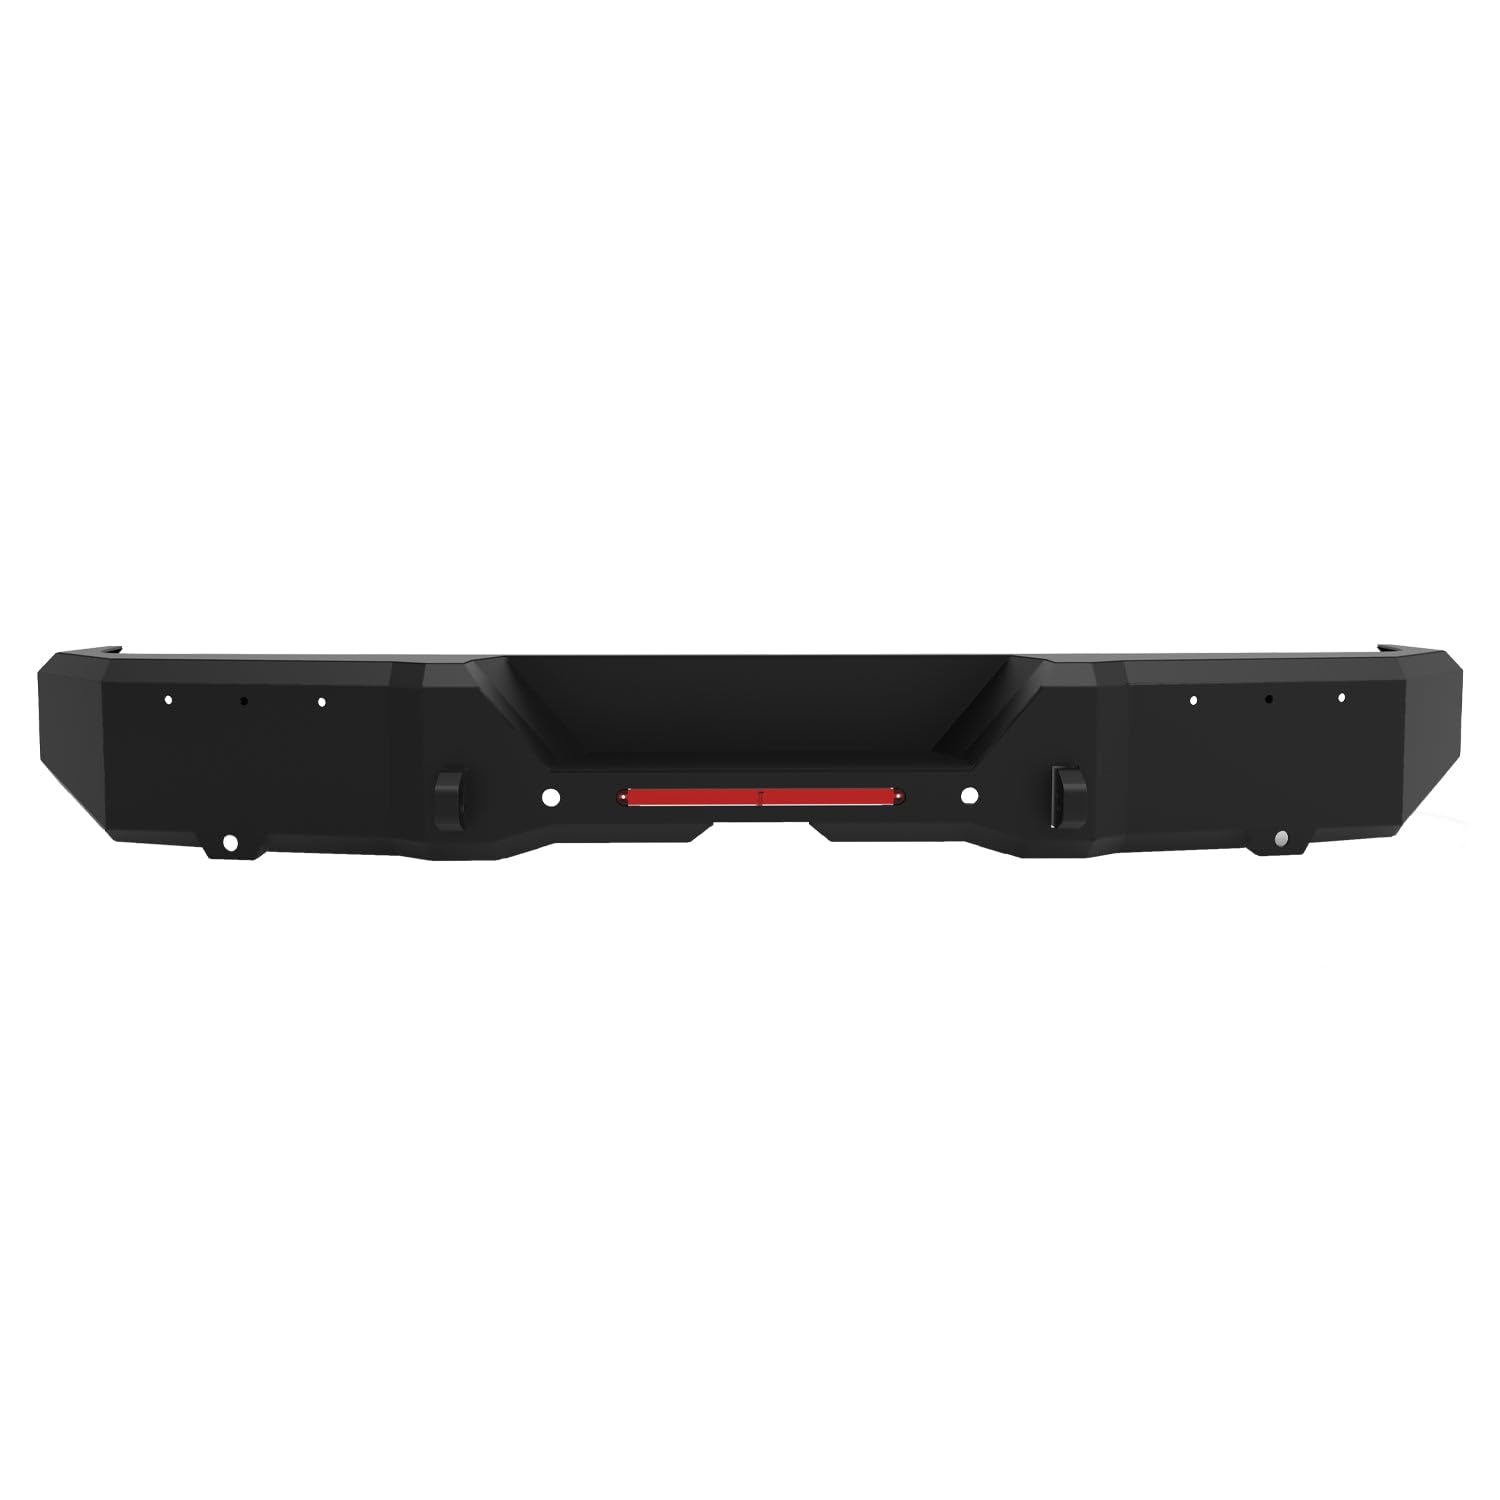
Image 3.1: Raptor Series Magnum Rear Bumper RT Style (Model RBM45JPN).
4. Tools Required
- Socket Wrench Set (metric)
- Torque Wrench
- Pry Tool (plastic, for trim removal)
- Wire Strippers/Crimpers
- Electrical Tape or Heat Shrink Tubing
- Measuring Tape
- Marker or Pen
5. Setup and Installation
The Magnum Rear Bumper is designed for direct bolt-on installation using factory mounting locations, requiring no drilling.
5.1. Pre-Installation Checks
- Inspect the bumper for any shipping damage or manufacturing defects. Ensure all welds are intact and the powder coat finish is uniform.
- Confirm all included hardware matches the parts list.
- Park the vehicle on a flat, level surface and engage the parking brake.
- Disconnect the negative terminal of the vehicle's battery.
5.2. Removal of Factory Rear Bumper
- Locate and disconnect any wiring harnesses connected to the factory bumper (e.g., license plate lights, parking sensors if equipped).
- Remove the bolts securing the factory bumper to the vehicle frame. Keep these fasteners organized, as some may be reused or serve as reference.
- Carefully remove the factory bumper from the vehicle. It may require assistance due to its weight and size.
5.3. Mounting the Magnum Rear Bumper
- With assistance, carefully lift the Magnum Rear Bumper into position on the vehicle frame. Align the bumper's mounting points with the factory mounting locations.
- Insert the provided mounting hardware (or factory hardware if specified) through the bumper and frame. Hand-tighten all bolts to ensure proper alignment.
- Once all bolts are in place and the bumper is aligned, progressively tighten all fasteners to the manufacturer's specified torque settings. Ensure even tightening to prevent stress on the bumper or frame.
5.4. Wiring for LED Lights
The bumper includes an integrated LED brake light and a separate LED license plate light. These require electrical connection to the vehicle's existing wiring.
- Integrated LED Brake Light: Locate the vehicle's brake light wiring. Splice the wires from the bumper's integrated LED brake light into the corresponding vehicle wires using appropriate connectors (e.g., crimp connectors, solder and heat shrink). Ensure polarity is correct.
- LED License Plate Light: Attach the LED license plate light to its bracket. Mount the bracket to the designated location on the bumper. Splice the license plate light wires into the vehicle's existing license plate light wiring.
- Secure all wiring with zip ties to prevent chafing or damage from road debris.

Image 5.1: Included license plate light bracket.

Image 5.2: Illuminated LED license plate light.
5.5. Final Checks
- Reconnect the vehicle's battery.
- Test all lights (brake lights, license plate lights) to ensure they function correctly.
- Verify that all bolts are securely tightened.
- Check for any clearance issues with other vehicle components.

Image 5.3: Magnum Rear Bumper installed on a Jeep Wrangler JL/JLU, showing the rear profile.

Image 5.4: Magnum Rear Bumper installed on a Jeep Wrangler JL/JLU, showcasing side clearance.

Image 5.5: Magnum Rear Bumper installed on a Jeep Wrangler JL/JLU, angled view highlighting the rugged design.

Image 5.6: Magnum Rear Bumper installed on a Jeep Wrangler JL/JLU, wide rear view showing overall fitment.
6. Operating Considerations
Your Magnum Rear Bumper is designed for durability and functionality in various conditions.
- D-Ring Anchors: The bumper features 1-inch solid steel D-ring anchors, fully welded for maximum strength. These are intended for vehicle recovery operations. Always use rated D-rings and recovery straps.
- Receiver Compatibility: The bumper is compatible with a receiver hitch (not included). Ensure any hitch used meets vehicle towing specifications and is properly installed.
- Parking Sensors: The bumper design allows for installation with or without parking sensors. If your vehicle has parking sensors, ensure they are properly reinstalled and functioning after bumper installation.
- Ground Clearance: The rugged design increases ground clearance for improved approach angles, beneficial for off-road driving.
7. Maintenance
Regular maintenance will help preserve the appearance and functionality of your bumper.
- Cleaning: Wash the bumper regularly with mild soap and water to remove dirt, mud, and road salt. Avoid abrasive cleaners or harsh chemicals that could damage the powder coat finish.
- Inspection: Periodically inspect all mounting hardware for tightness. Re-torque bolts as necessary. Check the bumper for any signs of damage, rust, or wear, especially after off-road use.
- Finish Care: The 3-stage powder coat provides excellent corrosion and scratch resistance. Minor scratches can be touched up with appropriate paint to prevent rust.
- Electrical Connections: Inspect wiring for any signs of wear, fraying, or corrosion. Ensure all connections remain secure and waterproof.
8. Troubleshooting
- Bumper Does Not Align Properly: Loosen all mounting bolts and re-adjust the bumper. Ensure no obstructions are preventing proper fitment. Verify that the correct bumper model is being installed on the correct vehicle year/model.
- LED Lights Not Functioning: Check all electrical connections for proper splicing and secure contact. Ensure the vehicle's battery is connected and fuses are intact. Verify correct polarity of wiring.
- Loose Components: If any part feels loose after installation, re-check all fasteners and torque them to specification. If a component was damaged during shipping (e.g., a light), contact customer support for a replacement.
- Unusual Noises: Inspect the bumper and surrounding areas for any contact points or loose components that could be causing rattling or other noises.
9. Specifications
| Brand | Raptor Series |
| Model Number | RBM45JPN |
| Compatible Vehicle | 2018-2026 Jeep Wrangler JL/JLU |
| Material | Alloy Steel (1/8in steel shell, 1/4in internal bracing) |
| Color | Black |
| Exterior Finish | 3-Stage Powder-Coated |
| Item Weight | 53 lbs (Product Weight), 74 lbs (Shipping Weight) |
| Product Dimensions (D x W x H) | 9" x 66" x 12" |
| D-Ring Anchors | 1-inch solid steel, fully welded |
| Lights Included | Integrated LED Brake Light, LED License Plate Light |
10. Warranty Information
Raptor Series provides the following warranty for the Magnum Rear Bumper RT Style:
- Limited Lifetime Manufacturer Warranty: Applies to the structure of the bumper.
- 5 Years Warranty: Applies to components (e.g., LED lights).
- 1 Year Warranty: Applies to the finish and coating.
Please retain your proof of purchase for warranty claims. For full warranty terms and conditions, refer to the official Raptor Series warranty documentation or contact customer support.
11. Customer Support
If you have any questions, require assistance with installation, or need to report a missing/damaged part, please contact Raptor Series customer support. For the most up-to-date contact information, please visit the official Raptor Series website.
Online Resources: Raptor Series Amazon Store