
1. Important Safety Instructions
Before beginning any exercise program, consult your physician. This is especially important for individuals over the age of 35 or those with pre-existing health conditions. Read all instructions before using the equipment. Physionics assumes no responsibility for personal injury or property damage sustained by or through the use of this product.
- Keep children and pets away from the equipment.
- Place the equipment on a flat, stable surface.
- Wear appropriate exercise clothing and footwear.
- Inspect the equipment before each use for loose parts or signs of wear. Do not use if damaged.
- Do not exceed the maximum user weight of 120 kg.
- Ensure all bolts and nuts are securely tightened before use.
- Stop exercising immediately if you feel faint, dizzy, or experience pain.
- Keep hands and feet clear of moving parts.
2. Package Contents
Carefully unpack all components and ensure you have received all items listed below. If any parts are missing or damaged, contact customer service immediately.
- 1 x Physionics Exercise Bike EXBK03 (unassembled)
- 1 x Multilingual Assembly Instructions (EN/DE/FR/IT)
Note: 2 x AAA 1.5V batteries for the LCD console are not included and must be purchased separately.
3. Assembly Instructions
Follow these steps carefully to assemble your Physionics Exercise Bike EXBK03. It is recommended to have two people for assembly.
- Base Stabilizers Attachment: Attach the front and rear stabilizer bars to the main frame using the provided bolts and washers. Ensure they are securely tightened.
- Pedal Installation: Identify the left (L) and right (R) pedals. The left pedal screws counter-clockwise, and the right pedal screws clockwise. Thread them into the crank arms and tighten firmly.
- Seat Post and Saddle Assembly: Insert the seat post into the main frame. Attach the saddle to the seat post. Adjust the height and horizontal position as needed (refer to 'Adjustments' section).
- Handlebar Post and Handlebar Assembly: Insert the handlebar post into the main frame. Attach the handlebar to the post. Connect the pulse sensor wires from the handlebar to the console.
- Console Installation: Mount the LCD console onto the handlebar post. Connect the sensor wires from the main frame and pulse sensor to the console. Insert 2 x AAA batteries (not included) into the console.
- Final Check: Before first use, double-check that all bolts, nuts, and connections are secure.
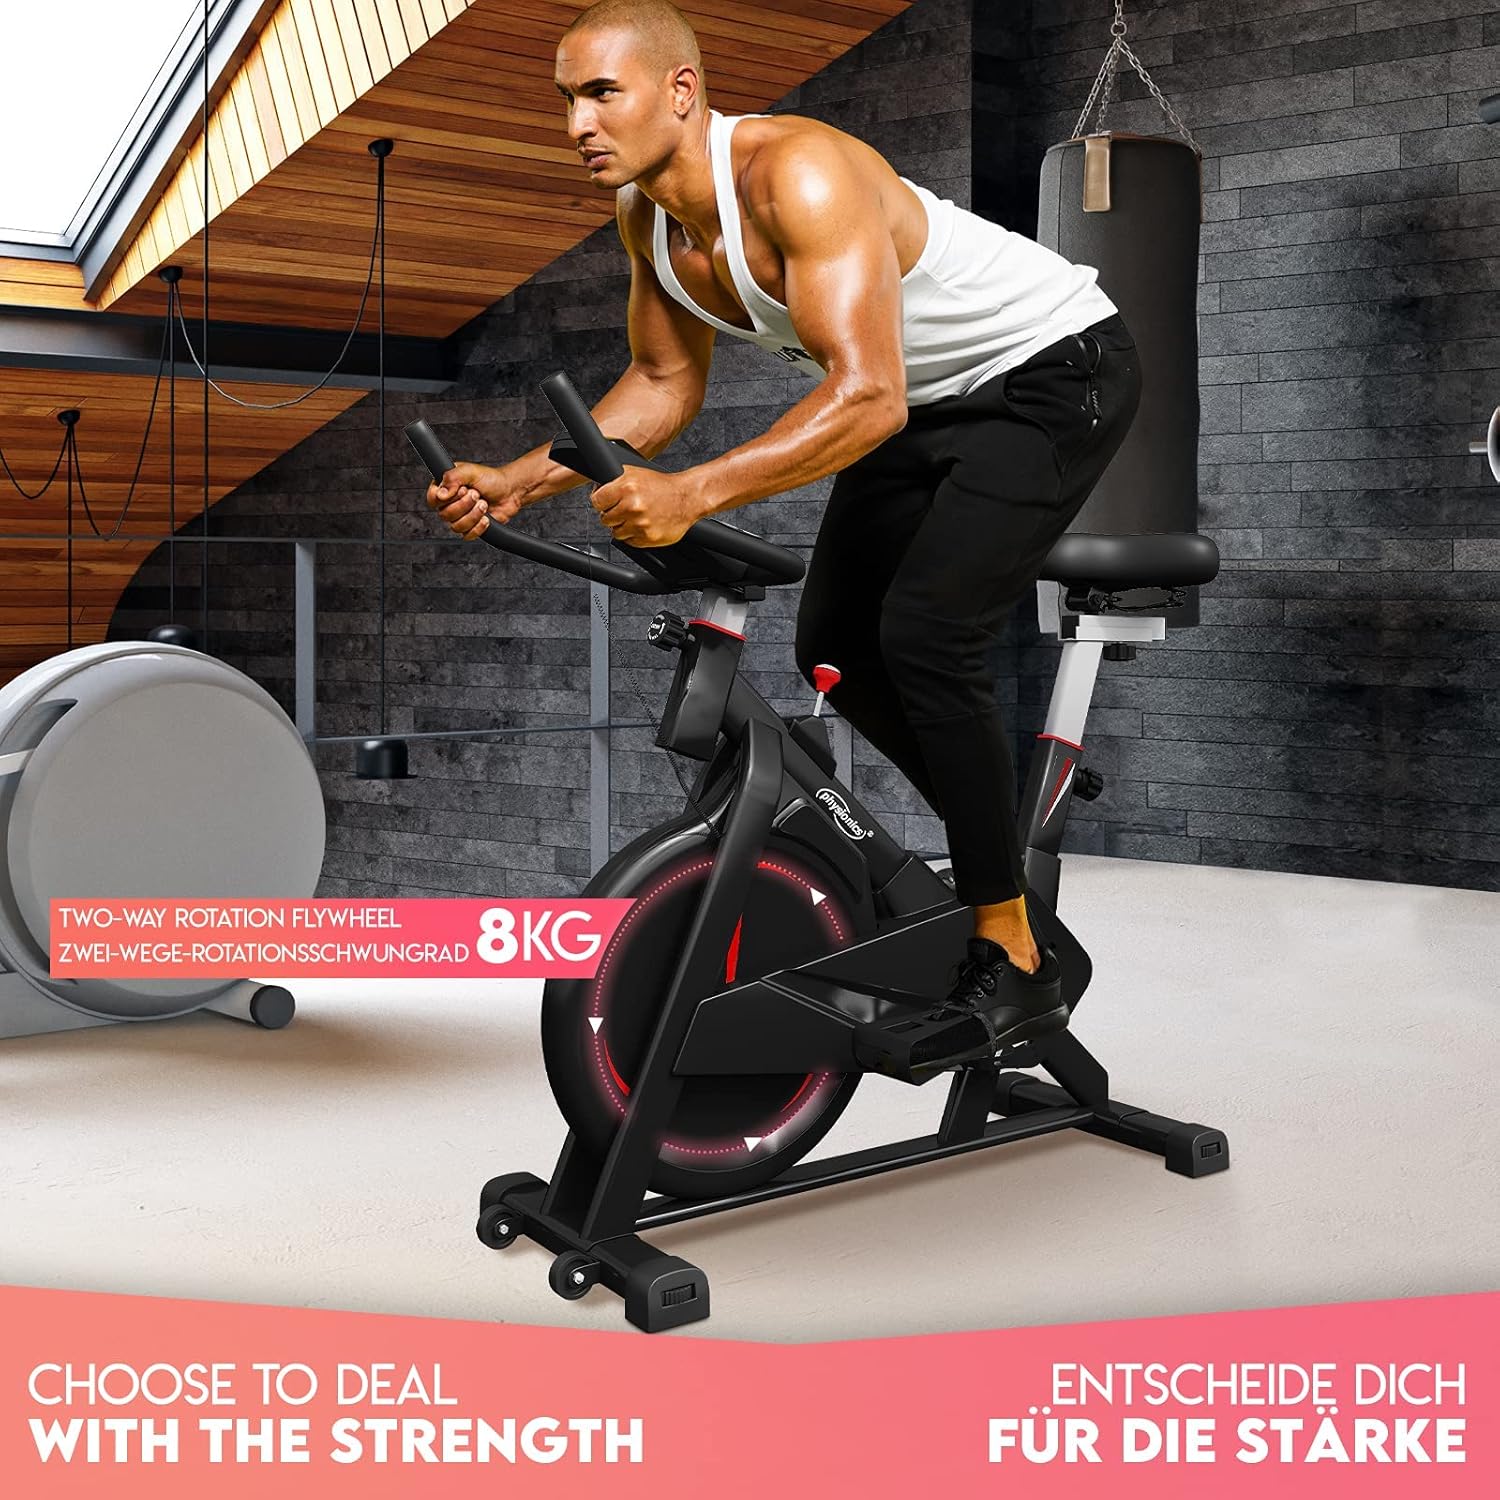
Physionics Exercise Bike EXBK03 in use, highlighting the 8kg two-way rotation flywheel.
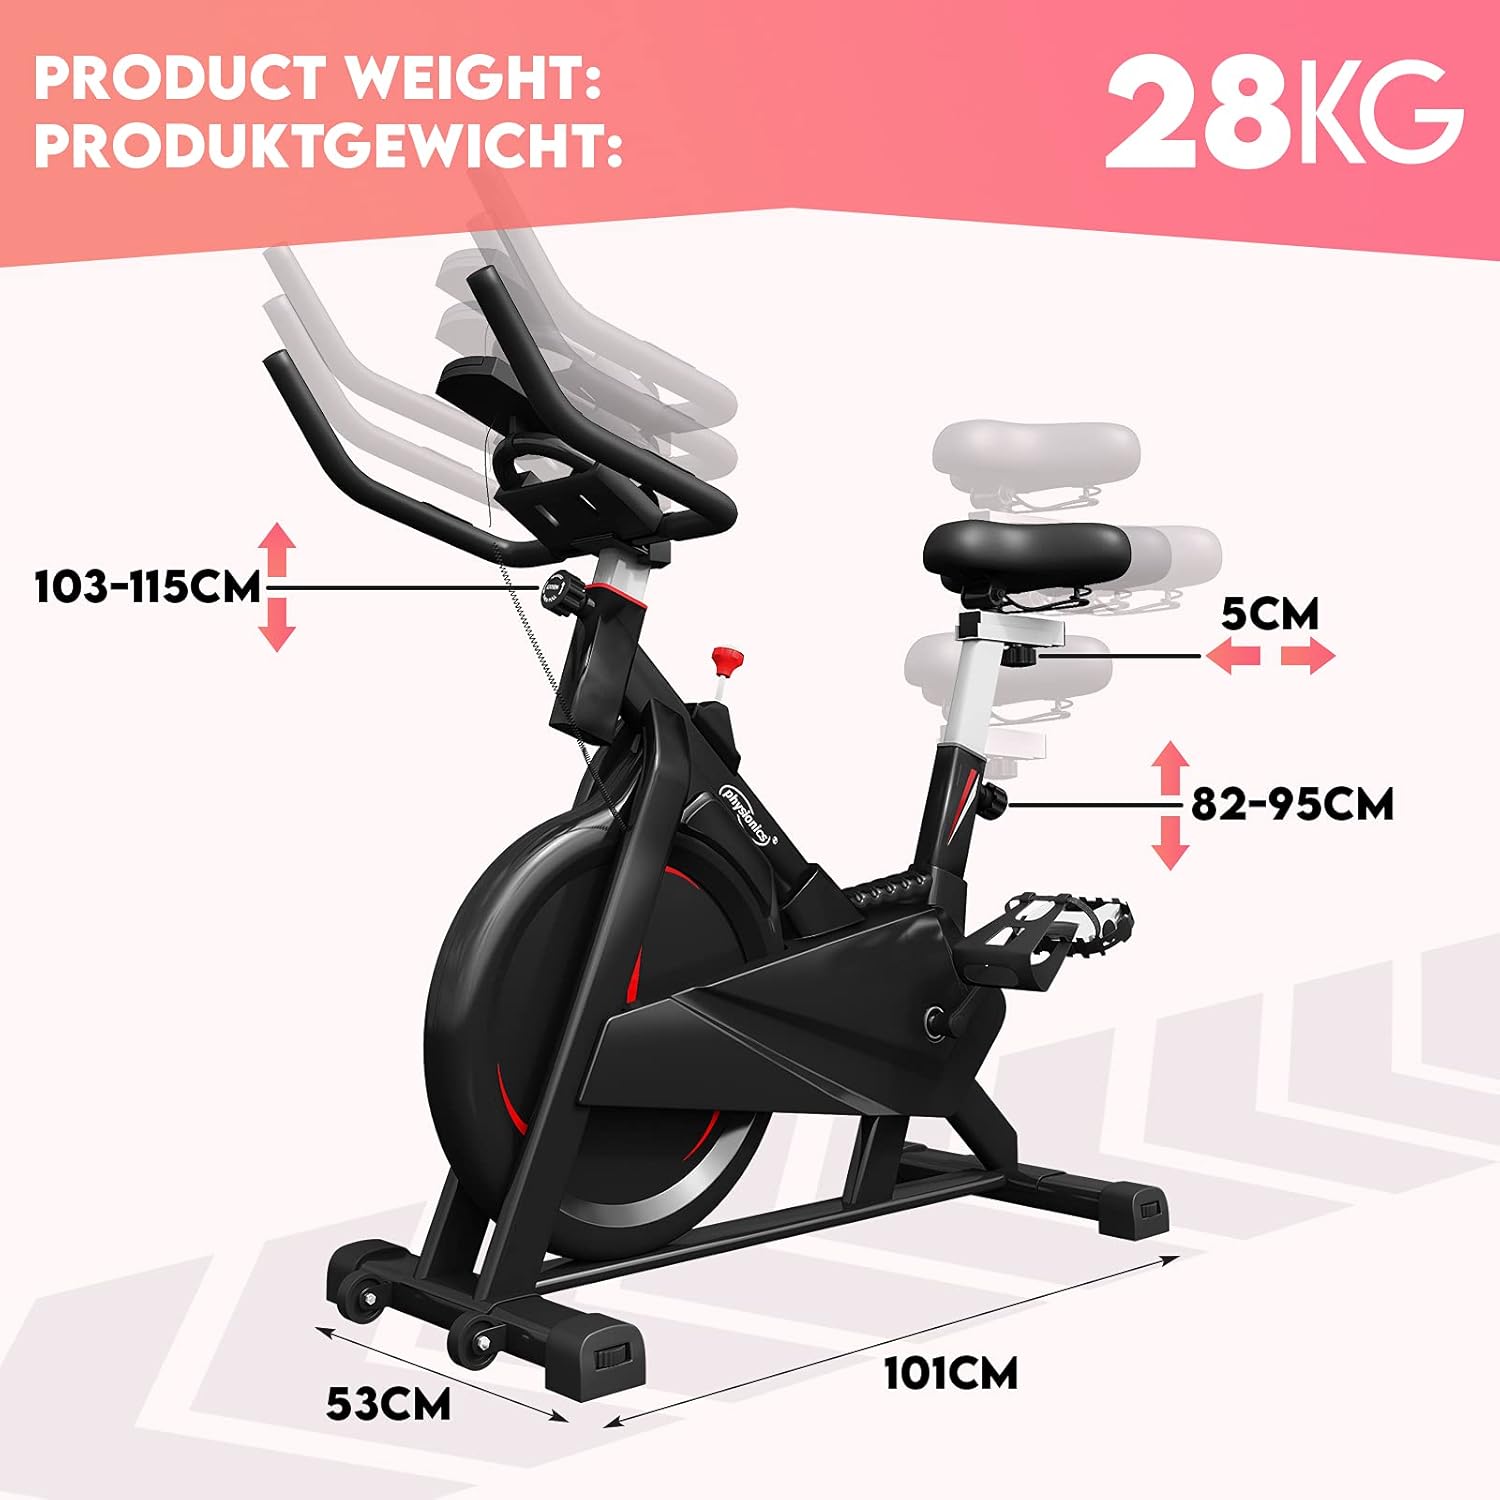
Overall dimensions of the exercise bike are 101cm (L) x 53cm (W) x 118cm (H), with a product weight of 28kg.
4. Operating Instructions
To begin your workout, sit on the saddle and place your feet securely in the pedal straps. Adjust the resistance to your desired level using the tension control knob.
- Starting a Workout: Begin pedaling. The LCD console will automatically turn on and start displaying your workout data.
- Adjusting Resistance: Turn the red tension control knob located below the handlebars. Turn clockwise to increase resistance and counter-clockwise to decrease it.
- Stopping: To stop the flywheel quickly, press down firmly on the red tension control knob. This acts as an emergency brake.

The Physionics Exercise Bike EXBK03 supports a maximum user weight of 120 kg and features 5-level adjustable handlebars.

Detail of the friction braking system and 8kg flywheel for smooth and quiet operation.

The brake knob allows for immediate stopping, and a convenient bottle holder is integrated into the design.
5. Adjustments
Proper adjustment of the seat and handlebars is crucial for comfort and effective exercise.
- Saddle Height Adjustment: Loosen the adjustment knob on the vertical seat post. Raise or lower the saddle to one of the 5 available levels (approx. 82-95 cm). Ensure your leg has a slight bend at the knee when the pedal is at its lowest point. Tighten the knob securely.
- Saddle Horizontal Adjustment: Loosen the adjustment knob under the saddle. Slide the saddle forward or backward (approx. 5 cm range) to find a comfortable position relative to the handlebars. Tighten the knob securely.
- Handlebar Height Adjustment: Loosen the adjustment knob on the handlebar post. Raise or lower the handlebars to one of the 5 available levels (approx. 103-115 cm). Tighten the knob securely.

Features include a pulse sensor on the handlebars, 5-level vertical and horizontal seat adjustments, and secure pedal straps.
6. Console Functions
The LCD console tracks your workout progress. It is powered by 2 x AAA 1.5V batteries (not included).
- SCAN: Automatically cycles through all display functions every few seconds.
- TIME: Displays the duration of your current workout in minutes and seconds.
- SPEED: Shows your current cycling speed.
- DISTANCE: Displays the distance covered during your current workout.
- HEART RATE (PULSE): When holding the pulse sensors on the handlebars, your heart rate will be displayed in beats per minute (BPM).
- CALORIES: Estimates the calories burned during your workout.
- ODOMETER: Displays the total accumulated distance since the console was reset or batteries were changed.
- MODE Button: Press to select a specific display function or to activate the SCAN mode.
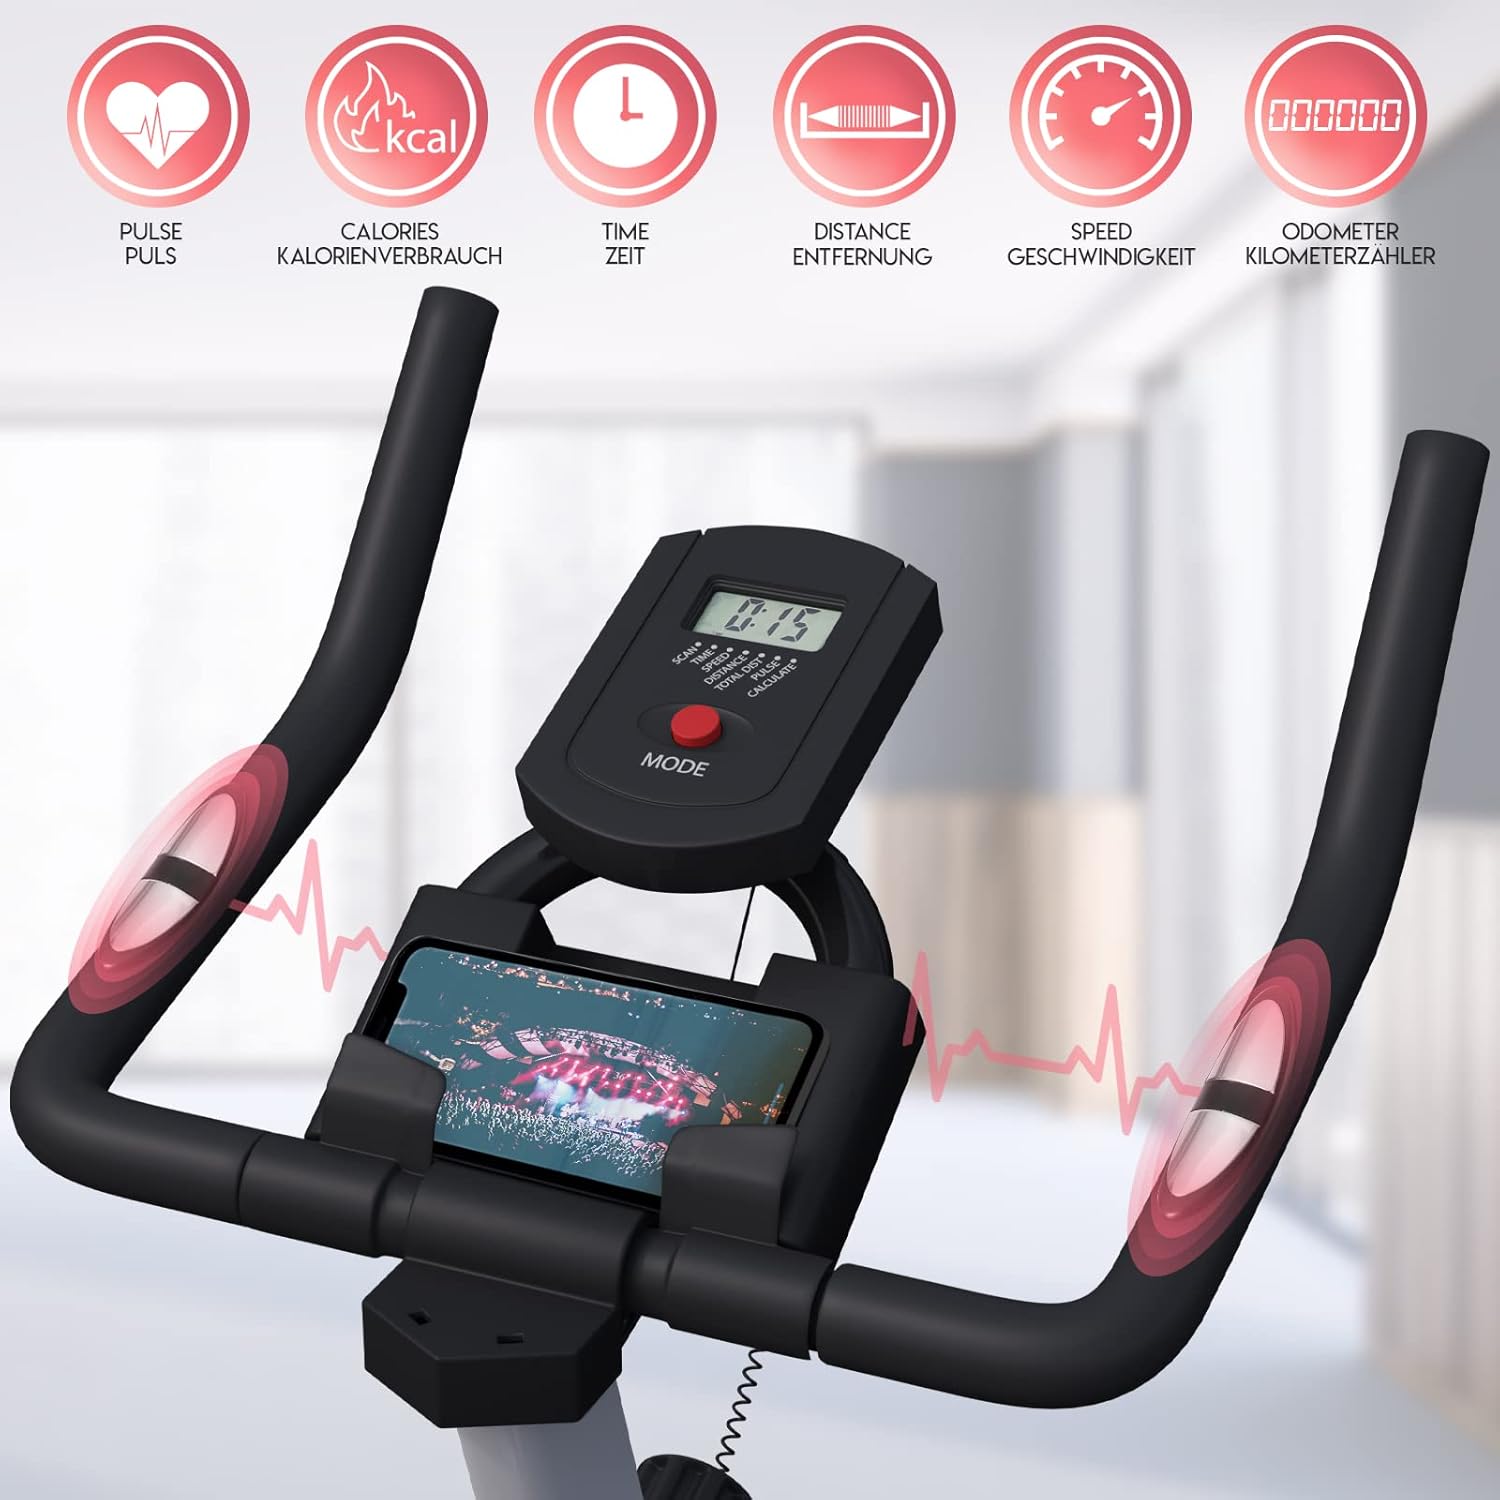
The LCD console displays pulse, calories, time, distance, speed, and odometer readings.
7. Maintenance
Regular maintenance ensures the longevity and safe operation of your exercise bike.
- Cleaning: Wipe down the equipment with a damp cloth after each use to remove sweat and dust. Do not use abrasive cleaners.
- Lubrication: Periodically check for any squeaking or grinding noises. If present, apply a small amount of silicone-based lubricant to moving parts as needed. Avoid over-lubricating.
- Battery Replacement: When the LCD display becomes dim or stops functioning, replace the 2 x AAA 1.5V batteries in the console.
- Tightness Check: Regularly inspect all bolts, nuts, and connections to ensure they remain tight. Tighten if necessary.
- Storage: Store the exercise bike in a dry, cool place away from direct sunlight and moisture. Use the transport rollers for easy movement.

Integrated transport rollers at the front of the bike allow for easy relocation.
8. Troubleshooting
Here are solutions to common issues you might encounter:
- No display on console:
- Check if batteries are installed correctly.
- Replace with new AAA 1.5V batteries.
- Ensure all console cables are securely connected.
- Inaccurate or no pulse reading:
- Ensure both hands are firmly gripping the pulse sensors.
- Check the connection of the pulse sensor wires to the console.
- Squeaking or grinding noise:
- Inspect all moving parts for friction. Apply a small amount of silicone lubricant if necessary.
- Check if any bolts or nuts are loose and tighten them.
- Pedals feel loose:
- Ensure pedals are threaded correctly and tightened firmly. Remember the left pedal is reverse-threaded.
9. Specifications
| Model Number | EXBK03 |
| Dimensions (L x W x H) | 101 cm x 53 cm x 120 cm |
| Product Weight | 28 kg |
| Maximum User Load | 120 kg |
| Recommended User Height | 120 cm - 180 cm |
| Flywheel Weight | 8 kg (double rotation) |
| Resistance System | Wool felt friction |
| Braking System | Friction brake (push-down knob) |
| Saddle Adjustment | Vertical (5 levels: 82-95 cm), Horizontal (5 cm slider) |
| Handlebar Adjustment | Vertical (5 levels: 103-115 cm) |
| Console Display | LCD (Scan, Time, Speed, Distance, Heart Rate, Calories, Odometer) |
| Power Supply (Console) | 2 x AAA 1.5V batteries (not included) |
| Materials | Steel frame, ABS plastic, PU leather, foam |
| Color | Black and Grey |
10. Warranty and Support
This product comes with a standard manufacturer's warranty. Please refer to your purchase documentation for specific warranty terms and conditions. For technical support, missing parts, or warranty claims, please contact the retailer or manufacturer directly using the contact information provided at the time of purchase.
Always retain your proof of purchase for warranty purposes.