
1. Introduction
This manual provides comprehensive instructions for the installation, operation, and maintenance of your Intel Core i7-12700K Gaming Desktop Processor. The Intel Core i7-12700K is a high-performance processor designed for gaming, content creation, and demanding multitasking, featuring Intel's performance hybrid architecture with 12 cores (8 Performance-cores + 4 Efficient-cores) and integrated Intel UHD 770 Graphics.
It is compatible with Intel 600 series and 700 series chipset-based motherboards and offers up to 5.0 GHz unlocked clock speed for enhanced performance.
Package Contents:
- Intel Core i7-12700K Processor
- Documentation (this manual, warranty information)
- Note: A CPU cooler is not included and must be purchased separately.

Figure 1.1: The retail packaging for the Intel Core i7-12700K processor, showcasing the product branding and model information.
2. Safety Information
Please read and understand all safety precautions before installing or operating the processor. Failure to do so may result in personal injury or damage to your system components.
- Electrostatic Discharge (ESD) Prevention: Always handle the processor by its edges. Wear an anti-static wrist strap and work on an anti-static mat to prevent ESD damage.
- Power Disconnection: Ensure your computer system is completely powered off and unplugged from the wall outlet before beginning any installation.
- Component Compatibility: Verify that your motherboard, RAM, and power supply are compatible with the Intel Core i7-12700K processor. Refer to your motherboard's manual for specific compatibility lists.
- Thermal Management: An adequate CPU cooler is essential for proper operation and longevity. Ensure the cooler is correctly installed and thermal paste is applied.
- Ventilation: Ensure your computer case has sufficient airflow to dissipate heat generated by the processor and other components.
3. Setup and Installation
This section guides you through the physical installation of the Intel Core i7-12700K processor into your motherboard.
3.1. Preparing Your Motherboard
- Unpack Motherboard: Carefully remove your motherboard from its packaging and place it on an anti-static surface.
- Locate CPU Socket: Identify the LGA1700 CPU socket on your motherboard.
- Open Socket Lever: Gently push down and away on the small metal lever next to the CPU socket to release it. Lift the load plate.
- Remove Protective Cover: The socket will have a plastic protective cover. Do not touch the pins inside the socket.
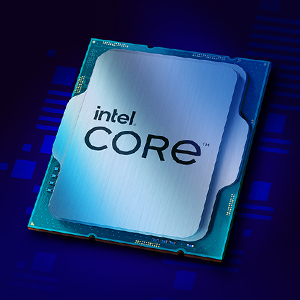
Figure 3.1: A close-up view of the Intel Core i7 processor chip, showing its metallic surface and integrated components.
3.2. Installing the Processor
- Handle Processor: Remove the Intel Core i7-12700K processor from its packaging, holding it only by the edges. Avoid touching the gold contacts on the underside or the top surface.
- Align Processor: Align the two notches on the sides of the processor with the corresponding keys on the CPU socket. Ensure the small golden triangle on one corner of the processor aligns with the triangle on the socket.
- Gently Place: Carefully lower the processor straight down into the socket. Do not force it. It should sit flush without resistance.
- Close Socket: Lower the load plate back down over the processor. Push the metal lever back into its locked position. This will secure the processor firmly in place.
3.3. Installing the CPU Cooler
A CPU cooler is critical for dissipating heat from the processor. Follow the instructions provided with your specific CPU cooler for installation. General steps include:
- Apply Thermal Paste: If your cooler does not have pre-applied thermal paste, apply a small amount (pea-sized dot) to the center of the processor's integrated heat spreader (IHS).
- Mount Cooler: Carefully place the cooler onto the CPU, aligning it with the mounting holes or brackets on the motherboard.
- Secure Cooler: Fasten the cooler securely according to its manufacturer's instructions. Ensure even pressure is applied to prevent uneven thermal paste spread.
- Connect Fan: Connect the CPU cooler's fan cable to the "CPU_FAN" header on your motherboard.
4. Operating Your System
Once the processor and cooler are installed, you can proceed with assembling the rest of your computer system and powering it on.
- First Boot: After assembling your PC, connect a monitor, keyboard, and mouse. Power on the system.
- BIOS/UEFI Configuration: Access your motherboard's BIOS/UEFI settings (usually by pressing DEL or F2 during boot). Verify that the processor is recognized correctly. You may need to enable XMP/DOCP for your RAM.
- Operating System Installation: Install your preferred operating system (e.g., Windows 10/11, Linux).
- Driver Installation: Install the latest chipset drivers from your motherboard manufacturer's website and the latest graphics drivers for the integrated Intel UHD 770 Graphics from Intel's official website.
- Performance Monitoring: Utilize software tools (e.g., Intel Extreme Tuning Utility, HWMonitor) to monitor CPU temperatures and clock speeds to ensure optimal performance and stability.

Figure 4.1: An example of a multi-monitor setup, illustrating the capabilities of the Intel Core i7-12700K processor for gaming, streaming, and multitasking.
5. Maintenance
Proper maintenance ensures the longevity and stable performance of your Intel Core i7-12700K processor.
- Dust Removal: Regularly clean dust from your CPU cooler and case fans using compressed air. Dust buildup can impede airflow and lead to higher temperatures.
- Thermal Paste Replacement: Consider replacing thermal paste every 2-3 years, or if you remove and re-install your CPU cooler, to maintain optimal thermal conductivity.
- Software Updates: Keep your operating system, motherboard BIOS/UEFI, and Intel drivers updated to benefit from performance improvements, security patches, and bug fixes.
- System Monitoring: Periodically check CPU temperatures and usage patterns. Unusual spikes or consistently high temperatures may indicate a cooling issue.
6. Troubleshooting
This section addresses common issues you might encounter with your processor.
| Problem | Possible Cause | Solution |
|---|---|---|
| System does not boot / No display | CPU not seated correctly, power cables loose, incompatible RAM/motherboard. | Re-seat CPU, check all power connections (24-pin ATX, 8-pin CPU), verify RAM and motherboard compatibility. |
| High CPU temperatures | Improper cooler installation, insufficient thermal paste, poor case airflow. | Ensure cooler is securely mounted, re-apply thermal paste, improve case ventilation. |
| System crashes or freezes | Overheating, unstable overclock, outdated drivers, faulty RAM. | Monitor temperatures, reset BIOS to default, update drivers, test RAM with diagnostic tools. |
| Poor performance in applications/games | Outdated drivers, background processes, power settings, thermal throttling. | Update drivers, close unnecessary background apps, set Windows power plan to "High Performance", check temperatures. |
7. Specifications
Detailed technical specifications for the Intel Core i7-12700K processor:
- Processor Base Frequency: 3.6 GHz
- Max Turbo Frequency: Up to 5.0 GHz
- Total Cores: 12 (8 Performance-cores, 4 Efficient-cores)
- Total Threads: 20
- Processor Graphics: Intel UHD Graphics 770
- Graphics Base Frequency: 300 MHz
- Graphics Max Dynamic Frequency: 1.45 GHz
- Cache: 25 MB Intel Smart Cache
- TDP: 125W (Processor Base Power)
- Max Turbo Power: 190W
- Socket: LGA1700
- Memory Types: Up to DDR5 4800 MT/s, DDR4 3200 MT/s
- Max Memory Size: 128 GB
- PCI Express Revision: 5.0 and 4.0
- PCI Express Configurations: Up to 1x16+4, 2x8+4
- Intel Optane Memory Supported: Yes
- Intel Thermal Velocity Boost: No
- Intel Turbo Boost Max Technology 3.0: Yes
- Intel Hyper-Threading Technology: Yes
- Intel Virtualization Technology (VT-x): Yes
- Intel VT-d for Directed I/O (VT-d): Yes
- Intel AES New Instructions: Yes
- Product Dimensions: 4.57 x 1.73 x 3.98 inches
- Item Weight: 2.82 ounces
8. Warranty and Support
Intel provides a limited warranty for its processors. For detailed warranty terms and conditions, please refer to the official Intel website or the warranty card included with your product.
- Warranty Period: Typically 3 years from the date of purchase for boxed processors.
- Warranty Claims: Contact Intel Customer Support or your point of purchase for warranty service.
- Technical Support: For technical assistance, driver downloads, and troubleshooting guides, visit the official Intel Support website: www.intel.com/support
- Product Compatibility Tool: To find compatible motherboards and other related information, use the Intel Product Compatibility Tool: Intel Product Compatibility Tool


