
1. Product Overview
This HECASA 2-IN-1 Windshield is designed to provide protection and versatility for your Polaris RZR. Its unique design allows it to function as both a full and a flip-down windshield, adapting to various weather conditions and riding preferences. Constructed from durable polycarbonate, it offers impact resistance and clear visibility.
1.1 Compatibility
This windshield is compatible with the following Polaris RZR models:
- 2010-2014 Polaris RZR 4 800
- 2008-2014 Polaris RZR 800
- 2009-2014 Polaris RZR S 800
- 2011-2014 Polaris RZR XP 900
- 2012-2014 Polaris RZR XP 4 900
- 2012-2023 Polaris RZR 570
- 2017 Polaris RZR 570 S

Figure 1.1: Product compatibility with Polaris RZR models.
2. Package Contents
Before beginning installation, please verify that all components are present in your package:
- 1 x 2-IN-1 Windshield (Upper and Lower Sections)
- Mounting Hardware (Clamps, Gas Springs, Rubber Seals, Bolts, Nuts)
- Installation Instructions
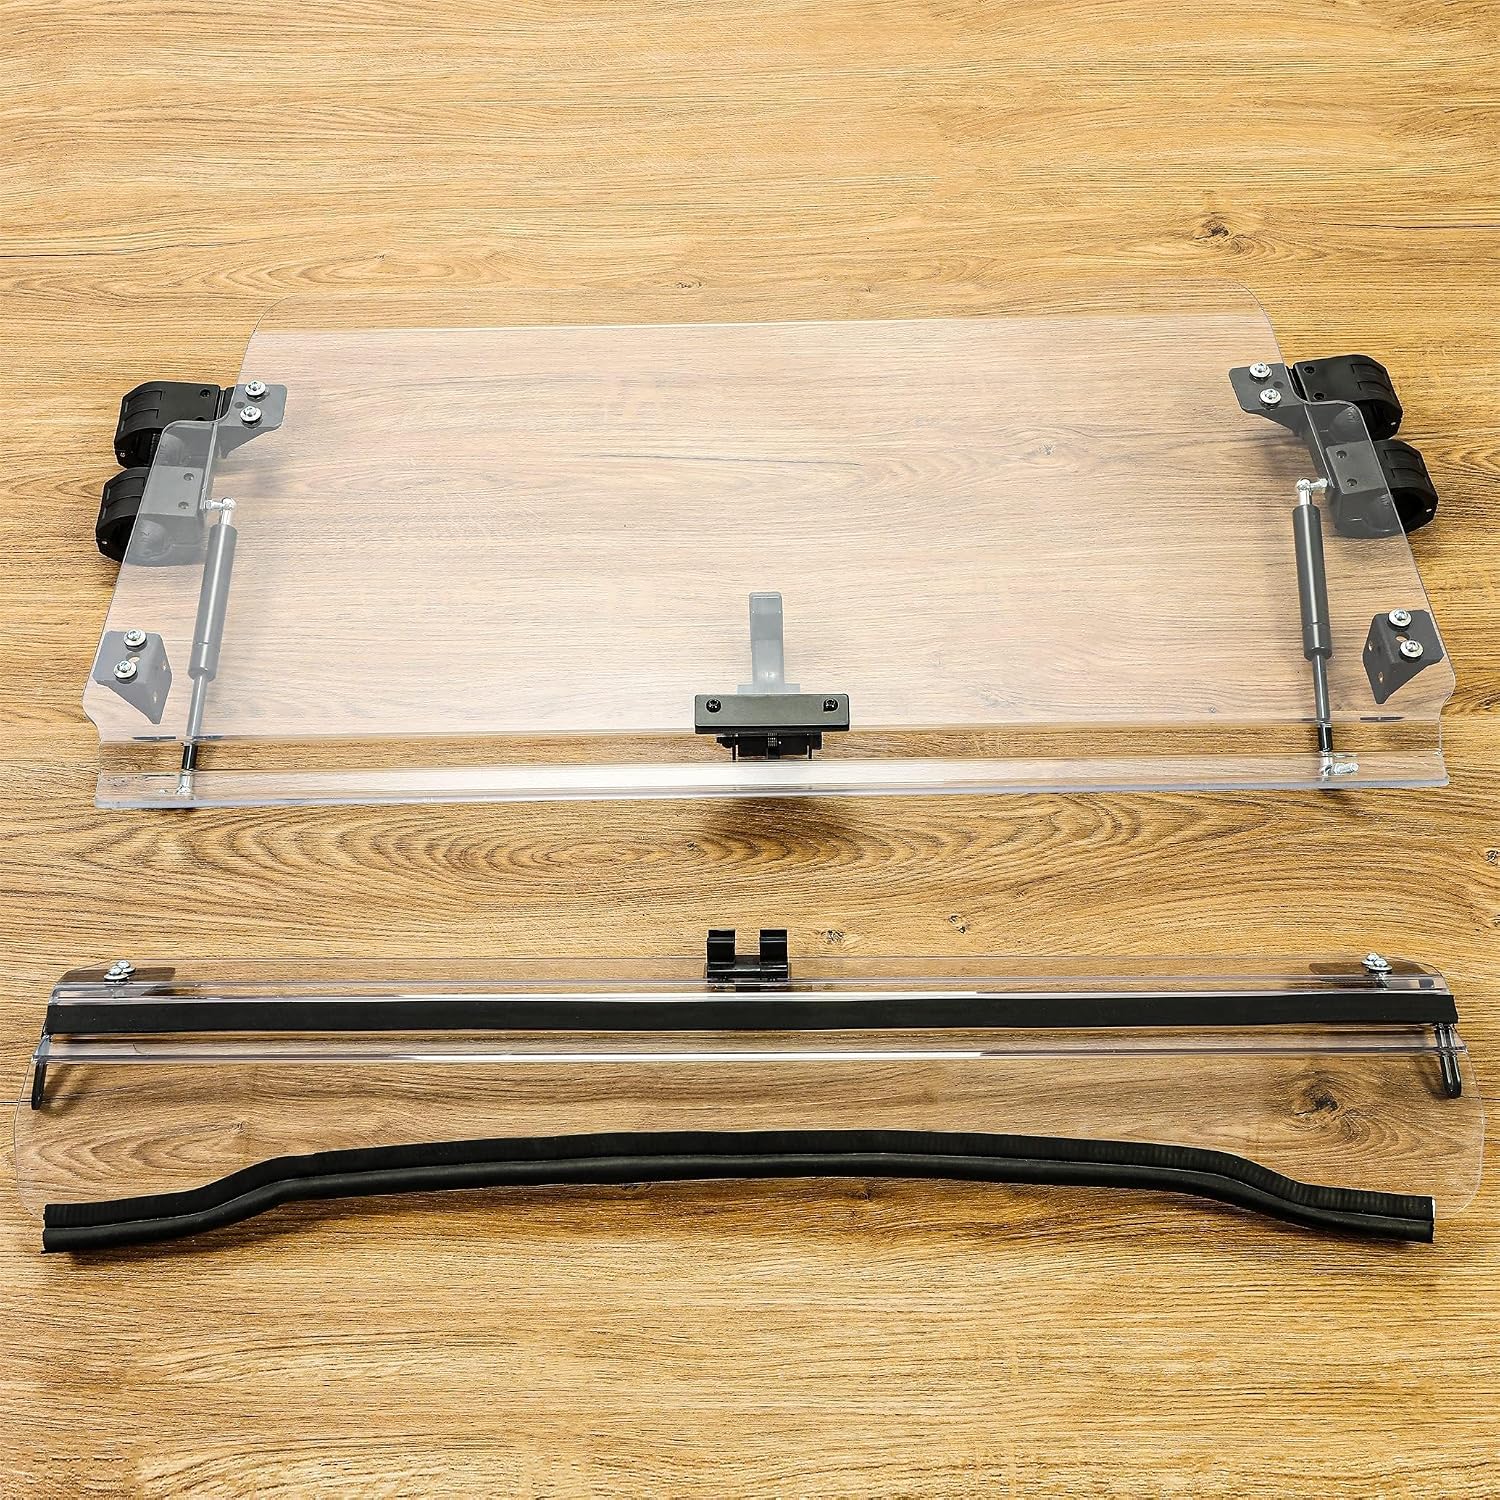
Figure 2.1: All included components of the windshield kit.
3. Safety Information
Please read and understand all safety warnings and instructions before installation and use. Failure to follow these instructions may result in property damage or personal injury.
- Always wear appropriate personal protective equipment (PPE) during installation.
- Ensure the vehicle is parked on a level surface and the engine is off before starting installation.
- Do not overtighten fasteners, as this may damage components.
- Regularly inspect the windshield and mounting hardware for any signs of wear or damage.
- Ensure the windshield is securely latched in either the full or flip-down position before operating the vehicle.
4. Installation Instructions
Follow these steps carefully to install your HECASA 2-IN-1 Windshield. It is recommended to have assistance during certain steps.
- Prepare the Vehicle: Park your Polaris RZR on a flat, stable surface. Turn off the engine and engage the parking brake.
- Unpack Components: Carefully remove all parts from the packaging and verify against the package contents list.
- Attach Mounting Clamps: Secure the mounting clamps to the roll cage of your RZR. Ensure they are positioned correctly to align with the windshield's pre-drilled holes. Do not fully tighten at this stage.
- Assemble Windshield Sections: If the upper and lower sections are separate, connect them according to the provided hardware, ensuring the rubber seal is properly seated.
- Mount Windshield: Carefully position the windshield onto the mounting clamps. Align the holes and insert the bolts.
- Install Gas Springs: Attach the gas springs to their designated mounting points on the windshield and the roll cage. These springs assist in the flip-down operation.
- Adjust and Tighten: Once the windshield is in place and all hardware is loosely attached, adjust the position for a proper fit. Ensure the full-length rubber seal along the bottom edge makes good contact with the hood. Gradually tighten all bolts and nuts, ensuring a secure fit without over-tightening.
- Test Operation: Verify that the windshield can be smoothly flipped between the full and open positions and that the latches engage securely.

Figure 4.1: Detail of windshield mounting with hoops.
5. Operating Instructions
The 2-IN-1 design allows for quick conversion between a full windshield and a flip-down windshield.
5.1 Switching Between Modes
- Full Windshield Mode: When fully upright, the windshield provides maximum protection from wind, rain, sand, and snow. Ensure the upper section is securely latched in the upright position.
- Flip-Down Mode: To convert to flip-down mode, release the upper latches and gently lower the upper section. The gas springs will assist in this movement. Ensure the upper section is securely latched in the lowered position. This mode allows for increased airflow and an open-air experience.
The folding hinge is designed to be below the rider's line of sight, ensuring an unobstructed view in both positions.

Figure 5.1: The 2-IN-1 design in open and closed positions.
6. Maintenance
Proper maintenance will extend the life and clarity of your windshield.
- Cleaning: Clean the polycarbonate windshield with mild soap and water. Use a soft cloth or sponge. Avoid abrasive cleaners, brushes, or dry wiping, as these can cause scratches. Rinse thoroughly with clean water and air dry or gently blot with a clean, soft microfiber cloth.
- Inspection: Periodically inspect all mounting hardware, clamps, and gas springs for tightness and signs of wear or corrosion. Replace any damaged components immediately.
- Rubber Seals: Ensure the rubber seals are clean and free of debris to maintain a tight fit and prevent rattling.
7. Troubleshooting
If you encounter issues with your windshield, refer to the following common problems and solutions:
- Poor Fitment: If the windshield does not fit perfectly or appears misaligned, loosen all mounting hardware, adjust the windshield's position, and then re-tighten. Ensure the rubber seal is properly seated against the hood.
- Missing Parts: If any parts are missing from your package, please contact HECASA customer support immediately for assistance.
- Difficulty Opening/Closing: Check that the gas springs are correctly installed and not obstructed. Ensure no debris is caught in the hinge mechanism or latches. Lubricate moving parts if necessary.
- Scratches or Stains: Polycarbonate can scratch if improperly cleaned. Always use mild soap, water, and a soft cloth. For stubborn water stains, a diluted vinegar solution may be used, followed by a thorough rinse. Avoid harsh chemicals.
8. Specifications
| Feature | Specification |
|---|---|
| Material | Polycarbonate (PC) |
| Color | Clear |
| Orientation | Front |
| Vehicle Service Type | UTV (Polaris RZR specific) |
| Model Number | CB-1174 |
| Manufacturer | JMTAAT |
| Included Components | 1 x 2-IN-1 Windshield |

Figure 8.1: Dimensional drawing of the windshield.
9. Warranty and Support
For warranty information or technical support, please refer to the contact details provided with your purchase or visit the official HECASA website. Keep your purchase receipt for warranty claims.