
AMIR WA109-F
AMIR Alarm Clock User Manual
Model: WA109-F
1. Product Overview
The AMIR LED Alarm Clock is a versatile electronic desktop clock designed for home use, featuring a large LED display, temperature display, adjustable brightness, and 12/24H time format. It offers multiple alarm modes and power-saving features.
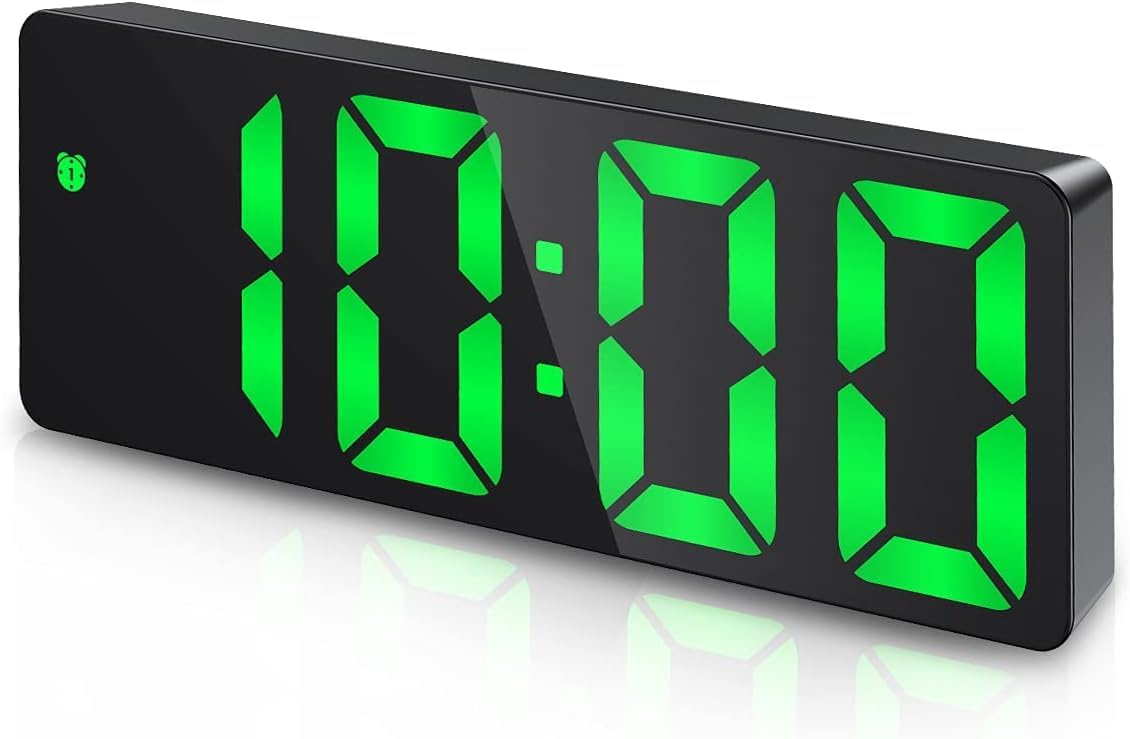
Figure 1: AMIR LED Alarm Clock (Green Display)
Key Features:
- Large LED Display: 6.3"x0.7~1"x2.36" display for clear visibility.
- Multi-function Modes: Clock, date, temperature, night mode (ON/OFF), and alarm modes.
- Adjustable Brightness: 3 levels (Bright/Medium/Low) with automatic dimming in night mode.
- Working Day Mode & Snooze: Three alarm modes (Mon-Fri, Mon-Sat, Mon-Sun) and 1-60 minute snooze.
- Voice Control & Power Saving: Activate display by sound when battery-powered; automatic power-saving mode after 16 seconds of inactivity.
- Dual Power Options: USB power (cable included, adapter not) or 3 AAA batteries (not included) with memory function.
2. Package Contents
Please check the package contents upon unboxing to ensure all items are present:
- AMIR LED Alarm Clock (Model: WA109-F)
- USB Power Cord (1 meter / 39.37 inches)
- User Manual
- Remote Control
- Wall Mount Hooks (2 adhesive hooks)
- CR2025 Button Cell Battery (for remote control)

Figure 2: Package Contents
3. Setup
3.1 Powering the Clock
The AMIR Alarm Clock can be powered in two ways:
- USB Power (Recommended for continuous display): Connect the included USB power cord to the DC 5V port on the back of the clock. Plug the other end into a USB power adapter (not included) or a USB port. The screen will always be on when using USB power.
- Battery Power (Power Saving Mode): Insert 3 AAA batteries (not included) into the battery compartment on the back of the clock. Ensure correct polarity. When using battery power, the screen will turn off after 10 seconds to enter power-saving mode. The clock retains previous time settings even after a power outage when using battery power.

Figure 3: Two Power Modes
Note: An AC adapter is not included. When powered by USB alone, there is no time memory function after power off.
3.2 Initial Time and Date Setting
To set the time and date:
- Set 12/24 Hour Format: Press and hold the "MODE" button until the time display flashes. Use the "UP" or "DOWN" buttons to switch between 12-hour and 24-hour formats.
- Set Time: Press "MODE" once more. The hour digits will flash. Use "UP" or "DOWN" to adjust the hour. Press "MODE" again, and the minute digits will flash. Use "UP" or "DOWN" to adjust the minutes.
- Set Date: Press "MODE" again. The year will flash. Use "UP" or "DOWN" to set the year. Press "MODE" again, the month will flash. Use "UP" or "DOWN" to set the month. Press "MODE" again, the day will flash. Use "UP" or "DOWN" to set the day.
- Confirm: Press "MODE" one last time to confirm all settings and return to the normal time display.

Figure 4: Steps to Adjust Alarm Clock Time
4. Operating Instructions
4.1 Adjusting Brightness
The clock offers 3 levels of brightness (Bright/Medium/Low) and a night mode:
- Manual Adjustment: Simply press the "UP" or "DOWN" button on the back of the clock to cycle through the three brightness levels.
- Night Mode:
- Press "MODE" 3 times to enter the night mode setting.
- Press "UP" or "DOWN" to toggle night mode ON/OFF (default is OFF).
- When ON, the clock automatically dims during 18:00-6:00. You can customize this period by long pressing "MODE" in night mode setting.
- Turn Off Display: Press and hold the "SNOOZE" button for more than 3 seconds to turn off the display completely, preventing light disturbance at night. Press any button to reactivate.

Figure 5: Adjustable Brightness

Figure 6: 3 Levels Adjustable Brightness
4.2 Setting and Using Alarms
The clock supports three alarm modes and a snooze function:
- Setting Alarm Time:
- Long press "ALARM" until the hour digits flash. Use "UP" or "DOWN" to set the desired alarm hour.
- Press "ALARM" again, and the minute digits will flash. Use "UP" or "DOWN" to set the desired alarm minutes.
- Press "ALARM" again to set the snooze duration (1-60 minutes). Use "UP" or "DOWN" to adjust.
- Working Day Modes: After setting snooze, press "ALARM" again to select the alarm mode:
- 1-5: Monday to Friday
- 1-6: Monday to Saturday
- 1-7: Monday to Sunday (Everyday)
- Snooze Function: When the alarm sounds, press the "SNOOZE" button to get 1-60 minutes of extra sleep. The alarm will sound again after the set snooze time.
- Cancel Alarm: To cancel the alarm when it sounds, press any button other than "SNOOZE".

Figure 7: Three Alarm Modes

Figure 8: Easy Snooze
4.3 Voice Control (Battery Powered Only)
When the clock is powered by batteries, it features a voice control function to activate the display:
- Make a noise such as clapping your hands, rapping on the table, or touching the clock to activate the display.
- The display will automatically turn off after 16 seconds of no operation to conserve battery power. The internal system continues to keep time and temperature.

Figure 9: Intelligent Voice Control
4.4 Displaying Date and Temperature
The clock can cycle through time, date, and temperature displays:
- Press "MODE" twice to display the date.
- Press "MODE" three times to display the temperature.
- To switch between Celsius (°C) and Fahrenheit (°F) for temperature, press "MODE" twice to enter temperature display, then use the "DOWN" button.

Figure 10: Time, Date, and Temperature Display
5. Troubleshooting
If you encounter any issues with your AMIR Alarm Clock, please refer to the following common solutions:
| Problem | Possible Cause / Solution |
|---|---|
| Clock display does not light up. |
|
| Screen turns off after 10 seconds. | This is normal behavior when powered by batteries to conserve energy (power-saving mode). To keep the screen always on, use USB power. |
| Clock loses time settings after power outage (when using USB only). | When powered by USB alone, the clock does not have a time memory function. Use AAA batteries in conjunction with USB power to enable the memory function. |
| Alarm does not sound or is difficult to set. |
|
For further assistance, please refer to the complete User Manual PDF linked in the support section.
6. Specifications
| Feature | Detail |
|---|---|
| Brand | AMIR |
| Model Number | WA109-F |
| Color | Green |
| Display Type | Digital |
| Product Dimensions | 6.3"W x 2.36"H x 0.7-1"D (approx.) |
| Power Source | Battery Powered (3 AAA, not included) / USB Powered (cable included, adapter not) |
| Material | Acrylonitrile Butadiene Styrene |
| Item Weight | 5.6 ounces |
| Special Feature | Alarm, Temperature Display, Adjustable Brightness, Voice Control (battery mode) |
7. Maintenance
To ensure the longevity and optimal performance of your AMIR Alarm Clock, follow these simple maintenance guidelines:
- Cleaning: Wipe the clock gently with a soft, dry cloth. Do not use abrasive cleaners or solvents, as they may damage the surface or display.
- Placement: Place the clock on a stable, flat surface. Avoid direct sunlight, extreme temperatures, or high humidity, which can affect performance and lifespan.
- Battery Replacement: If using batteries, replace them when the display becomes dim or the clock starts to malfunction. Remove batteries if the clock will not be used for an extended period.
- Handling: Handle the clock with care. Avoid dropping it or subjecting it to strong impacts.
8. Support
For detailed instructions, troubleshooting, or warranty information, please refer to the official User Manual PDF:
For further assistance, please contact AMIR customer support through your purchase platform.
9. Official Product Videos
Watch these official product videos for visual guides and demonstrations:
Amazon Choice - Simple Desktop Clock for Bedroom
This video provides an overview of the AMIR Alarm Clock, highlighting its features and simple design suitable for bedrooms and desktops. It demonstrates the clock's appearance and basic functionality.
Related documentsWA109-F


Ask a question about this manual
Ask about setup, troubleshooting, compatibility, parts, safety, or missing instructions. Manuals+ will review the question and use this page’s manual context to help answer it.