
1. Introduction
This manual provides essential information for the safe and efficient use of your PATONA Premium V-Mount 4-Channel Smart Charger, Model 1698. This compact charger is designed for parallel charging of up to four V-mount batteries and can also function as a DC power supply for various devices. Please read these instructions carefully before operation.
2. Safety Instructions
- Do not expose the charger to rain, moisture, or extreme temperatures.
- Ensure proper ventilation during operation. The internal ventilation system requires clear airflow.
- Use only compatible V-mount batteries with this charger.
- Do not attempt to disassemble or modify the charger. Refer all servicing to qualified personnel.
- Disconnect the charger from the power outlet when not in use or before cleaning.
- The 4-pin XLR DC output cannot be used when the charger is connected to the mains power supply.
- Keep out of reach of children.
3. Package Contents
- 1x PATONA V-Mount 4-Channel Smart Charger (Model 1698)
- 1x 4-pin XLR DC Cable (170 cm)
- 1x EU Power Cable

Figure 3.1: Included EU power cable and 4-pin XLR DC cable.
4. Product Features
- 4-Channel Simultaneous Charging: Charges up to four V-mount batteries in parallel.
- Variable Charging Current: Provides 3A (16.8V) for 1-2 batteries and 2A for 3-4 batteries.
- DC Power Output: Features a 4-pin XLR output (16.5V 4.5A / 75W max.) for powering external devices like LED lights, video cameras, or monitors.
- Microcontroller Unit (MCU): Ensures stable and constant energy supply for optimal charging and power delivery.
- Internal Ventilation System: Provides efficient cooling during operation to maintain performance and longevity.
- Lightweight and Portable: Compact design with a practical handle for easy transport.
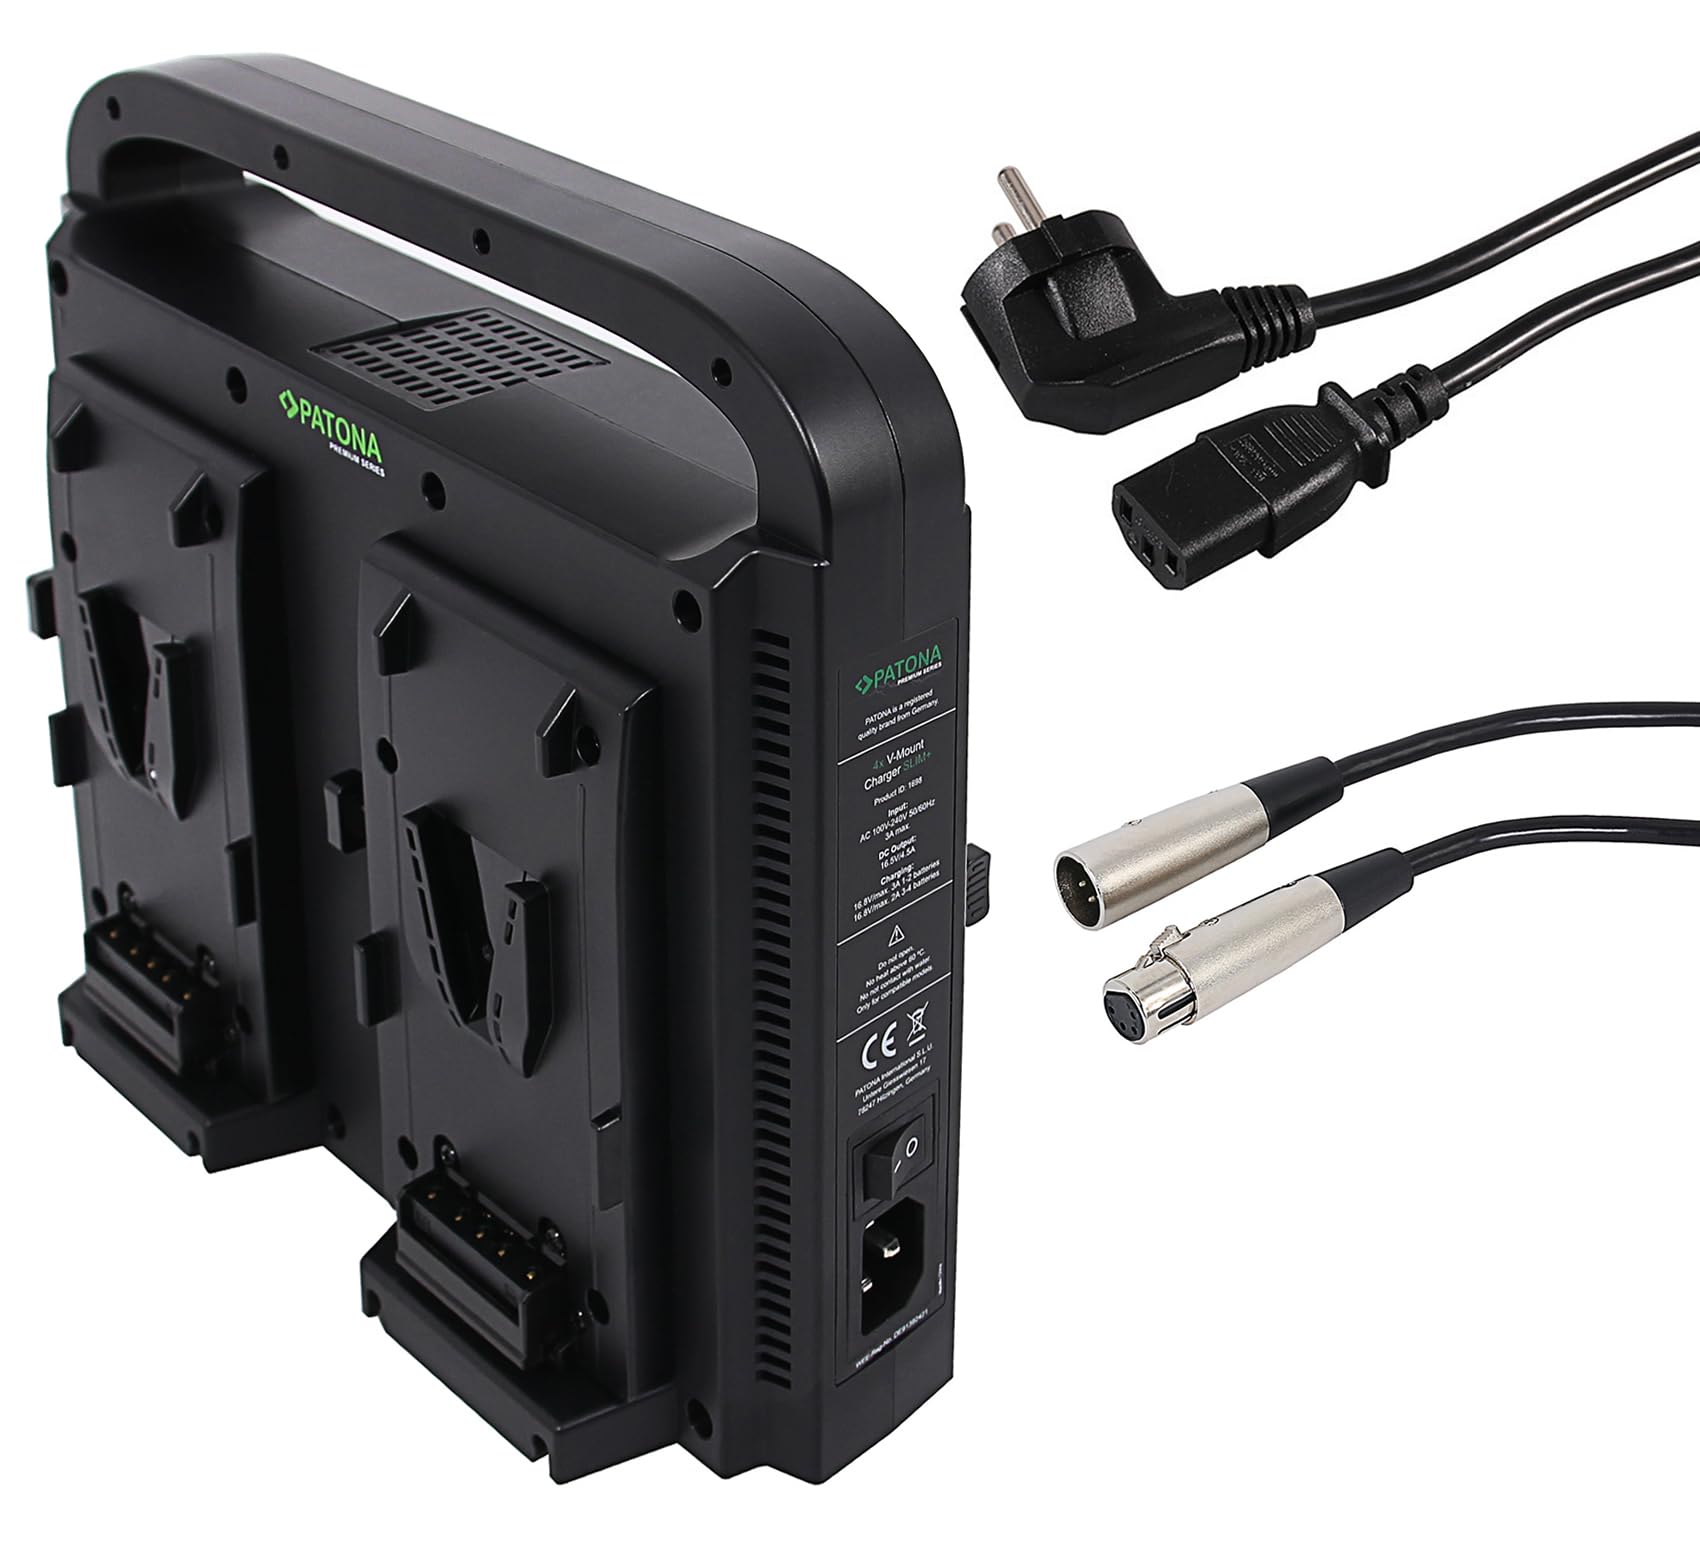
Figure 4.1: PATONA V-Mount 4-Channel Smart Charger.
5. Setup
- Unpack the Charger: Carefully remove the charger and all accessories from the packaging.
- Position the Charger: Place the charger on a stable, flat surface with adequate ventilation. Ensure the air vents are not obstructed.
- Connect to Power: Insert the EU power cable into the AC input port on the rear of the charger and then plug the other end into a suitable mains power outlet.
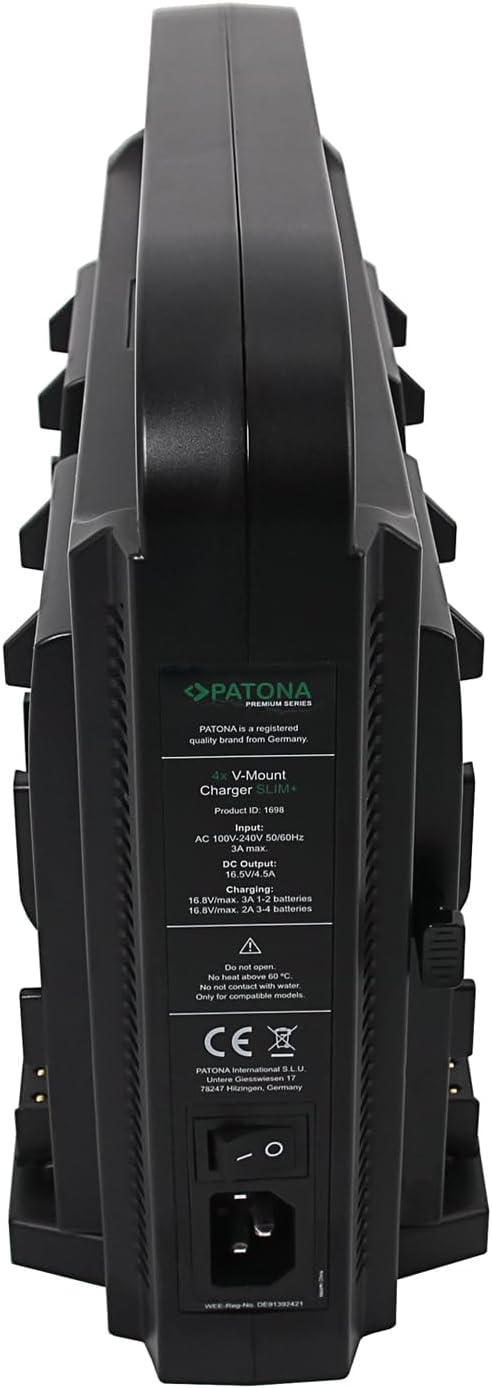
Figure 5.1: Rear view of the charger with AC power input.
6. Operating Instructions
6.1. Charging V-Mount Batteries
- Attach Batteries: Align the V-mount battery with one of the charger's V-mount plates and slide it down until it clicks securely into place. You can attach up to four batteries.
- Monitor Charging Status: The LED indicators on the side panel will show the charging status. A red light typically indicates charging, while a green light indicates a full charge.
- Charging Current: The charger automatically adjusts the charging current: 3A per channel when 1-2 batteries are connected, and 2A per channel when 3-4 batteries are connected.
- Remove Batteries: Once fully charged, press the release button on the V-mount plate and slide the battery upwards to remove it.

Figure 6.1: Side view of the charger with V-mount battery plates.
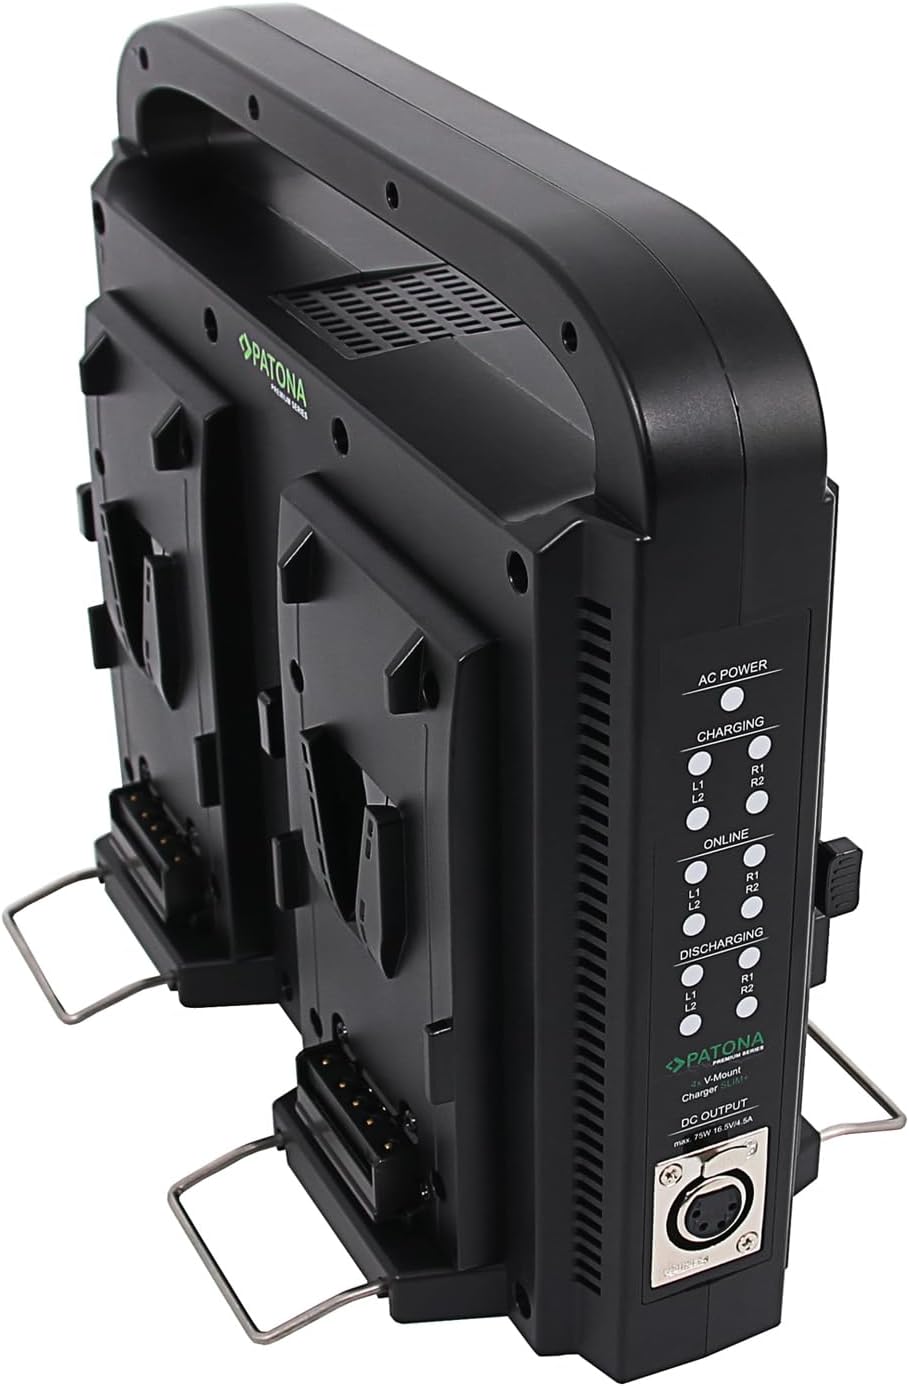
Figure 6.2: LED indicators for charging status.
6.2. Using as a DC Power Supply
- Disconnect from Mains: Ensure the charger is NOT connected to the AC mains power supply. The DC output function is only available when operating as a power bank.
- Connect External Device: Use the provided 4-pin XLR DC cable to connect your compatible device (e.g., LED light, video camera, monitor) to the 4-pin XLR DC output port on the front of the charger.
- Power Output: The charger provides a stable 16.5V DC output at a maximum of 4.5A (75W). Ensure your device is compatible with these specifications.

Figure 6.3: Front view of the charger with 4-pin XLR DC output.
6.3. Relevant Product Videos
This video demonstrates the features and usage of a SmallRig V-Mount battery, which is compatible with the PATONA V-Mount 4-Channel Smart Charger. It highlights the battery's various ports and how it can power camera equipment.
This video showcases the SmallRig VB99 mini V-Mount battery, illustrating its compact design and multiple output options. This type of V-mount battery can be charged by the PATONA V-Mount 4-Channel Smart Charger.
7. Maintenance
- Cleaning: Use a soft, dry cloth to clean the exterior of the charger. Do not use liquid cleaners or solvents.
- Storage: Store the charger in a cool, dry place away from direct sunlight and extreme temperatures.
- Ventilation: Regularly check that the ventilation openings are free from dust and debris.
8. Troubleshooting
| Problem | Possible Cause | Solution |
|---|---|---|
| Charger not powering on | No power supply; faulty cable; power switch off. | Check power cable connection; ensure power outlet is active; verify power switch is on. |
| Batteries not charging | Battery not properly seated; incompatible battery; faulty battery. | Re-seat battery firmly; ensure battery is V-mount compatible; try a different battery. |
| DC output not working | Charger connected to mains; incompatible device; faulty XLR cable. | Disconnect charger from AC mains; verify device voltage/amperage compatibility; test with another XLR cable. |
| Overheating | Obstructed ventilation; excessive load. | Ensure clear airflow around vents; reduce number of charging batteries or connected devices if possible. |
9. Specifications
| Feature | Detail |
|---|---|
| Brand | PATONA |
| Model | 1698 |
| Part Number | P1698b |
| Number of Ports | 4 (V-Mount) |
| Charging Current (1-2 Batteries) | 3A (16.8V) per channel |
| Charging Current (3-4 Batteries) | 2A (16.8V) per channel |
| DC Output (XLR 4-pin) | 16.5V, 4.5A (75W max) |
| Product Dimensions | 27 x 10 x 22 cm |
| Item Weight | 1.65 kg |
| Batteries Included | No |
| Batteries Required | No |
10. Warranty and Support
PATONA products are manufactured with high-quality standards. For warranty information and support, please refer to the official PATONA website or contact your retailer. Keep your proof of purchase for any warranty claims.

Figure 10.1: Regulatory marks and manufacturer contact information.
PATONA International S.L.U.
Untere Giesswiesen 17, 78247 Hilzingen, Germany
www.patona.de, info@patona.de