
1. Introduction
This manual provides detailed instructions for the installation, operation, and maintenance of your Hiorucet Fireplace Blower Fan Kit. Please read this manual thoroughly before installation and use to ensure proper function and safety. This kit is designed to enhance heat distribution from your fireplace.
2. Safety Information
- Always disconnect power to the fireplace before installing, servicing, or cleaning the blower kit.
- Ensure all wiring connections are secure and comply with local electrical codes.
- Do not operate the blower if any components are damaged.
- Keep hands and foreign objects away from moving parts during operation.
- This product is intended for use with compatible fireplaces only. Refer to the compatibility section.
3. Components Included
The Hiorucet Fireplace Blower Fan Kit includes the following components:
- Replacement Blower Fan Unit
- 3-Prong Power Cord (83 inches long)
- Rheostat Variable Speed Control
- Wiring Harness
- Velcro Mounting Strips (double stick foam pads)
- Installation Instructions (this manual)
Note: This kit does NOT include a thermostat. If a thermostat-equipped kit is required, please ensure you purchase the correct model.

Figure 3.1: Included components for the Hiorucet Fireplace Blower Fan Kit.
4. Specifications
| Feature | Specification |
|---|---|
| Product Dimensions (L x W x H) | 15.0" x 3.5" x 4.0" |
| Air Discharge Length | 12.5" |
| Insulation Class | Class H (rated to 392°F) |
| Motor RPM | 3000 RPM |
| Airflow (C.F.M) | 160 CFM |
| Voltage | 120 Volts |
| Frequency | 60 Hz |
| Power Consumption | 52 watts |
| Power Cord Type | 3-prong |
| Power Cord Length | 83" |
| Motor Type | Solid Pure Copper, Sealed Ball Bearing |
| Construction Material | Aluminum + Galvanized Steel |
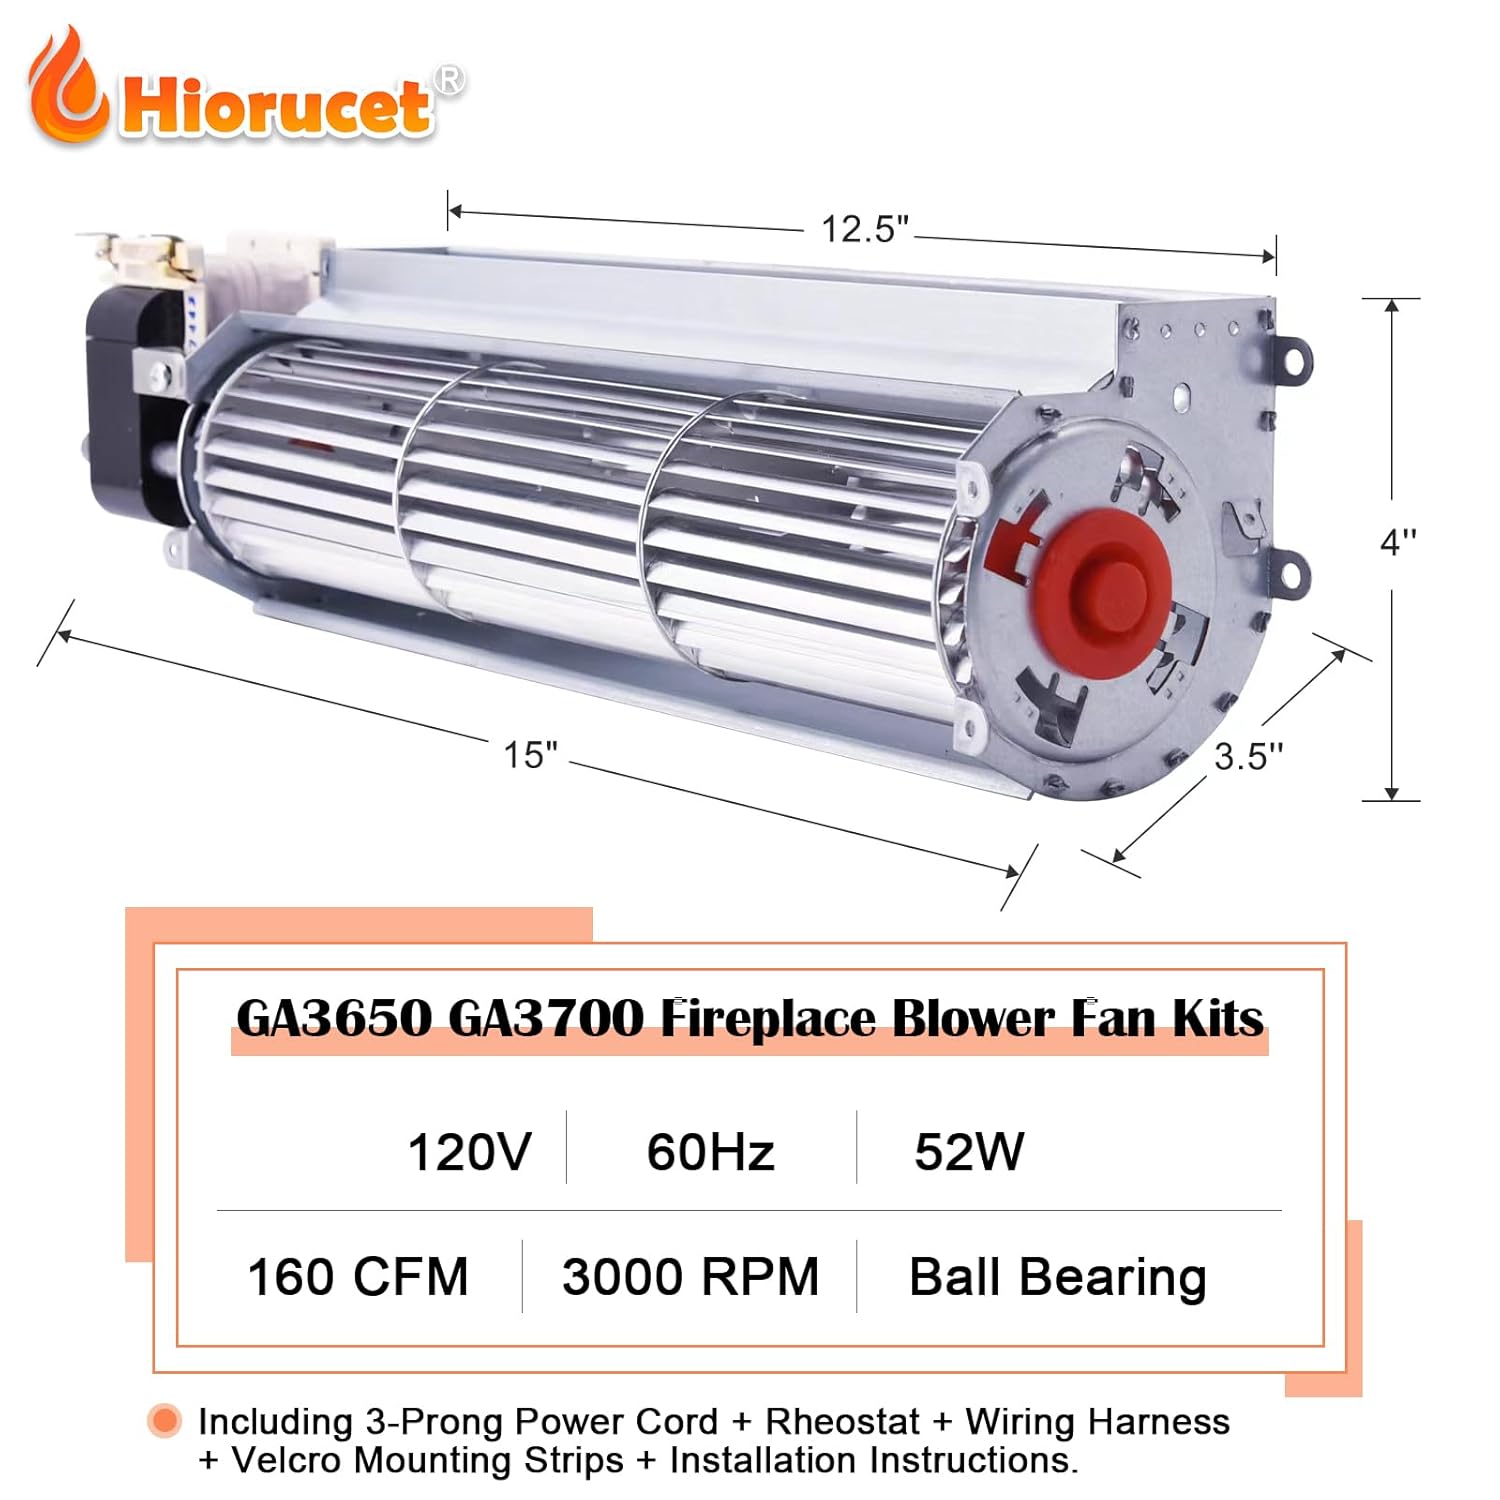
Figure 4.1: Product dimensions and key specifications.

Figure 4.2: Blower performance metrics.
5. Compatibility
This Hiorucet fireplace blower kit is designed to fit various fireplace models. It can also be used in universal applications where adequate mounting space is available.
Cross Reference Numbers:
BK, BKT, GA3650, GA3650T, GA3650TB, GA3700, GA3700A, GA3700T, GA3750, GA3750A, GA3450TA, 103581-01, 103581-02, 103581-03, 103581-04, 119943-01, IHP #F1081, #F1082, DA3610TA
Compatible Fireplace Brands and Models:
- Desa Tech: B36, B36L-MC, BV36L, B42, BHDV37, BHDV41, BV42L, CB36, CGEFP33, CHDV32NR, CHDV36NR, CSGF28, CTDV32NR, CTDV36NR, DVF34, DVFE34, DVFE37, DVFE41, DVFH34, EFP33, FPS33, FPVF33, HDFB32, HDV37, HDV41, K36, K42, LMFP33, T32, T36, V32, V36, V42, VB42, VSGF28, VSGF33, VSGF36...
- FMI: B36 Wood Burning, B36L-MC, BV36L, B42, BV42L, BFBF36, BFBF42, BFBL42, C36, C42, CD36, CDC36, CDV36, CGCDV42, CHDV36NR, CTDV32, CTDV36, CUVF36, CUVF42, CVDV42NR, FBL32, FBL36, FSF32, FSF36, K36, K42, KC36, KC42, L32, L36, L42, M36, M42, T32, T36, TC32, TC36, V32, V36, V42, VB42...
- Astria: Astria Universal Firebox (32ZP2, 36ZP2, 36ZP3, 42ZP2, 42ZP3), TaurusSTZ2...
- Vanguard: BV36L/BV42L, CWB36C, VB36, VB42, VBV36L/VBV42L, VC36L, V42L...
- Comfort Flame: CGEFP33, EFP33
- Comfort Glow: CDV34, CDV37, CDV41, CHDV36NR, CHDV47...
- Vexar: CD32M-B, CD32, CD36, CD42

Figure 5.1: Cross-reference numbers and compatible fireplace models.
6. Setup and Installation
Follow these steps to install your Hiorucet Fireplace Blower Fan Kit. Ensure the fireplace is cool and disconnected from power before beginning.
- Prepare the Fireplace: Locate the area within your fireplace where the blower will be installed. Ensure there is adequate space for the unit (15.0" L x 3.5" W x 4.0" H).
- Attach Mounting Strips: Apply the provided double-stick foam pads (Velcro mounting strips) to the blower unit. These pads help secure the blower to the fireplace walls and reduce noise and vibration.
- Position the Blower: Carefully place the blower unit into the designated area within the fireplace, ensuring it is stable and the air discharge is directed appropriately for optimal heat circulation.
- Connect Wiring Harness: Connect the wiring harness to the blower unit. Ensure all connections are firm.
- Connect Rheostat: Connect the rheostat variable speed control to the wiring harness. The rheostat allows you to adjust the fan speed.
- Connect Power Cord: Plug the 3-prong power cord into the rheostat.
- Secure Components: Ensure all wires are routed safely and not in contact with hot surfaces or moving parts.
- Restore Power: Once all connections are secure and the blower is properly positioned, restore power to the fireplace.
Video 6.1: Installation guide for the Desa Fireplace Blower Fan Kit, demonstrating wiring and setup.
7. Operating Instructions
The Hiorucet Fireplace Blower Fan Kit is designed to improve heat circulation from your fireplace, distributing warmth more evenly throughout your room.
- Power On: After installation, ensure the fireplace is operating and generating heat.
- Adjust Fan Speed: Use the rheostat variable speed control to turn the blower on and adjust its speed. Turn the knob clockwise to increase fan speed and airflow, and counter-clockwise to decrease it.
- Optimal Heat Distribution: The blower will draw cool air from the room, pass it over the hot surfaces of the fireplace, and then circulate the warmed air back into the room. This process significantly improves the efficiency of your fireplace.
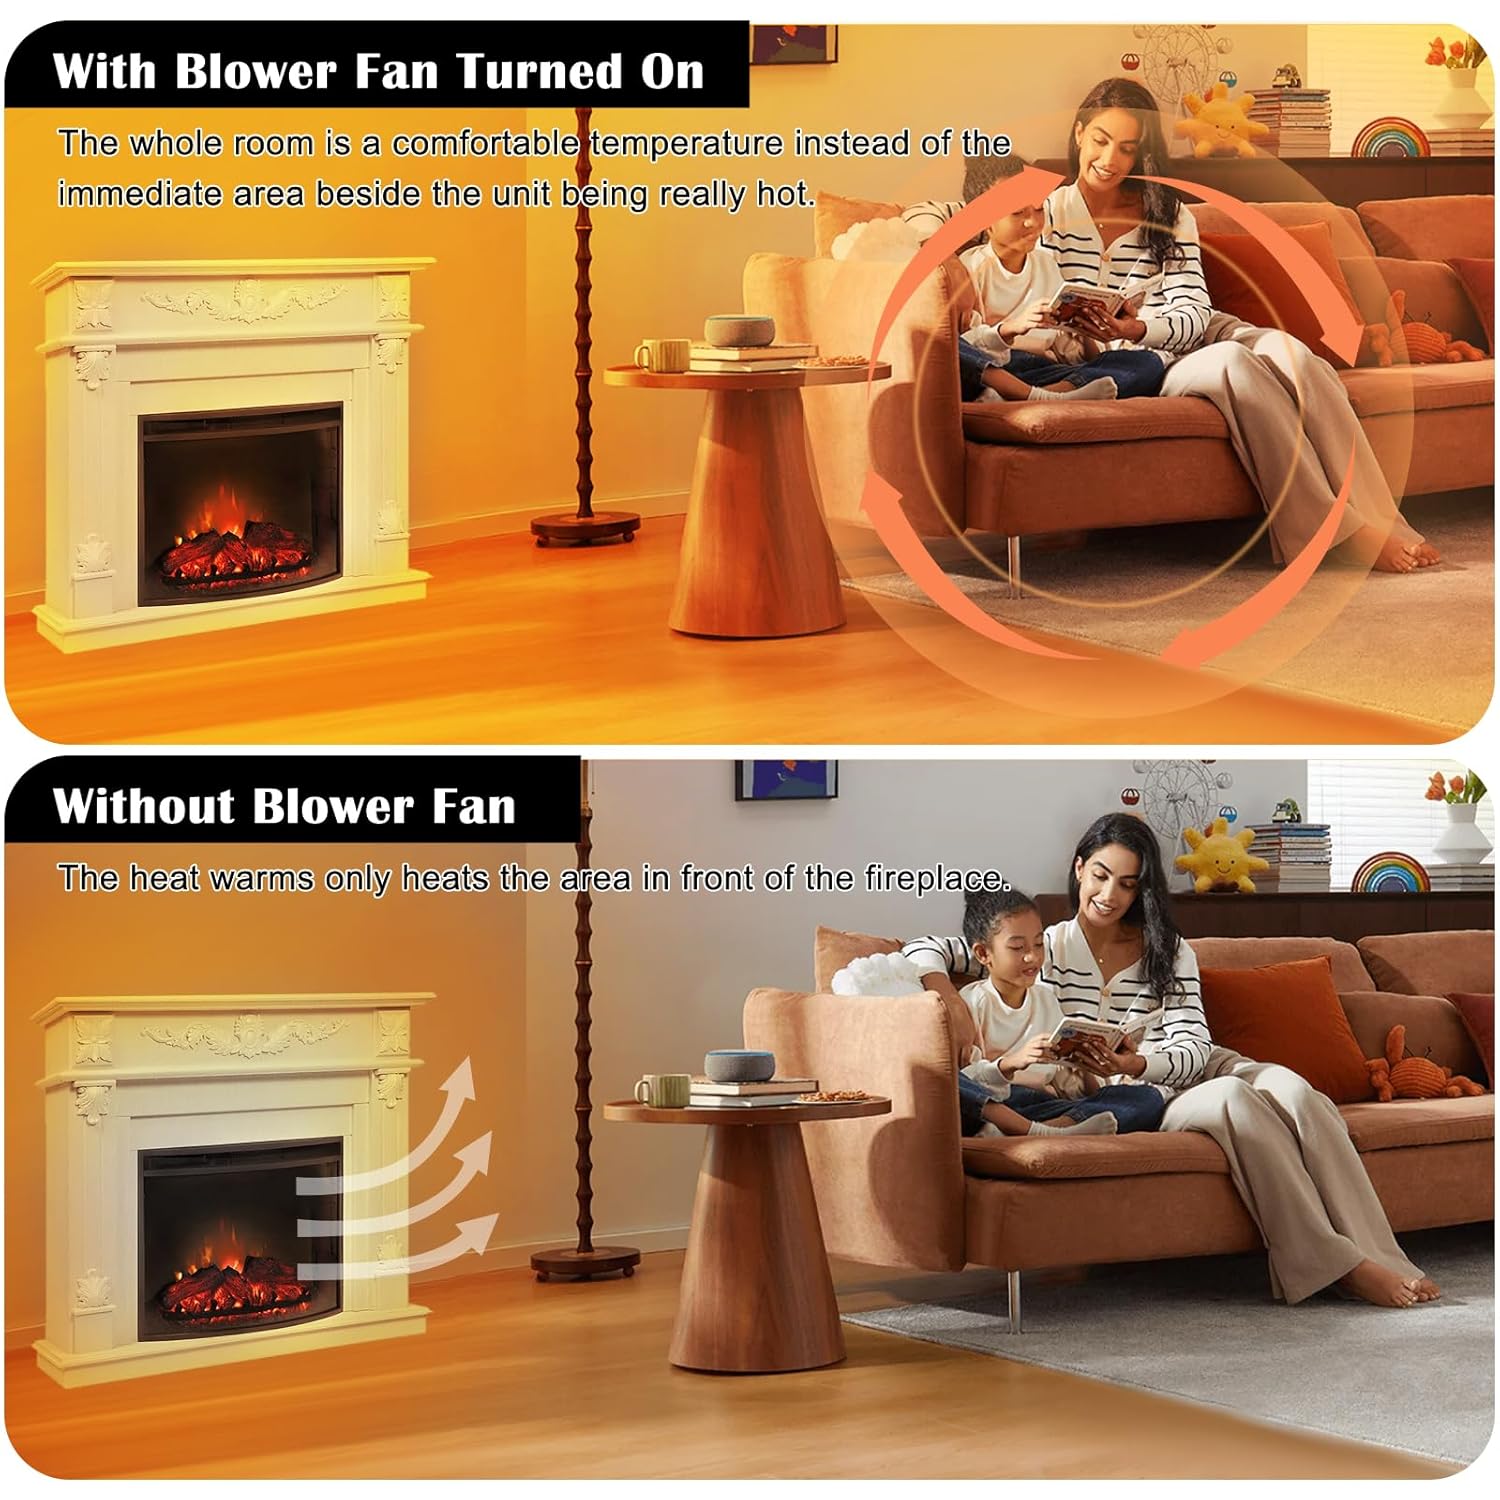
Figure 7.1: Enhanced heat distribution with the blower fan.
8. Maintenance
Regular maintenance ensures the longevity and efficient operation of your blower fan kit.
- Cleaning: Periodically, with the power disconnected, inspect the blower fan for dust and debris accumulation. Use a soft brush or vacuum cleaner to gently remove any buildup from the fan blades and motor housing.
- Inspection: Check the power cord and wiring harness for any signs of wear, fraying, or damage. Ensure all connections remain secure.
- Noise Reduction Pads: Inspect the Velcro mounting strips (foam pads) to ensure they are still securely attached and providing adequate vibration dampening. Replace if necessary.

Figure 8.1: Noise reduction features for quiet operation.
9. Troubleshooting
If you encounter issues with your blower fan kit, refer to the following common problems and solutions:
| Problem | Possible Cause | Solution |
|---|---|---|
| Blower does not turn on | No power, loose connections, faulty rheostat | Check power outlet, ensure all wiring connections are secure, test rheostat functionality. |
| Excessive noise or vibration | Loose mounting, debris in fan, worn bearings | Ensure blower is securely mounted with foam pads, clean fan blades, inspect for internal damage. |
| Low airflow | Fan speed set too low, obstructed intake/discharge, motor issue | Increase fan speed via rheostat, clear any obstructions, contact support if motor is suspected faulty. |
10. Warranty and Support
For warranty information or technical support, please refer to the product packaging or contact Hiorucet customer service. Keep your purchase receipt for warranty claims.