1. Introduction
This manual provides essential information for the safe and effective installation, operation, and maintenance of your Kicker 47KPB1 PowerBar 20-inch Bluetooth Powered UTV Soundbar. Please read this manual thoroughly before using the product and retain it for future reference.

Figure 1: Kicker 47KPB1 PowerBar 20-inch Bluetooth Powered UTV Soundbar, front view with included remote control.
2. Package Contents
Verify that all items listed below are present in your package:
- Kicker 47KPB1 PowerBar 20-inch Soundbar
- Wireless Remote Control
- Adjustable Clamp Mounting Hardware (for round tubes)
- Power Wiring Harness (12 ft / 3.66 m)
- Instruction Manual

Figure 2: Side view of the soundbar, illustrating the power cable connection point.
3. Safety Information
Always prioritize safety during installation and operation. Failure to follow these guidelines may result in injury or damage to the product or vehicle.
- Disconnect the vehicle's battery before beginning any electrical work.
- Ensure all wiring is properly insulated and secured to prevent shorts and damage.
- Mount the soundbar securely to avoid detachment during vehicle operation.
- Do not operate the soundbar at excessively high volumes for prolonged periods to prevent hearing damage.
- The product is IP66 rated for weather resistance; however, avoid submerging it in water.
4. Installation
The Kicker 47KPB1 PowerBar is designed for simple installation on various powersports vehicles. Ensure you have the appropriate tools and a clear workspace.
4.1 Mounting the Soundbar
The soundbar includes adjustable clamps for mounting to round tubes. Square tube clamps are sold separately. The soundbar features a rugged aluminum enclosure for durability.
- Identify a suitable mounting location on your UTV's roll cage or overhead panel. Ensure sufficient clearance and stability.
- Attach the adjustable clamps to the soundbar using the provided hardware. The clamps allow for height adjustment and pivoting to optimize sound direction.
- Securely fasten the soundbar to the chosen location. For installations on flat surfaces like overhead panels, custom hardware (e.g., 1-inch stainless steel 1/4"-20 bolts with flat washers and lock nuts) may be required to ensure a flush and secure fit.
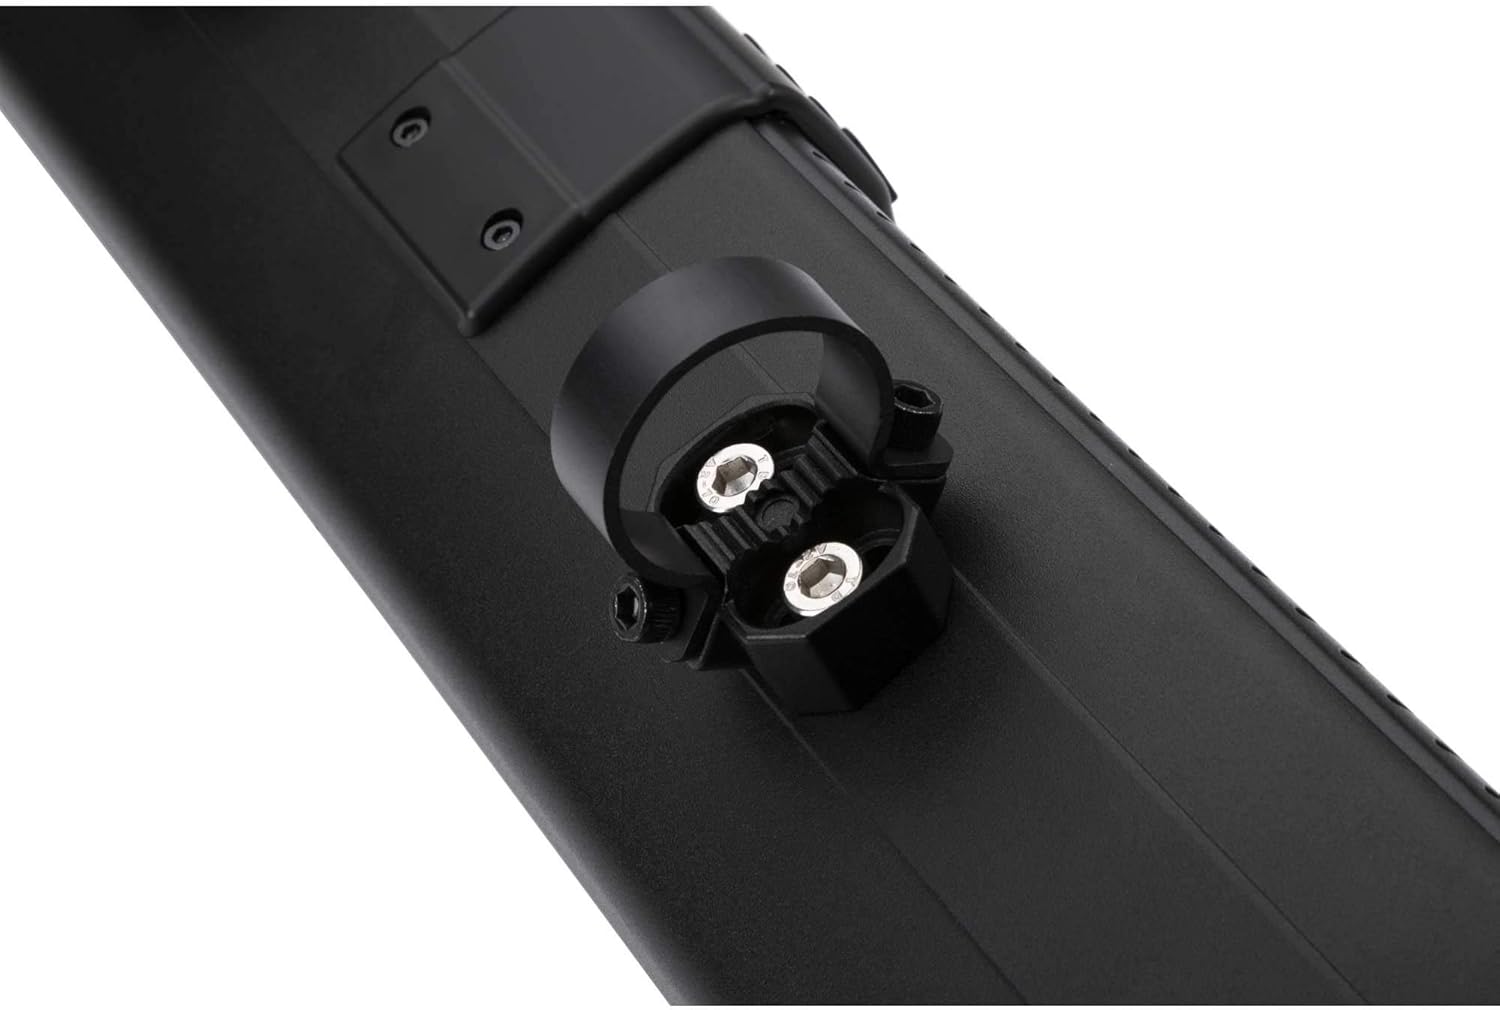
Figure 3: Detail of the adjustable clamp mounting mechanism.
4.2 Wiring the Soundbar
The soundbar requires a 12V power connection. The included wiring harness is 12 feet (3.66 meters) long.
- Route the power wiring harness from the soundbar to your vehicle's 12V battery. Ensure the wiring is protected from moving parts, heat, and sharp edges.
- Connect the red wire to the positive (+) terminal of the battery and the black wire to the negative (-) terminal or a suitable ground point.
- Secure all connections and ensure they are weather-tight.
4.3 Installation Videos
Video 1: Detailed installation guide for a UTV soundbar, demonstrating removal of an old system and mounting of a new one. This video provides general steps applicable to the Kicker PowerBar.
Video 2: Overview of the KEMIMOTO Metal Midnight Soundbar, showcasing its features and general appearance. This provides a visual reference for a similar product type.
Video 3: Short demonstration of installation steps for a UTV soundbar, offering a quick visual guide to the mounting process.
Video 4: Comprehensive unboxing, installation, and demonstration of a UTV soundbar, providing detailed steps for setup and showcasing operational features.
5. Operating Instructions
Your Kicker PowerBar offers multiple ways to enjoy your audio.
5.1 Powering On/Off
Press and hold the power button on the soundbar's control panel or the remote control to turn the unit on or off.
5.2 Bluetooth Pairing
- Ensure the soundbar is powered on and in Bluetooth mode (indicated by a single LED).
- On your mobile device, enable Bluetooth and search for available devices.
- Select "Kicker KPB1" from the list to pair. A confirmation tone will sound upon successful pairing.
5.3 Auxiliary Input
Connect an external audio device using a 3.5mm auxiliary cable to the AUX-In port on the soundbar. The LED indicator will change to reflect AUX-In mode.
5.4 Wireless Remote Control
The included wireless remote control allows for convenient operation of the soundbar's functions, including power, volume, track control, and LED lighting modes.
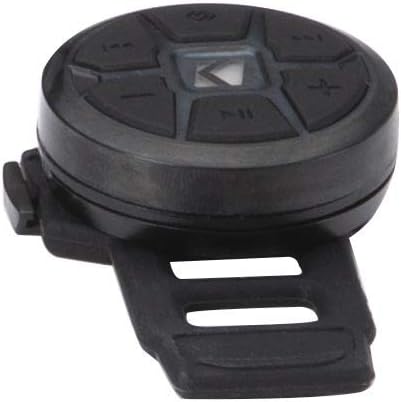
Figure 4: Wireless remote control for the Kicker 47KPB1 PowerBar.
5.5 Concert Mode
Utilize Concert Mode to pair and share music with other compatible Kicker PowerBar units, creating a synchronized audio experience.
5.6 DSP-Controlled EQ Settings
The soundbar features DSP-Controlled EQ settings for optimized audio performance across various music genres and listening environments.
6. Maintenance
Regular maintenance ensures the longevity and optimal performance of your soundbar.
- Clean the soundbar's exterior with a soft, damp cloth. Avoid harsh chemicals or abrasive cleaners.
- Periodically inspect all wiring connections for corrosion or damage. Ensure they remain secure and weather-tight.
- Check mounting hardware for tightness, especially after off-road use, to prevent vibration or detachment.
7. Troubleshooting
If you encounter issues with your Kicker PowerBar, refer to the following common solutions:
- No Power: Check all power connections to the battery. Ensure the inline fuse (if present) is not blown. Verify the vehicle's battery has sufficient charge.
- No Sound: Confirm the soundbar is powered on and the volume is up. Check the audio source (Bluetooth, AUX) and ensure it is playing. If using AUX, verify the cable is fully inserted and functional.
- Bluetooth Connectivity Issues: Ensure the soundbar is in Bluetooth pairing mode. Move your mobile device closer to the soundbar. Try unpairing and re-pairing the device.
- Distorted Sound: Reduce the volume on both the soundbar and your audio source. Check for loose wiring connections.
8. Specifications
| Feature | Specification |
|---|---|
| Model Number | 47KPB1 |
| Woofer/Tweeter Count | 4 Woofers / 2 Tweeters |
| Woofer Size | 3 inches (76 mm) |
| Tweeter Size | 1 inch (25 mm) |
| Power Output (RMS @ 14.4V) | 150 Watts (Less Than 10% THD+N) |
| Frequency Response | 50-20,000 Hz |
| Signal-to-Noise Ratio | >75 dB (A-weighted, re: rated power) |
| Enclosure Length | 21 inches (53 cm) |
| Enclosure Height | 4-7/16 inches (11.3 cm) |
| Enclosure Depth | 4-9/16 inches (11.5 cm) |
| Wire Harness Length | 12 feet (3.66 m) |
| Item Weight | 15 pounds |
| Product Dimensions | 26.5 x 9.76 x 8.5 inches |
| Weather Rating | IP66 |
8.1 Product Overview Video
Video 5: An overview of the Wet Sounds Stealth Sound Bar, highlighting its features and design. This provides a general understanding of high-performance soundbars for powersports applications.
9. Warranty and Support
The Kicker 47KPB1 PowerBar is covered by a 1-Year Manufacturer Warranty from the date of purchase. This warranty covers defects in materials and workmanship under normal use.
For warranty claims, technical support, or additional product information, please contact Kicker customer service or visit the official Kicker website.


