
1. Introduction
This manual provides essential instructions for the safe and efficient use of the sloHEXtted Q200 Ultra Industrial Wireless Crane Remote Control Kit. This system is designed for industrial applications requiring precise and reliable remote control of cranes and hoists. It features advanced Frequency-Hopping Spread Spectrum (FHSS) technology for stable signal transmission, durable construction, and user-friendly operation.
Please read this manual thoroughly before installation and operation. Keep it for future reference.
2. Product Features
- Stable and Smooth Signal: Equipped with Frequency-Hopping Spread Spectrum (FHSS) technology to prevent interference and ensure precise control, even in crowded industrial environments.
- Durable Construction: Features a dust-proof structure, high-performance metal contact buttons, and a nylon-reinforced fiberglass housing for both transmitter and receiver. Designed to withstand drops from up to 20 meters.
- IP65 Rated: Provides protection against dust and water ingress, making it suitable for harsh environments with high oil pollution, humidity, and dust.
- Extended Operating Range: Standard range of 100m (328ft), reconfigurable via software to 7 selectable levels ranging from 30m (98ft) to 200m (656ft).
- User-Friendly Design: Lightweight, ergonomic transmitter with oversized buttons and backup safety stickers for easy operation without constant visual reference. Includes an emergency stop button.
- Easy Pairing: Receiver automatically pairs with the transmitter wirelessly, requiring no specialized equipment.
- Software Customization: Compatible with Q Series remote control software for flexible parameter settings and custom key functions via PC (requires Windows system and dedicated programming cable).

Figure 2.1: Transmitter overview showing mushroom-head EMS button, status indicators, fiberglass case, silicone housing, and tactile buttons.

Figure 2.2: Internal circuit board highlighting the SEMTECH LLCC68 RF chip and TI IC chips for reliable performance.

Figure 2.3: Detail of the original imported ALPS switches, designed for long-term industrial use.

Figure 2.4: Software customization interface for flexible parameter settings and key function adjustments.
3. Components Included
The sloHEXtted Q200 Ultra Industrial Wireless Crane Remote Control Kit typically includes the following items:
- Transmitter Unit
- Receiver Unit
- Button Stickers (for customization)
- Fasteners (for installation)
- Level 5 Cut-Resistant Gloves
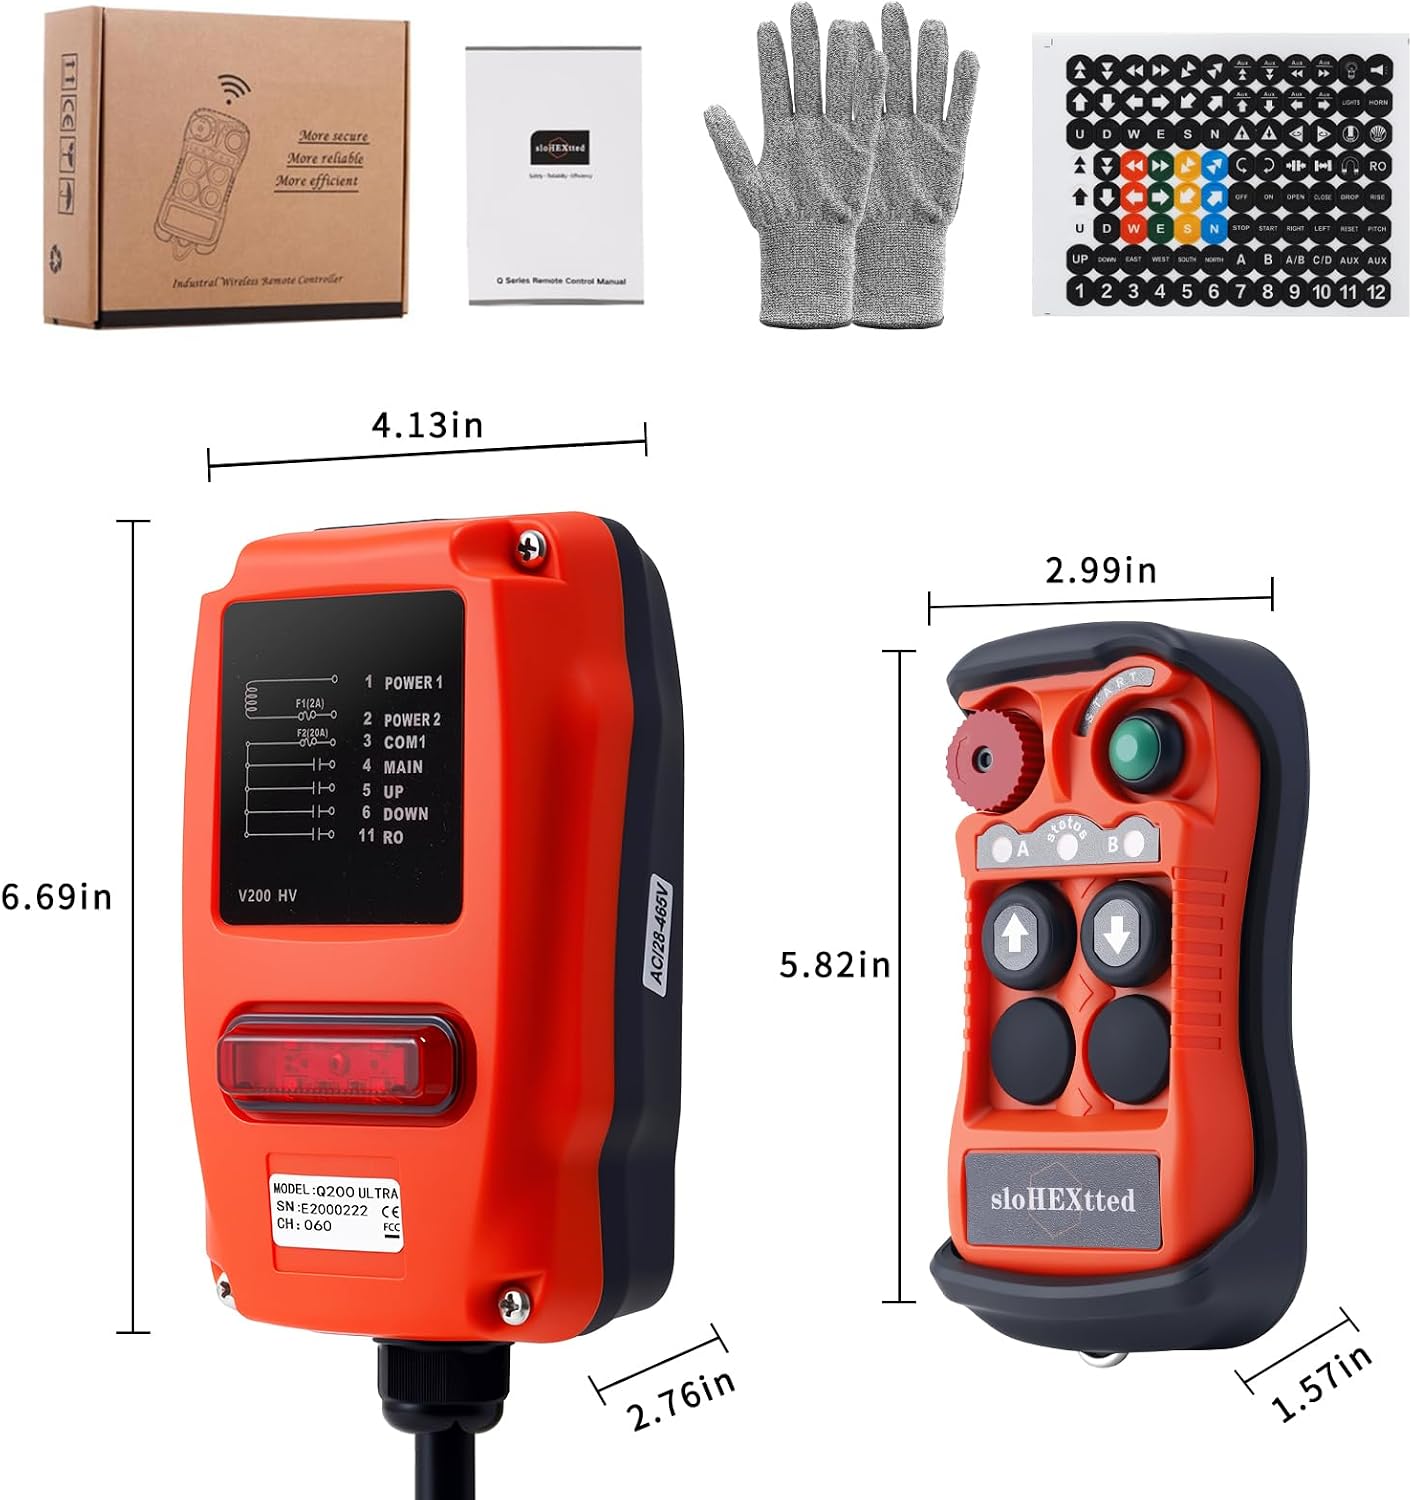
Figure 3.1: Packaging and included accessories for the Q200 Ultra kit.
4. Setup Instructions
Proper installation is crucial for the safe and reliable operation of the Q200 Ultra system. If you are not familiar with electrical wiring, consult a qualified electrician.
4.1 Receiver Installation
- Mounting: Select a secure, dry location for the receiver unit, away from excessive vibration or heat. Ensure it is easily accessible for wiring and maintenance. Use the provided fasteners to securely mount the receiver.
- Wiring: Connect the receiver to the crane or hoist control circuit according to the wiring diagram provided with your specific unit. Ensure all connections are secure and insulated. The receiver operates on AC 28-465V. Verify the power supply matches the receiver's requirements.
- Antenna: Ensure the receiver's antenna is positioned for optimal signal reception, clear of obstructions.
4.2 Transmitter Preparation
- Battery Installation: The transmitter requires 2 "AA" batteries (not included). Open the battery compartment on the back of the transmitter and insert the batteries, observing correct polarity.
- Button Customization (Optional): Use the provided button stickers to label the control functions on the transmitter according to your crane's specific operations.
4.3 Pairing
The receiver and transmitter are typically pre-paired from the factory. If re-pairing is necessary, refer to the detailed pairing instructions in the separate Q Series Remote Control Manual. Generally, pairing involves activating a sync button on the receiver and then initiating a pairing sequence on the transmitter.
5. Operating Instructions
Familiarize yourself with all controls and functions before operating any equipment with the remote control.
5.1 Basic Operation
- Power On: Ensure the receiver is powered and the transmitter has fresh batteries. Press the 'START' button on the transmitter to activate it. The status indicators (A+B) will illuminate, indicating signal strength.
- Control Functions: Use the directional buttons (Up, Down, Left, Right, etc.) to control the movement of the crane or hoist. The buttons are designed for momentary control, meaning the function activates only while the button is pressed.
- Emergency Stop: In case of an emergency, immediately press the red mushroom-head EMS button. This will cut power to the controlled equipment. To reset, twist the EMS button clockwise to release it, then press 'START' again.
5.2 Signal Indicators
The transmitter features status indicators (A and B) that provide feedback on signal strength and operational status. Refer to the full manual for a detailed explanation of indicator patterns.

Figure 5.1: Enhanced safety features, including the mushroom-head EMS button and A+B signal indicators.
5.3 Range Adjustment (Advanced)
The operating range can be adjusted via software. This requires a dedicated programming cable and a Windows-based computer. Consult the Q Series software manual for detailed instructions on modifying range settings.
Video 5.1: Demonstration of the Hoist Crane Industrial Wireless Remote Transmitter Receiver in operation, showcasing its responsiveness and ease of use.
6. Maintenance
Regular maintenance ensures the longevity and reliable performance of your Q200 Ultra remote control kit.
- Cleaning: Periodically clean the transmitter and receiver with a soft, damp cloth. Do not use harsh chemicals or abrasive cleaners. Ensure all buttons are free of debris.
- Battery Replacement: Replace transmitter batteries promptly when the low battery indicator appears or if performance degrades. Always use high-quality "AA" alkaline batteries.
- Inspection: Regularly inspect the housing for any signs of damage, cracks, or wear. Check all cables connected to the receiver for fraying or loose connections.
- Storage: When not in use for extended periods, remove batteries from the transmitter and store the unit in a dry, cool place.
7. Troubleshooting
This section addresses common issues you might encounter. For more complex problems, contact customer support.
| Problem | Possible Cause | Solution |
|---|---|---|
| No response from crane/hoist |
|
|
| Intermittent control or lag |
|
|
| Receiver becomes excessively warm |
|
|
| Power supply issues (e.g., incorrect voltage) |
|
|
8. Specifications
| Feature | Detail |
|---|---|
| Model Number | Q200 |
| Manufacturer | sloHEXtted |
| Voltage | AC 28-465V (for receiver) |
| Transmitter Power | 2 x AA batteries (not included) |
| Operating Range | Standard 100m (328ft), adjustable 30m (98ft) to 200m (656ft) via software |
| Material | Nylon-reinforced fiberglass housing |
| Protection Rating | IP65 (Dust-proof and Waterproof) |
| Item Weight | Approximately 2.2 pounds |
| Product Dimensions | Transmitter: 5.82 x 2.99 x 1.57 inches; Receiver: 6.69 x 4.13 x 2.76 inches (approximate) |
| Special Features | FHSS Technology, Emergency Stop, Tactile Buttons, Software Customization |
9. Safety Information
WARNING: Failure to follow these safety instructions could result in serious injury or death.
- Always ensure the area of operation is clear of personnel and obstructions before moving any load.
- Never operate the remote control if you are under the influence of drugs, alcohol, or medication that impairs judgment.
- Regularly inspect the remote control system for damage. Do not use if any part is damaged.
- The Emergency Stop button must be easily accessible and functional at all times. Test it before each use.
- Ensure proper grounding of the receiver unit according to local electrical codes.
- Only qualified personnel should install, maintain, or repair the electrical components of this system.
- Do not modify the remote control system. Unauthorized modifications can compromise safety and void the warranty.
- Always maintain a safe distance from the load and moving machinery.
10. Warranty and Support
For warranty information, technical support, or service inquiries, please contact sloHEXtted LLC directly through their official website or the retailer where the product was purchased. Keep your purchase receipt as proof of purchase.
